
A root cellar provides natural underground storage to keep your garden potatoes fresh for months after harvest. You'll want to maintain temperatures between 32-40°F and humidity levels of 85-95% for maximum preservation. The ideal setup includes proper ventilation, darkness, and storage containers that allow airflow like open crates or perforated bags. You can build your cellar by digging into a hillside or at least 10 feet underground, using materials like concrete, brick, or earthbags for walls. Regular maintenance and pest prevention are essential steps to guarantee your potatoes don't spoil. Exploring the right construction methods and storage techniques will help you create the perfect environment for long-lasting produce.
Understanding Root Cellar Basics
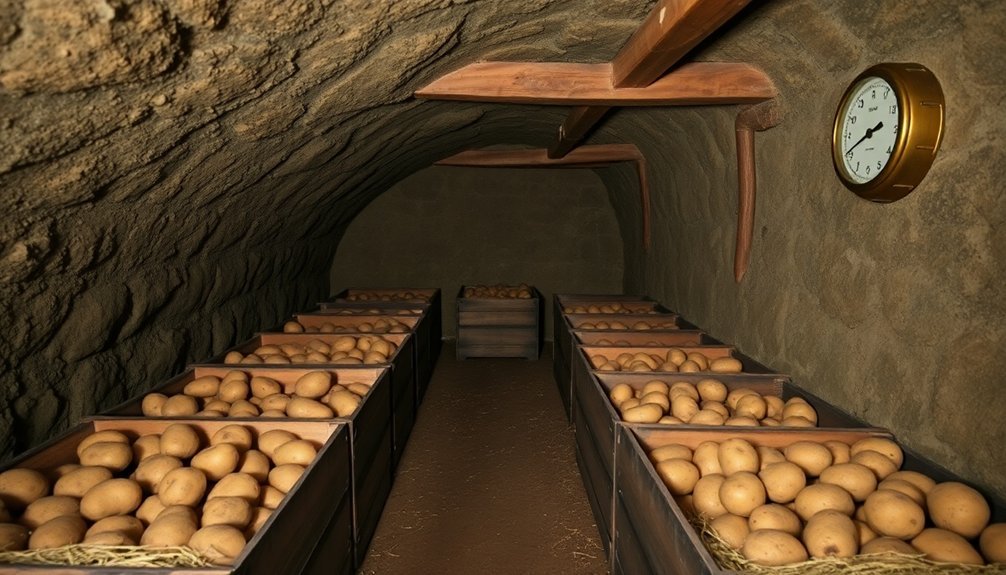
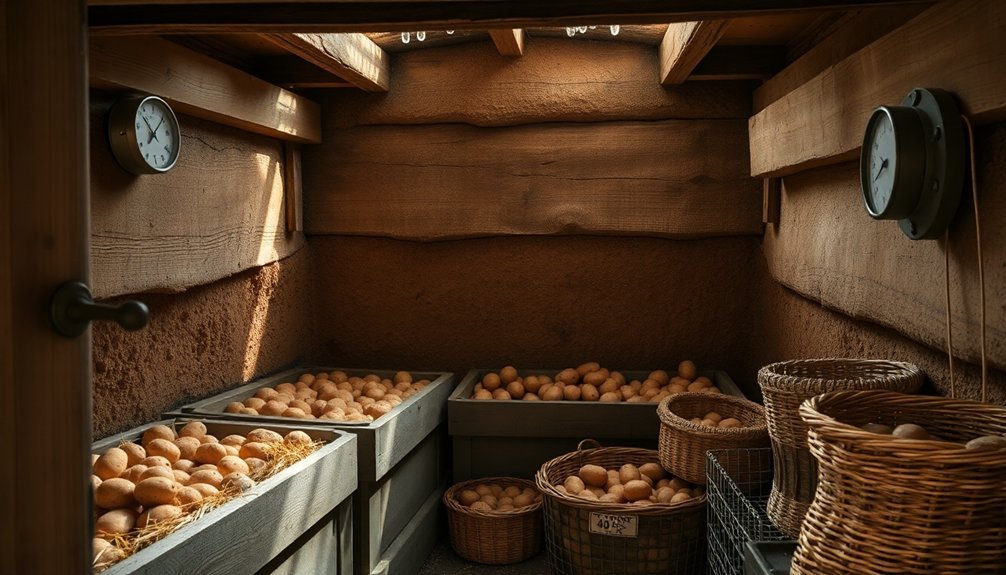
A root cellar provides the perfect environment for storing your garden potatoes and other vegetables through the winter months. You'll need to maintain specific conditions to keep your harvest fresh and prevent spoilage. The ideal temperature range falls between 32-40°F (0-4°C), though temperatures up to 50°F (5-10°C) can work for shorter storage periods.
Your root cellar's humidity should stay between 85-95% to prevent vegetables from drying out. You can achieve this by utilizing the natural moisture from earthen floors or adding gravel that you'll occasionally sprinkle with water. Dirt floors retain moisture much better than concrete or stone surfaces.
Proper ventilation is equally essential – it helps control temperature, reduces excess moisture, and removes ethylene gas that can speed up vegetable spoilage.
When setting up your root cellar, choose a location that naturally maintains cool temperatures and high humidity. You'll want to insulate it well using materials like straw bales or foam board.
Remember that heat rises, so installing shelves creates different temperature zones within your cellar. Regular maintenance includes monitoring for spoilage, adjusting ventilation, and ensuring good air circulation to prevent mold growth.
Optimal Underground Storage Conditions
Successful root cellar storage depends heavily on maintaining precise underground conditions for your potatoes.
You'll need to keep temperatures between 32-40°F (0-4°C), though you can allow slightly higher temperatures of 45-50°F (7-10°C) during summer months. Don't let temperatures exceed 60°F (15°C) for more than two weeks, as this will accelerate sprouting. Stack your crates under shady trees to pre-cool potatoes before moving them to storage.
You must maintain humidity levels between 85-95% to prevent your potatoes from drying out. While high humidity is essential, you'll need to avoid excess moisture that could lead to mold and rot. Proper ventilation is your key defense against these issues – ventilate every 2-3 days for 6-9 hours during the first two weeks after harvest.
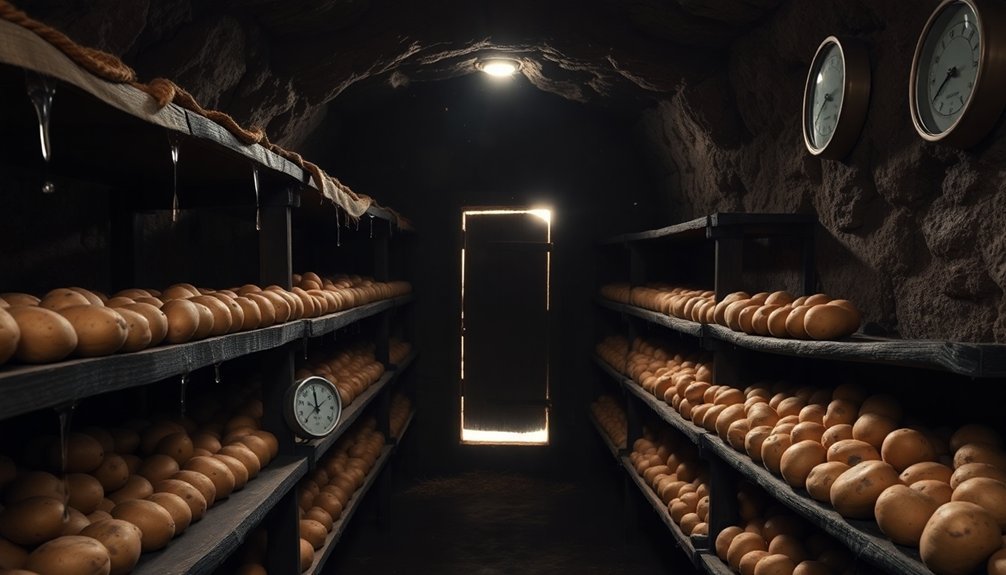
Store your potatoes in complete darkness using open plastic crates or perforated bags to guarantee adequate airflow. Don't wash them before storage, as this increases the risk of rot.
You'll want to check your stored potatoes regularly for signs of decay, removing any affected tubers promptly. During late fall, cool your cellar to 40-45°F (5-7°C) for ideal long-term storage, and minimize temperature fluctuations to prevent premature aging and sprouting.
Site Selection and Planning
When planning your root cellar for potato storage, you'll need to assess whether an underground or above-ground structure better suits your property's natural drainage patterns and soil conditions.
Your ideal location should be on the north side of your home or a shaded area that stays consistently cool, with natural protection from direct sunlight and heat.
You'll want to choose ground that's elevated enough to prevent water accumulation but still allows for easy access during harvest and throughout the storage season. Using natural materials like stone provides sustainable and effective insulation for maintaining proper storage temperatures.
Location Requirements and Assessment
Selecting the right location for your root cellar stands as the most critical decision you'll make in the storage planning process.
You'll want to focus on finding a north-facing spot that maintains a consistent temperature between 32-40°F, ideally on a slope or hillside where you can take advantage of the earth's natural insulation.
Look for an area that offers natural humidity levels of 85-95% and provides good drainage to prevent water accumulation.
Your chosen spot should be shaded, particularly on the north side of a structure or hill, to minimize direct sunlight exposure.
The soil type matters too – you'll need ground that retains natural moisture while allowing excess water to drain away.
Make sure you can easily access your root cellar year-round, especially during winter when you'll need your stored potatoes.
Consider how you'll incorporate proper ventilation to prevent ethylene gas buildup and maintain air circulation.
Don't forget to assess the location for potential rodent problems and plan appropriate protection measures.
If you're working with an existing structure, evaluate its ability to maintain stable temperatures and humidity levels through proper insulation and moisture control.
Underground Vs Above Ground
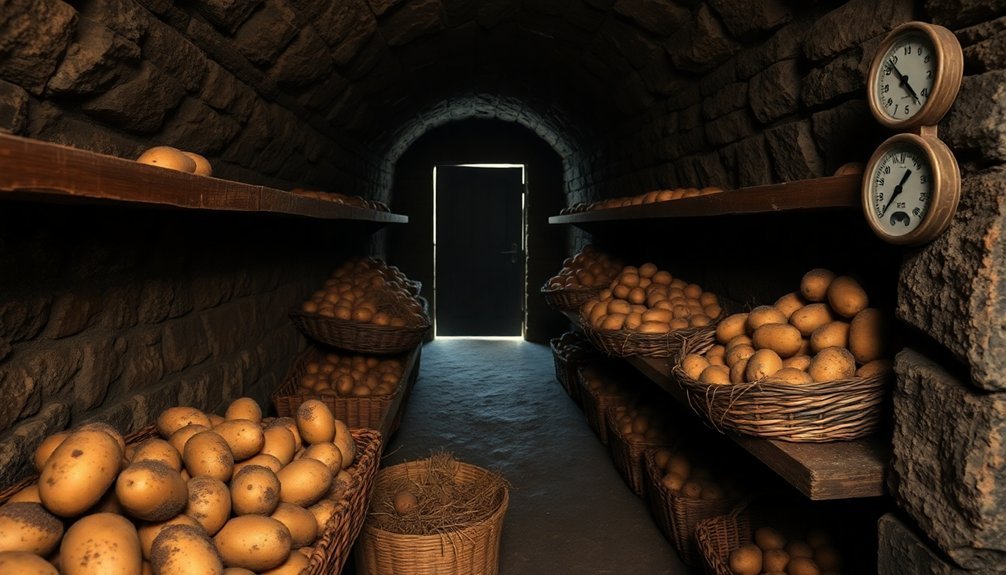
After pinpointing your ideal location, you'll need to decide between underground and above-ground root cellar construction.
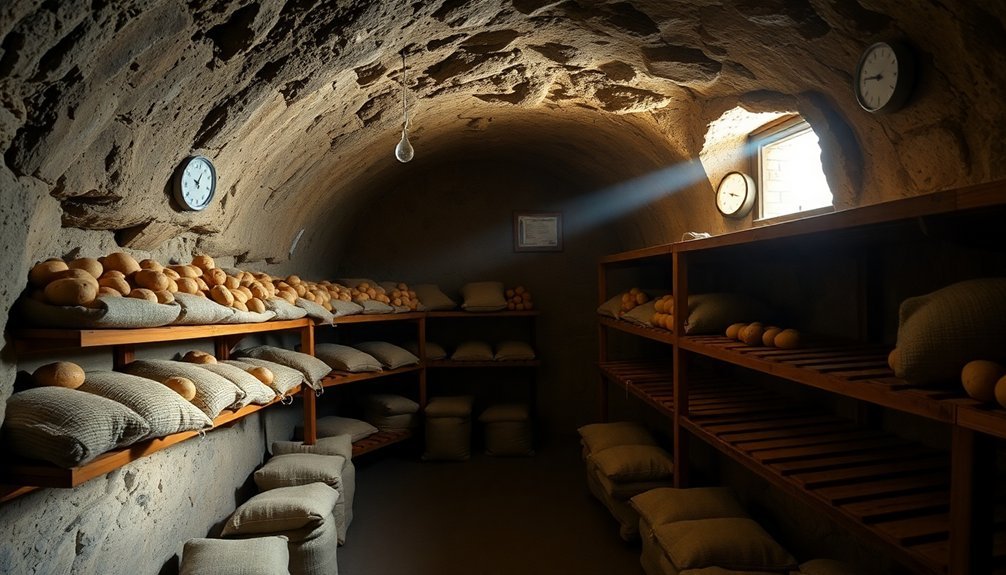
Underground cellars naturally maintain temperatures around 52°F and provide nearly 100% humidity, ideal conditions that'll keep your potatoes fresh for 5-8 months. The earth's natural insulation helps maintain these stable conditions with minimal intervention.
Above-ground cellars, while more convenient to build, present greater challenges for potato storage. You'll need to compensate for temperature fluctuations and humidity control through additional insulation and moisture management techniques. These structures typically maintain temperatures between 40-50°F, which isn't quite as ideal as underground conditions.
If you choose an underground cellar, you'll need to dig below the frost line and cover the structure with 2-4 feet of earth. Include proper drainage features and ventilation pipes for air circulation.
For above-ground storage, focus on heavy insulation using materials like foam board or straw bales, and create methods to maintain humidity, such as storing potatoes in damp sand or sawdust. You'll also need to incorporate shading techniques and night cooling strategies to manage temperatures effectively.
Natural Drainage Patterns
Three critical drainage factors will determine the success of your root cellar location: natural water flow, soil composition, and ground elevation.
You'll want to observe how water moves across your property during heavy rains and avoid any areas where it tends to collect or create runoff channels. North-facing slopes are ideal, as they'll help maintain consistently cool temperatures while promoting natural drainage.
Your soil needs to strike a balance between stability and drainage capacity.
Look for ground that's firm enough to support the structure but not so rocky that it's difficult to excavate. The soil should provide good insulation while maintaining proper moisture levels for vegetable storage.
Don't choose areas with weak soil structure that might cave in over time.
To guarantee proper drainage, you'll need to position your cellar floor higher than the surrounding ground level.
Install a perforated 4-inch drainpipe on a 3-inch gravel bed, maintaining a slope of 1 inch per 8 feet. Cover the pipe with heavy roofing paper or 6-mil plastic sheeting to prevent silt accumulation.
This system will direct both groundwater and surface runoff away from your storage area.
Root Cellar Construction Methods
Building a root cellar requires careful planning and several key construction steps to create an effective underground storage space. You'll need to start by digging a hole roughly 6 feet deep and 8 x 12 feet at the base, ensuring you account for wall thickness in your measurements. If possible, dig into a hillside or at least 10 feet underground for ideal natural insulation.
For wall construction, you've got several options. You can use earthbags filled with soil or sand, which provide excellent natural insulation, or opt for traditional materials like bricks, concrete, or cinder blocks. Before building walls, lay a 6-mm plastic sheeting around the hole's edge for moisture protection.
When using earthbags, you'll need to secure them with a 2 x 8 lumber bond beam and rebar.
Insulation is essential for temperature control. Install rigid foam sheets around exterior walls, or use natural materials like straw bales packed into walls and ceiling.
For the roof, you'll want sturdy construction using wood, concrete, or metal, properly insulated and secured. If you're using earthbags, drill through the bond beam boards into the bags and reinforce with rebar for stability.
Proper Ventilation Systems
In accordance with proper root cellar design, an effective ventilation system serves as the cornerstone of successful potato storage.
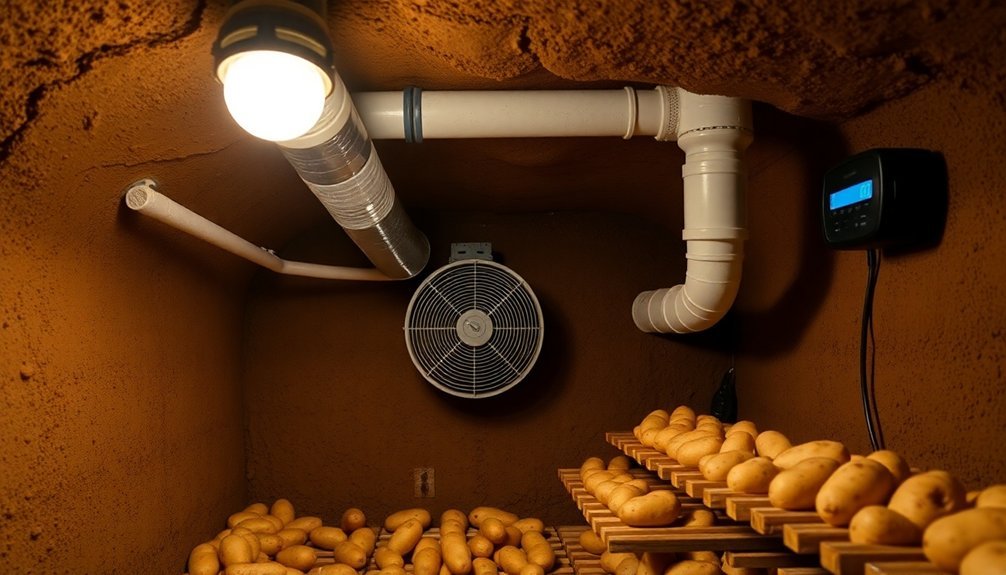
You'll need to position intake vents low to the ground and outlet vents near the ceiling on opposite sides of the cellar to maximize airflow. Don't forget to seal around vents with packed cloth or expanding foam and install wire screens to keep pests out.
You should ventilate your cellar for 6-9 hours every few days, particularly during the first two weeks after harvest to prevent Black Heart in potatoes.
Choose daytime ventilation if nights are too cold, or night ventilation if days are too warm. After about four weeks, when potatoes become dormant, you won't need to ventilate as frequently.
To enhance airflow, you can rely on natural convection or install a fan system with ductwork.
Only run fans when outside temperatures are cooler than inside the cellar. Monitor humidity levels using a humidistat, aiming to maintain 60-80 percent humidity.
This ventilation strategy helps control ethylene gas buildup and prevents mold growth while keeping your potatoes in prime condition.
Temperature Control Techniques
You'll find that natural cooling methods, like opening vents during cool nights and using ice storage, create an effective foundation for maintaining proper root cellar temperatures.
Your temperature monitoring system should include thermometers placed at different heights within the cellar to track temperature variations throughout the space.
Installing remote temperature sensors can help you quickly respond to any concerning temperature changes that might affect your stored potatoes.
Natural Cooling Methods
Natural cooling methods provide the foundation for successful root cellar storage, starting with the earth's remarkable insulating properties.
You'll benefit from the earth's consistent temperature when you build your cellar underground, as it maintains stable conditions without requiring electricity. The soil's natural moisture also helps create the ideal humidity levels that your potatoes need for long-term storage.
You can enhance your cellar's cooling effectiveness by implementing strategic ventilation. Opening vents during cooler nighttime hours helps regulate temperature and prevents ethylene gas buildup. If you're in a cold climate, you can create a "cold battery" by storing ice during winter months, using about one-third of your cellar's volume for ice storage.
- Install ventilation controls to manage airflow based on temperature differences between outside and inside
- Position your cellar to maximize natural shade and minimize direct sunlight exposure
- Use thick walls made of heat-absorbing materials like brick or concrete
- Add proper insulation to walls and ceiling to maintain consistent temperatures
These passive cooling techniques work together to create an energy-efficient storage environment that'll keep your potatoes fresh for extended periods.
Temperature Monitoring Systems
While natural cooling methods form the foundation of root cellar storage, modern temperature monitoring systems enhance your control over the storage environment.
You'll find that devices like RuuviTag sensors can accurately track both temperature and humidity levels, providing real-time data and historical trends that help you maintain ideal conditions for your potatoes.
You can set up these monitoring systems to send alerts when temperatures fall outside the perfect range of 40-50°F for potato storage. By connecting devices to a Ruuvi Gateway, you'll receive email notifications when conditions need adjustment. This automation helps prevent your potatoes from experiencing temperatures below 40°F, which can convert starches to sugars, or above 60°F, which promotes sprouting.
Installation is straightforward – you can mount sensors on walls using magnets, screws, or 3M tape.
For more advanced control, connect your monitoring system to smart switches that automatically activate fans and ultrasonic misters. These devices work together to maintain consistent temperatures throughout your root cellar, while data logging guarantees you can track conditions over time and make informed adjustments to your storage strategy.
Managing Underground Humidity Levels
Maintaining proper humidity levels in a root cellar requires a delicate balance between too wet and too dry. You'll want to keep humidity between 80-95% for ideal potato storage. A dirt floor naturally helps maintain moisture levels, while gravel layered on top prevents the floor from becoming too wet.
Your root cellar's underground location provides natural humidity control through the earth's moisture retention properties. If you're finding the humidity too low, you can sprinkle water on the floor or use damp burlap bags. For longer-lasting moisture control, try packing your potatoes in slightly damp sawdust or sand.
Here's what you'll need to monitor and control humidity effectively:
- A reliable thermometer and humidity gauge for daily readings
- Containers of water for slow evaporation when conditions are too dry
- A dehumidifier for managing excess moisture, especially during spring
- Proper drainage systems, including French drains and rain gutters
When waterproofing your cellar, consider applying DryLok to the walls to prevent excessive moisture seepage.
Keep the cellar well-stocked, as a full root cellar naturally maintains more consistent humidity levels. Regular monitoring and adjustments will guarantee your potatoes stay in ideal storage conditions throughout the season.
Potato Preparation Before Storage
To guarantee your potatoes survive winter storage, proper preparation must begin weeks before harvest. Start by reducing watering in mid-August and wait until the vines have completely died back. You'll know your potatoes are ready when you test-dig one and its skin doesn't rub off easily. Always harvest in dry soil conditions to prevent storage problems.
Once you've harvested your potatoes, gently brush off excess soil using a dry cloth or soft brush. Don't wash them unless absolutely necessary; if you must, make sure they're completely dry afterward. Keep your potatoes out of direct light during cleaning to prevent greening and solanine development.
The next vital step is curing. Place your cleaned potatoes in a dark, well-ventilated area for 7-10 days. Lay them in a single layer on newspaper or sheets to allow proper air circulation and skin hardening. During this time, maintain moderate temperatures and high humidity levels.
Before moving potatoes to long-term storage, carefully sort through them. Remove any that show signs of disease, injury, or excessive greening. If you find potatoes with minor imperfections like scabs or small cuts, plan to use these first or preserve them through alternative methods.
Storage Container Options
The right storage container can make or break your potato storage success. When selecting containers, focus on options that provide adequate ventilation while protecting your potatoes from light exposure.
You'll find several effective choices, from traditional wooden crates lined with straw to modern plastic containers with ventilation holes. For maximum storage, choose containers that allow air circulation while maintaining proper humidity.
Layer your selected container with newspaper or straw, and verify there's space between potato layers to prevent bruising and promote airflow.
Here are your best container options for storing potatoes:
- Open plastic crates with ventilation slots – ideal for preventing fungal growth and maintaining air circulation
- Wooden crates lined with straw – traditional and effective, especially when layered properly
- Specialized potato baskets with burlap lining – designed specifically for root vegetable storage
- Cardboard boxes with newspaper lining – affordable and practical when covered with a heavy towel
Remember to stack your containers with space between them and the walls. If you're using drawers or closed containers, keep them slightly open for ventilation.
For best results, position your storage containers in an area where you can maintain consistent temperatures between 45°F and 50°F.
Pest Prevention Strategies
Successfully protecting your potato harvest requires a thorough pest prevention strategy in your root cellar. Start by maintaining a clean, dry environment with regular sanitization of shelves, walls, and floors. Store your potatoes off the ground using shelves or pallets to improve airflow and reduce pest access. You'll need to inspect your stored potatoes frequently, removing any that show signs of decay.
Natural deterrents provide effective pest control without harmful chemicals. Here's a practical guide to protect your potato storage:
| Pest Type | Natural Deterrent | Application Method |
|---|---|---|
| Insects | Peppermint Oil | Place soaked cotton balls at entry points |
| Weevils | Bay Leaves | Scatter on shelves and in bins |
| Rodents | Ground Cloves | Sprinkle around perimeter |
| Moths | Mothballs | Place in corners |
| General Pests | Mint Spray | Mist throughout cellar |
Don't forget to secure your root cellar by sealing all gaps and covering ventilation pipes with hardware cloth. You'll want to use breathable storage containers like burlap sacks or brown paper bags for your potatoes. Keep the area well-ventilated while maintaining proper temperature and humidity levels for ideal storage conditions.
Seasonal Maintenance Tasks
Your fall preparation starts with leaving the cellar door open on mild days every 2-3 days to regulate temperature and enhance ventilation.
Throughout winter, you'll need to check your stored potatoes weekly for signs of decay and maintain ideal humidity levels between 85-95%.
You can manage winter temperature swings by adjusting ventilation patterns and ensuring there's proper airspace between crates and walls for consistent air circulation.
Fall Preparation Steps
Preparing for fall storage means getting down to essential maintenance tasks in your root cellar. You'll need to thoroughly clean and sanitize the space to prevent bacterial and fungal growth that could spoil your potato harvest.
Check for any structural damage that might affect temperature and humidity control, and make necessary repairs before the storage season begins.
It's essential to remove all remnants of last season's produce and prepare your storage setup with proper ventilation in mind. You'll want open plastic crates positioned on plastic pallets to guarantee adequate air circulation.
Before bringing in your new harvest, let the cellar warm up to match the temperature of your freshly dug potatoes to prevent condensation issues.
- Inspect walls, floors, and ceiling for cracks or damage that could compromise storage conditions
- Deep clean all surfaces with appropriate sanitizing solutions
- Set up your ventilation system to maintain proper airflow every 2-3 days
- Position storage containers and pallets to maximize air circulation around future potato stores
Start these preparation steps several weeks before harvest to confirm your root cellar is in prime condition for long-term potato storage.
Winter Monitoring Schedule
Regular monitoring throughout winter months forms the backbone of effective root cellar maintenance. You'll need to check your storage conditions at least twice weekly, focusing on temperature, humidity, and ventilation to guarantee your potatoes stay fresh.
Keep your thermometer readings between 32-40°F (0-4°C), and maintain humidity levels at 85-95%. If you notice temperature fluctuations, adjust your ventilation schedule accordingly. During the first two weeks of winter storage, you'll need to ventilate for 6-9 hours every two to three days.
After this initial period, you can reduce ventilation to once weekly. You'll want to inspect your potatoes regularly for signs of spoilage or Black Heart, removing any affected tubers immediately. If you notice the humidity dropping, add moisture using damp burlap bags or water pans.
Don't forget to check that there's adequate airspace between storage crates and walls for proper circulation. Make it a habit to record temperature and humidity readings. When you're organizing your inspection routine, include sanitizing shelves and floors to prevent bacterial and fungal growth.
If you're storing potatoes in sawdust, sand, or moss, check that these materials remain appropriately damp.
Common Storage Problems
The most common potato storage problems stem from poor environmental control in root cellars. You'll need to monitor ventilation closely, especially during the first two weeks after harvest, to prevent Black Heart from developing.
Keep temperatures steady between 40-45°F (5-7°C) and maintain humidity at 85-90% to avoid premature aging and sprouting.
Light exposure and inadequate darkness can trigger sprouting, so you'll want to cover your potatoes with cloth or newspapers. If you're using outdoor storage, make sure to protect them with a waterproof tarp.
Don't wash your potatoes before storage, as excess moisture promotes rot and mold growth.
Here are the key issues you'll need to manage:
- Temperature fluctuations that can break dormancy and cause sprouting
- Moisture imbalances leading to either shriveling or rot
- Light exposure that triggers premature sprouting
- Pest infestations and rot spread among stored potatoes
Check your stored potatoes every 2-3 weeks, removing any that show signs of damage or decay.
Use straw or wood shavings as buffer materials to maintain proper humidity while preventing direct contact between potatoes. Proper airflow remains essential, so choose containers that allow adequate ventilation.
Frequently Asked Questions
Can Potatoes and Onions Be Stored Together in the Same Root Cellar?
You shouldn't store potatoes and onions together in your root cellar because onions emit ethylene gas that makes potatoes sprout prematurely. Keep them in separate containers with good ventilation for best results.
How Long Should Potatoes Acclimatize Before Moving Them Into Root Cellar Storage?
You'll need to cure your potatoes for 7-10 days at 60-65°F, then let them acclimatize overnight in a shaded outdoor area before moving them into your root cellar for long-term storage.
What Natural Materials Can Replace Commercial Humidity Controllers in Root Cellars?
You can naturally control humidity using water trays, damp sand, or moist soil in your root cellar. Place these materials strategically around the space, and don't forget to use sealed containers with vegetable storage.
Do Different Potato Varieties Require Different Root Cellar Storage Zones?
No, you don't need different zones for potato varieties. They'll all thrive in the same storage conditions of 38-40°F and 85-90% humidity. Just make certain you're maintaining consistent temperatures throughout your root cellar.
Can I Convert an Existing Storm Shelter Into a Root Cellar?
Yes, you can convert your storm shelter into a root cellar if it provides cool temperatures, adequate humidity, and proper ventilation. You'll need to add insulation, guarantee good air flow, and monitor conditions regularly.
In Summary
You'll find that root cellar storage is an effective, time-tested method for keeping your garden potatoes fresh through winter. By maintaining proper temperature, humidity, and ventilation while preventing pest intrusion, you're preserving your harvest naturally without electricity. Whether you've built a traditional underground cellar or modified an existing space, you'll enjoy your homegrown potatoes for months when you follow these storage principles.

Leave a Reply