When building a root cellar pit for potatoes, you'll need to focus on five key elements for success. Choose a shaded location near your house with stable, non-rocky soil and good drainage. Dig your pit about 10 feet deep (5-6 feet in warmer areas), making it larger than your planned structure to accommodate proper supports. Layer your pit with gravel for moisture control and insulate walls with urethane sheets. Maintain temperatures between 40-50°F and humidity at 85-95% using water pans and regular ventilation. Install monitoring systems to track conditions – proper storage management can extend your potato harvest's life by several months.
Choosing Your Ground Location
A successful root cellar starts with selecting the perfect spot on your property. You'll want to choose ground that's close to your house, ideally incorporating one of your home's foundation walls into the design. This proximity makes it easier to access your stored potatoes, especially during harsh weather conditions.
When surveying potential locations, look for naturally shaded areas that aren't prone to flooding or water accumulation. The ground should be stable and free from rocky terrain that could complicate digging. You'll need soil that can maintain its structure without risking cave-ins over time. Following proper basement construction codes will ensure your cellar meets local regulations.
Consider the natural insulation benefits of your chosen spot. Underground locations are ideal because they provide consistent temperatures between 45-55°F (7-13°C), which is perfect for potato storage.
You'll also want to guarantee your selected area allows for proper ventilation installation, as air circulation is vital for preventing mold and ethylene gas buildup.
Don't place your root cellar in low-lying areas or spots that receive direct sunlight throughout the day. If you're dealing with challenging terrain, look for alternative locations that offer better natural protection and stability for your storage needs.
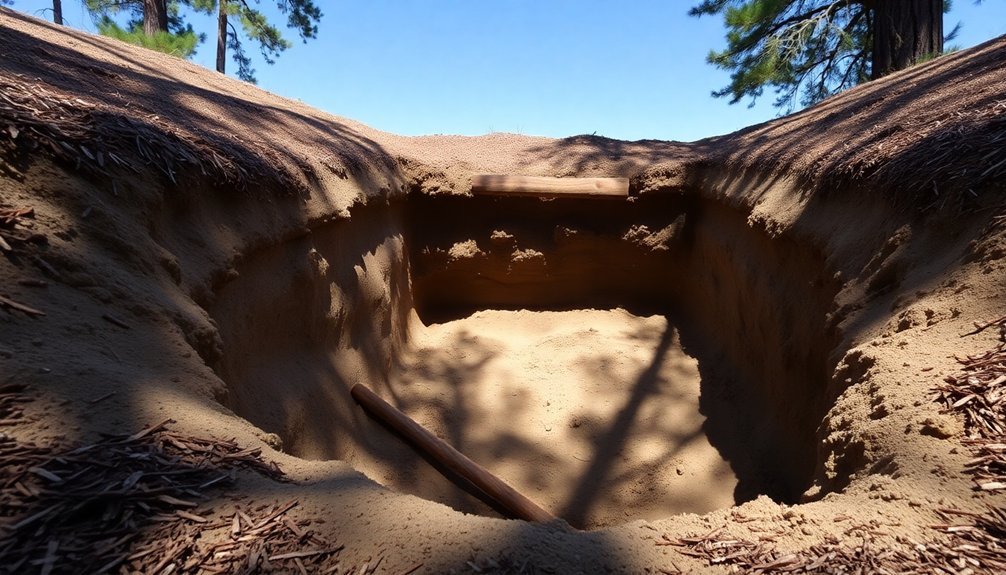
Digging The Perfect Pit
Digging your root cellar pit requires careful planning and precise measurements to secure ideal storage conditions for your potatoes. You'll need to dig approximately 10 feet deep in most regions, though you can get away with 5-6 feet in some areas depending on your local climate and soil conditions. Maintaining 85-95% humidity levels is essential for optimal potato preservation throughout the storage period.
When digging, make your hole larger than your intended structure to accommodate walls and support systems. You'll want to watch for different soil layers and avoid hitting groundwater or permafrost. Don't forget to compact the soil with sand and gravel mixtures where needed.
| Depth Considerations | Safety Measures |
|---|---|
| Check frost line (36-48") | Install temporary stairs |
| Dig deeper in warm areas | Cover hole when unattended |
| Avoid permafrost zones | Support walls properly |
| Monitor groundwater levels | Prevent water accumulation |
Remember to install proper structural support, including concrete footers and well-built walls to prevent cave-ins. Your flooring should include 1/2-inch spaces between boards to promote air circulation. If you're using SIPs for construction, they'll work effectively for both walls and roofing. Keep monitoring the dig site for potential flooding issues and secure your entrance area has a solid concrete foundation.
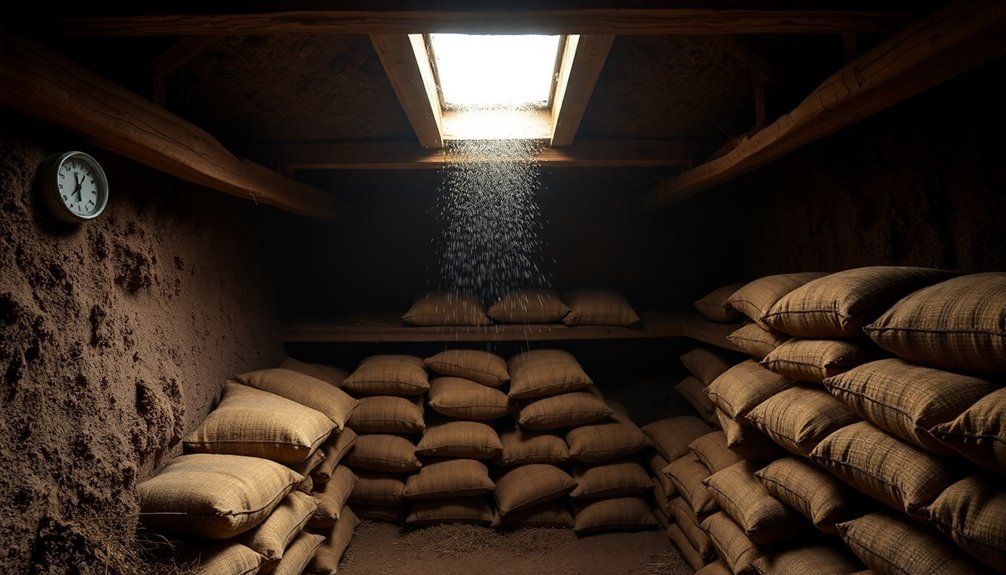
Layering Materials For Protection

Proper layering of materials in your root cellar creates the perfect environment for long-term potato storage. You'll need to carefully consider how you layer materials for humidity control, insulation, air circulation, and light protection to maintain ideal conditions.
Start with a dirt floor and add a layer of gravel to manage moisture levels effectively. You can sprinkle water on the gravel when you need to increase humidity. Using pans of water can also help maintain the ideal 90-95% humidity range.
For insulation, attach 2-inch sheets of urethane or Styrofoam to the roof's exterior and cover them with 6-mil polyethylene. Don't forget to add extra insulation under bulkhead doors during cold weather.
To protect your potatoes from light exposure while ensuring proper air circulation, you can use several methods:
- Line plastic laundry baskets with newspapers and layer potatoes between them
- Store potatoes in cardboard boxes or wooden crates covered with cloth
- Use partially opened drawers in an old dresser, covered with heavy towels
Remember to maintain a 2-inch gap between storage containers and walls for air circulation. Using containers with open slats or ventilation holes will help prevent moisture buildup and reduce the risk of spoilage.
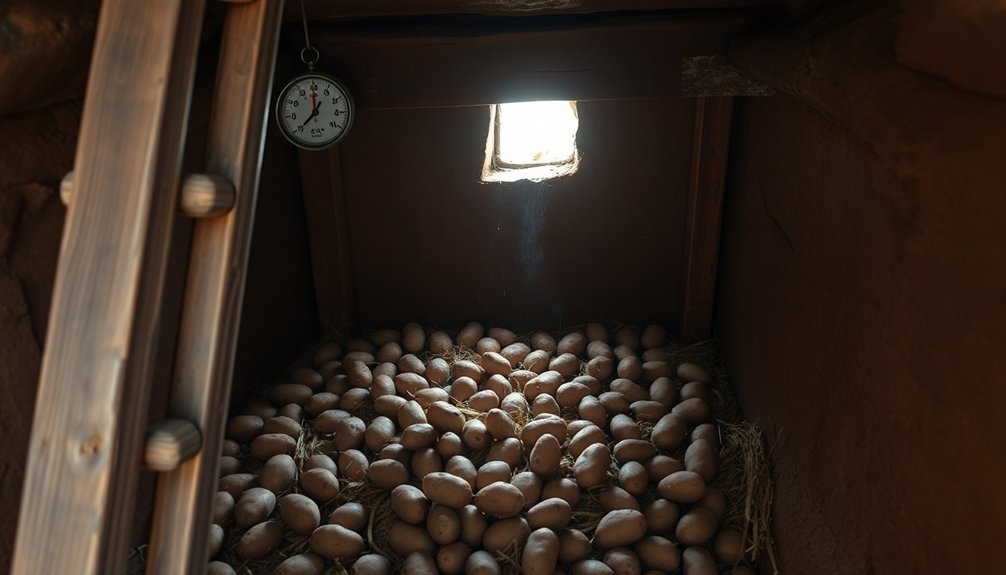
Temperature And Humidity Control
Successful potato storage hinges on maintaining precise temperature and humidity levels throughout different storage phases.
You'll need to start with a two-week curing period at 60-75°F, which helps heal wounds and toughen skins. During this phase, keep temperatures above 50°F to guarantee proper wound healing.
For long-term storage, you'll want to maintain temperatures between 40-50°F. If you're storing fresh market potatoes, aim for 40°F, while seed potatoes do best at 38-40°F.
You'll need to ventilate your storage space every 2-3 days for 6-9 hours, choosing times when the outside temperature is 0-20°F cooler than your target.
Maintain humidity levels between 85-95% to prevent your potatoes from drying out. You'll need to balance this high humidity with proper ventilation to avoid mold growth and rot.
Use a hygrometer to monitor humidity levels regularly, and guarantee good air circulation throughout your storage space.
Don't let temperatures fluctuate suddenly, as this can trigger sprouting and physiological aging. Remember that lower temperatures reduce disease incidence but can increase sugar formation, which affects processing quality.
Monitoring Your Underground Storage
While maintaining the right temperature and humidity sets the foundation for potato storage, monitoring your root cellar requires a detailed approach.
You'll need to regularly check CO2 levels and guarantee proper ventilation to prevent spoilage and maintain ideal storage conditions. Though manual measurements work, installing an automatic monitoring system can save you time and provide real-time alerts when issues arise.
Your ventilation system plays an essential role in maintaining air quality and preventing the buildup of harmful gases.
Make sure you're checking it regularly for any malfunctions or failures. Today's advanced monitoring systems offer all-encompassing solutions, allowing you to track multiple parameters simultaneously:
- Temperature sensors at different levels of your storage
- CO2 monitors with automatic alerts
- Humidity sensors with remote monitoring capabilities
You should conduct daily checks of your root cellar's conditions, including temperature readings and ventilation performance.
Monthly inspections for sprouting, rot, and blemish diseases are vital to catch any issues early.
If possible, invest in a wireless monitoring system that can send notifications to your phone, helping you respond quickly to any storage problems that might develop.
Frequently Asked Questions
How Long Can Potatoes Remain Viable in a Root Cellar Pit?
You can store your potatoes in a properly maintained root cellar for 5-8 months, but storage time varies by variety – Russets last 3-5 months, Yukon Golds 2-3 months, and Red/Fingerling 1-2 months.
What Should I Do if Rodents Infiltrate My Underground Potato Storage?
If you've got rodents, immediately seal all entry points with hardware cloth, set peanut butter traps, and use natural deterrents like peppermint oil. Remove damaged produce and thoroughly clean the storage area to discourage return visits.
Can I Store Different Potato Varieties Together in the Same Pit?
You can store different potato varieties together, but you'll want to sort and layer them by variety. Use shorter-storing varieties first and keep them separated to track their different storage lives better.
Should I Remove Sprouted Potatoes From the Pit Immediately?
Yes, you'll need to remove sprouted potatoes immediately as they release ethylene gas that triggers sprouting in other potatoes. Don't wait, as this can lead to increased rot and reduced storage life throughout your collection.
How Often Should I Rotate Stored Potatoes to Prevent Bottom Layer Compression?
You'll want to rotate your stored potatoes every 2-3 weeks. Check bottom layers for signs of compression and move them to the top. This helps prevent damage and guarantees even air circulation throughout your storage.
In Summary
You'll find that a properly constructed root cellar pit gives you months of potato storage when you've followed these essential steps. By selecting the right location, digging to proper depth, using protective layers, maintaining ideal conditions, and checking regularly, you've created a reliable underground storage system. Don't forget to monitor for moisture and rodents to guarantee your potato harvest stays fresh until spring.


Leave a Reply