Salt preservation is a time-tested method to keep your garden vegetables fresh without electricity or expensive equipment. You'll need firm, unblemished vegetables like cucumbers, carrots, or cabbage, along with pure pickling salt and clean glass containers. First, wash your vegetables thoroughly and trim any damaged parts. Create a brine using 2.5-5% salt concentration by weight, pack your vegetables tightly, and guarantee they stay completely submerged. Monitor the brine daily and store your preserved vegetables in a cool, dark place. With proper technique, your preserved harvest can last up to two years and transform everyday meals into flavorful creations. These simple steps will set you up for preservation success.
Why Preserve Vegetables With Salt
Along with being one of the oldest preservation methods known to humanity, salt preservation offers a remarkably sustainable and cost-effective way to store your garden vegetables. You won't need expensive equipment or electricity, making it an environmentally friendly choice that reduces your carbon footprint while saving money.
When you preserve vegetables with salt, you'll maintain their nutritional value and natural flavors. Unlike other preservation methods, salt preservation doesn't strip away vitamins and minerals. Instead, it enhances the vegetables' taste, often creating more intense flavors while maintaining their crisp texture for months. A 2% salt concentration typically provides the ideal balance for most vegetable preservation projects.
Salt preservation creates an inhospitable environment for harmful bacteria and mold. As the salt draws moisture from your vegetables, it creates a protective brine that promotes beneficial bacteria while inhibiting unwanted microorganisms. This natural process not only preserves your produce but also develops beneficial probiotics through fermentation.
You'll discover that salt-preserved vegetables often develop unique flavor profiles, becoming sweeter and more complex over time. Whether you're making traditional sauerkraut, fermented cucumbers, or other preserved vegetables, you're using a time-tested method that guarantees your garden's bounty doesn't go to waste.
Selecting Your Garden Vegetables
Now that you understand the benefits of salt preservation, choosing the right vegetables from your garden will set you up for success.
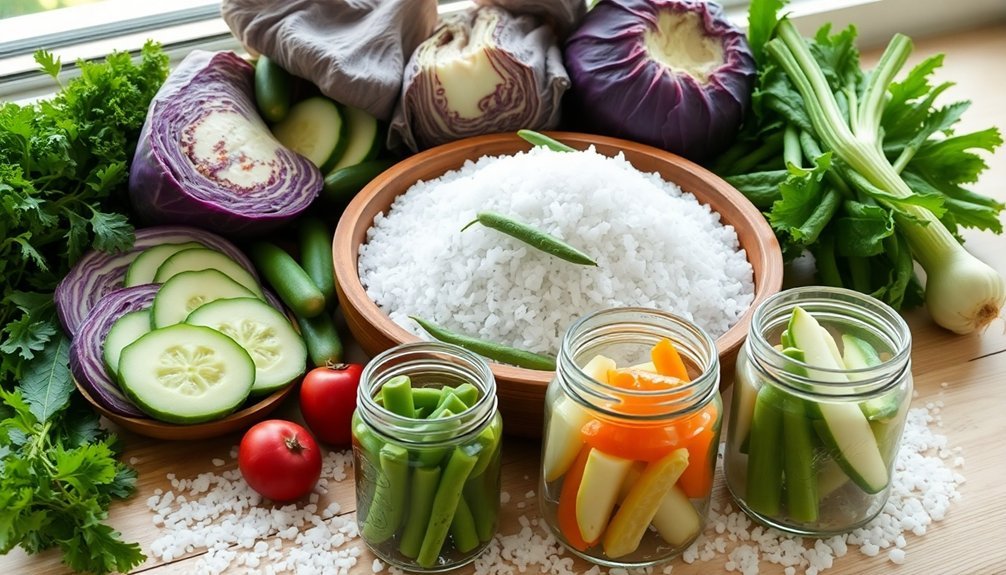
You'll want to focus on vegetables with naturally firm structures and lower water content, as these characteristics make them ideal candidates for preservation. Look for cucumbers, carrots, cabbage, beets, and onions, which have proven themselves as traditional favorites. Green beans are particularly well-suited for salt preservation due to their excellent preservation qualities.
Select vegetables that are slightly underripe and crisp, without any blemishes or soft spots. Your chosen produce should be at its peak condition but not overripe, as this guarantees the best preservation results.
When harvesting, pick vegetables that maintain their crunchiness naturally, as they'll hold up better during the preservation process.
Consider how you'll prepare the vegetables before selecting them. If you're planning to make sauerkraut, choose firm cabbage heads that you can finely chop. For mixed vegetable preserves, select a variety that works well together, like carrots, celery, and peppers.
Remember that different vegetables require different salt concentrations, so group your selections based on their preservation needs – for instance, garlic and beetroot need 2% salt, while cucumbers need 3-4%.
Essential Tools and Equipment
Store your preservation equipment in a designated space and keep it sanitized.
Label your containers with dates and contents, and maintain a clean workspace throughout the process.
Regular monitoring of your equipment's condition will help guarantee successful preservation results.
Use only nonreactive containers made of glass, wood, or food-grade plastic for your vegetable preservation projects.
Understanding Salt Types
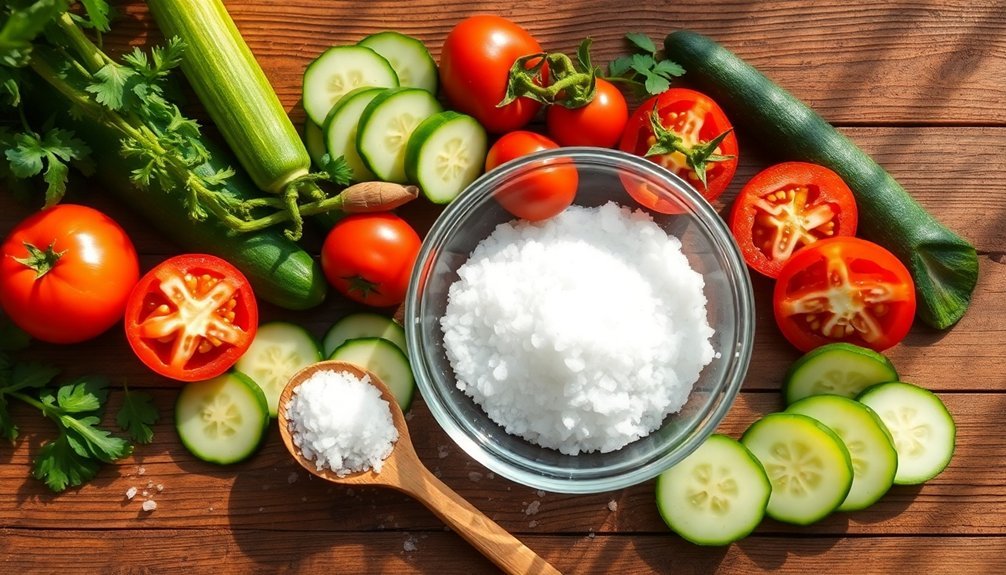
You'll want to choose the right salt for your preservation projects, with pickling salt being the top choice due to its pure sodium chloride composition and lack of additives that could cloud your brine.
For accurate results, always measure your salt by weight rather than volume, as different salt crystal sizes can lead to significant measurement variations.
Whether you're fermenting vegetables at 2.5-5% salt concentration or curing them at 20-25%, a kitchen scale will help you achieve precise measurements that guarantee food safety and consistent results.
Best Salt For Preservation
Selecting the right salt for preservation can make the difference between crisp, flavorful vegetables and a cloudy, discolored batch. For the best results, you'll want to use pickling salt, which is pure sodium chloride without any additives. It dissolves easily and creates a clear brine that won't discolor your vegetables.
While you might be tempted to use table salt from your kitchen, it's best to avoid it for preservation. The iodine and anti-caking agents in table salt can make your brine cloudy and affect the appearance of your preserved vegetables.
If you can't find pickling salt, kosher salt is your next best option. Just remember that its larger crystals will affect volume measurements, so you'll need to measure by weight for accuracy.
Sea salt can work for preservation, particularly when preserving whole lemons, but be aware that it's more expensive and its mineral content can vary.
Whatever type you choose, avoid salts with high mineral content, like Himalayan salt, as they can discolor your vegetables and leave undissolved minerals in your brine. The purer the salt, the better your preserved vegetables will turn out.
Understanding Salt Measurements
For successful vegetable preservation, understanding the different salt types and their measurements is vital. When you're measuring salt for preservation, it's important to know that different salt types have varying densities.
For instance, kosher salt is about half as dense as table salt, while pickling salt has its own unique weight characteristics. Weight measurements are always more accurate than volume measurements when preserving vegetables.
You'll want to avoid using regular table salt due to its additives, which can interfere with the preservation process. Instead, opt for pickling salt or pure kosher salt for the best results.
- Low salt concentrations (2.5% to 5%): Use 2-4 ounces of salt per 5 pounds of vegetables for fermentation
- High salt concentrations (20% to 25%): Use 1 to 1.25 pounds of salt per 5 pounds of vegetables for curing
- Important range: Avoid concentrations between 5% and 20% to prevent spoilage
- Precision matters: Use a gram scale for accuracy (2.5 grams salt per 100 grams vegetables)
Remember to include all salt in your measurements and make sure it's thoroughly mixed with your vegetables for consistent preservation results.
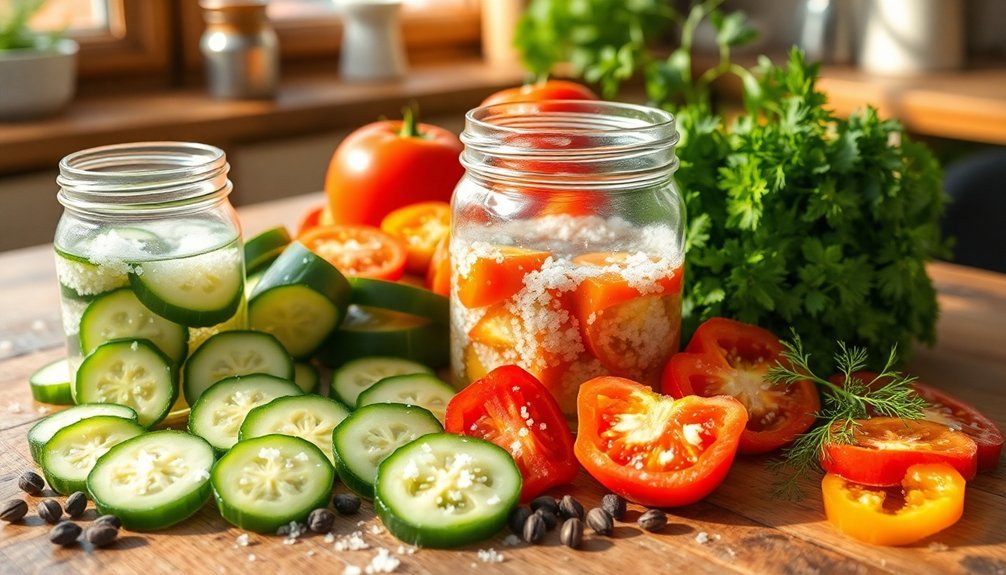
Making the Perfect Brine
Success in vegetable preservation hinges on creating the right brine solution. You'll need non-iodized salt, clean water, and optionally, spices or herbs for added flavor. If you're using tap water with high chlorine content, let it sit overnight before using it in your brine.
For a basic fermentation brine, mix 2 tablespoons of sea salt with 4 cups of water. You can adjust this ratio up or down depending on your batch size. If you're quick pickling instead, use equal parts water and vinegar. When making the brine, stir until all salt dissolves completely, which may take several minutes.
For traditional fermentation, make sure your vegetables stay completely submerged in the brine using weights if necessary. You'll need to monitor the process daily, releasing built-up carbon dioxide and checking that everything remains under the liquid.
Brining times vary greatly: 1-4 hours for pre-cooking preservation, or several days to weeks for fermentation. Test your vegetables periodically for desired texture and taste. Once they've reached your preferred level of preservation, transfer fermented vegetables to the refrigerator for long-term storage. You can store excess brine in the refrigerator for future use.
Preparing Vegetables for Preservation
You'll want to start with the freshest, blemish-free vegetables from your garden, selecting those that are mature but slightly underripe for ideal preservation.
Next, thoroughly clean your produce and trim away any damaged parts, ensuring uniform sizes for even salt distribution.
Before you begin the preservation process, gather your essential equipment including sharp knives, cutting boards, clean bowls, and sterilized fermentation vessels with weights or airlocks.
Selecting Prime Garden Produce
Selecting the right vegetables marks the essential first step in successful salt preservation. You'll want to focus on produce that naturally lends itself to salt preservation, such as cucumbers, carrots, cabbage, onions, and beets. These vegetables maintain their texture and develop enhanced flavors during the preservation process.
When choosing your produce, look for vegetables that are fresh, firm, and slightly underripe, avoiding any with signs of damage or disease.
For ideal results in your salt preservation journey, consider these key selection criteria:
- Choose vegetables at peak maturity but not overripe – they should be crisp and firm to the touch.
- Select produce free from blemishes, cuts, or bruising that could lead to spoilage.
- Opt for varieties specifically suited to preservation, such as bush beans or determinate tomatoes.
- Consider growing conditions – vegetables from well-maintained gardens with proper watering and weed control typically preserve better.
If you're growing your own vegetables for preservation, plan your garden layout strategically.
You'll need to maintain proper spacing, implement crop rotation, and keep the garden well-maintained. Water at soil level rather than on foliage to prevent disease, and use organic mulch to control weeds.
Cleaning and Trimming Steps
With your garden vegetables carefully selected, proper cleaning and trimming techniques will set the foundation for effective salt preservation.
Start by washing your vegetables under cold running water, using a produce brush for root vegetables to remove stubborn dirt. For leafy greens, submerge them in a large bowl of water to allow dirt to settle at the bottom.
You'll want to create a saltwater solution by mixing one tablespoon of salt per large bowl of water for your leafy vegetables. Soak them for 5-10 minutes, then rinse thoroughly with fresh water.
For root vegetables, you can either peel them or leave the nutrient-rich skins intact. If you're dealing with particularly dirty produce, use a vinegar bath (1 part vinegar to 2 parts water) to eliminate pesticides and bacteria.
Trim any damaged, wilted, or rotting parts from your vegetables before preservation. For leafy greens, dry them completely using a salad spinner or clean towels.
Don't wash your vegetables days in advance; clean them just before you're ready to begin the preservation process. Remove any produce stickers and residue using vinegar's natural cleaning properties.
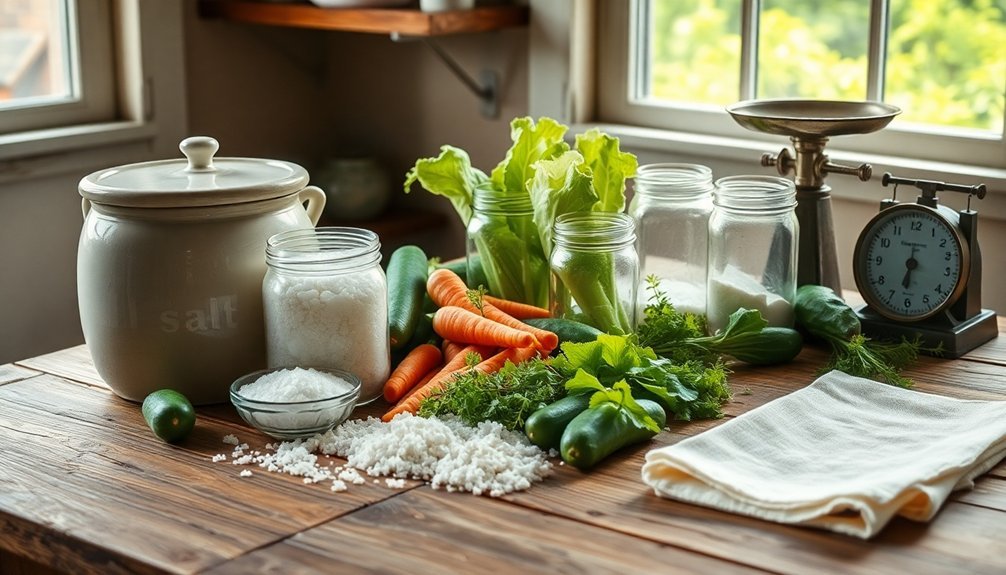
Essential Equipment Setup
A well-organized workspace and proper equipment form the backbone of successful vegetable preservation. You'll need nonmetallic vessels that won't react with salt or acidic fermentation byproducts. Glazed pottery crocks, food-grade plastic containers, wooden barrels, or glass jars are your best options.
Before you begin, sterilize all your equipment thoroughly to prevent unwanted bacterial growth.
To guarantee successful preservation, gather these essential items for your workstation:
- Large nonreactive mixing bowls for combining vegetables with salt and creating brine solutions
- Clean weights or water-filled bags to keep vegetables submerged and create an airlock system
- Measuring tools for accurate salt proportions (2.5-25% depending on your preservation method)
- Sterilized storage containers with tight-fitting lids for the final product
You'll also want a dedicated food processing area with enough counter space to handle your vegetables efficiently. Keep your salt storage container nearby, and have clean cloths ready for wiping equipment.
If you're planning to steam-blanche vegetables before preservation, set up your steaming equipment in advance and guarantee proper ventilation in your workspace.
Salt Concentration Guidelines
Remember that lower salt concentrations (1-2%) will speed up fermentation but may compromise texture, while higher concentrations (3-10%) will help maintain crunchiness and extend shelf life.
For mixed vegetable preparations, aim for 2.5-5% salt concentration.
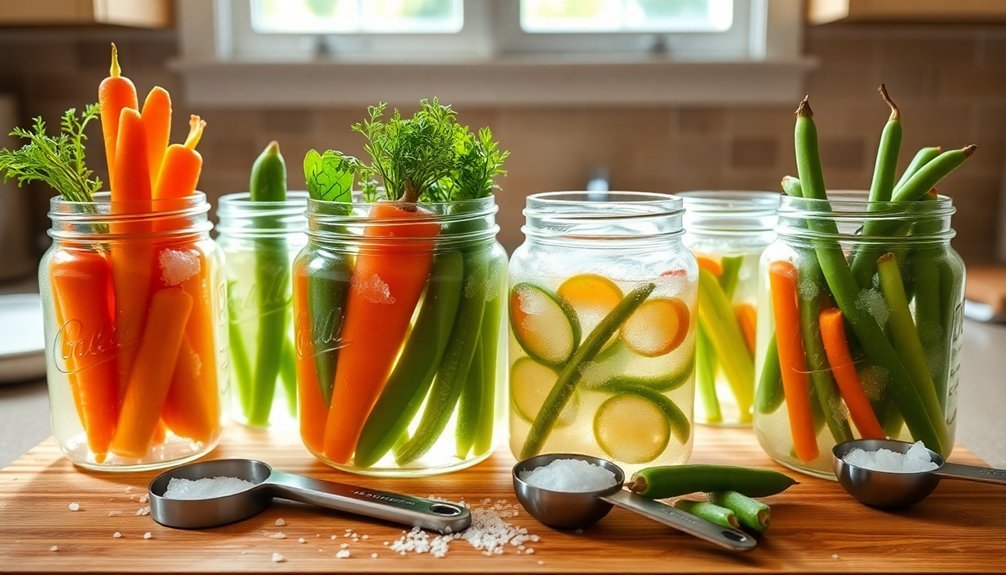
Packing Methods and Techniques
Successful salt preservation depends heavily on proper packing methods and techniques.
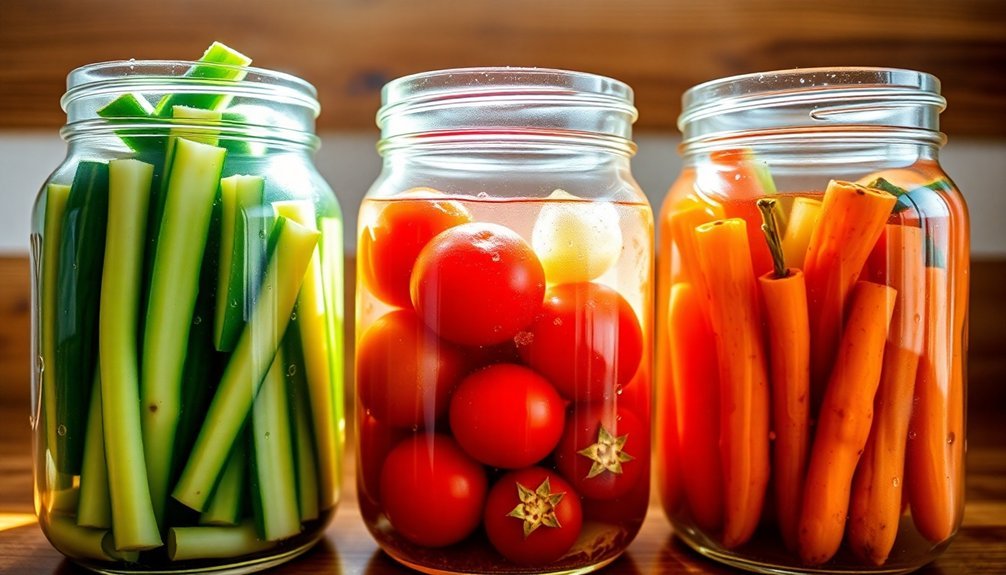
You'll need to start by selecting vegetables that are firm, clean, and free from damage. Choose produce with naturally firm structures and lower water content, such as cucumbers, carrots, cabbage, and beets. Before packing, wash your vegetables thoroughly and prepare them by slicing, chopping, or leaving them whole based on your recipe.
When you're ready to pack, follow these essential steps:
- Fill sterile jars or ceramic containers tightly with your prepared vegetables, eliminating air pockets that could lead to spoilage.
- Cover the vegetables completely with salt or brine solution, ensuring they remain fully submerged.
- Seal containers tightly to prevent air from entering, and label them with dates for tracking.
- Store in a cool, dry place, checking periodically to maintain proper salt concentration.
Remember to adjust your packing method based on the vegetable type. Leafy greens need a saltwater soak before packing, while root vegetables benefit from a light salt sprinkle.
For vegetables like cucumbers and cabbage, you'll want to allow for fermentation at room temperature before refrigerating.
Monitoring the Preservation Process
You'll know your vegetables are preserving well when they maintain their crispness and develop a translucent appearance without any signs of rotting or discoloration.
Check your brine levels daily to guarantee vegetables remain completely submerged, as exposure to air can lead to spoilage and compromise the preservation process.
Watch for a proper fermentation smell and the absence of surface mold, which indicates your salt preservation is progressing as it should.
Signs of Successful Preservation
Monitoring your preserved vegetables regularly helps guarantee they're properly curing and remaining safe to eat. You'll want to check for specific signs that indicate successful preservation, including proper brine formation, vegetable texture, and the absence of unwanted organisms.
Keep your preserved vegetables in a cool, dry place with minimal light exposure, maintaining temperatures between 64°F to 75°F for ideal results.
Watch for these key indicators of successful preservation:
- The vegetables should remain firm and crunchy, with a slight shrinkage as they release water to form a clear or slightly cloudy brine that completely covers them.
- There shouldn't be any visible mold, yeast, or slimy texture on the surface of the vegetables or brine.
- The color may intensify slightly, and you'll notice a more pronounced flavor developing over time.
- The salt concentration should stay between 2% to 5%, and no air pockets should form around the vegetables.
Check your preserved vegetables every few days, ensuring the containers remain properly sealed and maintaining anaerobic conditions.
If you notice any off smells or unusual changes in texture, remove those portions immediately to prevent contamination of the entire batch.
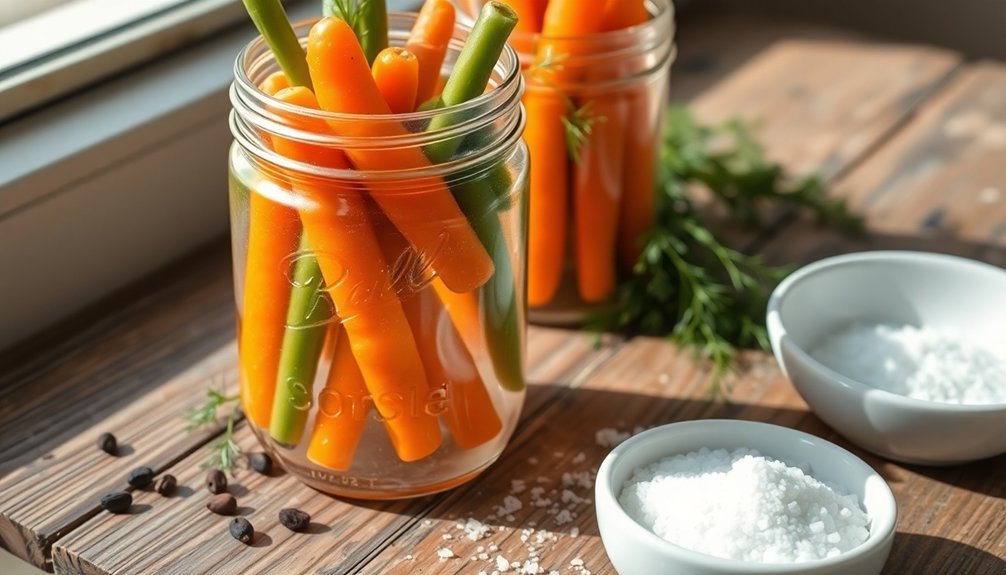
Daily Brine Level Checks
Regular brine level checks are critical to the long-term success of your vegetable preservation efforts. You'll need to verify that your vegetables remain submerged 1-2 inches below the brine's surface to prevent spoilage from air exposure. Use proper weights like ceramic or glass pieces to keep the vegetables down, and don't use rocks or non-food-grade materials that could contaminate your preservation.
Monitor your brine's concentration carefully, as it's essential for controlling microbial growth. Different vegetables require specific salt levels – ranging from 1% to 15% – so you'll need to maintain these precise concentrations throughout the preservation period. Add salt as needed to counteract any dilution that occurs during the process.
Check your brine's quality daily by looking for clarity and absence of mold. You'll want to keep your container covered with a clean towel or lid and store it in a cool, dry place away from direct sunlight.
If you're using a weighted system, make sure your plates or bags filled with brine haven't shifted. Remember to use distilled or filtered water when preparing or adjusting your brine to avoid introducing impurities that could affect the preservation process.
Long-Term Storage Solutions
For successful long-term storage of salt-preserved vegetables, proper containers and environmental conditions play vital roles.
You'll want to use non-porous glass or ceramic jars that can protect your fermented vegetables from oxygen exposure and contamination. These containers should be filled to within 2 cm of the top to minimize air contact while leaving just enough space for any natural expansion during storage.
Your preserved vegetables can last up to two years when you follow these significant storage guidelines:
- Store your jars in a cool, dark location or refrigerator to maintain ideal preservation conditions.
- Check regularly for signs of mold or spoilage, removing any affected portions immediately.
- Keep vegetables fully submerged beneath the brine using weights or fermentation tools.
- Maintain consistent storage temperatures to prevent fluctuations that could affect preservation.
Remember that different vegetables may have varying storage requirements.
Hard vegetables like beets and turnips typically store longer than softer varieties like cucumbers. When you notice any changes in color, texture, or smell, it's best to evaluate the contents carefully before consuming.
Always verify your storage area remains clean and dry to prevent external contamination of your preserved vegetables.
Using Your Preserved Vegetables
Release the versatility of your preserved vegetables by incorporating them into a wide range of dishes, from quick stir-fries to flavorful plant-based meals. You'll find they're incredibly convenient for adding instant umami flavor to your cooking, especially when you're short on time.
For stir-fries, start by dry frying your preserved vegetables with vinegar and sugar to adjust their taste. You can combine them with meat or tofu, adding chicken stock to enhance the overall flavor. When working with tofu, choose medium firmness and create a rich sauce using preserved vegetables, oyster sauce (or mushroom sauce for vegetarian options), and black pepper.
| Dish Type | Preserved Vegetable Use | Key Ingredients to Add |
|---|---|---|
| Stir-Fries | Dry fry first | Meat, garlic, stock |
| Plant-Based | Create sauce base | Tofu, mushroom sauce |
| Quick Meals | Direct addition | Vinegar, sugar, oils |
Your preserved vegetables can transform simple pantry ingredients into flavorful meals within minutes. Whether you're making a quick sauce or adding depth to a stir-fry, they're versatile enough to enhance any dish while saving you precious preparation time.
Frequently Asked Questions
Can I Mix Different Vegetables in the Same Preservation Jar?
You can mix different vegetables together, but make certain they have similar fermentation needs and salt requirements. Choose veggies with compatible textures and water content to guarantee they'll preserve evenly and safely.
What Happens if My Vegetables Float Above the Brine?
If your vegetables float above the brine, they'll risk developing mold and off-flavors. You'll need to push them back down and add proper weights to keep them submerged for successful fermentation.
How Do I Know if My Preserved Vegetables Have Gone Bad?
Watch for mushy textures, offensive odors, and unnatural colors. If you notice bulging lids, foam, or mold growth, don't eat them. When your vegetables float or have slimy texture, they're likely spoiled.
Can I Reuse Leftover Brine for a New Batch of Vegetables?
Yes, you can reuse clear, refrigerated brine for new ferments. Add it to fresh vegetables to jumpstart fermentation, but make sure it's not cloudy. Consider boiling old brine and adding fresh vinegar first.
Should I Sterilize My Weights Before Placing Them on the Vegetables?
Yes, you'll absolutely need to sterilize your weights before using them. You can boil, steam, or soak them in vinegar to kill harmful bacteria and guarantee your fermentation stays safe and contamination-free.
In Summary
Salt preservation lets you enjoy your garden's bounty year-round while maintaining nutrients and flavor. You'll find it's an affordable, straightforward method that doesn't require special equipment. Keep experimenting with different vegetables and brine concentrations until you've mastered your preferred technique. Once you've started preserving your own vegetables, you won't believe you ever relied solely on freezing or canning methods.


Leave a Reply