To master oil-infused pickling, you'll need essential equipment like a vacuum sealer and canning jars, plus quality oils and fresh vegetables. Start by thoroughly cleaning and blanching your veggies, then pat them dry to prevent spoilage. Choose your oil base wisely – neutral oils like grapeseed work well for subtle flavors, while distinctive oils like sesame add depth. Season with complementary herbs and spices, maintaining a 1:10 ratio of flavoring materials to oil. Always follow proper temperature control (35-40°F for storage) and safety protocols for preservation. This basic foundation opens the door to endless creative pickling possibilities.
Essential Equipment and Ingredients
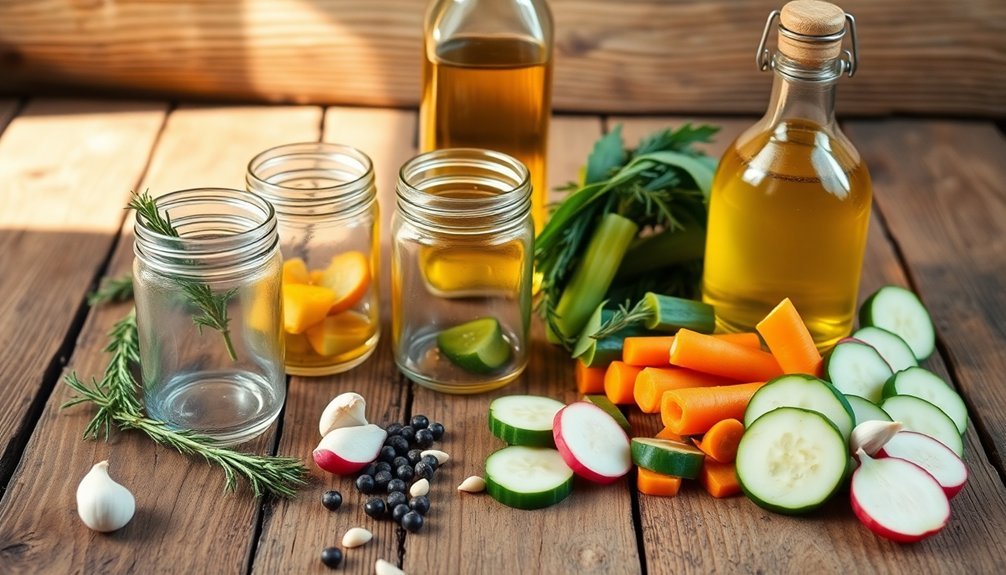
Success in infused oil pickling begins with having the right equipment and ingredients on hand.
You'll need a chamber vacuum sealer and food-safe vacuum bags to achieve rapid flavor infusion and proper compression of your vegetables. Don't forget essential canning jars for storage and a quality slicer or knife for consistent vegetable cuts. Keep a large bowl and measuring cup nearby for precise ingredient portions.
Your choice of oil greatly impacts the final product. Select olive oil when you want herb flavors to shine while maintaining freshness, or opt for canola oil if you prefer a milder base. Mustard, sesame, and sunflower oils each bring their unique characteristics to your pickles. Dark-colored bottles are essential for protecting oils from light exposure and extending shelf life.
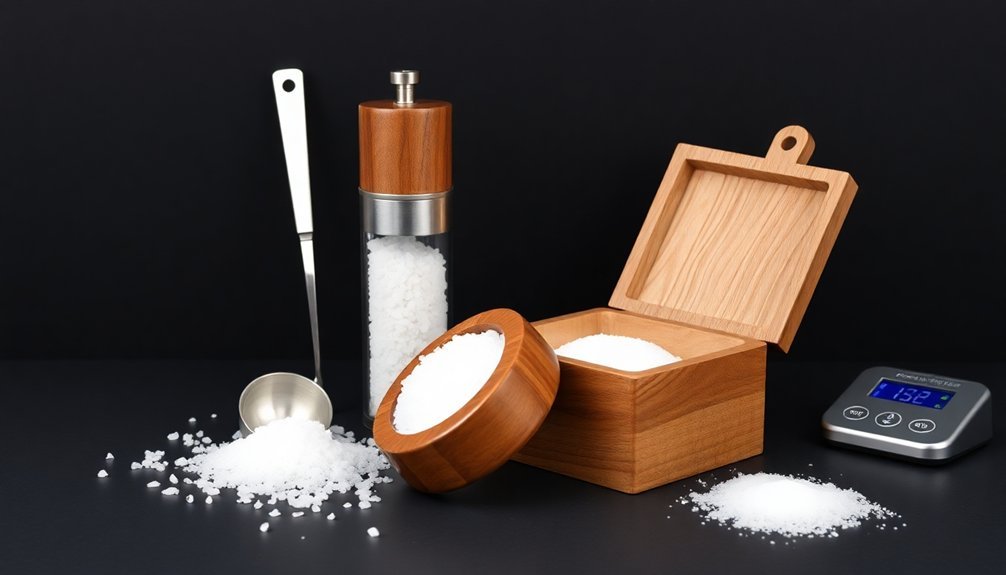
For your pickling brine, you'll need vinegar (red wine, apple cider, or white), salt, and optional sugar to balance acidity.
Stock up on spices like celery seed, mustard seed, and black peppercorns. Fresh or dried herbs such as dill, thyme, and oregano will enhance flavor profiles.
Consider additional ingredients like garlic, onions, ginger, or hot peppers to create unique combinations, but remember not to mix garlic with herbs due to different infusion requirements.
Preparing Vegetables for Oil Infusion
You'll need to thoroughly clean your vegetables and cut them into uniform pieces to guarantee even oil absorption and consistent pickling results.
Next, blanch your vegetables in boiling water to soften them slightly while maintaining their crunch and preparing them for proper oil infusion.
Before adding the vegetables to your oil, it's essential to salt-dry them thoroughly, removing excess moisture that could lead to bacterial growth and spoilage. For safety, vegetables must be treated with a 3% citric acid solution before oil infusion to prevent dangerous pathogen growth.
Cleaning and Size Control
Before infusing vegetables in oil, proper cleaning and sizing techniques are essential for both safety and quality. Start by rinsing your vegetables under cool running water for at least 20 seconds, using a soft brush to remove trapped dirt. You'll want to soak them in either a white vinegar solution (1:4 ratio) or salt water for 15-20 minutes to guarantee thorough cleaning.
To eliminate pesticide residue, you can use a bicarbonate of soda solution or a mixture of distilled white vinegar with essential oils. Since pesticides are typically oil-based compounds, standard water rinsing alone won't be sufficient for proper removal. Don't forget to rinse thoroughly after any soaking method.
| Vegetable Type | Size Guide | Cleaning Method | Storage Tip |
|---|---|---|---|
| Cucumbers | 1-1.5 inch pieces | Vinegar soak | Cool, ventilated area |
| Carrots | 1/2 inch pieces | Salt water soak | Pat dry before storing |
| Celery | 1 inch pieces | Baking soda solution | Separate from raw meat |
| Mixed vegetables | Uniform sizes | Essential oil spray | Sterile containers |
For best results, cut your vegetables into uniform pieces according to type. Remove 1/16-inch from blossom ends to prevent softening, and guarantee all cuts are clean and precise. Remember to process your vegetables within 24 hours of harvesting for the best quality in oil infusion.
Blanching for Oil Readiness
Proper blanching serves as the foundation for successful oil-infused vegetables, preparing them for ideal flavor absorption and preservation. You'll need to choose between water and steam blanching, with steam being particularly effective for vegetables like broccoli and winter squash. For water blanching, use one gallon of water per pound of vegetables, and make sure the water returns to boiling within a minute of adding your produce.
Your blanching times are vital – underblanching can actually worsen quality, while overblanching strips away nutrients and flavor. Follow specific timing guidelines: asparagus needs 2-4 minutes, green beans require 3 minutes, and cabbage takes just 1.5 minutes when shredded.
- Place your vegetables in a single layer when steam blanching to guarantee even heat distribution.
- Watch for the bright color change that signals proper blanching.
- Count blanching time only after water returns to a full boil.
- Use a large pot with a tight-fitting lid to maintain consistent temperature.
- Prepare an ice bath beforehand to stop the cooking process immediately.
This preparation step enhances oil absorption while preserving the vegetables' texture and nutritional value, setting the stage for successful infusion.
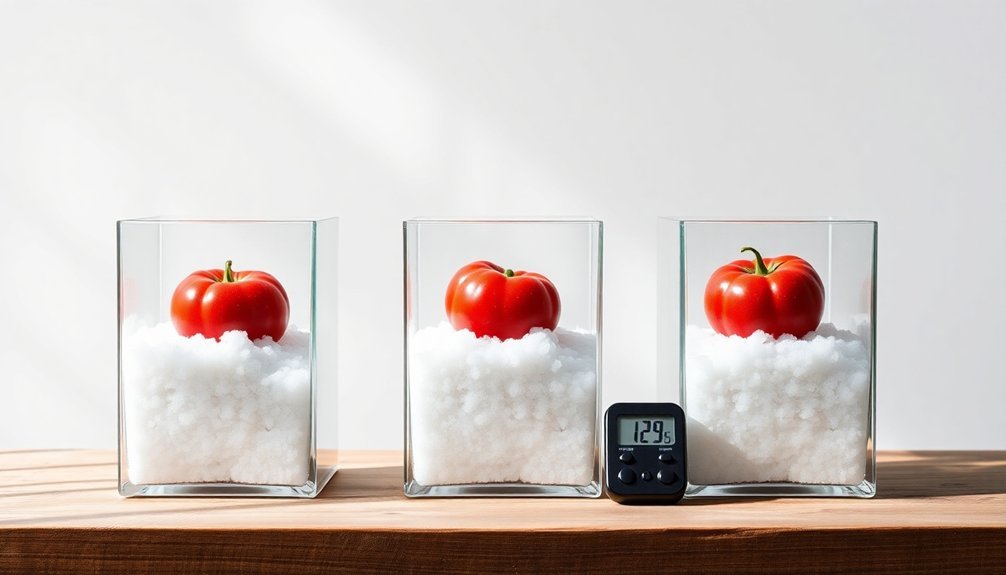
Salt-Drying Before Infusion
After blanching, salt-drying stands as the next key step in preparing vegetables for oil infusion.
You'll need to verify your vegetables are completely moisture-free before moving forward, similar to preparing fresh herbs for oil infusion. This critical step prevents water-based spoilage and extends the shelf life of your pickled vegetables.
Start by patting your blanched vegetables thoroughly with clean paper towels to remove surface moisture.
Then, spread them on a drying rack or clean kitchen towels and sprinkle them generously with salt. The salt draws out remaining moisture from the vegetables' cells, creating an environment that's ideal for oil infusion. Let the vegetables sit for 30-60 minutes, depending on their water content.
Once the salt has done its work, you'll notice water droplets on the vegetables' surface.
Pat them dry again with fresh paper towels, removing both the excess moisture and salt. Test for dryness by touching the surface – it should feel completely dry to the touch.
Just as with herb infusions, any remaining moisture can compromise the quality and safety of your finished product. Remember, you're aiming for vegetables that are ready to fully absorb the infused oil.
The Oil Selection Process
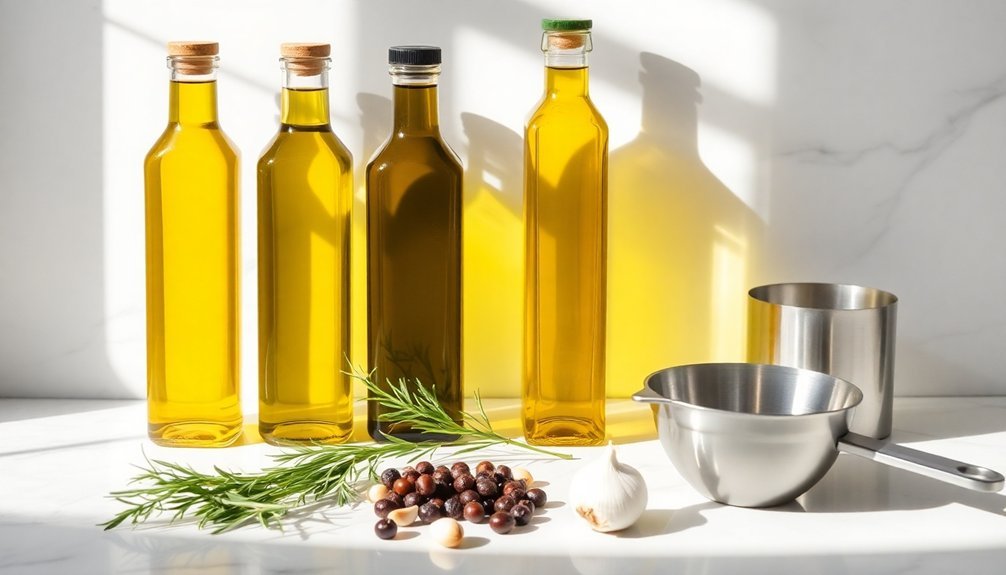
When choosing oils for pickling vegetables, you'll need to contemplate both flavor profiles and preservation qualities. For a neutral base that won't overpower your vegetables, consider grapeseed, sunflower, or canola oil. These options let the natural flavors of your vegetables and seasonings shine through.
If you're looking for oils that add distinctive character, mustard oil brings a pungent kick while sesame oil contributes a rich, nutty depth.
Health benefits and shelf life should factor into your selection process. Sesame and olive oils offer high antioxidant content, while mustard oil provides heart-healthy omega-3 fatty acids. Coconut oil's lauric acid content naturally extends preservation time, making it an excellent choice for long-term storage.
- Grapeseed oil works best when you want infused herbs and spices to dominate
- Sunflower oil's vitamin E content helps prevent spoilage while maintaining a neutral profile
- Sesame oil's antioxidant properties minimize oxidation while adding nutty complexity
- Coconut oil prevents oxidation and adds subtle tropical notes
- Mustard oil offers both preservative qualities and distinct flavor enhancement
Choose your oil based on your specific pickling goals, considering whether you want the oil to be a neutral carrier or an active flavor contributor.
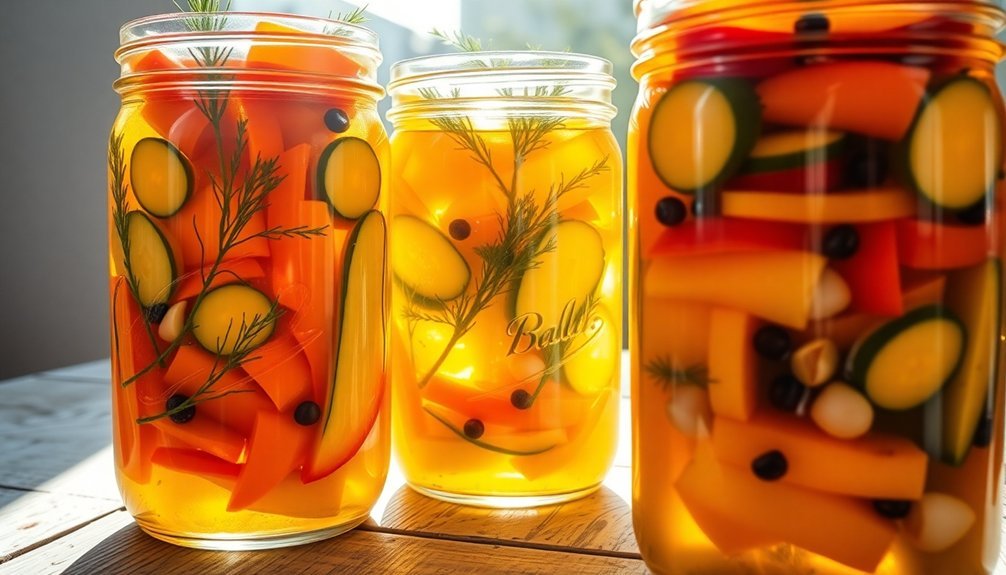
Seasoning and Flavor Combinations
Successful oil pickling relies on the perfect marriage of seasonings and aromatics to create vibrant, complex flavors.
You'll want to start with fresh herbs like basil, oregano, and thyme, which form your flavor foundation. Combine these with garlic, shallots, or onions to build depth in your pickled creations.
To enhance your pickling blend, you can add whole spices such as black peppercorns, coriander, or mustard seeds, which slowly release their flavors during infusion. For heat, incorporate red pepper flakes, marash chili flakes, or fresh serrano peppers.
Don't forget aromatic roots like ginger and horseradish, which add distinctive zest to your pickles.
You'll need to monitor the infusion process carefully – let it develop at room temperature for 1 to 10 days, or speed up the process by heating to 140°F for 5 minutes.
Keep the ratio of flavoring materials to oil at roughly 1:10 for balanced results.
Try creative combinations like dill pickles with fresh dill and garlic, or citrus peel with rosemary and basil.
Remember to refrigerate your infused oils if they're not acidified, and remove herbs once you've achieved your desired flavor intensity.
Safe Preservation Techniques

You'll need to carefully monitor temperature throughout the pickling process, keeping your oil-vinegar mixture between 140-160°F during preparation and cooling it completely before storage.
When storing your pickled vegetables, maintain consistent refrigeration temperatures between 35-40°F to prevent bacterial growth and preserve quality.
Always keep your infused oil pickles in the back of the refrigerator where temperatures are most stable, and avoid storing them in the door where temperature fluctuations occur more frequently.
Temperature Control During Pickling
Proper temperature control stands as the cornerstone of safe pickling with infused oils. You'll need to carefully manage temperatures throughout the process to guarantee both safety and quality.
For oil infusion, keep temperatures below 140°F to protect the oil's flavor profile, though you can briefly heat to this temperature for 5 minutes to speed up infusion. When you're pasteurizing pickles, maintain water temperatures between 180°F and 185°F for 30 minutes, using a candy thermometer for precise monitoring.
For the best results during the pickling process, you'll want to:
- Keep your infusion at room temperature (around 70°F) for standard preparations
- Heat your oil mixture to 104°C (220°F) for 30 minutes when rapid infusion is needed
- Cool your mixture quickly using an ice bath to prevent unwanted flavor development
- Monitor temperatures constantly using a reliable thermometer
- Avoid temperature fluctuations that could compromise the pickling process
Remember to cool your mixtures rapidly after heating. Place your pot in an ice bath immediately after the heating phase, and remove it once the oil approaches room temperature.
This quick cooling helps maintain product quality and prevents bacterial growth during the preservation process.
Storage Best Practices
After mastering temperature control during the pickling process, safe storage practices will determine the long-term success of your preserved vegetables.
You'll need to store your infused oils and pickled vegetables in a cool, dark place to maintain their quality and prevent oxidation. Choose dark-colored, food-grade containers that are completely airtight, and always sterilize them before use.
For long-term preservation, keep your products in the refrigerator at temperatures below 40°F (4°C). If you're planning extended storage, freezing is an excellent option that won't greatly impact quality. Don't forget to label and date each container to track freshness and guarantee proper rotation.
You'll need to conduct regular safety inspections of your stored items. Check for any signs of spoilage, including mold growth, unusual odors, or changes in color and texture. If you notice leaking, bulging, or cracked containers, dispose of their contents immediately.
Keep your storage area clean by promptly wiping up spills with a bleach solution or disinfecting wipe. Remember, consistent storage conditions and proper container maintenance are vital for preserving both safety and flavor.
Serving Your Pickled Creations
Once your pickled vegetables have reached their peak flavor, countless serving possibilities open up before you. From enhancing everyday meals to creating sophisticated appetizers, your homemade pickled creations can transform ordinary dishes into memorable culinary experiences.
Add them to fresh salads for a tangy contrast, incorporate them into sandwiches for extra crunch, or use them as vibrant garnishes for main courses.
For an elevated dining experience, you'll find pickled vegetables shine particularly well in these serving suggestions:
- Create a stunning charcuterie board by pairing your pickled vegetables with aged cheeses, cured meats, and crusty bread.
- Mix them into grain bowls or pasta dishes, where they'll add bright acidity and textural contrast.
- Top grilled meats or fish with pickled vegetables to cut through rich flavors.
- Incorporate them into sandwich spreads, tacos, or wraps for an extra punch of flavor.
- Serve them as cocktail garnishes, particularly in savory drinks like Bloody Marys.
You can also blend different pickled vegetables into slaws, toss them with fresh greens for quick salads, or serve them alongside mezze platters for casual entertaining.
Frequently Asked Questions
Can I Reuse the Infused Oil After All Vegetables Are Consumed?
You can reuse your infused oil to make more pickles, marinades, or salad dressings, but make sure it's not cloudy or rancid. Don't keep it longer than 2-3 uses for food safety.
Why Do Some Vegetables Float While Others Sink During Pickling?
You'll notice vegetables float or sink based on their density compared to the brine. Higher water content and air pockets make them float, while denser, more compact vegetables sink below the surface.
Should Vegetables Be Completely Dry Before Adding Them to Oil?
Yes, you'll need to guarantee your vegetables are completely dry before adding them to oil. Any moisture can lead to bacterial growth, spoilage, and potential health risks when stored in oil.
Can I Mix Different Vegetable Oils for Unique Flavor Combinations?
You can mix oils, but it's best to stick with stable combinations like olive and canola oil. Avoid mixing oils high in polyunsaturated fats, as they'll turn rancid quickly and compromise your flavors.
What Causes Cloudiness in My Infused Oil, and Is It Safe?
Your infused oil can become cloudy from cold temperatures, light exposure, poor filtration, or moisture contamination. While temperature-related cloudiness is harmless, cloudiness from moisture could indicate unsafe bacterial growth.
In Summary
You'll find oil-pickled vegetables are a versatile addition to your culinary repertoire. Whether you're serving them as appetizers, mixing them into salads, or adding them to sandwiches, your homemade creations will bring unique flavors to any meal. Remember to store your pickled vegetables properly in the refrigerator and use them within two weeks for the best quality and safety. Don't hesitate to experiment with different combinations.
Leave a Reply