
Transform your end-of-season green tomatoes into tangy, crunchy delights through quick pickling. You'll need firm, uniformly sized tomatoes, basic canning equipment, and a simple brine of equal parts vinegar and water. Add classic spices like mustard seeds, peppercorns, and dill to create your signature flavor profile. The process takes just days – initial tanginess develops within 48 hours, while deeper flavors emerge after 5-7 days. Your pickled tomatoes will last up to 18 months when properly stored, offering a nutritious punch with 47% of your daily vitamin C per cup. Discover how these versatile preserves can elevate everything from sandwiches to cheese plates.
Why Choose Green Tomatoes

Gardeners and culinary enthusiasts have discovered that green tomatoes pack a powerful nutritional punch while offering unique culinary versatility. When you're looking to preserve your end-of-season tomatoes, you'll find these unripe gems are worth their weight in gold, offering an impressive 47% of your daily vitamin C needs and 24% of your daily biotin requirement per cup.
Regular consumption has been linked to a 14% reduced mortality risk. You won't just benefit from their nutritional profile – green tomatoes are perfect for pickling because of their firm texture and tart flavor. They'll provide you with significant polyphenols (179.6 mg per cup), including beneficial flavonoids that support your overall health. At just 41 calories per cup, they're an excellent low-calorie option that doesn't compromise on nutrients.
If you're watching your diet, you'll appreciate that green tomatoes contain only 7.2 grams of net carbs while delivering 2 grams of dietary fiber and 2.2 grams of protein per serving.
They're particularly valuable for their vitamin K and copper content, each providing 10-20% of your daily needs. Whether you're planning to make salsas, relishes, or quick pickles, green tomatoes' firm texture and tangy taste make them an ideal candidate for preservation methods.
Essential Equipment and Supplies
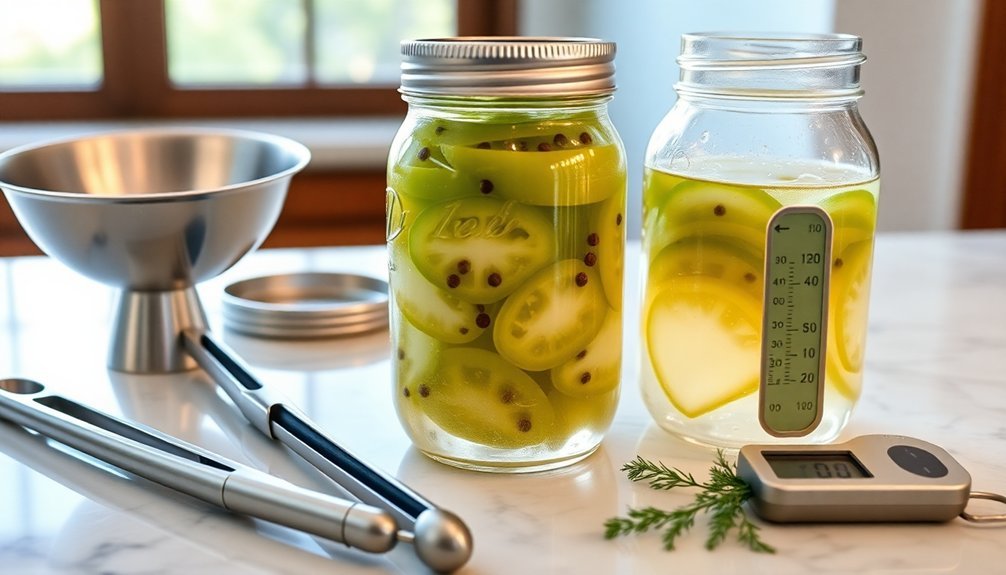
Before you start pickling those nutritious green tomatoes, gathering the right tools will set you up for success. You'll need several essential pieces of equipment, including a large pot and water bath canner for processing, plus pint-size or wide-mouth canning jars with corresponding lids and rings. Remember to use pint-size jars only as quart jars are not suitable for this recipe.
Don't forget a jar lifter to safely handle hot containers.
For preparation, you'll want both a large paring knife and a sharp kitchen knife for precise cutting. A crinkle cutter can add decorative edges if you'd like.
Keep several bowls handy – you'll need two large ones plus a smaller one for different stages of the process. Stock your workspace with spoons, a ladle, and a plate for testing.
Proper sanitation is vital, so have hot soapy water ready and prepare to sterilize your jars in boiling water. You'll also need clean towels and dishcloths for your workspace.
A canning funnel helps prevent spills when filling jars, and all utensils used for packing should be thoroughly sterilized.
Maintain a clean, organized workspace throughout the pickling process to guarantee food safety and the best results.
Selecting Perfect Green Tomatoes

When selecting green tomatoes for pickling, you'll want fruits that are firm, uniformly sized, and mature but not yet showing signs of ripening.
Look for unblemished specimens free from bruises, spots, or insect damage, as these imperfections can lead to spoilage during the pickling process.
The best time to gather your green tomatoes is late in the growing season when they're less likely to ripen naturally, typically just before the first frost threatens your garden. Make sure to select tomatoes with a stem still attached to minimize bruising during handling.
Size and Firmness Matters
Selecting the right green tomatoes is essential for successful quick pickling. You'll want to choose tomatoes no larger than a baseball, as smaller ones absorb the brine more effectively. For the best results, look for firm, hard green tomatoes that'll maintain their crunch throughout the pickling process.
When selecting your tomatoes, make certain they're slightly smaller than your jar's mouth for easier packing. Avoid any that show signs of ripening or feel soft when gently squeezed. While any green unripened variety works well, plum, Roma, and cherry tomatoes are particularly suitable for pickling.
| Characteristic | Good Choice | Poor Choice |
|---|---|---|
| Size | Baseball or smaller | Larger than baseball |
| Texture | Hard and firm | Soft or mushy |
| Color | Solid green | Starting to ripen |
| Variety | Cherry, Roma, Plum | Over-mature slicers |
Once you've selected your tomatoes, cut them into appropriate sizes based on your preference. Quarter larger tomatoes, halve medium ones, and leave small cherry tomatoes whole. Remember to pack them tightly in your jars to guarantee proper pickling and even brine distribution throughout the batch.
Avoiding Bruises and Spots
To achieve perfect pickled results, you'll need green tomatoes free from any blemishes or damage. When selecting your green tomatoes, carefully inspect each one for soft spots, bruises, cuts, or signs of disease. Any damaged areas can lead to spoilage during the pickling process and compromise your entire batch.
Check each tomato by gently squeezing it and examining its surface in good lighting. You'll want to avoid fruits with uneven coloration or dull patches, as these often indicate underlying issues. Look for tomatoes with a uniform whitish-green to slightly pink color and a natural shine.
Here's what to watch out for when inspecting your tomatoes:
- Dark or discolored spots that might indicate fungal growth or decay
- Puncture marks or scratches that could lead to bacterial contamination
- Soft areas that suggest internal bruising or overripeness
- Signs of insect damage or pest infestation
Remember to source your tomatoes from healthy vines that show no signs of disease or pest problems.
After selection, remove the stems carefully to prevent them from causing damage during storage or processing.
Best Seasonal Timing
Throughout the fall season, timing becomes essential for harvesting green tomatoes destined for pickling. You'll want to monitor the temperature closely, as daytime readings below 60°F signal it's time to gather your green tomatoes. Late October to early November typically offers the ideal window for harvest, though you should adjust based on your local climate.
Don't wait until you're seeing consistent heavy, cold rains, as these conditions can cause your tomatoes to split and develop mold. You'll need to watch weather forecasts carefully and harvest before any predicted frost.
When selecting tomatoes for pickling, look for those with a lighter, more translucent green shade rather than dark green specimens. For the best pickling results, you'll want to avoid tomatoes showing signs of ripening, such as yellow hints or pink blushes. These are better suited for indoor ripening.
Instead, choose firm, uniformly green tomatoes that aren't rock-hard. If you're dealing with a large harvest, you can extend your picking window during mild falls, but always stay alert to weather changes that might compromise your crop.
Preparing Your Pickling Solution
Making a proper pickling solution is essential for preserving the crisp texture and tangy flavor of your green tomatoes. You'll need to combine vinegar and water in equal parts, typically using 1-2 cups of each, along with salt and sugar to create your base solution.
Heat these ingredients in a saucepan over medium heat, stirring until the salt and sugar dissolve completely.
To create a well-balanced pickling liquid that'll complement your green tomatoes, follow these key steps:
- Bring your vinegar mixture to a boil, then remove it from heat immediately to prevent over-reduction.
- Add your chosen seasonings while the liquid is still hot – consider mustard seeds, peppercorns, and dill for classic flavor.
- Let the solution cool to warm temperature before pouring it over your tomatoes.
- Verify you're leaving 1/4 to 1/2 inch headspace at the top of your jars.
You can customize your pickling liquid by adding garlic cloves, chili flakes, or whole spices like coriander and fennel seeds.
Remember to submerge all your tomatoes completely in the solution before securing the lid and refrigerating to allow the flavors to develop fully.
Herbs and Spices Guide
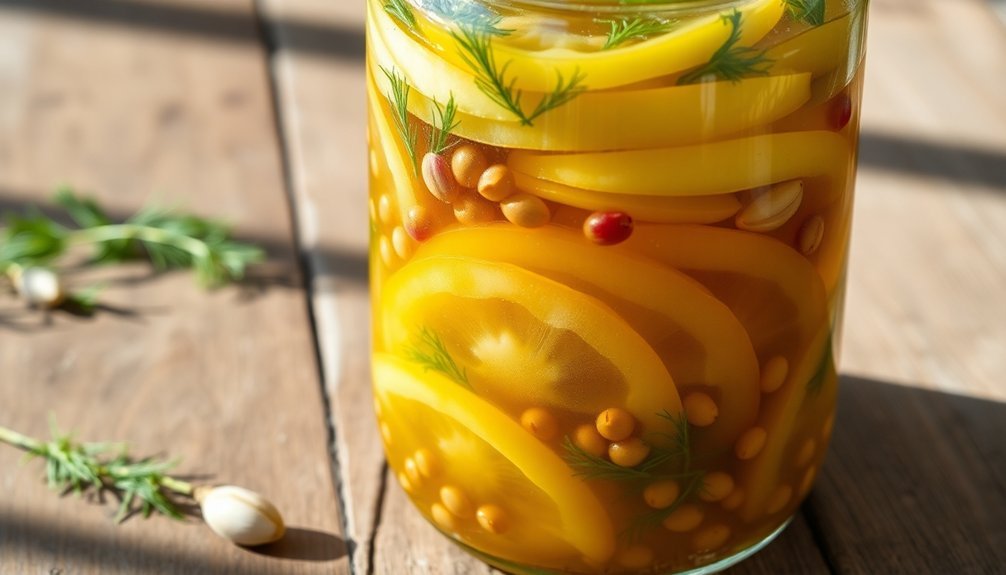
Your quick-pickled green tomatoes will benefit from classic pickling spice blends that combine mustard seeds, black peppercorns, and bay leaves for a traditional flavor profile.
You'll want to experiment with fresh herb combinations, particularly dill sprigs and garlic cloves, which add brightness and depth to your pickles.
While the basic blend creates wonderful pickles, you can personalize your recipe by adjusting the ratios of herbs and spices or adding optional ingredients like chili flakes for heat.
Classic Pickling Spice Blends
When crafting the perfect pickle, a well-balanced spice blend serves as your foundation for success.
You'll want to start with mustard seeds as your base, then layer in black peppercorns or red pepper flakes for depth. Sweet spices like allspice, cinnamon, or cloves add complexity, while coriander seeds and bay leaves round out the traditional blend.
For your green tomato pickling project, you'll need about 1½ teaspoons of spice blend per pint jar. You can customize the mix based on your heat preference by adjusting the chili flakes, or add extra dimension with ground ginger or turmeric.
Here's what makes a classic pickling blend work so effectively:
- The combination of sweet and savory spices creates a balanced flavor profile
- Whole spices release their flavors gradually during the pickling process
- The mix of aromatics guarantees your pickles won't taste one-dimensional
- The blend complements the natural tanginess of the vinegar brine
Remember to store your spice blend in an airtight container in a cool, dry place.
You'll get the best results when using it within 6-12 months, guaranteeing your pickled green tomatoes maintain their prime flavor.
Fresh Herb Combinations
Fresh herbs elevate quick-pickled green tomatoes from simple preserves to aromatic delicacies.
You'll find that basil adds brightness and sweetness, while dill provides that classic pickle taste you're familiar with. Mint brings a cool, revitalizing element, cilantro offers citrusy notes, and thyme contributes an earthy depth.
To create more complex flavor profiles, try pairing your herbs with complementary aromatics.
Combine basil with jalapeños for heat, or mix dill with garlic for a traditional pickle taste. For a zesty twist, pair mint with fresh ginger, or blend cilantro with lime peel. Thyme works beautifully with black peppercorns for a savory finish.
When adding herbs to your pickling jars, pack them in before pouring the hot brine.
Don't discard those herb stems – especially from basil and cilantro – as they'll infuse additional flavor into your brine. Remember to balance the herbs so they don't overwhelm your green tomatoes' natural taste.
You can adjust quantities based on your preferences and experiment with different combinations of herbs and spices until you find your perfect blend.
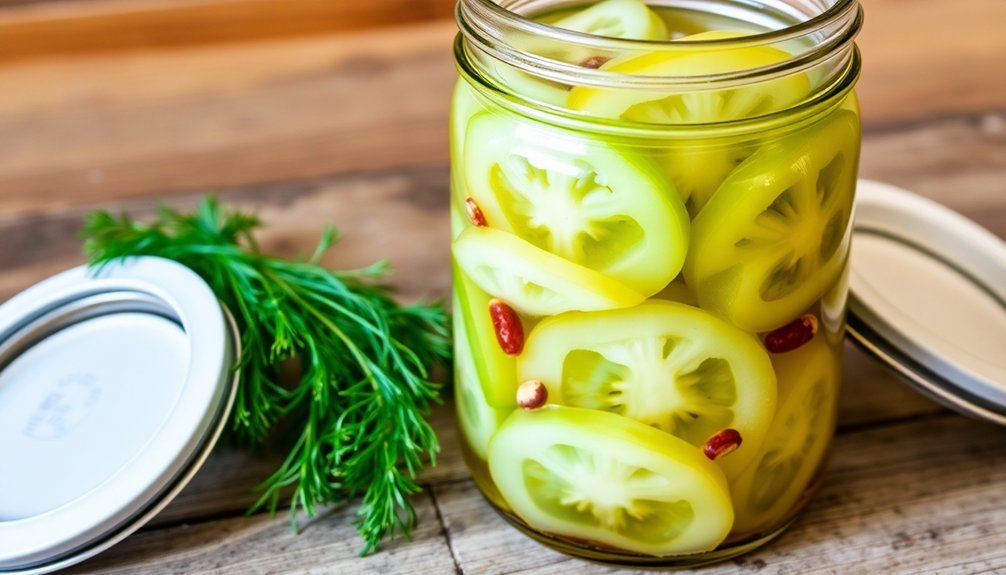
Step-by-Step Pickling Process
The art of quick-pickling green tomatoes follows a straightforward process that yields crisp, tangy results. You'll start by preparing a pickling solution, combining warm water, vinegar, salt, and sugar. Whisk these ingredients until they're fully dissolved, and if your recipe calls for it, bring the mixture to a brief boil.
Select firm, underripe green tomatoes for the best results. After washing them in cold water, cut them into your preferred size – whether that's halves, quarters, or chunks. You'll want the interior flesh exposed to guarantee even pickling throughout.
Here's your essential pickling sequence:
- Sterilize your jars and lids thoroughly through boiling or by using new, clean containers.
- Pack your prepared tomatoes into jars along with garlic, onions, peppers, and your chosen spices.
- Pour the pickling solution over the ingredients, leaving ½ inch headspace at the top.
- Tap jars to release air bubbles, seal them tightly, and refrigerate.
Let your pickled tomatoes rest for at least two days, though waiting 5-7 days will develop fuller flavors. During this time, the brine will transform your green tomatoes into a zesty, preserved delicacy.
Safe Food Handling Practices
Safe food handling practices form the foundation of successful pickling projects. Before you begin pickling your green tomatoes, you'll need to properly sterilize all your equipment.
Wash your jars and caps in hot, soapy water, then sterilize the jars by boiling them for 10 minutes. Simmer the lids separately at 180°F for 10 minutes, and dry the bands on a clean towel.
You'll need to store your quick-pickled green tomatoes properly to guarantee their safety. Keep them fully submerged in the pickling solution within a sterilized airtight container in your refrigerator.
Monitor the pickles regularly for signs of spoilage, such as white film, unusual odors, or changes in color. If you spot any jars that are damaged, leaking, or bulging, don't risk consuming their contents.
For the best results, use only fresh, uniform green tomatoes and pickling salt rather than table salt.
Follow the USDA's Complete Guide to Home Canning for additional safety measures. Remember to label and date your jars, and store them in a cool, dark, dry place.
Clean any spills immediately with a disinfecting solution to maintain a sanitary workspace.
Flavor Development and Timing
Proper handling and sterilization set the stage for creating flavorful quick-pickled green tomatoes that undergo fascinating changes over time.
You'll notice your tomatoes transform from firm, tart fruits into tangy, complex pickles as they rest in their vinegar-based brine.
Your brine composition directly influences the final flavor profile. While white vinegar creates a classic pickle taste, you can experiment with apple cider or rice vinegar for different notes.
The balance of sugar and salt works to tame the acidity while enhancing the natural flavors of your green tomatoes.
- Day 1-2: Initial tangy flavors develop, though pickles aren't fully infused
- Days 3-5: Spices and herbs begin to meld, creating deeper flavor complexity
- Days 6-14: Ideal flavor development period for quick pickles
- Up to 2 months: Continued flavor enhancement if stored properly in the refrigerator
To maximize flavor development, consider adding aromatic ingredients like mustard seeds, peppercorns, and fresh dill to your brine.
You'll get the best results by allowing your pickles to rest at least five days before enjoying them, though they're safe to eat after just 24 hours.
Storage Best Practices
Maximizing the shelf life of your quick-pickled green tomatoes starts with smart storage practices. Store your pickles in sterilized, airtight jars with secure lids, ensuring the tomatoes are completely submerged in the pickling liquid. Leave about ½-inch of headspace at the top of each jar to prevent overflow.
Keep your quick pickles in the refrigerator's coldest area, typically toward the back, where they'll stay fresh for up to a month. When serving, always use clean utensils to prevent contamination. Monitor your jars regularly for any signs of spoilage, such as unusual odors or mold growth.
If you're looking for longer storage options, consider water-bath canning your pickled green tomatoes. This method can extend their shelf life to 18 months when properly processed for 10-15 minutes, depending on your altitude and jar size.
After canning, check the seals within 12 hours and let the jars rest for at least three weeks to develop full flavor. Once you've opened a water-bath canned jar, refrigerate it immediately and consume the contents within six weeks.
Serving and Recipe Ideas
Now that your pickled green tomatoes are safely stored, there's a world of culinary possibilities to explore. You'll find these tangy treats are incredibly versatile, working well straight from the jar as a quick snack or chopped into more complex dishes.
For everyday meals, try adding them to sandwiches, burgers, or hot dogs for an instant flavor boost. They're especially good on Reuben sandwiches or mixed into potato salad. You can also blend them into dips, spreads, or classic dressings like Russian or Thousand Island.
Here are the most popular ways to enjoy your pickled green tomatoes:
- Top your grain bowls – Add to Mediterranean, farro, or tofu bowls
- Enhance appetizers – Include on cheese plates or veggie platters
- Mix into condiments – Blend into hummus, sauces, or marinades
- Use as garnish – Top burgers, sandwiches, or toast
For more creative applications, consider incorporating them into chutneys or using them as a tangy element in salad dressings.
They'll also complement grilled meats and vegetables, making them a perfect addition to your summer barbecues.
Frequently Asked Questions
Can I Use Cherry Tomatoes Instead of Regular Green Tomatoes?
Yes, you can use cherry tomatoes! They'll work great for pickling – just poke each one with a toothpick or cut them in half. They'll absorb the brine well and stay crunchy, just like regular tomatoes.
Will Pickled Green Tomatoes Continue to Ripen in the Jar?
No, your green tomatoes won't continue ripening once pickled. The vinegar and salt in the brine solution halt the ripening process completely, preserving them in their current state for months to come.
Can I Reuse the Pickling Liquid for a Second Batch?
Yes, you can safely reuse pickling liquid for a second batch. Just make sure you strain it first and re-boil it before using. You'll need to add fresh spices since the flavor weakens with reuse.
What Causes Pickled Green Tomatoes to Become Mushy?
Your pickled green tomatoes can become mushy if you're overcooking them, using overripe tomatoes, pouring too-hot brine over them, or not refrigerating promptly. Improper storage and high temperatures also cause mushiness.
Can I Add Other Vegetables to the Same Jar?
Yes, you can add bell peppers, jalapenos, onions, and garlic to the same jar. They'll complement your pickles nicely. Just make sure to slice everything uniformly and choose vegetables with similar textures.
In Summary
You'll find these tangy quick-pickled green tomatoes become a versatile addition to your fall preserves. Store them properly in your refrigerator for up to two months, and you'll have a crisp, zesty condiment ready whenever you need it. Try them on sandwiches, chop them into relish, or serve them alongside rich meats. Once you've mastered this simple preservation technique, you'll never let those end-of-season tomatoes go to waste.


Leave a Reply