
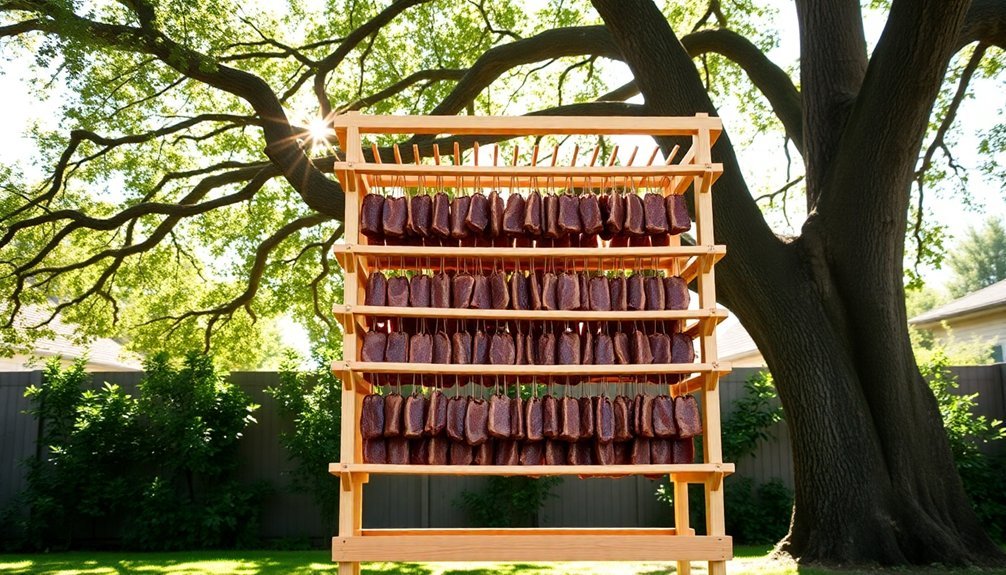
To build a DIY outdoor jerky rack, you'll need basic tools like a dehydrator or oven, sturdy green sticks, and mesh screening. Start by creating a tripod foundation with three 5-6 foot sticks positioned 2½ feet apart around a fire pit. Secure a horizontal frame using three 3-foot sticks lashed above the pit, then add thatching with Scots pine or fir boughs for heat retention. Install food-safe mesh screening across the frame, securing it tightly every 4-6 inches to prevent sagging. Maintain temperatures around 150°F for ideal drying conditions. This basic overview just scratches the surface of creating your perfect outdoor jerky setup.
Required Tools and Materials
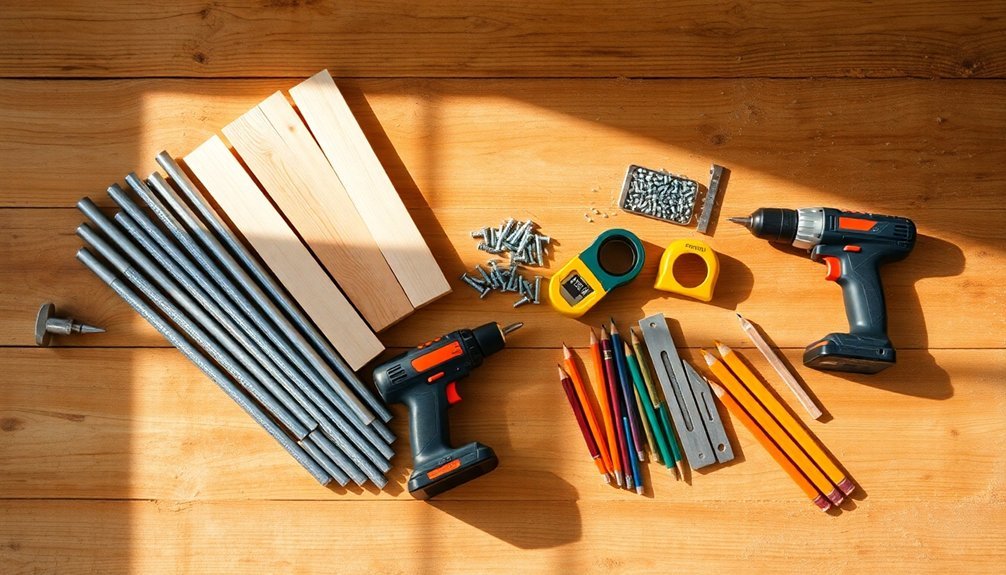
A well-equipped jerky-making station starts with essential tools and materials that'll guarantee your success.
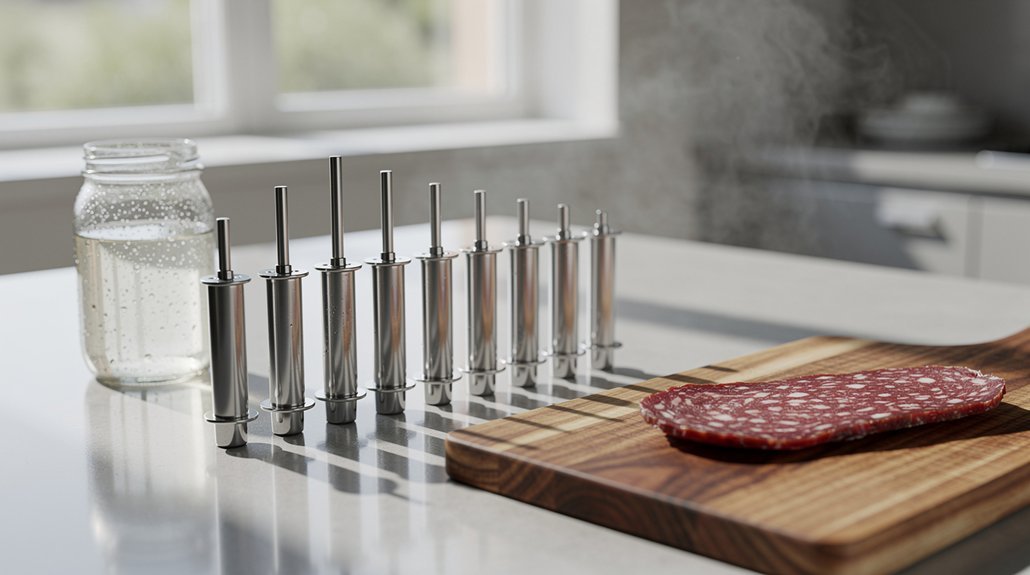
You'll need basic preparation tools including a reliable dehydrator or oven, a quality jerky gun like the JerkySpot or LEM Products models, and a sturdy kitchen scale for precise measurements.
If you're working with game meat, you'll also want a meat grinder on hand. The meat should be sliced into paper-thin cuts for optimal drying results.
For the seasoning process, gather your ground meat (90% lean or higher), jerky seasoning packets in your preferred flavors, and essential cure packets for proper preservation.
Don't forget rubber gloves for handling the meat and vacuum sealer bags for storage.
When building your outdoor setup, you'll need specific materials for construction and smoking.
Collect thatching materials like Scots pine boughs or pollarded poplar branches, along with hazel wood pieces for crosspieces.
You'll want tooling fabric or metal screening to protect against insects, and spruce roots for natural bindings.
For the actual drying process, make certain you have proper baking sheets, cooling racks, and sufficient firewood if you're planning to smoke your jerky.
Building the Frame Structure
Building your outdoor jerky rack starts with a sturdy tripod foundation that'll support the weight of your drying meat. Select three straight green sticks, each 5-6 feet long and broomstick-thick, and tie them together to form a tripod.
Position the legs roughly 2½ feet apart around your fire pit, which should be dug down to mineral earth for safety. Build a small, hot fire using softwood kindling and hardwood for steady coals.
Next, create the horizontal frame using three 3-foot sticks that are half the diameter of your tripod poles. Lash these smaller sticks securely to your tripod, making sure they're positioned above the fire pit to allow proper heat circulation.
You'll want to maintain about 150°F for ideal drying.
Complete the structure by adding the thatching and cross pieces. Use green fir boughs or Scots pine branches to create a dense covering that'll retain heat and smoke while keeping insects away.
Strip the bark from finger-thick hazel cross pieces and position them across the frame. These will serve as your hanging points for the meat strips.
Space them appropriately to guarantee good airflow around each piece of jerky.
Installing the Drying Mesh
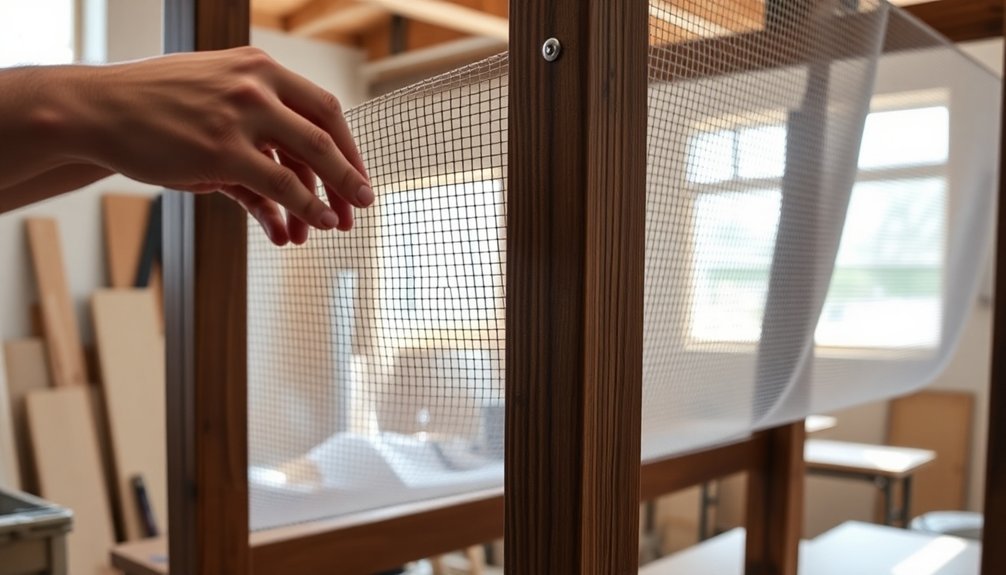
Start by cutting your drying screen to match your frame's dimensions, leaving an extra inch on each side for secure attachment.
When securing the mesh, you'll want to fasten the corners first using staples or screws to maintain proper tension across the surface.
Work your way around the frame's perimeter and then add fasteners every 4-6 inches throughout the middle sections to guarantee even wire distribution and prevent sagging during use. Using a bleach solution to sanitize the screen before installation is essential when working with salvaged materials.
Cutting Screen To Size
For ideal drying performance, selecting the right screen material forms the foundation of your jerky rack build. You'll need to choose between chicken wire or fine mesh screen based on your drying needs. Densely woven chicken wire works best for larger items like jerky strips, while tightly woven mesh screens are ideal for smaller pieces.
When cutting your chosen screen to size, you'll want to follow these essential steps:
- Measure your frame dimensions and add an extra inch on each side to allow for proper stretching and securing.
- Use sharp scissors or a utility knife with a straight edge to guarantee precise, clean cuts.
- Cut as close as possible to the outside wire to minimize jagged edges that could snag or cause injury.
- If working with rolled screen material, cut it slightly larger than needed to account for any curling.
If you're dealing with rolled screen material, you'll need to flatten it before installation. Heat the screen in a dehydrator or oven at 190°F for 15-30 minutes, placing the curled side down. This process will permanently flatten the screen, making it easier to work with during installation.
Secure Mesh Corners First
Proper mesh installation begins with securing the corners of your screen material.
You'll need to start by laying the mesh across the back of your frame, making sure it's completely flat and evenly distributed. Pull the mesh taut from one corner and secure it with your staple gun, then move diagonally to the opposite corner while maintaining tension.
Next, you'll want to work your way around the frame systematically, keeping the mesh tight as you go. Use your staple gun to firmly attach the mesh every few inches, ensuring there's no sagging or wrinkles that could compromise your jerky drying process.
If you're using chicken wire or fine mesh screen, be extra careful to maintain consistent tension to prevent warping.
Once you've secured all corners and edges, trim any excess mesh using sturdy scissors, leaving a clean edge that won't snag or create safety hazards.
Test the stability of your attachment points by gently pressing on the mesh surface. If you notice any loose areas, add more staples as needed.
Even Wire Distribution Tips
The key to successful mesh installation lies in achieving perfectly even distribution across your frame. You'll want to confirm the mesh maintains consistent tension throughout, preventing any sagging that could affect your jerky's drying process.
When working with your chosen mesh material, start from the center and work your way outward, keeping the wire pulled taut as you secure it.
For ideal mesh distribution, follow these essential steps:
- Start by anchoring the mesh at the center points of all four sides using your staple gun, maintaining equal tension in each direction.
- Work diagonally from corner to corner, securing the mesh while constantly checking for even distribution of tension.
- Add staples every 2-3 inches along the frame's perimeter, pulling the mesh tight as you move along each side.
- Trim any excess mesh close to the outside wire, confirming clean edges for safety and aesthetics.
If you're using chicken wire or metal screen, you'll need to sandwich it between your two frames for added stability.
Keep checking the surface tension as you work – if you notice any loose spots, remove the staples in that section and readjust before continuing.
Repurposing Old Window Frames
In accordance with sustainable building practices, old window frames offer remarkable potential for DIY jerky rack construction. You'll find these frames particularly suitable due to their sturdy construction and built-in grid patterns, which can serve as natural hanging points for your jerky strips.
When selecting old windows, look for frames that haven't been treated with lead-based paint and remain structurally sound.
To transform your window frame into a jerky rack, you'll need to remove the glass panels carefully and thoroughly clean the frame. Install hooks or rods across the existing muntins (the dividers between panes) to create multiple hanging levels.
You can maximize your drying space by connecting multiple window frames using hinges, creating a foldable rack system that's easy to store when not in use.
For outdoor use, weather-proof your repurposed frame by applying a food-safe sealant to protect against moisture and guarantee longevity.
Consider adding ventilation points by drilling small holes in strategic locations. If you're planning to use the rack frequently, mount it on a sturdy base with wheels for improved mobility and convenience during the drying process.
Proper Rack Placement
Successfully placing your jerky rack requires careful attention to both spacing and ventilation considerations. You'll need to guarantee proper airflow around each meat strip while maximizing your drying capacity. When setting up your rack system, maintain consistent gaps between pieces to prevent moisture buildup and promote even drying throughout the process.
Whether you're using a smoker or creating an outdoor setup, follow these essential placement guidelines:
- Position strips with at least 1/2 inch spacing between them, avoiding any overlap that could trap moisture and lead to uneven drying.
- Arrange your racks vertically with enough space between levels to allow proper air circulation and smoke distribution.
- If you're hanging strips, use pre-soaked toothpicks or skewers that extend slightly beyond the shelf width for stability.
- Rotate your racks periodically to guarantee uniform exposure to heat and airflow.
For maximum efficiency, consider using stackable racks with 3/8-inch holes to optimize airflow while supporting the weight of your meat strips.
When working with multiple levels, maintain adequate spacing between each rack to guarantee proper ventilation throughout the entire drying process.
Cleaning and Maintenance Tips
When you're maintaining your outdoor jerky racks, you'll need to establish a regular cleaning schedule that includes sanitizing with hot soapy water after each use and thorough drying before storage.
You can extend your racks' lifespan by storing them in a clean, dry space and protecting them with food-grade mineral oil between uses.
Make your maintenance routine easier by keeping dedicated cleaning supplies nearby and checking the racks monthly for signs of wear or damage that need attention.
Regular Sanitizing Methods
A spotless jerky rack forms the foundation of safe, delicious homemade jerky.
You'll need to establish a regular sanitizing routine to guarantee your equipment remains food-safe and ready for use. Creating a proper sanitizing solution is straightforward – mix 1-2 tablespoons of chlorine bleach with 1 gallon of water.
For effective sanitization of your outdoor jerky rack, follow these essential steps:
- Soak your racks in warm, soapy water for 15-30 minutes to loosen stuck-on residues, then scrub thoroughly with a non-abrasive brush.
- Rinse all surfaces completely with clean water to remove soap residue, guaranteeing no cleaning agents remain.
- Submerge your racks fully in the bleach solution, making sure all surfaces make contact with the sanitizing mixture.
- Allow the racks to air dry completely before storage or use to prevent moisture-related issues.
Don't forget to keep your raw meat processing separate from your finished jerky handling.
You'll want to maintain distinct zones for raw and dried meat preparation, using different utensils and surfaces for each.
Remember to wash your hands thoroughly with warm, soapy water for at least 20 seconds between handling raw and dried meat.
Rack Storage Solutions
Proper storage and maintenance extend your outdoor jerky rack's lifespan while keeping it ready for the next batch. You'll want to establish a dedicated dry storage area that protects your racks from moisture and environmental elements, which can lead to rust and deterioration over time.
When storing your jerky racks, always make certain they're completely dry before putting them away. Cover them with a heavy-duty canvas or protective material to shield them from dust and debris.
You'll find it helpful to store your racks vertically to save space and prevent warping, but make sure they're properly supported to maintain their shape.
Make it a habit to inspect your racks before and after each use. Look for signs of wear, loose components, or developing rust spots. Keep your cleaning supplies nearby in an organized storage area so you can maintain a regular cleaning routine.
If you're using multiple racks, label them and store them in order of size or purpose to streamline your jerky-making process. Don't forget to periodically check the integrity of your storage area itself, making sure it remains dry and well-ventilated throughout the seasons.
Preventive Maintenance Schedule
To maximize your jerky rack's longevity, implementing a regular maintenance schedule keeps it in prime condition throughout the year.
You'll want to establish a routine that includes both pre-use preparation and post-use cleaning to prevent food contamination and extend your rack's life span.
Before each use, spray your racks with cooking spray or Cast Iron Conditioner, guaranteeing they're clean and properly aligned in your smoker.
After cooking, clean the racks while they're still warm using a scrub brush or chain mail scrubber for stubborn residue.
For peak maintenance, follow these quarterly deep-cleaning steps:
- Soak racks overnight in hot water mixed with Quick 'n Brite solution to break down accumulated grease.
- Scrub thoroughly with a wire brush, applying moderate pressure to protect the metal surface.
- Rinse completely with hot water and dry immediately with a clean towel.
- Apply a light coating of oil before storing in a dry location.
Don't forget to inspect your racks regularly for signs of wear or damage.
When storing for extended periods, guarantee they're completely dry and protected with a thin layer of conditioner to prevent rust formation.
Frequently Asked Questions
How Many Pounds of Meat Can a Standard-Sized Rack Hold?
Your standard-sized rack (18" x 13") can hold about one pound of ground meat jerky strips. You'll want to space the strips evenly for proper airflow, ensuring they don't touch each other while drying.
Can I Stack Multiple Racks on Top of Each Other?
Yes, you can stack multiple racks on top of each other. Most models allow stacking 2-4 racks high, which increases your drying capacity. Just make sure your racks have proper feet for stable stacking.
What's the Ideal Drying Time Using This Type of Rack?
You'll need 4-8 hours drying time, depending on your meat thickness and weather conditions. Keep humidity low and guarantee good airflow. Check periodically – your jerky's done when it bends without breaking.
Should I Rotate or Flip the Meat During the Drying Process?
Yes, you'll want to rotate and flip your meat every 2-3 hours during drying. This guarantees even dehydration, prevents hot spots, and promotes consistent texture throughout. It's essential for quality results.
Can I Use This Rack Design for Drying Fruits and Vegetables?
Yes, you can use this rack for drying fruits and vegetables. It's versatile enough for multiple food types, but make sure you're using food-safe materials and maintaining proper airflow between each layer.
In Summary
Now you've got everything you need to build your own outdoor jerky drying rack. With proper care and maintenance, it'll serve you well for many jerky-making seasons to come. Remember to clean the mesh thoroughly between uses and store your rack in a covered area when not in use. You'll be amazed at how much money you'll save by making your own jerky with this DIY solution.

Leave a Reply