
Start with firm, ripe tomatoes that you'll clean thoroughly and slice into 1/4-inch pieces. After removing seeds, dry your tomatoes in an oven at 250°F for 3-4 hours or use a dehydrator at 155°F for 8-12 hours until they're pliable but not brittle. Give them a quick vinegar bath (4 lbs tomatoes to 1 gallon vinegar) for 3-7 minutes to enhance preservation. Pack the dried tomatoes tightly into clean glass jars, pressing down to eliminate air pockets. Pour high-quality extra virgin olive oil over the tomatoes, ensuring they're completely covered. Store in a cool, dark place and refrigerate after opening. These seven simple steps are just the beginning of your journey into perfectly preserved sun-dried tomatoes.
Select and Clean Fresh Tomatoes
Three key varieties of tomatoes work exceptionally well for sun-drying: paste tomatoes like 'La Roma' and 'San Marzano', cherry tomatoes such as 'Sungold', and specialty varieties like 'Principe Borghese'.
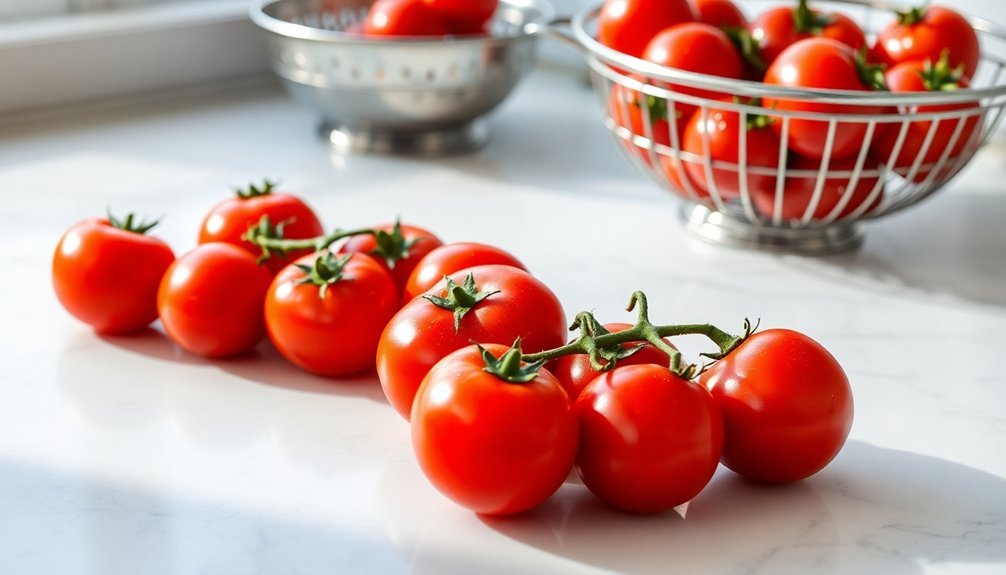
When selecting your tomatoes, look for firm, ripe fruits without blemishes or damage. You'll want to choose tomatoes that are fully ripe but not overripe, as they'll provide the richest flavor once dried. The drying process will concentrate the tomato flavors and enhance their natural sweetness.
Before you begin the drying process, you'll need to thoroughly clean your tomatoes and preparation area. Wash the tomatoes in clean water to remove dirt and debris, then pat them dry to eliminate excess moisture.
Make certain you've cleaned all utensils and equipment with hot soapy water to prevent contamination.
For ideal drying conditions, select an area with full sun exposure and low humidity (less than 20 percent). A paved area or flagstone patio works well as it reflects sunlight.
You'll need to move the tomatoes throughout the day to maximize sun exposure and bring them inside at night to prevent condensation. Good air circulation is essential for proper drying, so guarantee there's adequate space between the tomatoes.
Slice and Remove Seeds
Once your tomatoes are clean and ready for processing, proper slicing technique will set you up for successful drying. Start by cutting off the top core of your tomatoes, then slice them into halves or quarters depending on their size. If you're working with larger tomatoes, aim for 1/4 inch thick uniform slices to guarantee even drying. Firm paste varieties like Roma tomatoes work exceptionally well for this process.
You'll want to remove as many seeds as possible from your tomato pieces. Cut each tomato into wedges that intersect the seed pockets, then use your thumb or a small spoon to scrape out the seeds and gel-like substance. This step is essential for reducing moisture content and improving storage quality.
Place your prepared tomato slices on dehydrator trays or parchment-lined baking sheets, positioning them cut side up. Make certain to leave enough space between pieces for proper air circulation, though you can pack them relatively close together.
An over-the-sink cutting board proves especially helpful for efficient cutting and seed removal. While you want to maximize tray space, avoid overcrowding, as this can lead to uneven drying and potential spoilage.
Dry Using Heat Method
Proper heat drying stands out as one of the most reliable methods for creating sun-dried tomatoes at home. You'll need to choose between using your oven or a food dehydrator – both methods are effective but require different approaches. For optimal results, select firm, ripe tomatoes when preparing your batch.
For oven drying, preheat to 250F or your lowest setting. Line a baking sheet with parchment paper, arrange your tomato halves cut-side up, and sprinkle them lightly with salt. Keep the oven door slightly open with a wooden spoon to release moisture. The process typically takes 3-4 hours at 250F.
| Method | Temperature | Drying Time |
|---|---|---|
| Oven (High) | 250°F/121°C | 3-4 hours |
| Oven (Low) | 160°F/70°C | 8+ hours |
| Dehydrator | 155°F/68°C | 8-12 hours |
| Results | Pliable | Not brittle |
If you're using a dehydrator, set it to 155F/68C and arrange the tomatoes on the trays. You'll need 8-12 hours, checking after 7-8 hours for proper dryness. Regardless of your method, the tomatoes should be dry but pliable, not brittle. Let them cool completely before moving on to the packing stage.
Vinegar Bath Treatment
Before packing your dried tomatoes in oil, they need a quick vinegar bath to guarantee safe preservation. You'll want to start with Roma tomatoes, though any variety will work.
After washing them thoroughly, slice the tomatoes into manageable sections – halves or quarters work well for consistent results.
For the vinegar bath, you'll need to create the right ratio of tomatoes to vinegar. The ideal proportion is four pounds of sliced tomatoes to one gallon of vinegar, though you can adjust this between three to five pounds of tomatoes per 0.6 to 1.5 gallons of vinegar. You can use red wine vinegar, white wine vinegar, or other varieties based on your preference.
- Prepare your tomato sections and vinegar solution according to the recommended ratio
- Submerge the tomato sections in the vinegar bath for five minutes (acceptable range: 3-7 minutes)
- Drain the tomatoes thoroughly and set them aside for the next step
After the vinegar bath, you'll need to drain the tomatoes well. Some recipes may call for rinsing off excess vinegar before moving on to the dehydration process, which requires temperatures between 115°F to 150°F.
Pack Tomatoes Into Jars

Before you pack your sun-dried tomatoes, wash and thoroughly dry your glass jars in hot soapy water to guarantee they're clean and moisture-free.
Layer your tomatoes tightly into the jars, making sure they're completely cooled to room temperature for ideal preservation.
Press down gently as you pack to eliminate air pockets, which can lead to mold and spoilage.
Clean Jars First
Thorough jar sterilization stands as the critical first step in packing sun-dried tomatoes. You'll need to begin by washing your jars and lids in hot soapy water, followed by a thorough rinse.
Once clean, you're ready to start the sterilization process, which guarantees your preserved tomatoes remain safe and fresh.
To properly sterilize your jars, line a large pot with clean cloths and place your preserving jars and caps inside. Fill the pot with water until it's 2 inches above the jars, then bring to a boil for 20-25 minutes.
Use pliers to carefully remove the hot jars and caps, placing them upside down on a clean cloth to dry completely.
Here are the essential checks before packing your tomatoes:
- Confirm jars are completely moisture-free
- Verify there are no cracks or chips in the glass
- Check that lids are clean and undamaged
Don't touch the inside of the vessels or caps during the drying process. You can use clean kitchen towels or paper towels to assist with drying if needed, but avoid contaminating the sterilized surfaces.
Once your jars are completely dry and sanitized, they're ready for packing your sun-dried tomatoes.
Layer Tomatoes Carefully
Setting up your tomatoes correctly makes all the difference in creating perfectly preserved jars. Begin by washing and thoroughly drying your tomatoes, then cut them in half, removing the core and seeds. For best results, use plum tomatoes and guarantee they're completely dry before packing.
Pack your tomatoes tightly into the jar to minimize air spaces. You'll want to arrange them in a single layer or alternate them with herbs and spices. If you're doing a single layer, position the cut sides facing up. As you pack, gently press the tomatoes to eliminate air pockets, and fill to the jar's shoulders to guarantee proper oil coverage later.
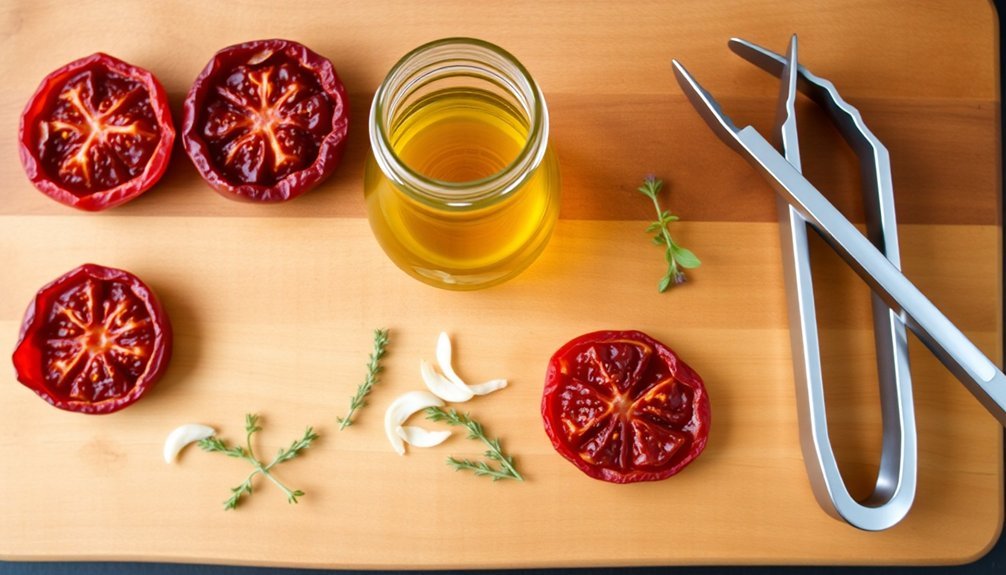
Add flavor by layering your tomatoes with dried herbs like oregano and basil, or include garlic and peppercorns for extra depth. You can also dip the tomatoes in vinegar or citrus juice before packing for added preservation and taste. Consider incorporating other vegetables like zucchini or peperoncino between layers for variety.
Finally, pour high-quality olive oil over your layered tomatoes until they're completely submerged. This full coverage is essential for preventing spoilage.
Once you've sealed the jars tightly, store them in a cool, dark place.
Remove Air Pockets
When packing sun-dried tomatoes into jars, removing air pockets is essential for proper preservation. Begin by filling your jar in quarters, tamping down the tomatoes firmly after each addition. Use a flattened spoon or tamper to press down the layers, guaranteeing no air remains trapped between the tomatoes. You'll want to pack them as tightly as possible to minimize any space where air could collect.
Next, pour olive oil over your packed tomatoes until they're completely submerged, leaving about an inch of space at the top of the jar. The oil serves a dual purpose – it preserves the tomatoes and helps displace any remaining air pockets. As the tomatoes settle, you may need to add more oil to maintain full coverage.
- Before placing tomatoes in the jar, dip them in vinegar using tongs and let them drip briefly.
- Press down firmly on each layer as you fill the jar to its shoulders.
- Check thoroughly for air pockets before sealing, and verify the lid is tightly secured.
Once sealed, store your jar in a cool, dark place and check periodically to confirm the tomatoes stay submerged in oil.
Pour The Olive Oil
You'll want to select a high-quality extra virgin olive oil for the best preservation and flavor of your sun-dried tomatoes.
Pour the oil slowly into your jar until it completely covers the tomatoes and reaches the top, ensuring there's no exposed product.
Before sealing the jar, gently tap it on the counter and use a clean utensil to remove any trapped air bubbles, which could lead to spoilage.
Quality Of Oil Matters
The choice of oil plays an essential role in preserving sun-dried tomatoes and enhancing their natural flavors. Extra virgin olive oil (EVOO) is your best option, as it provides superior taste and preservation qualities. When selecting your oil, verify it's free from contaminants to maintain food safety and peak flavor development.
The oil's quality directly affects how well your sun-dried tomatoes will keep and taste. You'll want to slightly heat the olive oil before adding it to your tomatoes, as this helps soften them and extract more flavor. For enhanced taste, you can add dried herbs and spices like basil, oregano, or rosemary, but avoid fresh ingredients that could compromise preservation.
- Store your oil-packed tomatoes in a cool, dark place, and refrigerate after opening.
- Keep the tomatoes fully submerged in oil to prevent mold growth.
- Check regularly for signs of spoilage, and always use clean utensils when handling.
Remember that the acidity of properly dried tomatoes, combined with high-quality oil, creates a safe preservation environment. You can even use the flavored oil afterward for cooking or as a tasty drizzle on other dishes.
Fill To The Top
Properly filling your jar with oil is essential for preserving sun-dried tomatoes. You'll need to pack the cooled tomatoes tightly into your jar, pressing down to maximize space and eliminate air pockets. If you're adding seasonings, sprinkle your chosen herbs and spices between layers as you fill.
Pour high-quality olive oil over the packed tomatoes until they're completely submerged. The oil creates an anaerobic environment that prevents bacterial growth and extends shelf life. You'll need to maintain the oil level above the tomatoes, even after removing some for use.
| Action | Purpose |
|---|---|
| Pack Tightly | Eliminates air pockets that could lead to spoilage |
| Cover Completely | Creates protective barrier against bacteria |
| Check Level | Guarantees continuous preservation |
| Add Oil as Needed | Maintains proper coverage as tomatoes absorb oil |
| Store Properly | Extends shelf life up to 2 months in fridge or 1 year in cool place |
Once filled, store your jar in the refrigerator or a cool, dark place away from direct sunlight. Check periodically to guarantee the oil level remains above the tomatoes, adding more if necessary. This careful attention to oil coverage will help maintain your sun-dried tomatoes' quality and safety.
Remove Air Bubbles First
After layering your tomatoes, removing trapped air bubbles becomes your next vital step before adding olive oil.
You'll need to guarantee there aren't any hidden pockets of air that could lead to spoilage or affect the preservation process. By gently pressing down on the tomatoes and tapping the jar's sides, you'll help dislodge any air that might be trapped between the layers.
To effectively remove air bubbles before pouring the oil:
- Press down gently on the layered tomatoes with clean fingers or a utensil, working from the center outward to push any trapped air toward the edges.
- Tap the jar's sides firmly against your palm or on a padded countertop to help smaller bubbles rise to the surface.
- Check between layers for visible air pockets, adjusting the tomatoes as needed to fill any gaps.
Once you've eliminated the air bubbles, you're ready to pour the olive oil.
Remember that proper air removal is essential for preservation – any remaining air pockets can create environments where mold might grow, potentially spoiling your sun-dried tomatoes.
You'll want to maintain this vigilance throughout the entire packing process.
Storage and Preservation Tips

Successfully storing oil-packed sun-dried tomatoes requires careful attention to temperature and container management.
You'll need to store your sealed jar in the refrigerator, ensuring the tomatoes remain completely submerged in olive oil at all times. While the oil may solidify when chilled, it'll return to liquid form at room temperature. When properly stored, your tomatoes can last up to 2-6 months in the fridge.
For longer preservation, you can freeze your oil-packed tomatoes. Spread them on a waxed paper-lined cookie sheet and freeze until solid, then transfer them to an airtight container or freezer bag. They'll keep for up to a year, though it's best to use them within three months.
Consider freezing in portions to avoid thawing more than you need.
To maintain safety and quality, always use clean, dry utensils when handling the tomatoes to prevent bacterial contamination.
Don't reuse the same spoon multiple times, as this can introduce harmful bacteria into the jar. If you notice any signs of mold or detect a rancid smell, discard the contents immediately.
If your tomatoes become dried out, you can revive them by soaking in warm water or broth.
Frequently Asked Questions
Can I Mix Different Varieties of Tomatoes in the Same Jar?
Yes, you can mix different tomato varieties in one jar, but you'll need to guarantee they're sliced uniformly and dried to the same consistency. They'll offer diverse flavors and textures in your final product.
How Do I Know if My Olive Oil Has Gone Rancid?
You'll know your olive oil is rancid if it smells like crayons or putty. Test it by tasting – if it's stale, fatty, or lacks fresh flavor, it's gone bad. Brown coloring also indicates spoilage.
Should I Sterilize the Jars Before Packing the Tomatoes?
Yes, you must sterilize your jars to prevent bacterial growth and guarantee food safety. You can boil them for 10 minutes or use your dishwasher's sterilization cycle. Don't skip this essential step.
Can I Add Fresh Herbs and Garlic to the Jar?
You shouldn't add fresh herbs and garlic unless you'll refrigerate and use within 2-4 days. They create safety risks at room temperature. For longer storage, stick with dried herbs and store in the fridge.
What's the Best Way to Remove Tomatoes From the Jar?
Use a clean fork to remove your desired amount of tomatoes. If the oil's congealed, let the jar reach room temperature first. You can also briefly warm it in water to liquefy the oil.
In Summary
You'll find these homemade sun-dried tomatoes in oil are far superior to store-bought versions. Once you've mastered these seven steps, you can create flavorful batches whenever tomatoes are in season. Remember to keep your packed tomatoes refrigerated and use them within 2-3 weeks. Don't forget you can customize the oil with herbs and garlic for even more delicious results.


Leave a Reply