You'll get the best sun-dried tomatoes by starting with meaty varieties like Principessa Borghese, Roma, or Campari. Wash and slice your tomatoes uniformly, removing seeds if desired, then arrange them on elevated plastic-mesh screens. Sprinkle with high-quality sea salt and place in a wind-protected area with full sun exposure. The drying process takes 3-14 days at temperatures between 90-100°F (32-38°C), with humidity below 60%. Bring your tomatoes inside each night to prevent moisture reabsorption. Test for doneness by checking for a leathery, pliable texture without stickiness. The journey to perfectly preserved tomatoes involves several key techniques and considerations.
The Art of Tomato Selection
When it comes to sun-drying tomatoes, selecting the right variety stands out as the most essential first step. You'll want to focus on varieties that have been specifically bred for drying, with Principessa Borghese being the top choice among experienced growers. This cultivar has been carefully developed to excel in the sun-drying process.
If you can't find Principessa Borghese, don't worry. Mini tomatoes and plum varieties make excellent alternatives due to their meaty texture and lower moisture content. You'll also find success with cultivars like Amoroso, Berlinto, and Messina, which have been tested extensively for their drying qualities. Cherry tomatoes work well too, and you can dry them whole or halved. Even slicing is crucial for achieving consistent results during the drying process.
Whatever variety you choose, make sure your tomatoes are ripe, firm, and fully matured. You'll need fruits that are at their peak flavor, as the drying process concentrates their taste.
Remember that larger tomatoes will take more time to dry, so if you're new to sun-drying, starting with smaller varieties might be your best bet. The quality of your fresh tomatoes directly impacts your final product's flavor, texture, and nutritional content.
Preparing Your Fresh Harvest
Once you've selected your perfect tomatoes, proper preparation becomes essential for successful sun-drying. Start by washing your tomatoes thoroughly in clean water to remove dirt and bacteria, then pat them dry to eliminate excess moisture.
Before proceeding, check each tomato carefully to verify there's no spoilage. For best results, choose Roma or Campari varieties for their meaty texture and lower moisture content.
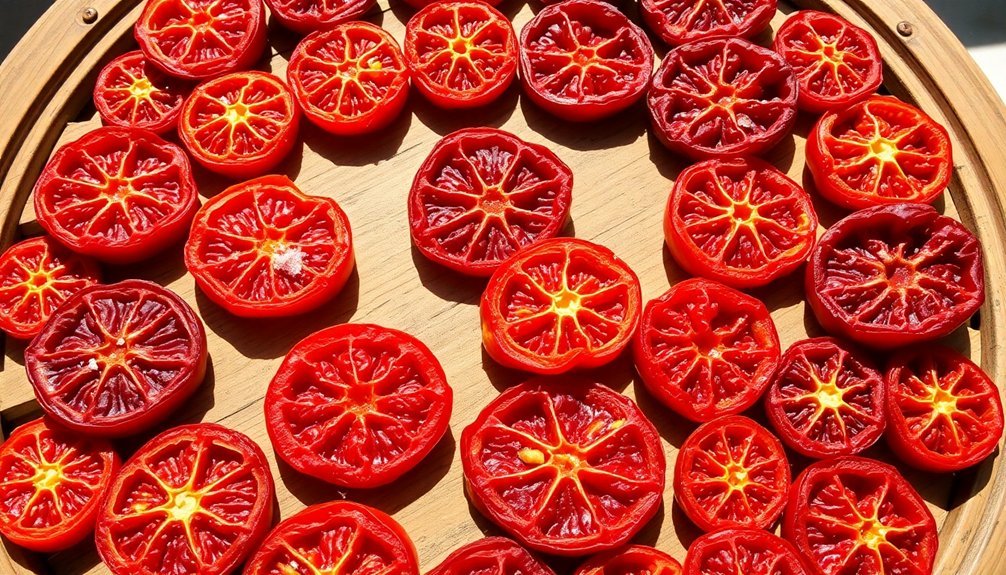
Cut your tomatoes according to their variety. For plum tomatoes, slice them almost in half lengthwise and open them like a book. If you're using round varieties, cut them into 1/4-inch thick slices or halves. Cherry tomatoes can be halved or left whole. Make a small slit on the skin side of plump tomatoes to help with moisture evaporation.
You'll need to decide whether to remove seeds and pulp. While optional, seed removal can speed up the drying process. Use a spoon to gently scrape out seeds, being careful not to remove the flavorful pulp.
Season your prepared tomatoes with high-quality sea salt and, if desired, add herbs like thyme, oregano, or basil. You can season either before or after drying, though pre-drying seasoning often yields more flavorful results.
Essential Tools and Equipment

You'll need proper drying surfaces like clean plastic-mesh screens, cheesecloth, or food-grade drying trays to prevent your tomatoes from sticking and guarantee even air circulation.
To maintain food safety standards, it's crucial to avoid galvanized screening, which can react with tomato acids, and instead opt for wooden, plastic, or non-stick-coated materials.
Your setup must include protective coverings like fine mesh or cheesecloth to shield the tomatoes from insects and debris while they dry. The ideal conditions for sun-drying tomatoes require 90-degree temperatures and low humidity for optimal results.
Basic Drying Surface Options
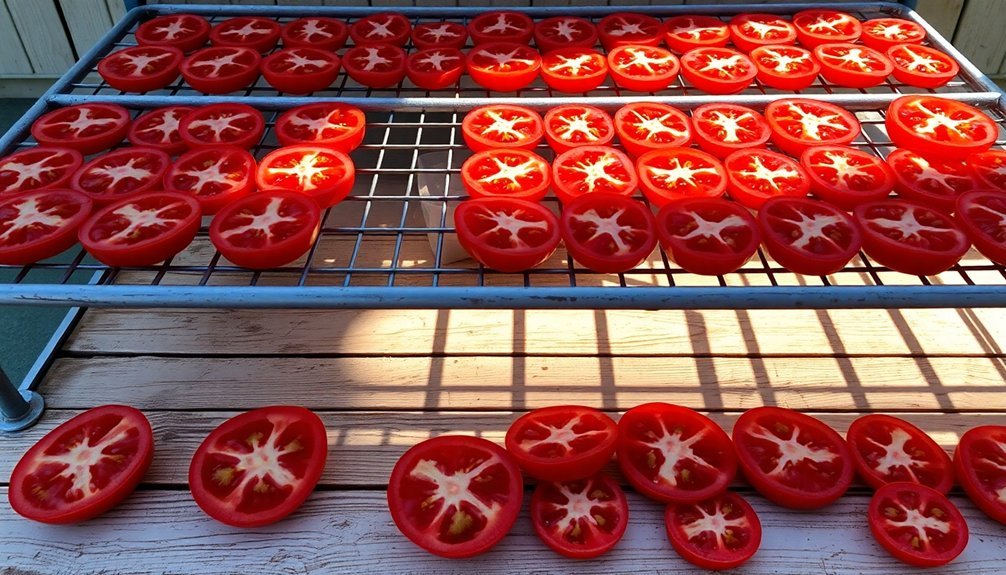
Before beginning the sun-drying process, selecting the right drying surface is critical for success. You'll need to choose surfaces that promote proper air circulation while keeping your tomatoes clean and safe from contamination. Clean wooden, plastic, chromed, or non-stick-coated drying trays work best, and fine wire racks offer excellent ventilation from underneath.
| Surface Type | Benefits | Key Considerations |
|---|---|---|
| Wooden Trays | Natural material, good airflow | Must be clean and splinter-free |
| Wire Racks | Maximum air circulation | Avoid galvanized metal |
| Non-stick Trays | Easy cleaning, no sticking | Keep elevated for airflow |
Position your drying surface at least one foot above the ground to guarantee proper air circulation. Don't use galvanized screening, as it can react with tomato acids. If you're using a baking sheet, line it with parchment paper to prevent sticking. For outdoor drying, consider placing your trays on reflective surfaces like flagstone patios to enhance the drying process. Remember to space your tomatoes ½ to 1 inch apart in a single layer, and never stack the trays on top of each other, as this will impede proper airflow.
Food Safety Equipment Essentials
Guaranteeing food safety during the sun-drying process requires specific tools and equipment to maintain proper hygiene standards.
You'll need a multi-compartment sink with hot and cold running water for thorough cleaning of tomatoes and utensils. Essential cutting tools include sharp knives, a knife rack, and clean cutting boards for proper preparation.
Keep your workspace sanitized with cleaning supplies like dish soap, sanitizing wipes, and safety gloves. You'll also need colanders and strainers for washing tomatoes, plus measuring tools for accurate seasoning.
Don't forget to have proper storage containers ready – they should be airtight and clearly labeled with dates using a label maker to track freshness.
Your safety equipment must include a fire extinguisher and first-aid kit for emergencies. For food temperature monitoring, you'll need reliable thermometers to guarantee safe drying conditions.
Store your dried tomatoes in the refrigerator using airtight containers to maintain quality. While food processors and blenders aren't essential for sun-drying, they can be helpful for processing tomatoes before or after drying.
Remember to keep garbage bags handy for proper waste disposal to prevent contamination.
Perfect Climate Conditions
The perfect climate for sun-drying tomatoes combines high temperatures, low humidity, and consistent sunlight. You'll need temperatures between 90°F and 100°F (32°C to 38°C) to effectively dry your tomatoes without risking spoilage. The San Joaquin Valley's ideal 15% humidity level demonstrates the importance of dry air in the process.
| Climate Factor | Best Conditions |
|---|---|
| Temperature | 90-100°F (32-38°C) |
| Humidity | Below 60%, ideally 15% |
| Sunlight | 5-10 days continuous |
| Cloud Cover | Minimal to none |
| Night Temp Drop | Max 20°F (11°C) |
Your drying location should receive direct sunlight for 5-10 consecutive days with minimal cloud cover. Don't forget to protect your tomatoes at night when temperatures drop. You'll need to bring the trays indoors or place them in a sheltered area to prevent moisture reabsorption and mold growth. If nighttime temperatures fall more than 20°F below daytime readings, you'll risk compromising the quality of your dried tomatoes. Remember, high humidity or insufficient heat can extend drying time and increase the risk of spoilage.
Step-by-Step Drying Process
To get the best results from sun-drying tomatoes, you'll want to start by selecting firm, ripe Roma or Principessa Borghese tomatoes, washing them thoroughly, and slicing them into uniform pieces after removing the core and stem.
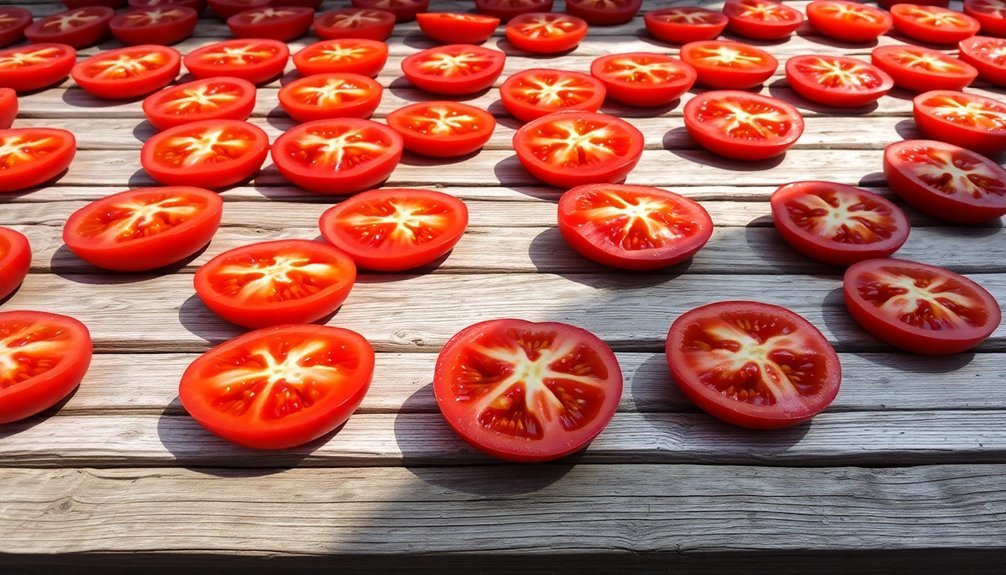
The actual drying process requires you to lay your prepared tomato slices on an elevated rack with their cut sides facing up, sprinkle them with sea salt, and guarantee they receive maximum sun exposure by rotating them throughout the day.
You'll need to bring your tomatoes inside each evening and continue this process for 3-4 days until they reach a chewy, slightly crunchy texture.
Preparing Your Tomatoes Properly
Before diving into sun-drying tomatoes, proper preparation will make all the difference in your final results.
You'll want to start by selecting plum-type or mini tomatoes, as they're ideal for drying due to their meaty walls and lower seed content. Wash your tomatoes thoroughly and dry them completely to prevent any moisture-related issues during the drying process.
Cut your tomatoes based on their size – halves or quarters for larger ones, and simple halves for cherry tomatoes. You can remove the core where the stem was attached, and if you'd like to reduce drying time, take out the seeds and pulp.
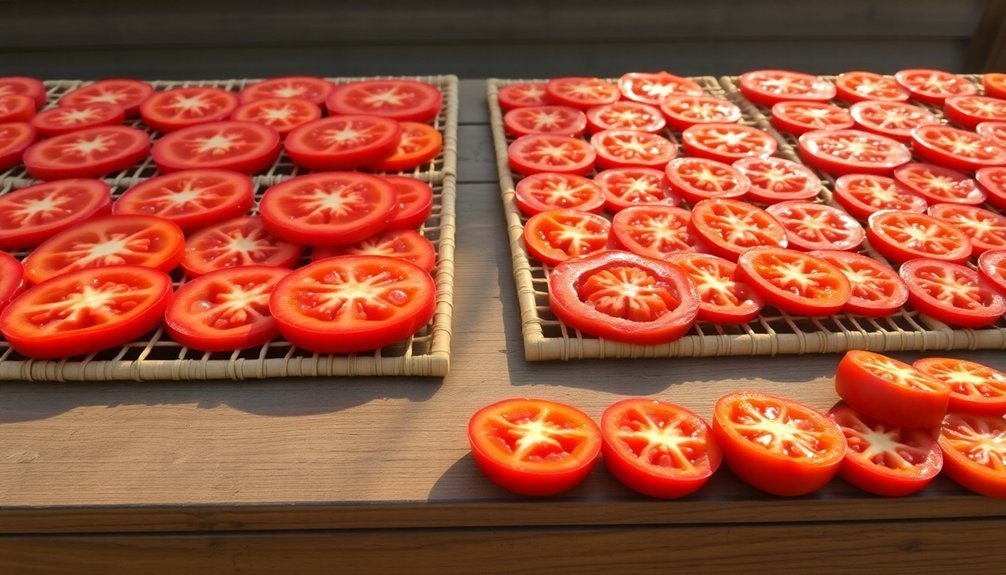
Once cut, arrange your tomatoes on appropriate drying trays, making sure they don't overlap and have enough space for air circulation.
Before starting the drying process, you'll want to season your tomatoes. Sprinkle them lightly with salt to help draw out moisture and enhance their natural flavor.
If you'd like, add herbs like thyme, oregano, or basil, but be careful not to overseason. Remember that the flavors will intensify as the tomatoes dry, so a light hand with seasonings works best.
Sun-Drying Time and Temperature
Successful sun-drying of tomatoes relies heavily on maintaining the right temperature and following a precise drying schedule.
You'll need to position your tomatoes on a fine wire rack placed over a tray, guaranteeing proper air circulation around each piece. Place them in direct sunlight, and you'll want to rotate their position throughout the day to maximize sun exposure.
The entire drying process can take anywhere from 4 days to 2 weeks, depending on your local weather conditions. To maintain consistent drying and prevent moisture buildup, you'll need to bring your tomatoes inside each night.
After a few days, flip the tomatoes over to guarantee their undersides dry properly. You can test for doneness by checking if they're leathery and pliable but not sticky or moist.
Once they're properly dried, let your tomatoes cool completely before storing them.
You've got two storage options: keep them in an airtight container as is, or submerge them in olive oil. Without oil, they'll last up to a week in the refrigerator; with oil, they can stay fresh for 3-4 weeks.
When you're ready to use them, simply rehydrate by soaking in water for 10 minutes.
Preventing Common Drying Issues
Proper preparation and monitoring are vital when sun-drying tomatoes to prevent common issues that can spoil your harvest. You'll need to carefully manage sun exposure, moisture levels, and environmental conditions throughout the drying process to achieve the finest results.
- Use plastic-mesh screens instead of metal wire racks to prevent acid reactions that can affect flavor, and guarantee proper air circulation beneath your tomatoes.
- Position your drying setup in a wind-protected area with full sun access, but be ready to move it during peak heat hours to prevent over-drying.
- Maintain consistent drying conditions by bringing tomatoes inside at night to avoid condensation, and dry them in manageable batches during favorable weather.
- Monitor humidity levels closely, aiming for less than 20 percent relative humidity on dry, sunny days with temperatures in the 90s.
You can enhance your success by slicing tomatoes uniformly and sprinkling them with high-quality sea salt.
Regular checks for signs of spoilage or incomplete drying are essential. Once dried, store your tomatoes in airtight containers or preserve them in olive oil with herbs and garlic for added flavor and longevity.
Testing for Complete Dryness
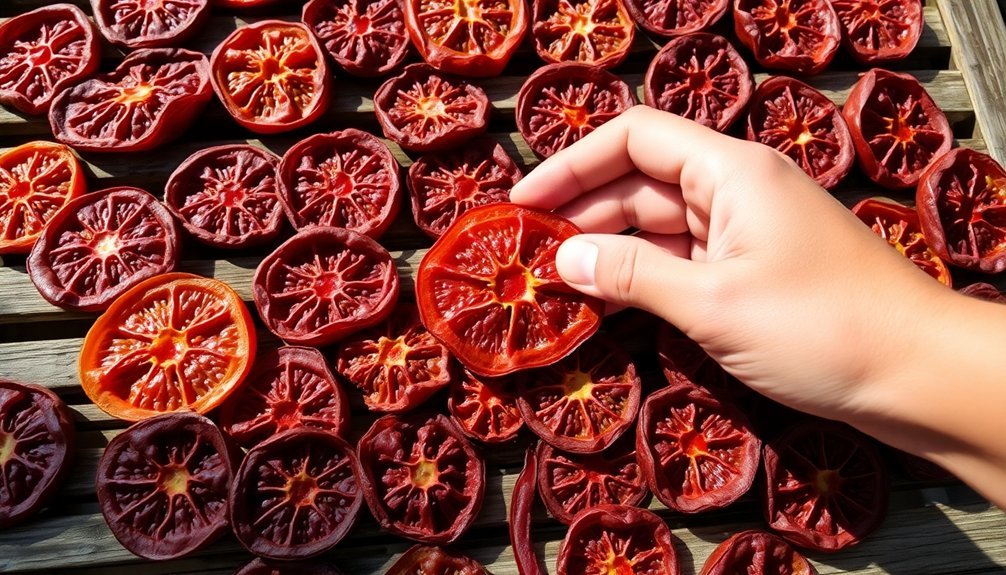
You'll know your sun-dried tomatoes are ready by checking a few key physical characteristics: they should be slightly crunchy, very chewy, and bend easily without breaking.
When you press the center of a tomato, no pulp should stick to your finger, and the texture should feel uniform throughout.
Before moving your tomatoes to storage, test a sample by rehydrating it in water for 10 minutes to verify it softens properly and evenly.
Physical Test Methods
Testing for complete dryness in sun-dried tomatoes requires several reliable physical methods. You'll want to confirm your tomatoes have reached the ideal moisture content of 12-24% for proper preservation. The physical characteristics of properly dried tomatoes will help you determine if they've reached the right level of dehydration.
Here are the key physical tests you can perform:
- Check the shrinkage – properly dried tomatoes should measure between 14.4 to 29.2 mm, depending on their cut size. If they're still larger, they need more drying time.
- Test the moisture content – squeeze the tomato between your fingers. It shouldn't feel wet or release any moisture, but it shouldn't be brittle either.
- Examine the water activity – while you can't measure this at home, you'll know you're close to the ideal range of 0.492-0.690 when the tomatoes are leathery but pliable.
- Verify the rehydration potential – take a small piece and place it in warm water. It should absorb between 15.4 and 21.5 grams of water per 10 grams of dried matter when fully rehydrated.
These physical indicators will help confirm your tomatoes are properly dried for safe storage.
Storage Readiness Checks
While physical tests help determine drying progress, confirming storage readiness requires specific checks before packaging your sun-dried tomatoes. You'll need to inspect each piece carefully for any remaining moisture that could lead to spoilage during storage. Break a few pieces in half – they should be leathery but not brittle, with no visible moisture at the breaking point.
Before transferring your sun-dried tomatoes to storage containers, check that they've cooled completely to room temperature to prevent condensation. You'll want to examine each piece for signs of discoloration, mold, or unusual textures that might indicate improper drying.
If you're planning to store them dry-packed, verify they're thoroughly dry to achieve the best one-year shelf life. For oil-packed storage, confirm that your containers are completely clean and dry before adding the tomatoes.
You'll need airtight containers or vacuum-sealed bags to maintain peak freshness. Remember to label your containers with the packaging date, as even properly dried tomatoes have specific shelf lives – up to two years for oil-packed and one year for dry-packed when stored unopened in ideal conditions.
Storage Methods and Shelf Life
Properly storing sun-dried tomatoes is essential for maintaining their intense flavor and extending their shelf life. You've got several storage options, depending on your preferences and how long you want to keep them fresh.
1. Oil Storage: Place your tomatoes in an airtight jar with extra virgin olive oil, adding aromatics like oregano and garlic.
First, soak them in hot water and vinegar to prevent bacterial growth. They'll last up to six months in the refrigerator once opened.
2. Dry Storage: Keep them in airtight containers or zip bags away from metal surfaces.
Store in a cool, dark cabinet, and they'll stay fresh for up to a year. Remember to minimize air exposure by using small containers.
3. Refrigeration: If they're not in oil or if you've opened an oil-packed jar, refrigerate them.
Non-oil packed tomatoes last about a week, while oil-packed ones can stay fresh for up to a month.
4. Freezing: For maximum longevity, freeze your sun-dried tomatoes.
Oil-packed varieties can last up to a year in the freezer, though they're best used within three months. Dry-packed ones can stay fresh for up to two years when frozen.
Rehydrating Sun-Dried Tomatoes
Before using sun-dried tomatoes in your recipes, you'll often need to rehydrate them to restore their plump texture and enhance their usability. You can choose from several effective methods, including warm water soaking, microwave heating, or stovetop simmering.
For the traditional soaking method, cover your tomatoes with warm water, wine, or broth, adding a pinch of salt for extra flavor. Let them soak for 30-60 minutes until they're soft and pliable.
If you're short on time, try the microwave or stovetop methods. For either approach, use twice the amount of liquid as tomatoes. In the microwave, cover and heat for 2 minutes, then let stand for 5 minutes. On the stovetop, bring the liquid to a simmer, remove from heat, and let the tomatoes plump for 5 minutes.
You can enhance the rehydration process by using flavorful liquids, as the tomatoes will absorb these tastes. Don't discard the soaking liquid – it's perfect for soups, sauces, or rice dishes.
For brothy recipes, you can add the dried tomatoes directly, as they'll rehydrate during cooking. After rehydration, consider marinating them in olive oil with herbs and garlic for additional flavor.
Health Benefits and Nutrition
Sun-dried tomatoes pack a powerful nutritional punch, offering an impressive array of vitamins, minerals, and antioxidants in their concentrated form. You'll find high levels of essential nutrients, including Vitamin C, Vitamin K, iron, and potassium, along with a significant amount of dietary fiber at 6.6 grams per cup.
With 7.6 grams of protein per serving, they're an excellent addition to a balanced diet.
These nutrient-dense morsels deliver remarkable health benefits:
- Their potent antioxidant properties, including lycopene and β-carotene, help protect your cells from damage and promote healthy aging.
- The combination of potassium, fiber, and magnesium supports heart health by regulating blood pressure and improving cholesterol levels.
- You'll boost your digestive health thanks to the high fiber content, which aids in preventing constipation and promotes feelings of fullness.
- Their anti-inflammatory compounds help reduce chronic disease risk while supporting overall well-being.
The concentration process intensifies these benefits, making sun-dried tomatoes an exceptionally nutritious choice.
They're particularly valuable for maintaining heart health, supporting digestive function, and providing antioxidant protection against cellular damage.
Frequently Asked Questions
Can I Use Partially Ripe Tomatoes for Sun-Drying?
You shouldn't use partially ripe tomatoes for sun-drying. They'll take longer to dry, have less flavor, and risk spoiling during the process. For best results, always choose fully ripe, firm tomatoes.
What Causes White Spots to Appear During the Drying Process?
You'll notice white spots when moisture gets trapped due to poor air circulation, uneven drying, or high humidity. They can also appear if you don't rotate your tomatoes regularly during the drying process.
Do Pesticides Concentrate in Sun-Dried Tomatoes?
Yes, you'll find that pesticides actually concentrate in sun-dried tomatoes. Since the drying process removes water but doesn't eliminate pesticide residues, they become more concentrated in the remaining tomato flesh.
Can Moldy Sun-Dried Tomatoes Be Salvaged?
You shouldn't risk eating moldy sun-dried tomatoes. While you can remove slight mold in some cases, it's safer to discard affected pieces entirely. The risk of food poisoning isn't worth trying to salvage them.
Why Do Some Sun-Dried Tomatoes Taste More Acidic Than Others?
You'll notice varying acidity in sun-dried tomatoes due to different tomato varieties, ripeness levels, and drying methods. The concentration of flavors during drying can also intensify the natural acid content.
In Summary
You've now mastered the traditional art of sun-drying tomatoes. By following these steps and maintaining proper conditions, you'll transform fresh tomatoes into flavorful preserved gems that'll last for months. Don't forget to store your dried tomatoes properly and enjoy their concentrated taste in various dishes. Whether you're preserving your garden harvest or stocking up, you've learned a sustainable way to savor summer's bounty year-round.


Leave a Reply