
To create your perfect food drying station, you'll need a controlled indoor space with temperatures below 150°F and humidity under 60%. Choose a well-ventilated area like an attic or spare room, and set up sturdy metal shelving with proper spacing between trays. Install fans for consistent airflow, and position your racks to allow 2-3 inches between layers. You'll want screens or mesh to protect your food from contamination, and remember to maintain 1.5 inches of clearance around all trays. For the best results, guarantee your station takes advantage of natural ventilation and sunlight. The secrets to successful food preservation await in the details of proper design and setup.
Selecting The Perfect Location

Three key factors determine the perfect location for air-drying food: environmental conditions, ventilation, and climate suitability.
You'll want to choose an indoor space where you can control humidity and temperature, as most regions don't provide ideal outdoor conditions for consistent drying.
Select a well-ventilated area with temperatures below 150°F (65°C) and low humidity levels. An attic, spare room, or screened-in porch can work well, provided you've got good airflow and protection from direct sunlight.
Make sure your chosen spot has easy access to electricity for fans and dehumidifiers, and guarantee proper drainage to prevent moisture buildup. A paper bag covering can help protect drying herbs and peppers from dust while maintaining adequate airflow.
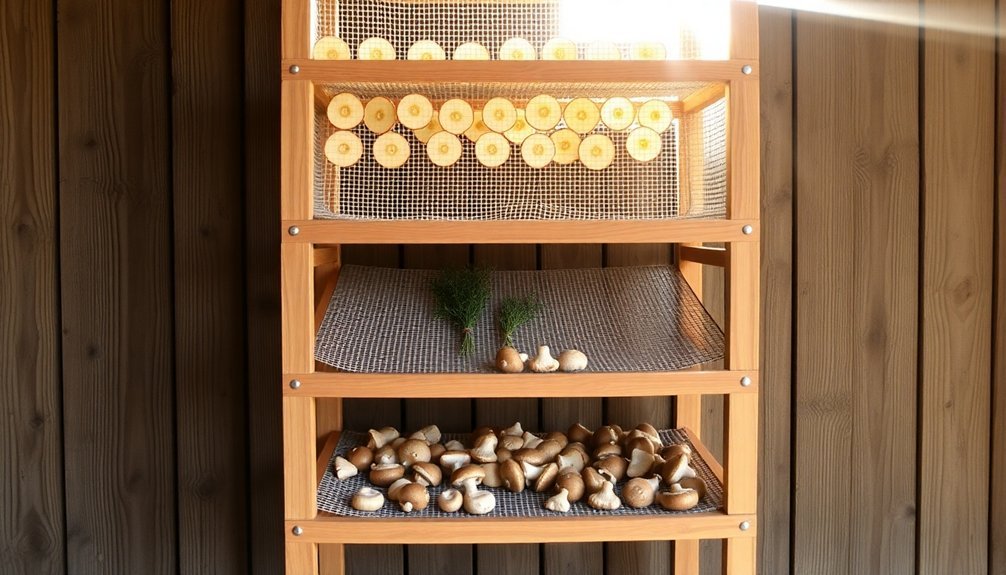
Set up your drying station at an elevated position where air can circulate freely around the food.
You'll need to install screens to protect against dust while allowing air movement, and position fans strategically to direct cooler air in and warmer air out.
If you're in a humid climate like Minnesota or New York State, don't attempt outdoor drying – stick to indoor locations where you can maintain temperatures above 85°F (29°C) and humidity below 60%.
Consider installing backup systems for heat and circulation to guarantee consistent drying conditions.
Essential Tools and Materials
The right tools and equipment make all the difference when air-drying food successfully. You'll need reliable dehydrating equipment, whether you choose an electric dehydrator, conventional oven, or sun-drying setup. Each method requires specific temperature control tools to guarantee proper drying without cooking your food.
| Essential Category | Basic Setup | Advanced Setup |
|---|---|---|
| Drying Equipment | Sun screens with cheesecloth | Electric dehydrator with automatic control |
| Temperature Tools | Oven thermometer | Digital controls with forced ventilation |
| Storage Solutions | Airtight containers | Vacuum sealer with mylar bags |
For any method you choose, you'll need appropriate trays or racks to support your food while allowing proper air circulation. If you're using an electric dehydrator, it'll come with specialized trays, but oven-drying requires mesh-covered frames or baking sheets. Don't forget about storage materials – they're vital for maintaining the quality of your dried foods. Stock up on airtight containers, glass jars, or re-closable mylar bags. For best results, consider investing in dehydrating mats or fruit leather sheets to prevent sticking and maintain proper airflow during the drying process. Using a conventional oven thermometer is crucial for maintaining the correct low temperature needed to dry foods without accidentally cooking them.
Basic Frame Construction Steps
You'll want to start with sturdy furring strips cut to your desired frame dimensions, making sure to select straight pieces without warping or damage.
Create your base structure by assembling the cut pieces into a rectangular shape, using pilot holes and drywall screws at each corner for secure joints.
Add cross bracing by sandwiching mesh between two identical frames and securing them together with evenly spaced screws, which provides the essential support needed for your food drying project. Air circulation becomes maximized when the frames are elevated using blocks or bricks.
Choose Support Materials
Selecting appropriate support materials is critical for building a reliable air-drying system. You'll need to focus on four key areas: insulation, flooring, ventilation, and shelving to create an efficient drying environment.
For your walls and ceiling, start with polystyrene foam board as your base insulation layer, then add FRP board on top for enhanced protection. Secure these materials with construction adhesive, guaranteeing you've got adequate thickness to maintain consistent temperatures.
For the floor, install plywood panels that connect seamlessly with your insulated walls, eliminating gaps that could compromise efficiency or allow pests to enter.
You'll need to plan your ventilation system before installing insulation. Include a gable vent fan with thermostat control and a 6-inch mounted fan to maintain proper air circulation. Cut the necessary openings for these components early in the process.
Finally, install metal shelving that's sturdy enough to support your food and equipment. Mount these shelves securely to the walls and guarantee they're positioned for easy access during loading and unloading. Remember that your shelves must be compatible with any heaters or fans you're planning to use.
Assemble Base Structure
Laying down a solid foundation starts with constructing your base frame using half-inch plywood and wood siding. Cut your plywood to match your planned dimensions, keeping in mind that an 8×8 foot base works well for a walk-in dehydrator. Secure the wooden sides to create a sturdy frame, and install hinges at the bottom to allow for swivel functionality of the collector frame.
Install metal roofing with ribs on top of your base frame – these ribs will support your drying frames while promoting air circulation. You'll need to decide whether to keep or remove the corrugated support strips underneath the roofing based on your ventilation needs.
For better temperature control, consider adding FRP board and polystyrene foam board as insulation materials.
Don't forget to incorporate proper ventilation features. Install a gable vent fan to regulate temperature and manage moisture levels. Add vents or openings strategically to enhance air flow throughout the structure.
Connect a thermostat to maintain ideal drying conditions. Finally, lay down plywood flooring to prevent condensation and guarantee a safe, stable surface for your food-drying operations.
Add Cross Bracing Components
After establishing your base structure, cross bracing becomes the next major step in building a sturdy air-drying frame.
You'll want to select robust materials like extruded aluminum channels or steel components that are at least .100" thick for proper rigidity. Confirm your bracing materials match your station's dimensions, typically 48" or 60" widths.
Begin by installing temporary chain bracing to maintain alignment during assembly. Once you've confirmed proper positioning, weld your permanent cross bracing to form a rigid frame.
Use interlocking solid panels with raised guides and secure them to your uprights, bases, and arms using appropriate clamps and hardware. Don't forget to incorporate double x-bracing for back-to-back units to enhance stability.
When installing your cross bracing components, confirm they're configured to allow sufficient air movement for effective drying.
Add angle braces or kickers for additional rigidity, and incorporate sway braces if you're in a seismic zone. Check that all components are securely nailed and properly aligned to prevent any movement.
Remember to inspect your bracing regularly to maintain structural integrity and safety over time.
Air Flow Design Principles
Proper airflow design serves as the cornerstone of effective food air-drying systems. You'll need to focus on both air velocity and distribution to achieve ideal drying results. By controlling these factors, you'll prevent uneven drying and guarantee your food dehydrates consistently.
Position your drying trays to allow air to flow freely between them, and consider installing baffles or deflectors to direct airflow where it's needed most. If you're using fans, place them strategically to create uniform air movement without dead zones. For larger setups, you might want to use variable speed drives to fine-tune your airflow control.
| Design Element | Purpose | Key Consideration |
|---|---|---|
| Air Velocity | Controls drying rate | Higher for wet foods, lower for delicate items |
| Tray Spacing | Enables proper circulation | 2-3 inches between trays minimum |
| Fan Placement | Guarantees even distribution | Position for maximum coverage |
| Baffles/Deflectors | Directs airflow | Install where circulation needs improvement |
Remember that deeper beds of food require stronger airflow, and you'll need to adjust your system based on the moisture content of what you're drying. Consider using CFD simulations for complex setups to refine your airflow patterns before finalizing your design.
Natural Ventilation Techniques
Gentle breezes and thermal currents form the backbone of natural ventilation systems for food drying. You'll need to strategically place inlets and outlets in your drying station to maximize airflow, focusing on sidewall openings that allow fresh air to circulate freely.
The natural forces of thermal buoyancy and wind will control your ventilation system, eliminating the need for electric fans and their associated maintenance costs.
When designing your drying station, consider placing air vents at each end to improve circulation. You can protect your food from insects and birds by installing screens or cheesecloth over the openings.
Your building's orientation plays a significant role in ventilation efficiency, so position it to take advantage of prevailing winds.
For ideal drying conditions, you'll want to set up in an area with abundant sunlight and low humidity. The system works best when cool air enters at the bottom and warm air escapes from the top.
To enhance drying efficiency, you might consider adding reflective surfaces like aluminum foil or glass. Remember to include proper protection from rain and condensation, as moisture can compromise your drying process.
Rack Spacing and Arrangement
Your food-drying racks need proper spacing to guarantee ideal airflow, with vertical gaps of at least 6 inches between layers to allow air movement around your items.
You'll want to position your racks so air can freely circulate from all directions, avoiding any stacking that could trap moisture and lead to uneven drying.
For the best results, stagger your food items on each layer rather than placing them directly above one another, which lets air move more effectively through the entire drying setup.
Optimal Airflow Between Layers
Efficient air-drying requires careful attention to the spacing and arrangement of food layers. You'll need to guarantee proper airflow distribution between each layer to effectively remove moisture from your food items. To achieve this, use open wire shelves or spiral-shaped racks that provide ample space between food pieces, allowing air to circulate freely.
When setting up your drying station, you'll want to maintain adequate spacing between layers. Position your racks so that air can move easily around each food item, which helps reduce humidity and speeds up the drying process. If you're using a conventional oven, prop the door open to enhance air circulation.
For even better results, consider using a fan or convection oven to improve airflow distribution. Pay attention to airflow velocity, aiming for terminal velocities between 100-150 FPM in cooler spaces.
You can optimize your setup by using adjustable shelves to customize spacing based on the size and type of food you're drying. Remember that proper air circulation is vital for moving moist air away from your food, so avoid overcrowding your racks or placing items too close together.
Vertical Space Requirements
Throughout your drying setup, proper vertical spacing between racks plays an essential role in maintaining consistent airflow and ideal drying conditions. You'll want to verify your trays are evenly spaced and positioned at least 6 inches off the floor for easy cleaning and maintenance.
When using vertical-airflow dehydrators, you can add trays as needed, but remember you'll need to rotate them periodically for even drying.
If you're working with a vertical-airflow system, you'll benefit from its space-efficient design, which allows for compact storage when not in use. Choose trays with quarter- to half-inch high edges to prevent food from falling, and verify the mesh size supports proper air circulation while keeping food secure.
For maximum flexibility, consider adjustable shelving systems that let you modify spacing to accommodate different food sizes.
When arranging your drying station, maintain clear aisleways for safe and efficient access to your trays. If you're using mobile racks, opt for corrosion-resistant materials like stainless steel or sturdy plastic that can withstand regular cleaning and frequent handling.
This setup will help you maximize vertical space while guaranteeing ideal drying conditions.
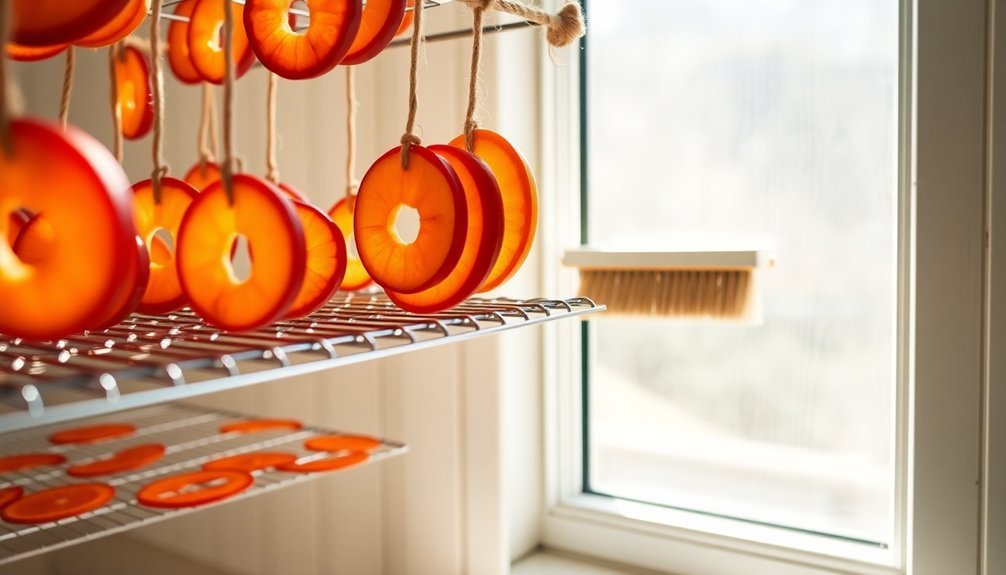
Protective Screens and Covers
Proper protective screens and covers play an essential role in successful air-drying of foods. You'll need to select appropriate covers based on your drying setup and local conditions. Dehydrator screens made from FDA-approved polypropylene offer a reliable foundation, with 1/8" holes preventing small pieces from falling through while maintaining proper airflow.
| Cover Type | Best Uses | Key Features |
|---|---|---|
| Clear Plastic | Indoor drying | Lightweight, inexpensive, allows light through |
| Opaque Fabric | Outdoor drying | Machine-washable, blocks UV, includes vents |
| Mesh Food Covers | Bug protection | High-density mesh, multiple compartments |
When you're drying outdoors, you'll want to take into account using multiple layers of protection. Start with dehydrator screens as your base, add a mesh cover to keep insects away, and top with an opaque fabric or aluminum foil cover to control light and heat exposure. Remember to maintain your screens and covers properly – wash them with mild detergent, avoid harsh chemicals, and verify they're completely dry before storage. If your dehydrator screens become warped, you can easily flatten them by heating them up to 190°F in your dehydrator or oven.
Food Placement Strategies
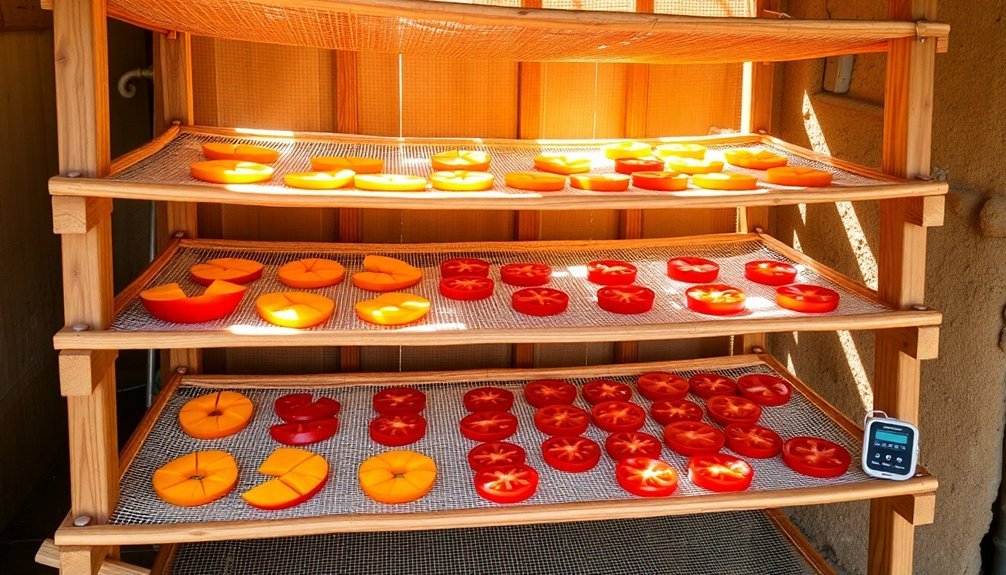
Strategic food placement stands at the heart of successful air-drying. You'll want to arrange your food items in single layers, guaranteeing uniform pieces for consistent drying rates. When working with pretreated fruits, position them with their pit cavities facing upward to promote even drying throughout.
Place your items on mats, racks, or screens that enable air to circulate from all directions. You'll need at least 1 1/2 inches of clearance on all sides of your trays for efficient airflow. If you're using stackable trays, insert wooden blocks at least 2 inches high between them to maintain proper air circulation.
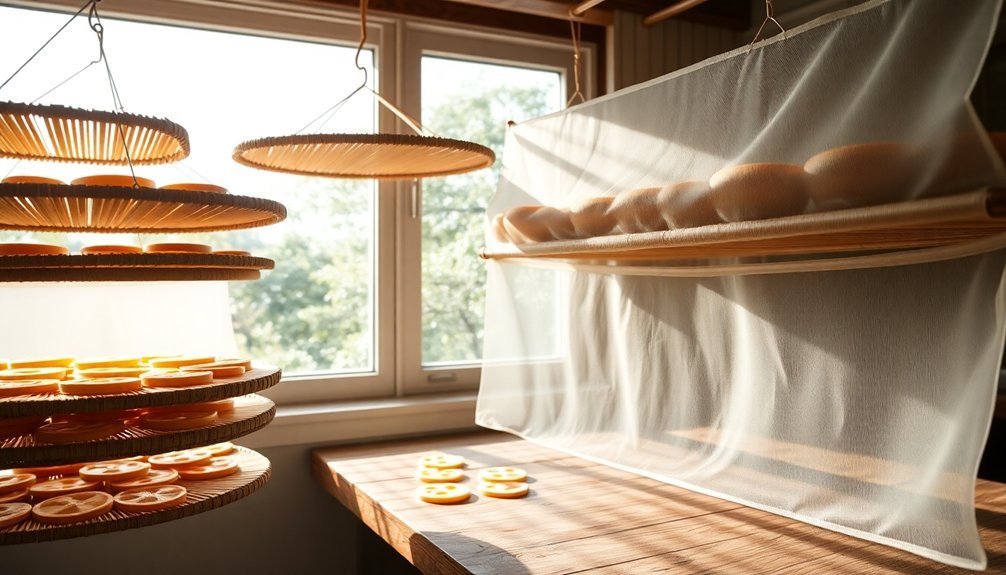
For herbs, you've got two effective options. You can either spread them on screens or tie them in bundles to hang from hooks or rafters.
If you're drying leafy greens, herbs, teas, or spices, keep them away from direct sunlight by setting up your drying station in a shaded area. Don't forget to reshuffle your trays periodically if you're using a stackable system – this guarantees even drying across all levels.
Remember to bring your racks indoors or cover them at night to prevent moisture from settling on your food.
Maintenance and Cleaning Methods
The success of your air-drying setup depends on diligent maintenance and cleaning routines. You'll need to regularly inspect your dehydrators, ovens, and other equipment for wear, while keeping filters clean to maintain proper airflow.
Check your thermostat's accuracy with an oven thermometer to verify it maintains 140°F, and don't forget to lubricate moving parts as specified in your manufacturer's guide.
Keep your drying surfaces spotless by washing trays and racks with gentle detergent and warm water. You'll want to sanitize these surfaces using a mixture of 1 tablespoon unscented chlorine bleach per gallon of water.
Don't use abrasive materials that could scratch the surfaces, and verify everything's completely dry before use.
When you're storing dried foods, use airtight containers and place them in a cool, dark location. You'll need to check stored items regularly for moisture or mold, and if you spot any issues, re-dry the food immediately.
Always use clean, dry utensils when handling stored foods, and label everything with dates and contents.
To prevent contamination, protect drying foods with screens or mesh, maintain good air circulation, and avoid high-humidity areas.
Handle foods carefully and follow proper drying times to verify complete dehydration.
Frequently Asked Questions
How Long Can Dried Foods Be Stored Before They Go Bad?
You'll find your dried foods can last several years when properly stored. With ideal conditions – cool, dark, and dry environments under 60°F and 10% humidity – they'll stay good for up to 20 years.
Can I Air-Dry Different Types of Food Together at Once?
You shouldn't dry most foods together. You can combine herbs and greens, or mushrooms with herbs, but keep fruits, vegetables, and meats separate to prevent flavor mixing and maintain proper hygiene.
What Temperature Is Too Hot for Effective Air Drying?
You'll want to avoid temperatures above 140°F (60°C) for most foods. If it's too hot, you'll risk case hardening, nutrient loss, and flavor changes. Stick to lower temperatures for better results.
Does Air Drying Affect the Nutritional Value of Foods?
When you air dry foods, you'll retain most nutrients, though some vitamin C and beta-carotene may decrease. The process actually concentrates nutrients, making dried foods more nutrient-dense per ounce than their fresh counterparts.
Should I Rotate Food Items Between Different Rack Levels While Drying?
Yes, you'll want to rotate your food items between different rack levels regularly. This guarantees even drying, prevents moisture buildup, and helps all pieces dry uniformly, especially in vertical airflow dehydrators.
In Summary
You'll find that building your own food drying station is both rewarding and practical. With proper planning and careful attention to ventilation, spacing, and protective measures, you've created a sustainable way to preserve your harvest. Keep your station clean, monitor the drying process regularly, and you'll enjoy perfectly dried foods year-round. Remember, it's all about maintaining consistent airflow and protecting your food from the elements.


Leave a Reply