
To master ancient Native pemmican smoking, you'll need seven sacred techniques perfected over generations. Start by selecting ceremonial woods like cedar for purification, then build your fire using traditional flint-and-pyrites or friction methods. Cut partially frozen meat against the grain into uniform strips, and maintain smoke temperatures between 100-115°F for ideal drying. Time your process carefully over 3-7 days, ensuring proper smoke circulation by positioning racks perpendicular to the wind. Use natural windbreaks and elevated platforms while monitoring weather conditions closely. These time-tested methods hold deeper spiritual significance that modern preparations often overlook.
Selecting Sacred Smoking Woods
Steeped in centuries of tradition, sacred smoking woods played an essential role in Native American ceremonies and spiritual practices. When selecting woods for smoking pemmican, you'll want to understand the deep spiritual significance behind each choice, as these materials were believed to carry prayers and messages to the spiritual domain.
You'll find cedar leaves are particularly important, as they're traditionally used for purification and blessing. When preparing your smoking woods, you'll need to follow specific ritual preparations that honor the spiritual connection. Before use, you should offer tobacco and other sacred plants to the spirits, following traditional protocols.
Different tribes maintained their own unique preferences for smoking woods. If you're following Lakota traditions, you'll want to use red stone and wood combinations, while Delaware methods call for stone pipes with dried sumac leaves. Many tribes used kinnickinnick mixtures that combined tobacco with local herbs and inner bark.
The Creek and Cherokee peoples placed special emphasis on tobacco preparation, considering it a sacred plant. When selecting your smoking woods, remember that each choice carries centuries of spiritual significance, and the proper selection is essential for maintaining the ceremonial aspect of traditional pemmican preparation.
Traditional Fire Building Methods
Traditional fire-making among Native American tribes employed two primary methods: flint-and-pyrites striking and wood friction techniques.
If you're following northern tribal practices like the Eskimo or Athapascan, you'll find the flint-and-pyrites method particularly effective, where striking these materials creates sparks to ignite your tinder.
For wood friction techniques, you've got two reliable options: the hand drill and the bow drill. The Pueblo tribes frequently used weathered cottonwood roots for their fire drills.
With the hand drill, you'll need to twist a slender rod between your palms against a wooden hearth, creating hot wood powder that collects in a small canal until it ignites. You'll want to select soft, weathered wood for best results, and you can add sand to increase friction.
The bow drill offers you a more efficient alternative. By using a bow's string to rotate the drill, you'll generate fire much faster – sometimes in just five seconds.
You'll need to prepare your materials carefully, selecting appropriate woods like cedar or mesquite for your hearth.
Don't forget to keep tinder ready, whether it's dry grass, bark fiber, or fungi, to catch those initial sparks.
Meat Cutting Practices
Before you begin preparing pemmican, mastering proper meat cutting techniques is vital for achieving the right consistency.
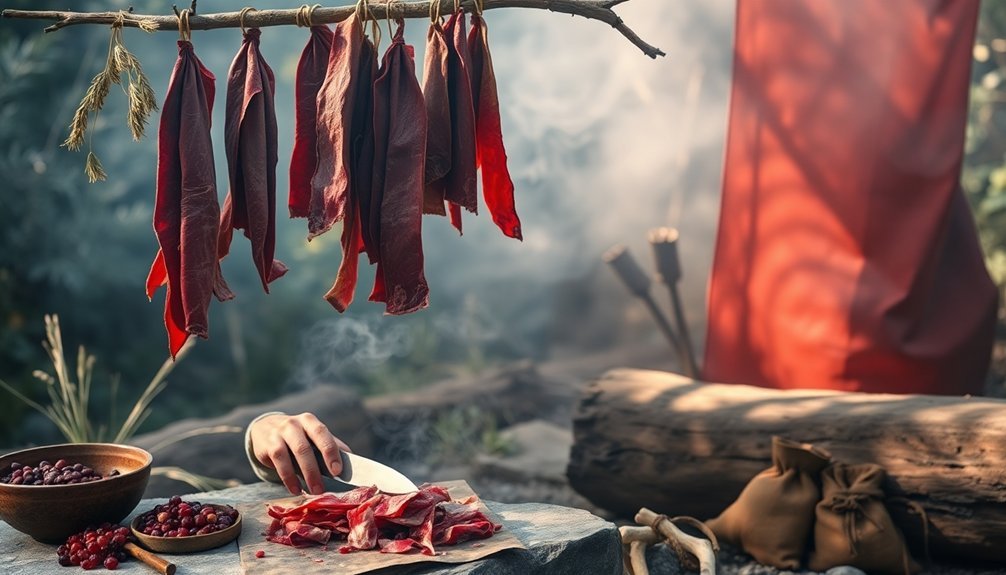
You'll want to start with lean meat, preferably from buffalo or bison, and partially freeze it to make the cutting process more manageable. Remove the larger muscles whole, as they're easier to work with when reducing them into strips. Plains Indian women were traditionally responsible for this careful butchering process.
When cutting the meat, you'll need to create thin, uniform strips. This consistency is important because it affects how evenly your meat will dry and ultimately powder. As you cut, make sure to preserve valuable parts like sinew, which can be used for other purposes in traditional preparations.
You'll find that cutting against the grain of the meat produces the best results for drying and later processing. The strips shouldn't be too thick, as this will impact drying time and final texture.
Keep your cuts as consistent as possible – this uniformity will help guarantee even drying and make the grinding process more efficient later on.
Perfect Smoke Temperature Control
Once you've prepared your meat strips, maintaining the right smoke temperature becomes your next major focus. You'll want to keep temperatures below 120°F to dry the meat properly without cooking it. The ideal range falls between 100-115°F, preserving both nutritional value and natural flavors.
For fat rendering, you'll need higher temperatures around 240°F, but never exceed 250°F to protect the fatty acids. When combining the rendered fat with dried meat, keep temperatures below 150°F to avoid deep-frying your carefully prepared pieces.
| Temperature | Purpose | Effect |
|---|---|---|
| 100-115°F | Ideal drying | Preserves nutrients and flavor |
| 120°F | Maximum dry temp | Prevents cooking |
| 150°F | Commercial limit | Too hot for traditional pemmican |
| 225-240°F | Fat rendering | Best melting point |
| 250°F | Maximum fat temp | Prevents fatty acid damage |
You can use traditional smoking methods like pit smoking or modern dehydrators, but always monitor your temperatures carefully. Your finished product needs proper storage – keep it wrapped in light-tight materials, in a dark place, and completely dry. When done correctly, your pemmican can last for years at room temperature.
Essential Timing and Duration
Time management stands at the heart of successful pemmican preparation. You'll need to allocate several days to a week for the complete process, as proper timing guarantees each component reaches its ideal state before combining.
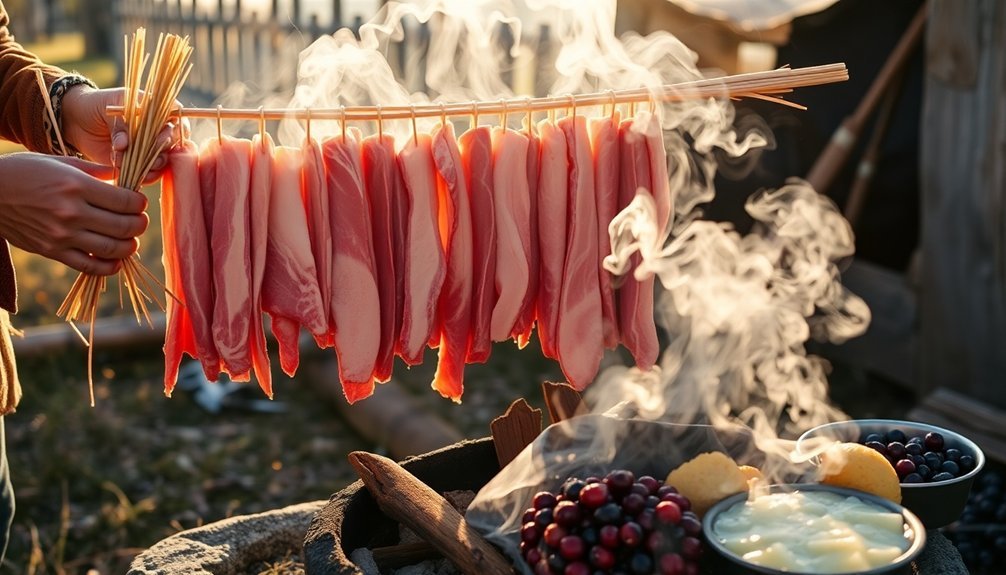
Start by slicing your meat into thin strips and laying them on wooden racks. The drying phase will take up the bulk of your preparation time, requiring 3-7 days depending on weather conditions.
While you're waiting for the meat to dry, you can begin rendering your fat, which typically takes about two hours over low heat.
Once your meat is thoroughly dried, you'll need to pound it between stones until it becomes powder-like. This labor-intensive step shouldn't be rushed, as proper meat consistency is essential for the final product.
When you're ready to combine ingredients, you'll want to work quickly while the rendered fat is still warm but not hot. Mix your powdered meat with the fat in equal parts by weight, adding powdered berries if desired.
Let the mixture cool for several hours before packing it into hide bags. You'll know it's ready when it holds its shape firmly and can be broken into pieces.
Smoke Circulation Techniques
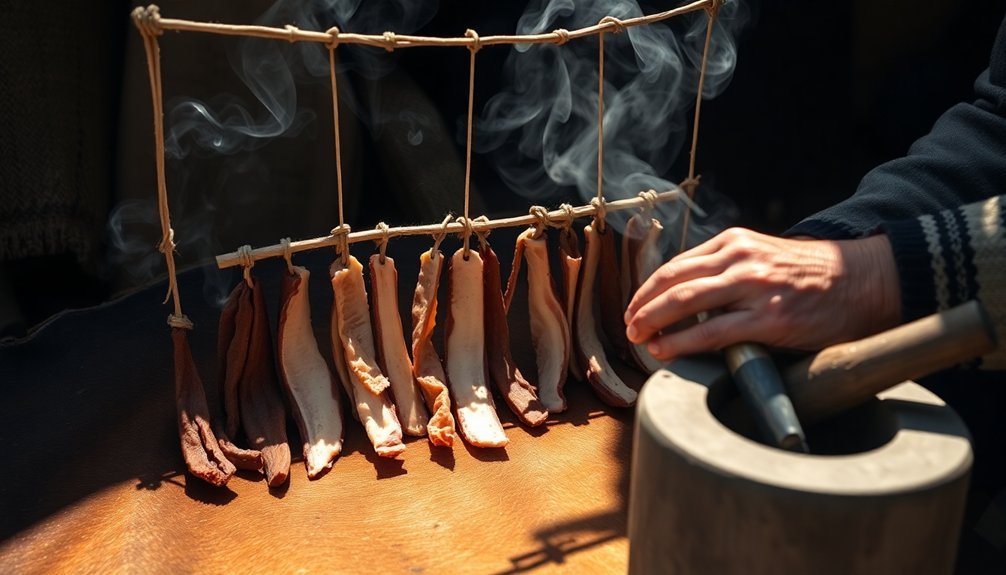
Proper smoke circulation transforms ordinary dried meat into richly flavored pemmican. You'll need to arrange your meat strips in a single layer on wooden racks, guaranteeing there's enough space between pieces for smoke to flow freely.
Position your smoking apparatus to create consistent airflow around all the meat surfaces.
You can choose between several effective smoking methods. If you're using a traditional approach, set up your campfire to mimic Native American techniques, but maintain control over the smoke flow.
For more precise results, you'll want to use a smoker or cold smoke generator, which provides steady, even smoke distribution.
Select well-seasoned wood for the best results. Hickory, pecan, or applewood will give you distinct, pleasant flavors, while avoiding woods that produce bitter tastes or harmful resins.
You'll need to monitor your ventilation carefully – whether you're using natural airflow or a ventilation system – to prevent smoke from becoming stagnant.
Keep the temperature low and adjust your airflow as needed to guarantee gradual drying and ideal smoke absorption.
Watch for even coloring and texture development across all your meat pieces as indicators of proper smoke circulation.
Weather and Wind Considerations
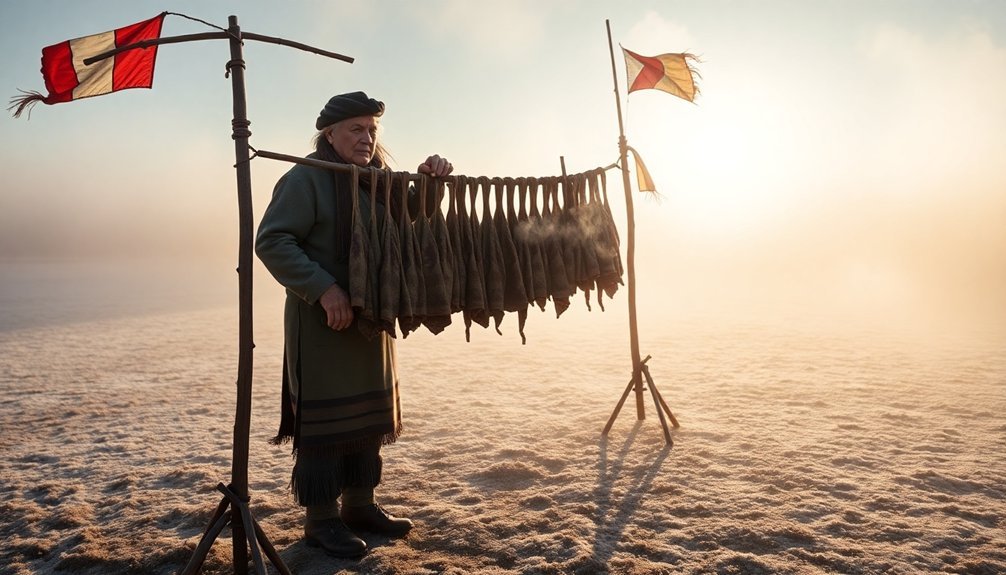
You'll want to position your drying racks with their narrow ends facing the prevailing wind to minimize direct exposure while still allowing adequate smoke flow.
During summer drying season, keep tarps or coverings nearby to quickly protect your meat from unexpected rain showers that could spoil the batch.
Setting up your smoking operation in a partially sheltered area, like against a natural windbreak, lets you take advantage of the driest months while maintaining consistent airflow around your racks.
Best Wind Direction Setup
Setting up your smoking area with proper wind direction is critical for successful pemmican preparation. You'll want to position your drying racks where a gentle breeze can flow consistently across the meat, helping it dry evenly while preventing moisture buildup. If you're working in an area with variable winds, consider setting up temporary wind barriers to maintain steady airflow.
- Place your drying racks perpendicular to the prevailing wind direction.
- Set up protective barriers on three sides, leaving the downwind side open.
- Stack your racks with 6-8 inches of space between them for ideal air circulation.
- Position the setup away from areas where wind tends to swirl or become turbulent.
- Monitor wind patterns throughout the day and adjust your setup as needed.
When you're establishing your drying area, verify it's in a location where you can maintain temperatures between 100°F and 115°F.
If you're using a campfire or smoker, position it downwind from your racks so the smoke gently passes over the meat without overwhelming it.
Remember that strong winds can disrupt the temperature control and even scatter your meat, so you'll need to strike a balance between good airflow and protection from excessive wind.
Rain Protection Methods
Rain can wreak havoc on your pemmican preparation if you're not properly sheltered. You'll need to create strategic protection systems to guarantee your meat dries properly, even during challenging weather conditions.
| Protection Method | Key Benefits |
|---|---|
| Tree Coverage | Natural shelter blocks direct rain while allowing smoke ventilation |
| Hide Canopies | Provides adjustable coverage and traditional weather protection |
| Elevated Platforms | Prevents ground moisture from affecting meat quality |
| Tripod Formations | Allows proper air circulation while offering structural stability |
| Hill Positioning | Creates natural windbreak and rain barrier |
When you're facing damp conditions, you'll want to position your drying racks under partial tree coverage while maintaining enough space for smoke circulation. If you're working in an open area, construct a hide canopy that slopes away from your drying space, guaranteeing it's high enough to prevent smoke from getting trapped. Remember to keep your meat elevated at least a few feet off the ground using platforms or tripod structures.
During persistent rain, you might need to move your operation closer to your fire shelter, but make sure you're maintaining proper temperature control to avoid cooking the meat instead of drying it.
Seasonal Drying Times
The success of your pemmican drying process depends heavily on seasonal weather patterns and wind conditions.
Spring offers favorable conditions with its lower humidity and gentle breezes, though you'll need to watch for sudden rain showers. When temperatures rise above 200F, you'll get faster drying times, but you must monitor the meat closely to prevent it from becoming too brittle.
Wind plays a significant role in the drying process. Low wind conditions will slow down your drying time and may lead to moisture retention, requiring you to check your meat more frequently for mold growth.
If you're facing challenging weather conditions, you can always turn to modern dehydrators, which maintain consistent temperatures between 160-165F.
Key considerations for ideal drying:
- Choose spring days with low humidity and gentle breezes for natural drying
- Monitor meat closely when temperatures exceed 200F to prevent over-drying
- Guarantee adequate air circulation to prevent moisture buildup
- Consider using a dehydrator during unfavorable weather conditions
- Check meat regularly for signs of uneven drying or mold growth
If natural drying conditions aren't ideal, don't hesitate to use a dehydrator for consistent results.
Frequently Asked Questions
Which Native Prayers or Ceremonies Were Performed Before Smoking Pemmican Meat?
You won't find specific prayers for smoking pemmican meat, as historical records don't show dedicated ceremonies for this process. While Native Americans used tobacco in ceremonies, it wasn't directly linked to pemmican preparation.
How Did Different Tribal Regions Vary in Their Sacred Smoking Traditions?
You'll find that Plains tribes often used elaborate pipe dances, while Woodland Indians focused on daily tobacco offerings. Northeast tribes emphasized directional ceremonies, and each region had its own sacred tobacco preparation methods.
What Spiritual Significance Did Moon Phases Have in Smoking Preparation?
You'd align your smoking rituals with moon phases, as full moons enhanced spiritual power. During the Wolf Moon and Hunter's Moon, you'd prepare ceremonial smoke offerings to honor ancestors and seek guidance.
How Were Apprentices Traditionally Taught the Sacred Smoking Methods?
You'd learn sacred smoking methods directly from tribal elders through hands-on practice, observation, and oral teachings. They'd guide you in proper tobacco preparation, ceremonial protocols, and spiritual significance over many moons.
Which Sacred Herbs Were Added to the Smoke for Spiritual Protection?
You'll find that tobacco and sage were the primary herbs used for spiritual protection in sacred smoking. Tobacco acted as the spirit activator, while sage's purifying smoke was believed to ward off negative energies.
In Summary
You've now learned the sacred art of smoking pemmican using traditional Native American methods. By carefully selecting your wood, building the right fire, cutting meat properly, controlling temperature, and mastering timing and airflow, you'll create perfectly preserved pemmican. Don't forget to check weather conditions before you begin. These time-tested techniques will help you honor this ancient preservation practice and guarantee your success.

Leave a Reply