Indigenous tribes have mastered seven time-tested methods for drying and preserving food. You'll find sun-drying on flat stones as the most basic technique, followed by elevated wooden drying racks that maximize airflow. Smoking over green branches adds flavor while preserving meats and vegetables. Traditional hide-based platforms offer durability, while grass mat dehydration provides a portable option. Rock-pressed vegetable preservation creates thin, quick-drying pieces, and woven branch frameworks allow for seasonal adjustments. Each method demonstrates the deep understanding of natural preservation that Indigenous communities have developed over thousands of years, with techniques that hold countless ancestral secrets.
Sun-Drying on Flat Stones
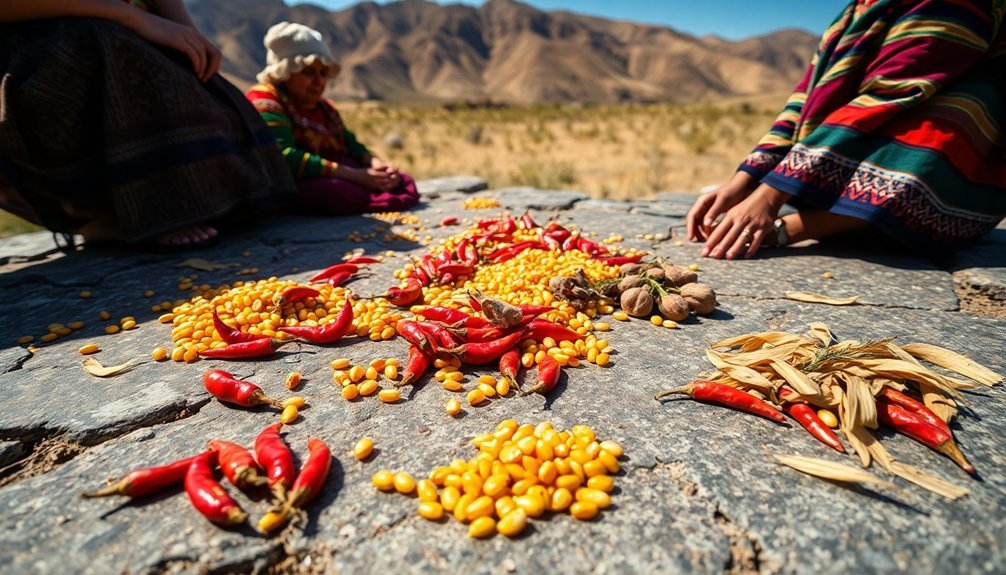
For thousands of years, Native American tribes have preserved food by sun-drying it on flat stones, a method that's both practical and culturally significant. You'll find this technique commonly used for drying corn kernels, wild berries, and buffalo meat, with each food requiring specific preparation before being laid out in single layers on clean, flat stones.
If you're interested in trying this method, you'll need to follow traditional practices carefully. First, you'll want to select a low-traffic area to prevent dust contamination. The River Yumans were especially skilled at this technique, as their proximity to waterways allowed them to dry abundant harvests of corn, beans, and melons. Before placing any food, you must wash the stones with hot, soapy water and let them air dry completely.
When you're ready to begin, you'll wash your hands thoroughly and use clean tools to handle the food.
What makes this method special is how it connects generations. You'll often see elders teaching younger family members the proper techniques, passing down not just a preservation method but cultural heritage as well.
While modern dehydrators exist, this traditional approach remains valuable because it's sustainable, requires minimal equipment, and reinforces community bonds through shared work and knowledge transfer.
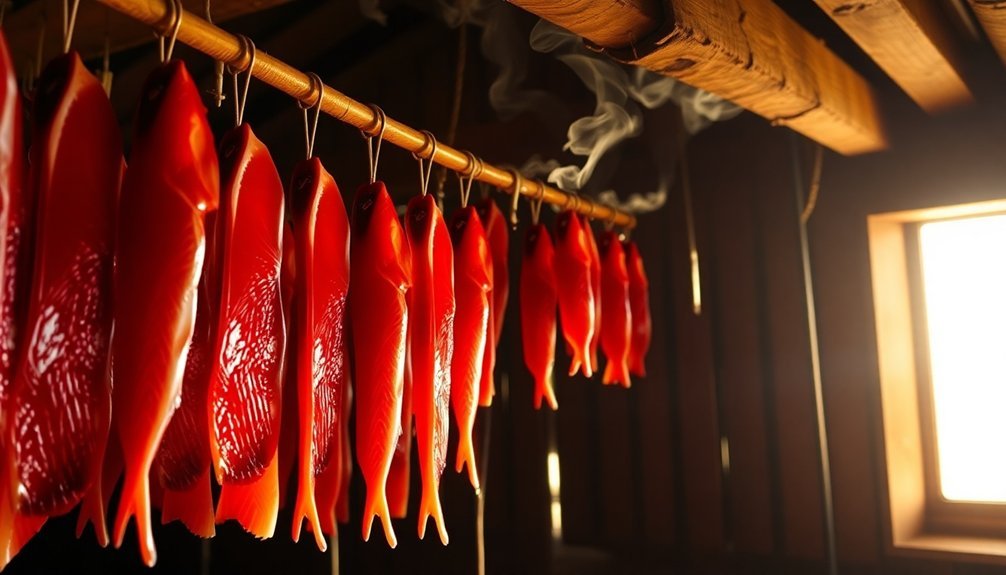
Elevated Wooden Drying Racks
You'll find that elevated wooden drying racks require careful selection of durable local woods and precise construction methods to withstand seasonal use.
The racks must be built with specific spacing between slats to maximize airflow while ensuring your food items won't fall through during the drying process. Seasonal hunting and fishing provided the primary food sources that needed preservation on these racks.
To maintain these traditional structures, you'll need to regularly inspect for loose joints, repair any weather damage, and treat the wood to prevent rot, especially in areas where the rack contacts moisture.
Construction and Material Selection
Traditional elevated drying racks rely on three primary materials: durable hardwoods like hickory and oak for the frame, natural fibers for binding, and mesh or woven surfaces for the drying platform.
You'll find that the construction process begins with selecting straight wooden pieces for the frame, which are then joined using natural binding materials made from bark or plant fibers. The frame's design follows a simple but effective pattern similar to picture frame construction. The indigenous tribes often crafted these structures using bone and horn tools for precise joining work.
For the drying surface, you'll need to weave plant materials like corn husks or grasses into a mesh-like pattern that allows air circulation while preventing food from falling through.
The integration of stones into the design serves a dual purpose: they provide stability for the structure and act as heat reservoirs during nighttime drying.
When you're building the rack, it's vital to position it where it'll receive ideal sun exposure while being protected from rain and excessive moisture.
You'll want to guarantee the rack stands at a comfortable working height, as the drying process often requires frequent turning and monitoring of the food items.
Design for Air Flow
In accordance with time-tested practices, proper air flow stands as the cornerstone of effective food drying. When you're designing elevated wooden drying racks, you'll need to focus on creating ideal air circulation to prevent spoilage and maintain food quality.
Start by raising your racks off the ground to allow air movement underneath, following the traditional methods used by Indigenous peoples who often utilized vigas and elevated platforms.
You'll want to space your slats or mesh materials appropriately to maximize air flow while preventing food from falling through. Consider how Native American tribes traditionally positioned their drying platforms on elevated grounds, incorporating natural wind patterns into their design.
When you're arranging food items, don't overcrowd them – proper spacing between pieces guarantees consistent drying and reduces moisture retention.
If you're working in direct sunlight, you'll need to incorporate adjustable covers that protect the food while maintaining ventilation. Remember that proper air circulation isn't just about preventing spoilage – it's essential for preserving nutritional value and flavor.
Monitor your drying process regularly and adjust the height of your racks based on environmental conditions to achieve the best results.
Traditional Rack Maintenance Tips
Maintaining elevated wooden drying racks extends their lifespan and guarantees ideal air circulation for your food preservation efforts. You'll need to clean your rack regularly with gentle solutions like vinegar and water, using a soft cloth to prevent scratches while removing dust and debris.
After cleaning, make sure you dry the rack thoroughly to prevent mold growth and maintain its structural integrity. Regular inspection of your drying rack is essential for long-term durability. Check for loose components, signs of wear, or structural issues. If you notice any problems, address them immediately by tightening screws or applying wood conditioner to prevent further damage.
Remember to store your rack in a dry location when it's not in use to avoid moisture-related issues.
- Rotate your rack's position periodically to guarantee even wear across all components, especially during heavy usage seasons.
- Sand wooden rungs lightly to maintain a smooth surface that won't snag or damage your drying foods.
- Apply wood sealant annually to protect against moisture and extend your rack's lifespan while maintaining food safety standards.
Always distribute weight evenly when loading food items and avoid exceeding the recommended weight capacity to prevent warping or structural damage.
Smoking Over Green Branches
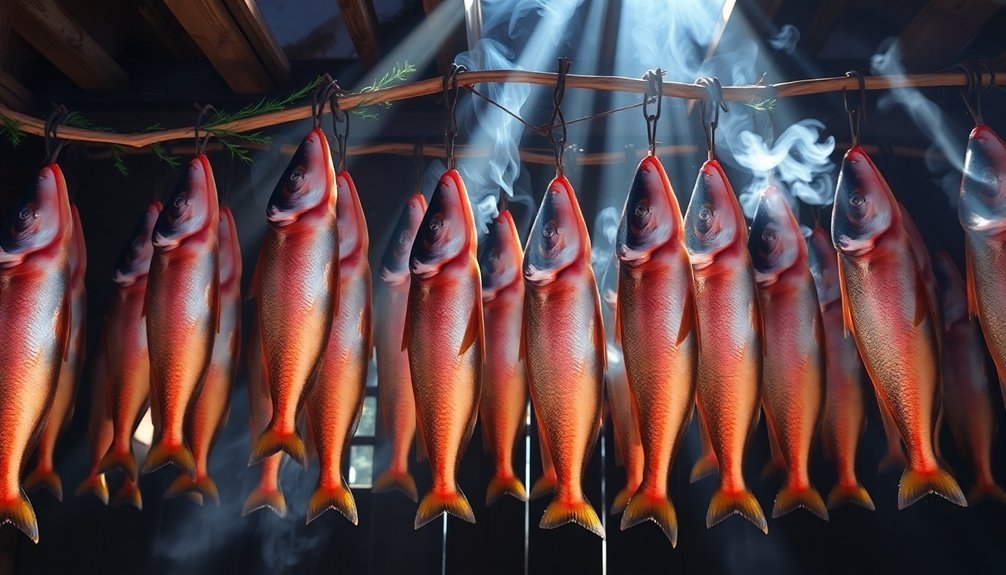
Food preservation experts rely heavily on smoking over green branches as a time-tested method for drying and preserving various foods. You'll find this technique particularly effective for meats and vegetables, as the smoke creates a protective barrier while slowly drying the food at lower temperatures.
When you're selecting branches for smoking, you can use willow, dogwood, or sumac leaves, each adding its own distinct flavors and preservation properties to your food. You'll want to choose your smoking materials based on both the type of food you're preserving and your regional traditions. The green branches shouldn't produce high heat; instead, they should generate a steady stream of smoke that'll coat your food with protective residues.
You can combine this smoking method with sun drying, especially if you're working in an indoor setting like a longhouse. While it's more labor-intensive than simple sun drying, you'll achieve better preservation results.
When you're smoking food over green branches, remember that it's not just about preservation – you're participating in a sustainable practice that reflects generations of Indigenous knowledge about seasonal cycles and local ecosystems.
Hide-Based Drying Platforms
While many assume hides serve primarily as drying platforms, traditional Indigenous practices actually focus on processing the hides themselves rather than using them to dry other foods.
You'll find that proper hide preparation requires thorough cleaning to remove flesh and membranes using bone or stick tools, followed by soaking in water mixed with wood ashes to remove hair. If you don't remove all flesh completely, the hide will rot.
Instead of using hides for drying platforms, Indigenous communities rely on alternative methods for food drying, including:
- Sun-drying screens specifically designed for corn, wild berries, and buffalo meat
- Rock platforms that provide stable, clean surfaces for laying out foods
- Wooden structures built to optimize airflow and prevent contamination
You'll notice these traditional drying methods often involve family and community collaboration, with multiple people working together to process foods efficiently.
The platforms must be kept meticulously clean, with regular washing using hot, soapy water to prevent contamination.
While modern food dehydrators offer convenience, these traditional methods continue to play a crucial role in preserving Indigenous cultural practices and maintaining traditional diets.
Grass Mat Dehydration
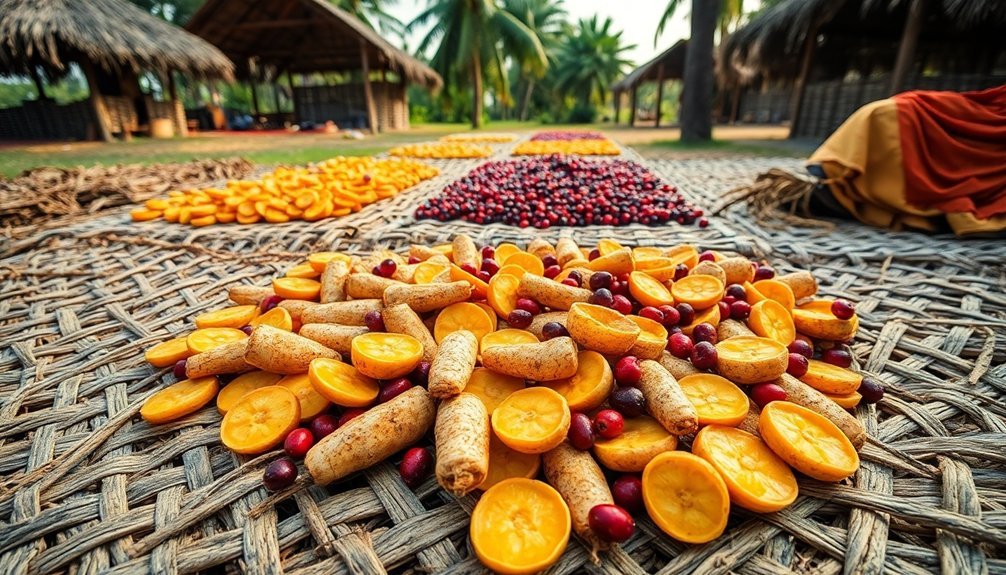
Traditional communities discovered that grass mats offered an ingenious solution for food dehydration, particularly when crafted from durable materials like Korai Grass or sedge grass.
You'll notice these mats start green when harvested but turn beige as they dry, releasing a distinctive scent reminiscent of sugarcane and crushed leaves.
When you're using grass mats for food drying, you'll want to spread your items evenly across the surface. Whether you're working with corn, wild berries, or vegetables, this method guarantees uniform drying.
You'll find it's best to place these mats in low-traffic areas to protect your food from dust and contamination.
You can combine this technique with other preservation methods, such as smoking for meats. For foods like squash, you'll need to flatten the strips first using a bone or rock before laying them on the mat.
Once you've dried your food, proper storage in lined pits or dedicated structures becomes essential for long-term preservation.
This sustainable method has been passed down through generations, and you'll appreciate its simplicity and effectiveness in preserving a wide variety of foods for your community.
Rock-Pressed Vegetable Preservation
Nature's earliest press originated with rocks and bones, tools that indigenous communities masterfully used to prepare vegetables for preservation. If you're looking to understand this time-tested method, you'll find that vegetables like squash were first cut into strips, then flattened using rocks or bones. This vital flattening step wasn't just about changing shape – it made the vegetables thinner and more suitable for even drying.
You'll want to follow these essential steps for rock-pressed preservation:
- Cut your vegetables into uniform strips that you can easily flatten
- Press them using smooth rocks or bones until they're consistently thin
- Place the flattened strips on flat rocks, grass mats, or hides for sun drying
Once you've completed the pressing process, you'll need to dry your vegetables thoroughly. Regular turning guarantees even dehydration, while keeping pests away remains vital.
You can store your finished products in containers made from natural fibers or bark, either in clay-lined storage pits or elevated structures. Remember, proper storage in cool, dry places will help maintain your preserved vegetables' longevity.
Woven Branch Framework Drying

When building a woven branch framework for drying foods, you'll need to select flexible young branches that can be bent and interwoven to create a sturdy drying surface.
You'll want to adjust the height of your framework seasonally – lower in summer to capture maximum sun exposure and higher in autumn to avoid ground moisture and frost.
The careful selection of branch materials and proper construction techniques will determine how well your framework supports the weight of drying foods while maintaining adequate airflow.
Construction and Branch Selection
Building an effective woven branch framework starts with selecting the right materials from your local environment. You'll need to choose sturdy branches that can withstand the weight of food items while maintaining proper airflow.
When you're gathering materials, focus on branches that aren't too brittle or green, as these won't provide the stability needed for long-term use.
The construction process requires careful attention to weaving techniques that guarantee your framework remains stable and elevated. You'll want to create a design that's both portable and adaptable to your specific needs, especially if you're part of a nomadic community.
Remember that proper elevation is essential for air circulation and preventing contamination from ground-level threats.
- Select branches with similar thickness for uniform weaving patterns
- Test each branch's flexibility before incorporating it into your framework
- Position cross-supports every few inches to maintain structural integrity
Once you've assembled your framework, you'll need to test its stability before use. The structure should be sturdy enough to hold your drying mats or screens while allowing adequate airflow through the gaps in the weaving.
Seasonal Height Adjustments
Seasonal changes demand careful adjustments to your woven branch framework's height throughout the year.
You'll need to modify the structure's elevation to accommodate different drying methods based on available foods and environmental conditions. During warmer months, you'll want to raise the framework higher to maximize sun exposure for fruit drying, while keeping adequate airflow to prevent spoilage.
In colder seasons, you'll need to lower the framework to better utilize smoke from fires below, especially when preserving meats and vegetables. Your framework's height should allow smoke to thoroughly penetrate the food while maintaining a safe distance from direct heat.
When combining sun and smoke drying, as with squash rings, you'll want to position the framework at a medium height that balances both elements.
You'll find that different foods require specific height adjustments. For berries and smaller fruits, a higher placement helps prevent moisture accumulation, while fish and meat benefit from lower positioning near the smoke source.
Remember to take into account your storage containers' accessibility when setting framework heights, ensuring you can easily transfer dried foods to bentwood boxes and baskets.
Frequently Asked Questions
How Long Does Traditionally Dried Food Remain Safe to Eat?
If you've properly dried and stored your food in dry, smoky conditions, it'll remain safe to eat for up to a year or longer. Your dried meats, fruits, and vegetables can last several months with proper storage.
What Signs Indicate Food Has Been Dried Properly?
You'll know food's dried properly when it's brittle for leafy vegetables, leathery for fruits, and hard for meats. There shouldn't be any moisture, and items should feel dry and slightly sharp when touched.
Which Weather Conditions Are Unsuitable for Traditional Food Drying?
You shouldn't dry food during rainy conditions, when humidity's above 60%, or temperatures are below 86°F. Watch out for stagnant air and cold weather too – they'll prevent proper drying and risk spoilage.
Can Traditional Drying Methods Be Adapted for Urban Environments?
You can adapt traditional drying methods for urban living by using food dehydrators, indoor drying racks, or balcony spaces. Modern tools and community resources make it practical to preserve food in city environments.
How Do Tribes Protect Drying Food From Insects and Animals?
You'll need to monitor food constantly, use elevated screens to block insects, and set up barriers against animals. Don't forget to turn food regularly and keep your workspace clean to prevent contamination.
In Summary
You've now learned seven time-tested methods that indigenous tribes have used for generations to preserve their food. Whether you're drying fish on stones, building elevated racks, or smoking meat over green branches, these techniques don't require modern technology. You'll find these methods are sustainable, effective, and still relevant today. Try incorporating these traditional preservation methods into your own food storage practices.


Leave a Reply