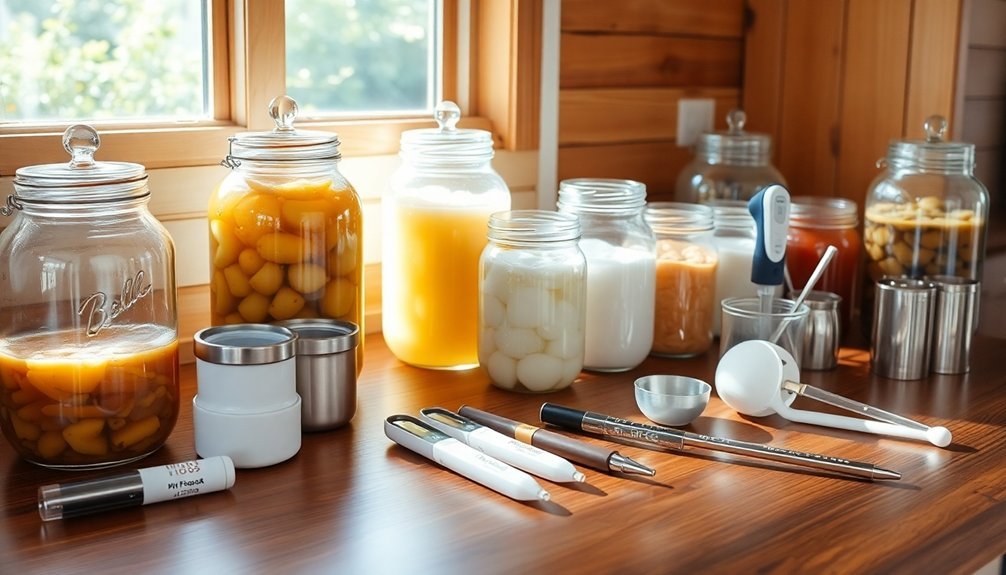
You'll need several key tools to guarantee successful home fermentation. Start with wide-mouth glass Mason jars, non-iodized salt, and weights to keep vegetables submerged in brine. A kitchen scale helps measure precise salt ratios, while pH strips or meters monitor fermentation progress. Don't forget essential equipment like a tamper for packing vegetables and airlocks to manage CO2 release. A clean workspace and consistent temperature (15-30°C) are vital for best results. Whether you're making kimchi or sauerkraut, these fundamental tools and proper monitoring will transform your fermentation journey from guesswork to assured success.
Equipment Fundamentals
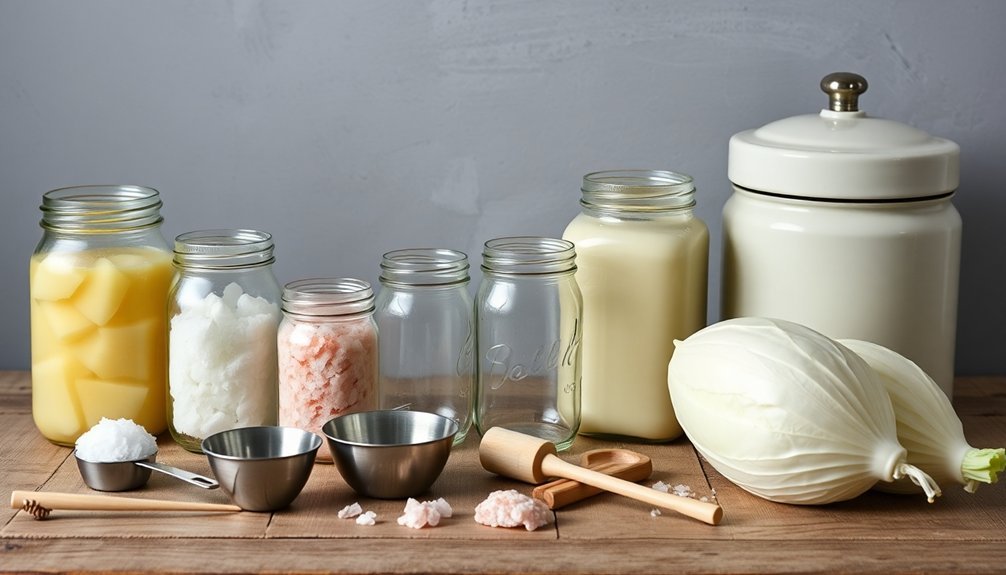
When starting your fermentation journey, selecting the right containers and tools makes all the difference in achieving successful results. Wide-mouth Mason jars are your best starting point, offering easy access and sufficient space for fermentation expansion. Stone weights are particularly effective for larger batches due to their durability and weight.
For larger batches, you'll want to take into account half-gallon jars or 2.5-liter fermentation crocks, which come equipped with water-lock lids and glass weights.
You'll need proper air control mechanisms to guarantee successful fermentation. Air locks or pickle pipes are essential tools that allow carbon dioxide to escape while keeping oxygen out. If you don't have these specialized tools, you'll need to manually "burp" your jars to release built-up gases.
Keeping vegetables submerged under brine is vital, and you've got several options for weights. Glass weights are ideal, but you can also use cabbage leaves or water-filled plastic bags as alternatives.
Don't forget to equip yourself with a vegetable tamper to pack down your produce and release essential juices. A fine-mesh colander and kitchen scale will help you prepare ingredients precisely, while a funnel will make filling narrow-mouth containers much easier.
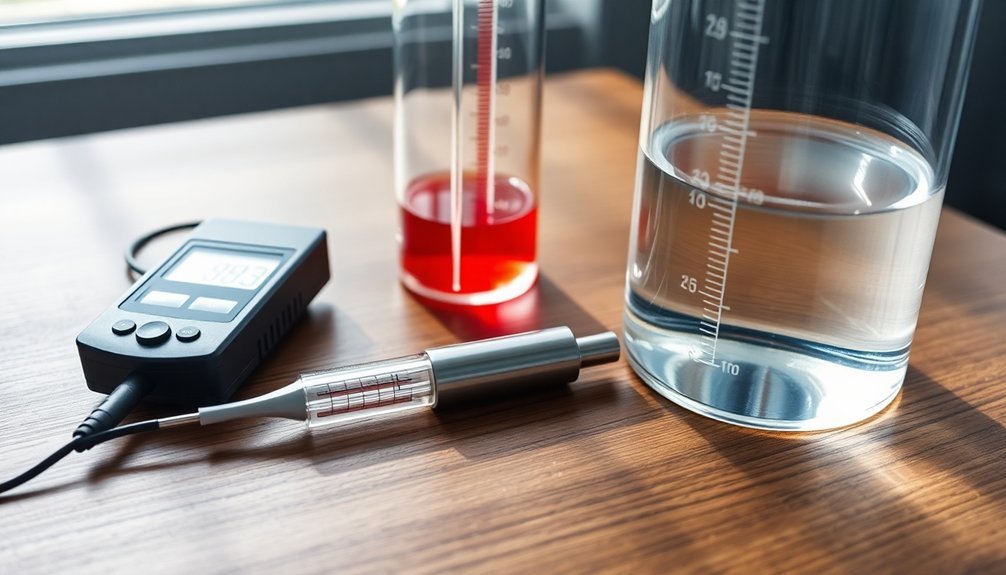
Precision Measurement Tools
Measuring fermentation progress accurately requires specialized tools that go beyond basic kitchen equipment. For home fermentation, you'll need reliable pH measurement tools to monitor acidity levels effectively. pH strips offer a basic solution, while digital pH meters provide more precise readings and often include temperature monitoring capabilities.
You'll want to track temperature consistently, as it greatly impacts fermentation rates and product quality. Digital thermometers that can provide continuous monitoring are ideal, helping you maintain ideal conditions throughout the process. Advanced monitoring systems utilize multivariate analyses to evaluate fermentation curve characteristics.
For more advanced home fermentation projects, consider investing in tools that can measure multiple parameters simultaneously. While professional-grade analyzers like the YSI 2500 or Cedex Bio aren't practical for home use, you can still achieve excellent results with simpler tools.
Focus on acquiring accurate pH measurement devices and reliable temperature monitors – these are your most essential precision tools for home fermentation success. Keep in mind that consistency in measurement is key; even basic tools, when used properly and regularly, can help you maintain quality control and achieve reproducible results in your fermentation projects.
Jar Selection Guide
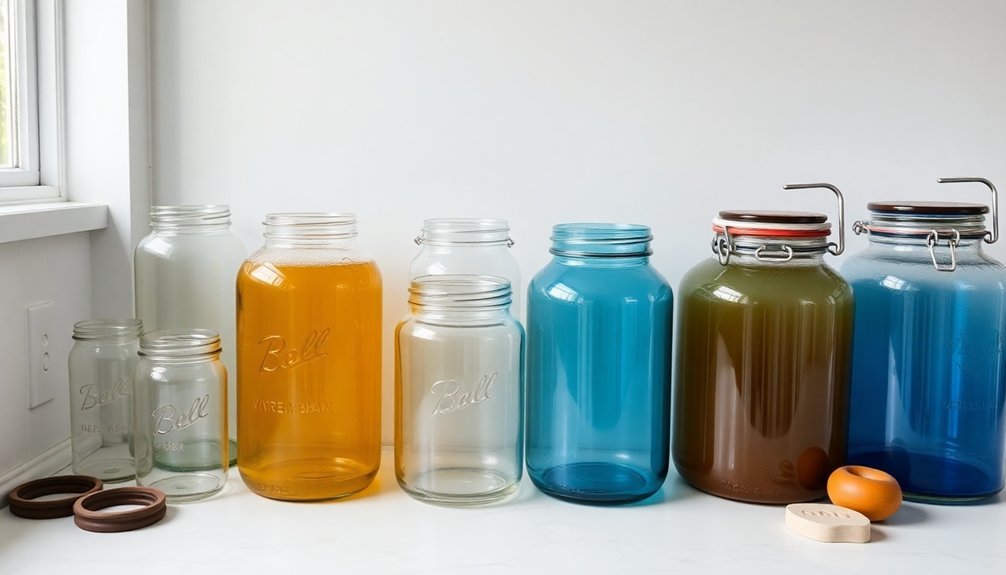
Beyond precision tools, proper jar selection forms the backbone of successful home fermentation. For beginners, glass jars offer the most practical and versatile option, with Mason jars being particularly user-friendly. You'll find they're readily available, affordable, and come in various sizes to suit your needs.
When selecting your fermentation vessels, prioritize glass containers for their non-reactive properties and transparency, which lets you monitor your ferments easily. Glass won't leach chemicals into your food and maintains its integrity through multiple uses. Water sealed crocks provide an excellent airtight seal that prevents oxygen from entering while allowing CO2 to escape.
You'll appreciate how easy they're to clean and sterilize.
Your choice of lid system greatly impacts fermentation success. Standard screw-on lids work well for most projects, though you'll need to "burp" them regularly to release excess pressure.
If you're looking for a more sophisticated option, consider lever lid systems like those found in Le Parfait jars. They provide excellent airtightness and accommodate larger weights, though you'll need to replace the rubber seals periodically.
Either system works effectively for home fermentation, but make sure whichever you choose maintains a proper seal throughout the process.
Air Management Systems
Proper air management stands at the heart of successful fermentation, especially when you're working to create the perfect anaerobic environment. Your primary goal is to let carbon dioxide escape while preventing oxygen from entering your fermentation vessel. This is where airlocks become your most valuable tool.
You'll find that water-seal airlocks are particularly effective for home fermentation. They create a simple but ingenious barrier where CO2 can bubble out through the water while blocking outside air from entering. You won't need to constantly "burp" your jars, and you'll maintain the ideal environment for your lactic acid bacteria to thrive.
If you're working with larger batches, you'll want to monitor CO2 levels to keep them below 5%, as excessive buildup can inhibit fermentation.
Keep your ferments submerged in brine to create an additional oxygen barrier. While temperature isn't directly related to air management, it's essential to maintain consistent conditions – you'll get the best results by keeping your ferments at room temperature and ensuring even moisture distribution throughout your vessel.
Salt and Brine Basics
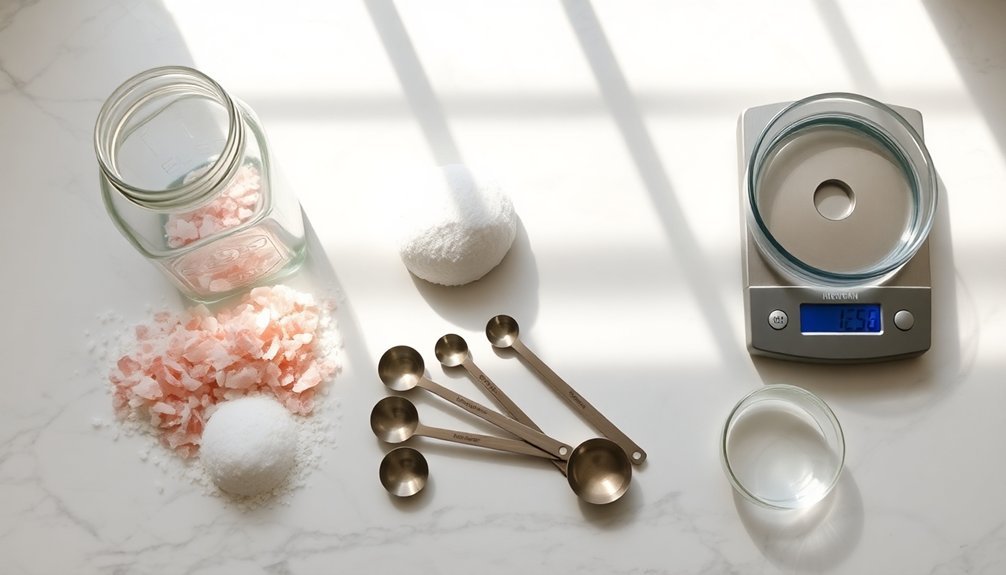
Salt sits at the foundation of successful fermentation, acting as both guardian and catalyst in your home projects.
You'll need to select the right type of salt – stick with non-iodized options like kosher, pickling, or sea salt, as table salt's iodine content can interfere with fermentation success.
When it comes to applying salt, you'll choose between two methods: dry salting or brining.
Dry salting works best for shredded vegetables like cabbage for sauerkraut, while brining suits whole vegetables like cucumbers. For brining, maintain a 2-3% salt concentration for ideal results – that's about 20g of salt per liter of water.
- Feel the satisfaction of watching salt draw moisture from your vegetables, creating the perfect environment for beneficial bacteria
- Experience the pride of maintaining centuries-old preservation techniques
- Enjoy the confidence of knowing you're creating safe, healthy ferments
- Savor the crunch of perfectly preserved vegetables
- Marvel at the transformation as salt works its ancient magic
Remember to measure your salt precisely using a kitchen scale – this isn't the time for eyeballing measurements.
Getting your salt ratios right guarantees both safety and success in your fermentation journey.
Temperature Control Equipment
Maintaining precise temperature control stands as a critical element in successful fermentation. You'll need reliable tools to monitor and regulate temperature throughout your fermentation process. Digital thermometers with probe attachments offer accurate, continuous readings and can be easily secured to your fermentation vessels.
For cooling needs, you've got several effective options. If you're working with smaller batches, a simple refrigerator or freezer setup can maintain consistent temperatures. For larger vessels, consider glycol jackets or cooling plates that attach directly to your fermentation tanks.
When heating's required, brew belts wrap conveniently around your vessels to achieve ideal temperatures. You'll want to match your temperature control equipment to your specific setup. Consider your vessel size, desired temperature range, and process volume when selecting your tools.
For precise control, look for units with programmable features that can maintain specific temperature ranges automatically. If you're using jacketed vessels or internal coils, verify your temperature control unit's capacity aligns with your system's requirements.
Remote monitoring capabilities can be particularly useful, allowing you to track temperature changes without constantly checking your fermentation setup.
Monitoring and Testing Devices
Three vital monitoring devices form the backbone of successful home fermentation: pH meters, multi-parameter probes, and testing strips. Your ability to maintain ideal fermentation conditions depends heavily on accurate monitoring of pH levels and other essential parameters.
While pH meters provide precise measurements, testing strips offer a quick and cost-effective alternative for routine checks. Multi-parameter probes can simultaneously track pH, temperature, and Redox potential, giving you extensive control over your fermentation process.
To guarantee reliable results, you'll need to calibrate your monitoring devices regularly using standard solutions and maintain them properly. Consider integrating these tools with your fermentation vessels, such as glass jars or crocks, for seamless monitoring.
- You'll feel confident knowing exactly when your ferment has reached its perfect pH
- You'll experience the satisfaction of consistent results batch after batch
- You'll avoid the frustration of failed ferments due to incorrect conditions
- You'll enjoy peace of mind with real-time monitoring capabilities
- You'll master the art of fermentation through data-driven decisions
When choosing monitoring devices, consider factors like cost, ease of use, and space requirements to find the right balance for your home setup.
Workspace Setup Essentials
With your monitoring tools in place, let's focus on creating an efficient workspace that'll set you up for fermentation success.
Start by selecting a room where you can maintain temperatures between 15°C and 30°C, as consistent temperature is essential for predictable fermentation rates. You'll want to set up your workspace on sturdy platforms or countertops that can support the weight of multiple fermentation vessels.
Keep your workspace meticulously clean and organized with easy access to essential tools like measuring utensils, mixing spoons, and cheesecloth.
Store your glass fermentation vessels nearby – whether you're using Mason jars, Le Parfait containers, or specialized fermentation jars. Don't forget to include fermentation weights to keep vegetables submerged under brine.
If you're planning advanced fermentation projects, you'll need to take into account ventilation requirements and possibly incorporate cooling fans or heating elements to maintain ideal conditions.
Set up your workspace near an electrical outlet if you'll be using temperature control devices. Keep your refrigerator accessible for storing finished ferments, and organize your supplies so you can maintain a smooth workflow during your fermentation projects.
Frequently Asked Questions
What Happens if My Fermented Vegetables Develop a White Film on Top?
If you notice a white film, it's likely kahm yeast. You can skim it off, check for off-odors, and continue fermenting. Just guarantee you've kept proper salt levels and temperature for future batches.
Can I Reuse the Brine From a Previous Successful Fermentation?
Yes, you can reuse brine from successful ferments! It'll jumpstart new batches by providing beneficial bacteria and reducing fermentation time. Just add it to fresh vegetables along with some additional salt for best results.
How Do I Know When My Fermented Vegetables Are Ready to Eat?
You'll know your fermented vegetables are ready when they have a tangy flavor, pleasant aroma, and desired texture. Taste them after a week – if they're sour enough for you, they're ready to eat.
Why Do Some of My Ferments Taste More Sour Than Others?
Your ferments' sourness varies due to differences in fermentation time, temperature, salt levels, and the types of bacteria present. Longer fermentation periods and warmer temperatures typically create more sour flavors in your vegetables.
Can I Mix Different Vegetables in the Same Fermentation Jar?
Yes, you can mix different vegetables in the same jar! It's a great way to create unique flavor combinations. Just make sure all veggies are cut to similar sizes for even fermentation rates.
In Summary
You're now equipped with the essential tools for successful home fermentation. From precise measurement tools to proper jar selection, air management, and temperature control equipment, you've got what you need to create delicious fermented foods. Remember to maintain a clean workspace and use quality monitoring devices. With these fundamentals in place, you'll be ready to start your lactic fermentation journey with confidence.


Leave a Reply