
You can replace traditional jelly bags with several household items for effective juice straining. Cheesecloth folded into multiple layers offers excellent filtration when secured over a bowl or colander. Clean muslin or unbleached cotton fabric works well as a reusable alternative, while fresh nylon stockings or tights provide minimal juice absorption. Flour sack towels and fine mesh bags from hardware stores serve as durable options. For best results, layer your chosen material and create a stable setup that allows for overnight draining. These simple alternatives will help you achieve crystal-clear juice, and there's plenty more to discover about perfecting your straining technique.
Essential Alternatives to Jelly Bags
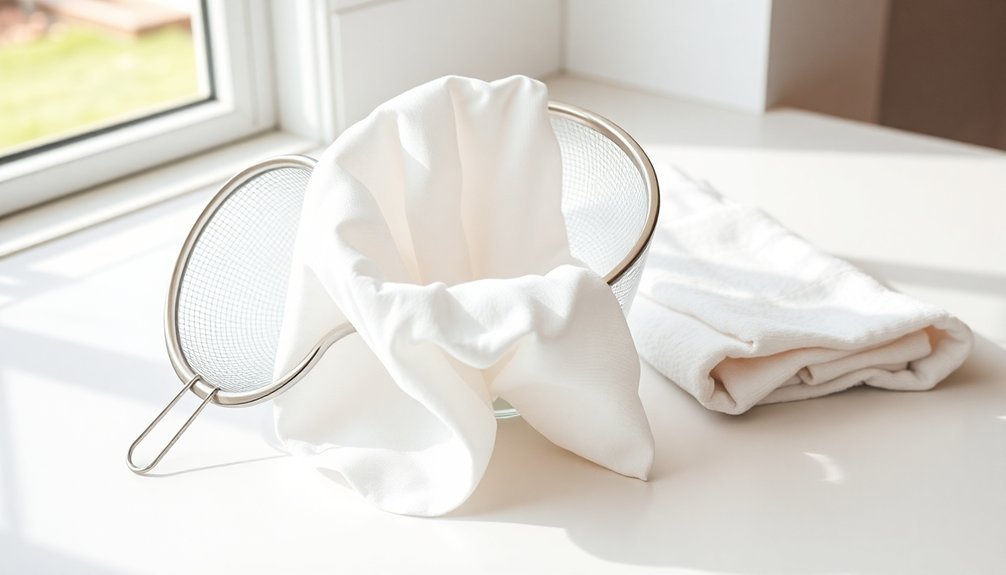
When making homemade jelly, you don't need to stick with traditional jelly bags – several effective alternatives can deliver similar or even better results. You'll find common household items that can serve as excellent straining solutions while saving money and reducing waste.
Muslin or unbleached cotton fabric stands out as a versatile option. You'll want to fold the fabric multiple times to create an effective filter, then secure it in a colander or fashion it into a makeshift bag using twine. For best results, choose firm, unbleached muslin or cotton flannel with the napped side turned inward. Dripping overnight will ensure you get the clearest juice possible.
Nylon stockings or tights offer another practical solution, especially since they don't absorb as much juice as cotton materials. You can stretch them over a frame or hang them to drip, and they're incredibly easy to clean for repeated use.
To maximize your juice yield, try pre-straining the pulp through a sieve first.
For larger batches, consider using a food mill or strainer. While it's particularly effective with soft berries and cooked fruits, you might need additional straining to remove finer pulp particles.
You'll find these tools readily available at hardware stores or online retailers.
Using Cheesecloth for Juice Straining
To achieve effective juice straining with cheesecloth, you'll need to fold it over multiple times to create four distinct layers of tightly woven fabric.
You can maximize filtration by first dampening your cheesecloth with water, which prevents excess juice absorption during the straining process.
When preparing your setup, make sure you've secured the edges of your layered cheesecloth firmly over a colander or straining stand to prevent any mishaps while filtering. While this method may produce slightly cloudier juice compared to jelly bags, it remains an accessible and effective alternative.
Proper Layering Techniques
Getting the layering right with cheesecloth stands out as the most critical step for successful juice straining. You'll need to create multiple layers of cheesecloth to achieve proper filtration, as a single layer won't be sufficient to catch all the particles in your juice.
Start by selecting a piece of cheesecloth that's large enough to wrap around your strainer with extra material to gather at the corners. You'll want to fold the cloth four times to create the necessary thickness for effective filtration. Clear, smooth juice results when you properly strain through cheesecloth, eliminating any gritty textures.
If you're using muslin or cotton flannel as alternatives, remember to turn the napped side inward for better results.
When you're setting up your layers, make certain they're even and properly aligned. You don't want any gaps or thin spots that could compromise the straining process.
Position the layered cloth over your strainer or colander, leaving enough excess material on all sides so you can gather and twist it later. Secure the edges firmly to prevent any shifting or collapsing during the straining process.
This careful attention to layering will help guarantee your juice comes out clear and free of unwanted particles.
Best Folding Methods
Mastering the proper folding techniques for cheesecloth guarantees ideal juice straining results. You'll want to start with a piece that's large enough to gather into a bag shape, ensuring you have sufficient material to work with when folding and twisting later.
Begin by dampening your cheesecloth to prevent it from absorbing too much of your precious juice. Then, layer it over your fine-mesh strainer, making sure you've got enough overhang on all sides. If you're working with particularly fine mixtures, you can fold the cloth multiple times to create several layers for more effective straining.
Once you've positioned your cloth, gather the corners together to create a secure pouch. You'll want to twist these corners tightly to prevent any accidental spills during the straining process.
If you're planning to suspend the cloth, make sure you've created a sturdy gathered section that can support the weight of your mixture. Remember to leave enough slack in the middle of your pouch to hold your mixture without risking tears or splits in the fabric.
When you're ready to extract the final drops, twist the gathered corners firmly while applying even pressure.
Muslin as a Straining Solution

Muslin fabric stands as a reliable and cost-effective alternative to traditional jelly bags when you're straining homemade juice. You'll want to select firm, unbleached muslin or cotton flannel, folding it into four layers to create an effective filter. Make sure to turn the napped side inward for ideal straining results.
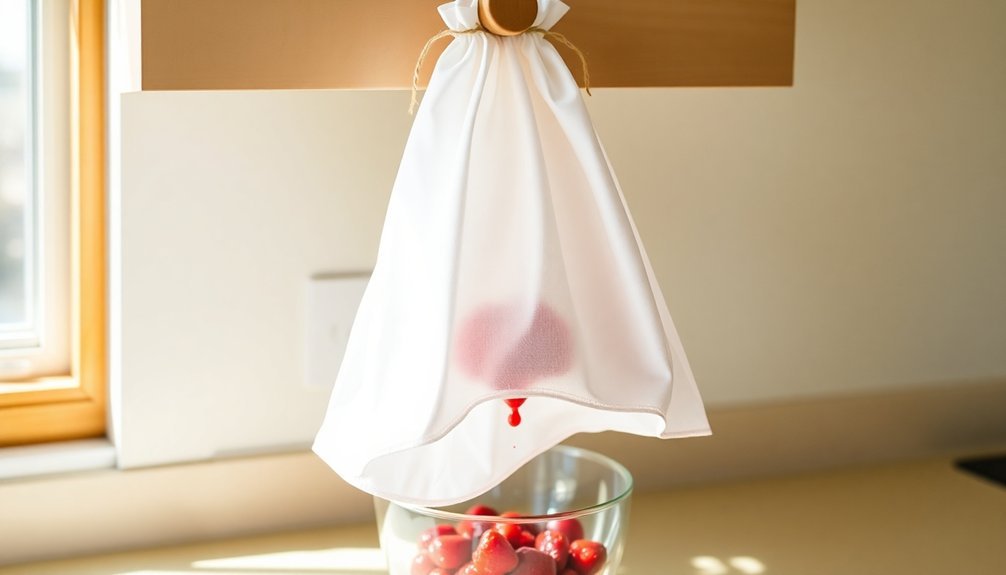
To set up your muslin strainer, dampen the fabric first to prevent excessive liquid absorption. You can either tie the muslin into a square and hang it from a cabinet knob or line a colander with it. If you're using the hanging method, secure it tightly to avoid any spills.
Let the juice drip naturally for at least two hours or overnight for the best results. Don't squeeze or press the muslin while straining, as this will make your jelly cloudy. Instead, let gravity do the work.
Once you're done, wash your muslin thoroughly before storing it in a clean, dry place. You'll be able to reuse it multiple times, making it an economical choice for your kitchen. This versatile material works well for various straining tasks beyond jelly making, offering you a sustainable solution for your culinary needs.
Old Tights Straining Method
You'll need to start with clean, fresh tights and cut off a leg section to create your makeshift straining tool.
Double up your tights to prevent stretching and guarantee effective straining of your yogurt, jam, or jelly mixtures.
Set up your straining station by securing the doubled tights over a large bowl, making sure there's enough depth for the liquid to drain properly.
Clean and Prep Tights
Many home cooks overlook the potential of old nylon tights as an effective straining tool. Before you use them for straining, you'll need to properly clean and prepare them to guarantee food safety and peak performance.
Start by handwashing your old tights in cool water with a gentle laundry detergent to remove any dirt or residue. If there are lingering odors, soak them in a mixture of 1/4 cup vinegar and tepid water for up to 30 minutes.
After cleaning, lay the tights flat on a drying rack or hang them to air dry. Don't use your dryer, as the heat can damage the nylon material and reduce its effectiveness.
Once they're completely dry, cut the legs into sections based on your straining needs. You'll want to stretch these pieces tightly over your straining container to create an even surface that won't let unwanted particles through.
The nylon material is particularly effective because it won't absorb much liquid, making it more efficient than cotton alternatives. Keep your tights clean between uses by washing them after each straining session, and store them in a cool, dry place to maintain their elasticity and durability.
Creating Effective Straining Setup
A sturdy straining setup forms the backbone of successful jelly-making with old tights. To begin, you'll need to cut off the foot portion of your old tights and knot the open end securely. Stretch the tights over your chosen container, ensuring they're firmly attached to prevent any accidents during the straining process.
For your container setup, you've got several options. You can use a tall yoghurt container with the bottom removed, placing it inside a blender jug or bowl for stability. If you prefer, a stand with a stitched rim or even a PVC pipe arrangement will work effectively.
Whatever you choose, make sure it's stable and away from any potential disturbances. To maximize straining efficiency, secure the tights tightly around your container to prevent leaks. If you need finer straining, double up the tights or consider combining them with a food mill.
Pour your mixture slowly through the tights, allowing it to drip freely into the container below. Remember, old tights work better than new ones due to their worn, breathable material, and they're often more effective than single-use alternatives like cheesecloth.
The Pillowcase Straining Technique
Confusion often surrounds the pillowcase method when it comes to jelly straining, but here's the truth: it's not actually a straining technique at all.
The pillowcase method is exclusively used in quilting, where it's a technique for finishing quilts without binding. You won't be able to use this method for straining juices or making jellies, as it's designed for fabric work, not kitchen tasks.
If you're looking to strain juice for jellies, you'll need to use proper straining methods instead. Here's what you can try:
- Use multiple layers of cheesecloth, which you can find in most grocery stores.
- Invest in a proper food mill or strainer designed specifically for juice extraction.
- Purchase fine cheesecloth from cheesemaking suppliers for better filtration.
- Create a DIY stand using a yogurt container to support a proper jelly bag.
Don't be misled by the name "pillowcase method" – it won't help with your jelly-making endeavors.
Instead, focus on proven straining techniques that are designed for juice extraction and will give you the clear, seed-free results you're looking for in your jelly-making process.
Food Mills and Juice Extraction
When you're using a food mill for juice extraction, you'll need to prepare your fruits by washing them thoroughly and removing any stems or damaged portions.
You can process both raw and cooked fruits through the mill, but you'll get the best results by turning the crank at a steady pace while applying gentle pressure.
For crystal-clear juice, you'll want to follow up your food mill straining with a cheesecloth or jelly bag, as the mill alone won't catch all the fine particles.
Efficient Food Mill Operation
Operating a food mill effectively requires proper setup and understanding of its components. You'll need to start by securely clamping the base and properly aligning the metal spring and plastic spiral over the internal stake. Make sure the screen with its gasket is firmly pushed over the spiral and locked in place with a quick turn.
For ideal juice extraction, follow these essential steps:
- Fit the crank lever and post into the sieve plate, ensuring the spring and crossbar mechanism are properly engaged.
- Process heated ingredients only after they've cooled to prevent warping and burns.
- Run the waste through the mill a second time to maximize pulp extraction.
- Use appropriate disc sizes based on your desired consistency – smaller holes for finer purees, larger ones for faster processing.
You can enhance your results by combining the food mill with additional straining methods. While the mill effectively removes seeds and skins, you might want to use a fine-mesh strainer or multiple layers of cheesecloth for clearer juices.
The spacing between holes in your chosen sieve will affect both the texture and processing speed, so select accordingly based on your needs.
Preparing Fruits and Vegetables
Before processing fruits and vegetables in a food mill, proper preparation guarantees ideal juice extraction and smooth operation. You'll need to break down larger or firmer produce into manageable pieces that your food mill can handle efficiently. This pre-processing step helps prevent strain on the equipment and assures better results.
Start by removing any obvious blemishes or unwanted parts from your produce. If you're working with particularly firm fruits or vegetables, you might want to simmer them first to soften their texture. Using an immersion blender can help break down tougher pieces before they go through the mill.
When you're ready to process, consider using a coarse sieve first to remove the largest pieces – this will make the subsequent straining more effective. Your food mill will separate the soft pulp from seeds, peels, and core tissue, but you may need additional straining for the smoothest consistency.
If you're aiming for crystal-clear juice, you can let gravity do the work by straining the mixture overnight through multiple layers of cheesecloth or muslin. Remember that proper straining takes time, so don't rush the process.
Juice Clarity Tips
Crystal-clear juice requires more than just running produce through a food mill. While food mills effectively separate seeds and skins from fruit, they won't give you the pristine clarity you're looking for in your final product. You'll need to implement additional straining methods to achieve that perfect transparency.
For the clearest possible juice, follow these essential steps:
- Start with a food mill to remove the largest particles, selecting one with properly spaced holes to prevent clogging and guarantee smooth processing.
- Layer four sheets of tightly woven cheesecloth or use a single layer of unbleached muslin with the napped side turned inward.
- Line a colander with your chosen straining material and pour the milled juice through it.
- Allow the juice to drip naturally overnight without pressing or squeezing.
If you're using muslin or cotton flannel, you'll find these materials more cost-effective than cheesecloth since they're reusable.
While pillowcases might seem like a convenient alternative, they're not as efficient as purpose-made straining materials.
Remember to avoid coffee filters, as they'll quickly become clogged and halt the straining process.
Creating DIY Straining Stands

Setting up a DIY straining stand doesn't require fancy equipment or expensive materials. You can create a stable straining system using common household items like a tall yogurt container with its bottom cut out. Simply place this container inside a blender jug or bowl for added stability, then secure your straining material with a rubber band around the rim.
For the straining setup, you've got several practical options. You can suspend your makeshift jelly bag over a bowl, hang it from a cabinet knob, or use a colander lined with cotton fabric. If you're working with larger quantities, consider creating multiple support points to prevent the system from tipping over.
When assembling your stand, prioritize stability and convenience. Position your straining system at an elevated height to maximize juice extraction, and guarantee it's placed in a clean area away from pets and children.
You'll want to select an arrangement that's easy to set up and dismantle for storage. For extra stability, secure all components firmly, and place a catch container underneath to prevent any messy spills during the straining process.
Multi-Layer Straining Systems
While a basic straining stand provides structure, the real magic happens with multi-layer straining systems. You'll need fine, closely woven cheesecloth as your primary material, since hardware store varieties are often too coarse for effective straining. To create an efficient filtering system, you'll want to fold the cheesecloth multiple times, using at least four layers to achieve thorough filtration.
For ideal results, follow these essential steps:
- Secure your folded cheesecloth tightly over a colander or fashion it into a bag with twine.
- Position a catch bowl underneath to collect the strained liquid.
- Check frequently for proper filtration of seeds, skin, and pulp.
- Replace the cheesecloth when it shows signs of wear to maintain effectiveness.
While this method is more labor-intensive than using a traditional jelly bag, it's an affordable alternative that can produce similar results.
You'll need to be patient as the straining process takes time, and you may need to repeat the process to achieve the desired clarity. Remember to maintain tension on the cloth throughout the straining process to prevent any unwanted particles from slipping through.
Natural Fiber Straining Methods

In addition to commercial jelly bags, natural fiber materials offer reliable options for straining homemade juices and jellies. Cotton muslin stands out as a cost-effective choice when you fold it multiple times to create the necessary thickness for straining fine pulp particles.
| Material | Benefits | Limitations |
|---|---|---|
| Cotton Muslin | Inexpensive, reusable | Needs multiple layers |
| Cheesecloth | Widely available | Often too coarse, single-use |
| Cotton Flannel | Good filtration | May retain juice |
You'll find that cotton materials work best when you line a colander or fashion them into a makeshift straining bag. If you're using cheesecloth, select finer grades from cheesemaking suppliers rather than hardware store varieties, and fold it into at least four layers for effective filtration. A cotton pillowcase can serve as a large straining bag, though you'll need to watch for potential tearing under pressure.
For stability, secure your chosen material with rubber bands or twine, and consider pre-straining through a sieve to remove larger solids. You can improve juice clarity by allowing it to settle for several days after straining.
Choosing Your Straining Material
Selecting the right straining material can make or break your jelly-making success. You'll want to take into account both effectiveness and practicality when choosing your straining solution. While traditional jelly bags have their place, you've got several reliable alternatives at your disposal.
For best straining results, examine these tested options:
- Use unbleached muslin or cotton flannel in a colander, positioning the napped side inward for better filtration – you'll need multiple layers for best results.
- Try nylon stockings in a 'nude' color, which won't release dyes and won't absorb as much juice as cotton materials while allowing effective squeezing.
- Invest in nylon mesh soup bags with convenient drawstrings if you're planning to strain larger quantities regularly.
- Set up a sturdy support system using a modified yogurt container or cabinet handles to suspend your chosen straining material.
Avoid common pitfalls like using hardware store cheesecloth, which is typically too coarse, or coffee filters that clog almost immediately.
If you're using natural fibers like muslin or cheesecloth, remember to layer them at least four times for adequate filtration. For heavier straining tasks, think about combining methods, such as using a food mill first, followed by fine straining.
Setting Up Your Straining Station

Now that you've chosen your straining material, proper setup of your straining station will determine how smoothly your jelly-making process flows.
You'll need to create a stable setup that allows your mixture to drain efficiently while keeping it secure and away from potential disturbances.
To suspend your straining material, you can use straps or twine to hang it in the air, making sure it's tied securely. If hanging isn't possible, consider using a stand or frame that sits on the rim of a bowl. You can even repurpose a tall yoghurt container by cutting out its bottom to create a makeshift stand.
Position your straining station in a stable location, away from heat sources and foot traffic. You'll want to secure the straining material to your container using rubber bands if necessary, and place it inside a larger vessel for added stability.
Make certain your catching container is large enough to hold all the liquid that'll drain through.
Remember to be patient during the straining process. Don't overfill your straining material, and monitor the draining to guarantee it's flowing evenly.
The process may take several hours, but rushing it could compromise your final product.
Time-Tested Household Straining Solutions
The versatile household items in your home can serve as effective alternatives to traditional jelly bags. You'll find that common fabrics and materials can effectively strain your culinary creations when properly utilized.
1. Layer your cheesecloth four times for ideal straining, or use flour sack towels, pillowcases, or clean cloth napkins secured with a rubber band over a bowl.
You'll want to use fresh, clean fabric and be prepared for potential staining.
2. Consider investing in fine mesh bags or paint strainer bags from your local hardware store.
They're durable, easy to clean, and perfect for straining broths, cheeses, and yogurts with consistent results.
3. Transform clean pantyhose into an effective straining tool by stretching them over a mixing bowl.
You can also create spice pouches by cutting off the feet and filling them with herbs.
4. Don't overlook your coffee filters and fine wire sieves.
While they're best for smaller batches, they'll effectively strain liquids when you're in a pinch.
Just remember to thoroughly clean reusable filters before returning them to your coffee maker.
Frequently Asked Questions
Can I Use Coffee Filters as an Alternative to Jelly Bags?
Yes, you can use coffee filters instead of jelly bags. They'll work for straining, but expect slower processing and limited capacity. You'll need to stir constantly and may need multiple filters for larger batches.
How Long Can I Store Homemade Straining Materials Before They Need Replacing?
You'll need to replace homemade straining materials when they show signs of wear, typically 6-12 months with regular use. If you clean and store them properly, they can last longer, especially nylon-based materials.
Will Metal Strainers Affect the Taste of Acidic Fruit Juices?
Yes, non-stainless steel metal strainers can affect your juice's taste by creating metallic flavors. You'll want to use stainless steel strainers instead, as they won't react with acidic juices or alter taste.
Can I Sanitize and Reuse Nylon Stockings for Multiple Batches?
Yes, you can reuse nylon stockings multiple times. Just rinse them in cold water, wash with dish soap, and they'll be ready for your next batch. Remember to boil new stockings before their first use.
Does the Color of the Straining Material Affect the Final Juice Color?
You don't need to worry about the straining material's color – it won't affect your juice color at all. The final color depends solely on your juice's natural pigments, pH levels, and concentration.
In Summary
You'll find that many common household items can effectively replace traditional jelly bags. Whether you've chosen cheesecloth, muslin, old tights, or even a clean pillowcase, these alternatives will strain your jellies and preserves just as well. Remember to select materials that are clean, tightly woven, and food-safe. With proper setup and careful straining techniques, you'll achieve crystal-clear results using these practical substitutes.


Leave a Reply