
You'll discover ancient desert peoples mastered food preservation through sun-drying techniques over 14,000 years ago. They created specialized "still houses" and used clay vessels to maintain ideal drying conditions between 120-185°F. Their methods worked perfectly for fish, meat, vegetables, and fruits, with careful attention to humidity levels below 60%. You can replicate these time-tested techniques using wooden racks, woven baskets, and proper spacing between food items for supreme air circulation. By following their sacred preservation wisdom of rotating trays and monitoring conditions, you'll reveal the secrets of storing food without electricity. There's much more to learn from our ancestors' ingenious methods.
Desert Peoples' Ancient Preservation Secrets
While many modern preservation methods rely on refrigeration, ancient desert peoples mastered the art of food preservation through ingenious techniques that didn't require electricity. They discovered that the intense desert sun could naturally dehydrate foods, a practice that dates back to 12,000 B.C.
Clay vessels were essential tools, as clay pots helped maintain freshness and protected food from pests.
You'll find it fascinating that they used this simple yet effective method to preserve fish, meat, vegetables, and fruits for extended periods.
When sunlight wasn't sufficient, they'd create "still houses" heated by fire to dry their food stocks. These structures enabled them to maintain consistent food supplies and develop thriving trade networks.
You can see similar principles in their use of salt, which they'd apply to draw moisture from foods and prevent harmful bacteria from growing.
Desert civilizations also mastered the art of storage, constructing specialized facilities like underground rooms to regulate temperature and humidity.
You'll appreciate how they used honey as a natural preservative, particularly in ancient Egypt.
Through these preservation methods, they developed sustainable food systems that supported large populations and fostered the growth of their settlements, proving that sometimes the simplest solutions are the most effective.
Survival Through Sun Drying
You'll find that ancient desert peoples created remarkably effective food storage solutions using nothing but sunlight and clever placement techniques.
Their traditional knowledge included selecting naturally shaded areas and understanding how to position drying racks to maximize airflow while minimizing direct sun exposure that could scorch the food. Maintaining temperatures of 120-185°F ensures optimal dehydration without damaging the food's nutrients.
These time-tested methods still work perfectly today, allowing you to preserve food without electricity while maintaining its nutritional value.
Desert Storage Solutions
Desert environments offer up some of the most effective natural food preservation methods through sun drying and innovative storage solutions.
You'll find that the combination of heat and aridity creates perfect conditions for drying fruits, vegetables, and meats within just a day or two.
To protect your dried goods, you'll want to implement proven storage methods that have worked for generations. Natural water evaporation through damp cloth shrouds can provide initial cooling success, though you'll need to watch for mildew development.
The ZEER desert refrigerator system can keep your fresh foods cool through evaporative cooling, reaching temperatures as low as 4.4°C.
You can enhance this effect by using stored rainwater and maintaining good airflow around your storage area.
For long-term storage, consider setting up a simple dryer design using saw horses and corrugated metal roofing.
You'll need to cover your food with insect screens to protect against pests, and you can efficiently use the space beneath for firewood storage.
For extended preservation, 55-gallon steel barrels make excellent outdoor pantries when fitted with custom donut-shaped plywood shelves.
These weatherproof solutions require minimal maintenance and will protect your preserved foods in cool, dark conditions for years to come.
Traditional Survival Knowledge
Ancient wisdom passed down through generations reveals time-tested methods for sun drying foods effectively. To preserve food like your ancestors, you'll need to understand their proven techniques that have sustained communities for centuries.
- Prepare your food meticulously by cutting it into thin slices under half an inch, blanching vegetables in salt solutions, and peeling fruits like bananas before drying.
- Elevate your drying trays above ground level using blocks to maximize air circulation and reduce contamination from dirt and pests.
- Cover your food with cheesecloth to protect it from birds and insects while allowing proper airflow.
- Rotate your trays 180 degrees daily to guarantee even drying across all food items.
You'll want to enhance these traditional methods by using reflective surfaces like aluminum or tin to increase drying temperatures.
Don't forget to bring your food inside at night to prevent moisture from condensing on it. Once dried, store your preserved foods in moisture-proof containers and keep them in a cool, dry place.
Remember to pasteurize your dried foods to eliminate any insects or eggs that might've settled during the drying process.
Tools For Desert Food Preservation
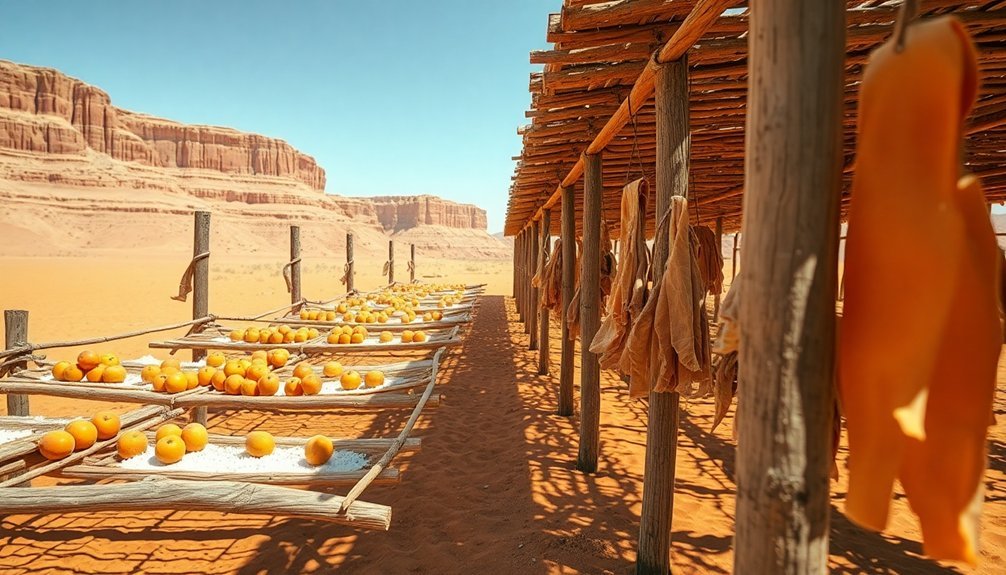
Your ancient ancestors relied on simple but effective tools for desert food preservation, including woven reed baskets for storing dried goods and elevated wooden racks that allowed air circulation while protecting food from insects and animals.
You'll need basic equipment like sharp knives for proper food preparation, clean cloths for covering drying foods, and sturdy cords for hanging strips of meat or fruit in the sun.
Natural preservation systems can be as straightforward as setting up parallel poles between trees or creating a tiered drying frame from local wood, which lets you maximize your drying space while keeping food off the ground.
Basic Desert Drying Equipment
Traditional food preservation in arid regions relies on several essential tools and structures that make desert drying both efficient and effective.
You'll need a basic setup that includes saw horses topped with corrugated metal roofing to create a sturdy drying platform. The key components include trays made from 1/2" hardware cloth lined with insect screening, plus a larger screen cover to protect your food from unwanted visitors.
For best drying results, you'll want to assemble these critical items:
- Cutting tools – knives, mandolines, and food processors for consistent food sizing
- Spreading implements – large knives, silicone scrapers, and offset spatulas
- Processing equipment – immersion blenders and food processors for pre/post drying
- Grinding tools – coffee or spice grinders for creating powders
Your setup should allow for quick drying, typically within one to two days.
To enhance preservation, you can incorporate evaporative cooling by placing water trays in shaded areas. This method, using cloth wicks and preferably rainwater, can reduce temperatures up to 35 degrees below ambient air temperature, helping maintain food quality during the drying process.
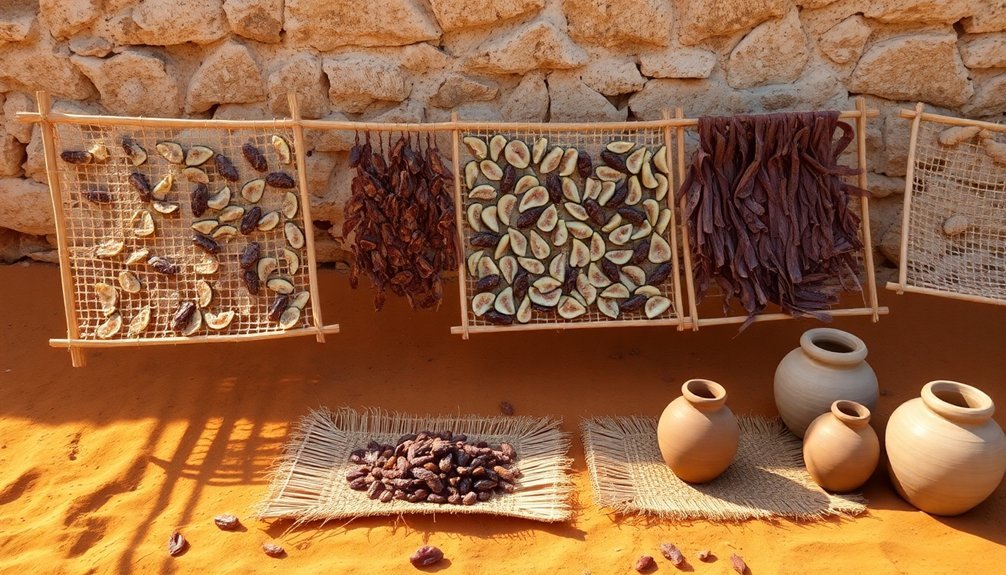
Sun-Dried Food Storage Containers
Proper storage containers form the backbone of successful desert food preservation. You'll need containers made from durable materials like stoneware or wood that can withstand desert temperatures up to 85°C (185°F).
When choosing your containers, look for airtight seals with silicone gaskets that prevent moisture from compromising your sun-dried foods.
Select containers that fit your specific storage needs. If you're drying large quantities of dates or figs, opt for bigger containers with wide mouths for easy access. For smaller portions of dried herbs or spices, compact containers will suffice.
Make sure they're stackable to maximize your storage space, especially if you're working with limited pantry areas.
Your containers should have secure, easy-to-operate lids that you can open and close without breaking the airtight seal.
Don't use metal utensils when scooping out dried foods, as they can damage the container's interior. Instead, use wooden or plastic scoops.
If you're storing food long-term, consider containers with snap-on lids for extra security.
Remember to test each container's seal by filling it with water and checking for leaks before using it for food storage.
Natural Preservation Racks Systems
Across the desert landscape, natural preservation racks provide vital tools for drying food effectively. You'll find these systems are remarkably simple yet efficient, using basic materials like saw horses and corrugated metal roofing as support structures.
By laying trays made of 1/2" hardware cloth lined with insect screen, you're creating an ideal drying surface for various foods.
- You can dry fruits, vegetables, and meat within just 1-2 days
- The space beneath serves as convenient firewood storage
- Large insect screens protect food from pests while drying
- The elevated design promotes proper air circulation
To maximize your food preservation efforts, you'll want to position your drying racks in areas with good airflow and direct sunlight. The combination of hardware cloth and insect screening guarantees proper ventilation while keeping insects away from your food.
You're fundamentally creating a multi-functional preservation station – the elevated design not only facilitates efficient drying but also makes use of the space underneath for practical storage.
When you're working with these racks, remember that proper spacing between food items helps achieve even drying, guaranteeing your preserved goods maintain their quality for extended periods.
Sacred Methods Of Our Ancestors
Throughout the millennia, our ancestors developed sacred food preservation methods that were essential for survival and deeply connected to their cultural practices. You'll find their wisdom particularly evident in four key preservation techniques that sustained civilizations across different climates and regions.
| Method | Sacred Practice |
|---|---|
| Drying | Built "still houses" with fire-heated chambers, following Middle Eastern traditions dating back to 12,000 B.C. |
| Curing | Combined specific ratios of salt, nitrates, and sugar in ceremonial preparation processes |
| Freezing | Created underground storage chambers and icehouses, working in harmony with natural cold cycles |
| Fermenting | Used carefully cultivated starter cultures passed down through generations |
When you're preserving food using these ancient methods, you're not just storing nutrients – you're practicing techniques that have sustained humanity for thousands of years. The Middle Eastern sun-drying traditions, Asian pickling practices, and cold-climate storage solutions all emerged from deep cultural understanding. You'll notice how these methods don't just preserve food; they often enhance its nutritional value, as with fermentation creating beneficial vitamins, or curing preventing harmful bacterial growth while adding distinct flavors.
Nature's Perfect Drying Environment

In nature's ideal drying environment, temperature and humidity work in perfect harmony to preserve food effectively. You'll find that mimicking these conditions requires careful attention to three key elements: temperature control, humidity management, and proper air circulation.
Your ancestors understood that maintaining temperatures between 125°F and 135°F after an initial warm-up period creates optimal drying conditions while preserving beneficial enzymes.
To achieve nature's perfect balance in your drying space, consider these essential elements:
- Start with a 2-3 hour warm-up at 160°F, then reduce to 135°F for fruits and 125°F for vegetables to prevent case hardening.
- Maintain humidity levels around 57-61% for herbs and adjust accordingly for other foods using cool, dark spaces.
- Guarantee consistent air movement throughout your drying area while avoiding overcrowded trays.
- Monitor regularly and store in airtight containers in cool, dark places.
You'll want to pay special attention to humidity levels, as they greatly impact drying time and quality.
When humidity drops below 10%, you might need to add moisture using simple solutions like ice water in a swamp cooler to maintain optimal conditions.
Building Your Drying Station
When building your own food drying station, you'll need a thoughtful combination of basic materials and proper design elements to guarantee success. Start with a simple wood frame using 2x4s arranged in a grid pattern, with 1x3s securing the top and bottom. For the base, install corrugated metal roofing with deep grooves to maximize air circulation beneath your food trays.
Construct your drying racks using 2×2 or 1.5×1.5 lumber, adding 1×3 side supports and 2×2 legs for stability. You'll want to verify proper spacing between trays for even drying. Don't use standard window screening for your food surfaces – it's not food-safe. Instead, opt for appropriate food-grade wire materials that can withstand heat while allowing air flow.
Position your windows slightly above the shade frames on supports, and install bottom stops to prevent slippage. To enhance natural convection, prop the entire unit at an angle facing the sun using shims. This creates an ideal air flow pattern where cool air enters at the bottom, flows under and through the food trays, and exits at the top.
Only load your dryer when you're expecting several consecutive sunny days.
Best Foods For Desert Drying
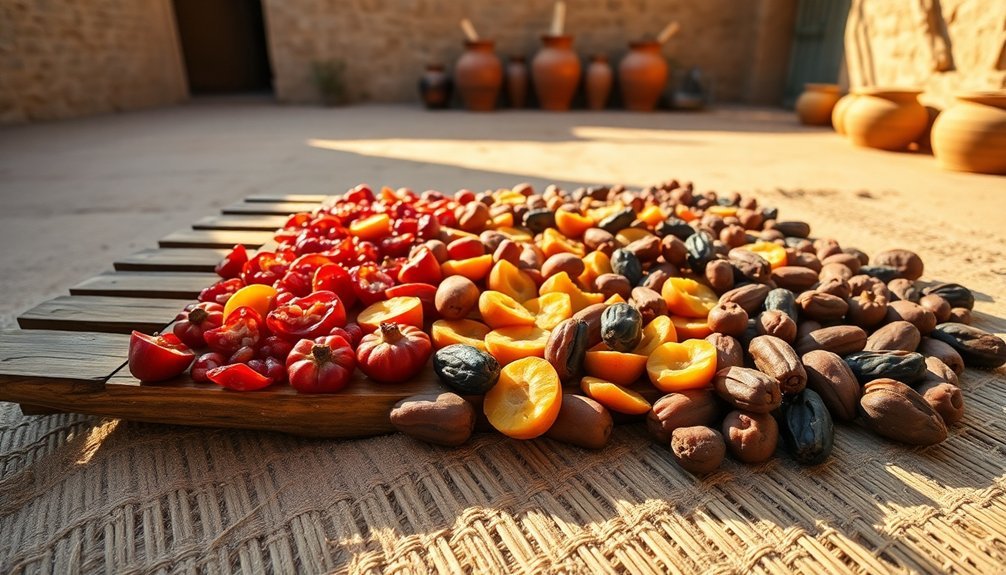
Many foods thrive in desert drying conditions, but certain varieties yield better results than others. You'll find that fruits like apples, bananas, and strawberries are excellent candidates when properly prepared. Apples need a quick lemon juice treatment to prevent browning, while bananas can be sliced into coins for convenient snacking.
- Vegetables that excel in desert drying include onions, carrots, and potatoes. You'll want to slice them thinly and, in the case of carrots, blanch them first to guarantee proper drying and future rehydration.
- Protein sources like meat strips and fish can be transformed into lasting provisions through desert drying. You'll achieve best results by cutting them thinly and adding salt for preservation.
- Traditional game meats such as deer, bison, and turkey adapt well to drying methods, particularly when made into jerky or pemmican.
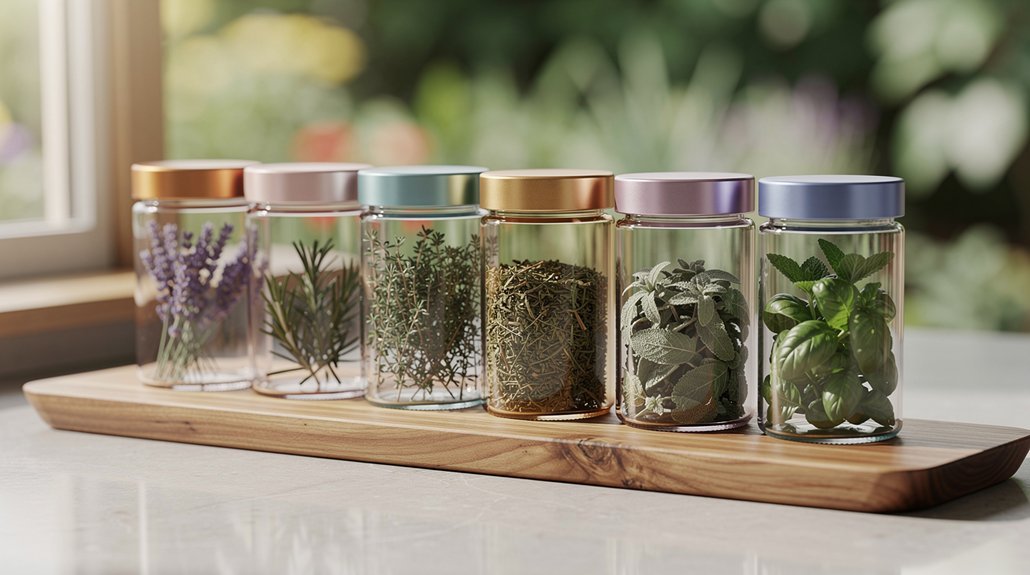
- Don't overlook supplementary foods like herbs, mushrooms, and nuts. These items not only dry effectively but also maintain their nutritional value and can enhance your dried food inventory with crucial nutrients and flavors.
Remember to prepare each food type appropriately, as proper cutting and pretreatment markedly impact your final results.
Seasonal Timing For Maximum Results
You'll get the best results from your food drying efforts by harvesting early in the morning when plants have the highest moisture content and nutrients.
To maximize nature's drying power, start your drying process between 10 AM and 2 PM when desert temperatures climb above 85°F and sunlight is most intense.
The ideal drying season falls during periods of low humidity and steady winds, typically late spring through early fall in most desert regions.
Best Harvest Collection Times
Successful food drying starts with picking your crops at precisely the right moment. You'll want to harvest each plant type during its peak window for ideal preservation results, just as our ancestors did when their survival depended on properly dried food stores.
- Root vegetables need collection before the first frost hits – especially sweet potatoes, which don't tolerate cold. Wait until onion and garlic tops yellow and fall over, and don't pull potatoes until their tops have died back completely.
- You'll find broccoli and other brassicas taste sweetest after experiencing a few light frosts. Harvest these when the buds are still tight and compact, avoiding extreme weather days that can affect quality.
- For tomatoes, you'll need different timing based on variety. If you're growing storage tomatoes, plant them later so they'll ripen after the first fall frost. You can pick them green for slow ripening over several weeks.
- You'll maximize your preservation efforts by planning harvests over several weeks. This spacing prevents overwhelming your drying capacity and guarantees you're working with each crop at its prime preservation point.
Sunlight Hours and Temperature
Solar drying demands precise timing and temperature control to achieve ideal results. You'll need temperatures between 120-185°F for peak drying, though the process can begin at 86°F. Watch closely to prevent overheating, which can cause case hardening and damage your food's quality.
Time your drying during rainless seasons when your harvest is at peak maturity. You'll want several consecutive days of bright sunshine and low humidity – preferably below 60%. If you're in a southern region with high humidity, you'll need to pay extra attention to air circulation and moisture levels.
Choose hot, breezy days for the best results. Start early in the morning to maximize sunlight exposure, but don't forget to protect your food at night from condensation.
Rotate your drying trays throughout the day to guarantee uniform exposure, and use screens or cheesecloth to keep insects away while maintaining airflow.
If direct sunlight becomes too intense, move your food to a shaded area to complete the process. Remember, consistent warmth is more important than extreme heat – you're drying your food, not cooking it.
Desert Wind Drying Seasons
Traditional desert wind patterns, particularly the Harmattan season from November to March, set up perfect conditions for drying food in West Africa. During this time, the dry northeasterly winds blow across the Sahara, creating an environment with humidity levels below 5% – optimal for preserving your food through natural drying methods.
You'll want to time your drying activities to align with these seasonal patterns for best results:
- Start your major drying projects in November when the Harmattan winds first arrive, bringing consistent dry conditions.
- Take advantage of the coldest nights and hottest days between December and January for maximum moisture removal.
- Plan to complete bulk drying by early March before the winds shift.
- Schedule regular monitoring during dawn and dusk to adjust for temperature fluctuations.
You'll need to protect your food from the wind-blown sand and dust while still allowing proper airflow. Set up your drying stations in sheltered areas that block the strongest gusts but maintain ventilation.
When you follow the traditional timing of these desert winds, you're tapping into centuries of ancestral wisdom that maximized food preservation in harsh conditions.
Common Desert Preservation Mistakes

Throughout the desert preservation process, even experienced food preservers can make vital mistakes that compromise both safety and quality. You'll want to avoid using incorrect or damaged equipment, as this can lead to contamination and spoilage.
Don't make up your own preservation recipes without scientific testing – this is particularly important in desert conditions where temperature and humidity fluctuations are common.
When you're drying food in desert conditions, you'll need to pay special attention to proper storage techniques. Keep your preserved foods away from direct sunlight and temperatures above 70°F, as these conditions can greatly decrease quality and nutrient value.
You'll also need to monitor your stored foods regularly for any signs of spoilage or contamination.
Watch out for common processing mistakes like inadequate sterilization of your equipment and workspace. Make sure you're using up-to-date, scientifically-tested methods rather than relying solely on traditional techniques that haven't been verified.
Don't forget to adjust your preservation times based on your specific altitude – this is especially vital in desert regions where elevations can vary greatly.
Modern Applications Of Desert Wisdom
In light of rising energy costs, ancient desert preservation methods are finding new relevance in modern food storage. You can adapt time-tested techniques like those used by ancient Egyptians and Amish communities to preserve food efficiently without relying on electricity.
- Set up a solar dehydrator similar to Amish designs to dry fruits and vegetables using only the sun's energy – it's like having a miniature greenhouse that removes moisture while maintaining nutritional value.
- Create your own root cellar based on Egyptian "shuna" principles to maintain steady temperatures year-round without mechanical cooling.
- Use glass jars with proper sealing techniques to preserve foods through fermentation, similar to how ancient cultures created nutrient-rich preserved foods.
- Apply natural preservation barriers like olive oil to create airtight seals, protecting food from spoilage.
These ancient methods aren't just historically interesting – they're practical solutions for today's challenges.
You'll find that combining traditional desert preservation wisdom with modern materials can greatly reduce your energy consumption while maintaining food quality.
Frequently Asked Questions
How Does Desert-Dried Food Compare to Electrically Dehydrated Food in Taste?
You'll find electrically dehydrated food tastes more consistent and controlled compared to desert-dried food. While both methods concentrate flavors, electric dehydration lets you manage temperature precisely, resulting in more predictable taste outcomes.
Can Desert-Dried Foods Be Safely Stored Without Additional Preservatives?
Yes, you can safely store desert-dried foods without preservatives if you've dried them completely and store them properly in airtight containers, away from light and moisture. Keep them cool and dark for best results.
What Role Did Trade of Dried Foods Play in Ancient Desert Economies?
You'll find that dried food trade was essential to ancient desert economies, as it created wealth through long-distance commerce, sustained trade networks, and served as currency while generating tax revenue for rulers.
How Did Desert Peoples Protect Drying Foods From Sandstorms?
You'll need to protect drying foods using elevated platforms, sturdy covers, and strategic locations. By monitoring weather patterns and placing food in sheltered spots, you can shield it from approaching sandstorms.
Did Ancient Desert Cultures Have Special Containers for Storing Dried Foods?
You'll find ancient desert peoples used specialized seed jars, sealed clay containers, and woven baskets to store dried foods. They'd often protect these containers in elevated granaries and fire-hardened storage pits.
In Summary
You've inherited powerful knowledge from desert cultures spanning thousands of years. When you dry foods using these ancient techniques, you're not just preserving sustenance – you're connecting with ancestral wisdom. Let the desert's natural elements work their magic while you avoid common pitfalls. By embracing these time-tested methods, you'll master preservation skills that remain relevant in today's world.

Leave a Reply