To sun-dry fresh fish outdoors, you'll need to start with pristine fish and the right tools. Select fish with clear eyes, shiny scales, and a mild ocean scent, then clean and gut thoroughly. Make strategic cuts to promote even drying, and place your fish on elevated mesh racks in a covered area with good airflow. Keep temperatures between 64-90°F and humidity below 75% for ideal results. Protect your drying fish from insects and weather with screens and canopies, and test for doneness using the skewer method. With proper storage in airtight containers, your sun-dried fish can last for months. The next steps will guarantee your success in this ancient preservation technique.
Benefits of Sun-Dried Fish
Why is sun-dried fish becoming increasingly popular among health-conscious consumers? The answer lies in its remarkable nutritional profile and health benefits. When you consume sun-dried fish, you'll get a concentrated source of protein that's essential for building and repairing tissues, while also supporting your immune system and muscle growth.
You'll benefit from its rich mineral content, including increased levels of sodium, potassium, iron, and zinc. The sun-drying process can actually enhance vitamin D levels, though you might see some reduction in calcium content. The preservation process extends shelf life significantly, making it a practical choice for long-term storage.
What's particularly valuable is the presence of essential amino acids like histidine, threonine, and valine, which your body can't produce on its own.
The omega-3 fatty acids in sun-dried fish will support your heart health and cognitive function, helping you maintain mental clarity and potentially reducing the risk of age-related cognitive decline.
If you're managing your weight, you'll appreciate how the high protein content increases satiety and boosts metabolism. Plus, you're choosing a sustainable food option that's been trusted for generations, contributing to food security in many communities while offering a practical way to preserve fish for extended periods without losing its nutritional value.
Selecting Fresh Fish
While sun-dried fish offers impressive health benefits, starting with high-quality fresh fish makes all the difference in your final product. When selecting your fish, use multiple senses to evaluate its freshness and quality.
Start with a visual inspection. Look for clear, bulging eyes with visible dark pupils and shiny, intact scales with a metallic sheen. The flesh should appear glossy and slightly translucent, not chalky or discolored. Check that the fins and tail are nimble and undamaged, as brittle fins indicate age.
Trust your nose – fresh fish should have a mild, salty aroma similar to sea air. If you detect strong fishy odors, that's a sign of protein breakdown and spoilage.
When touching the fish, the flesh should feel firm and spring back when pressed. You'll notice a natural, slightly slick moisture, but avoid fish with excessive sliminess. For best results when drying, choose lean fish varieties as they resist spoilage better than fatty options.
Don't forget to examine the gills, which should be bright red and moist, not brown or dry. If buying fillets, verify there's no drying around the edges, and check labels for carbon monoxide treatment, which can mask freshness by altering color.
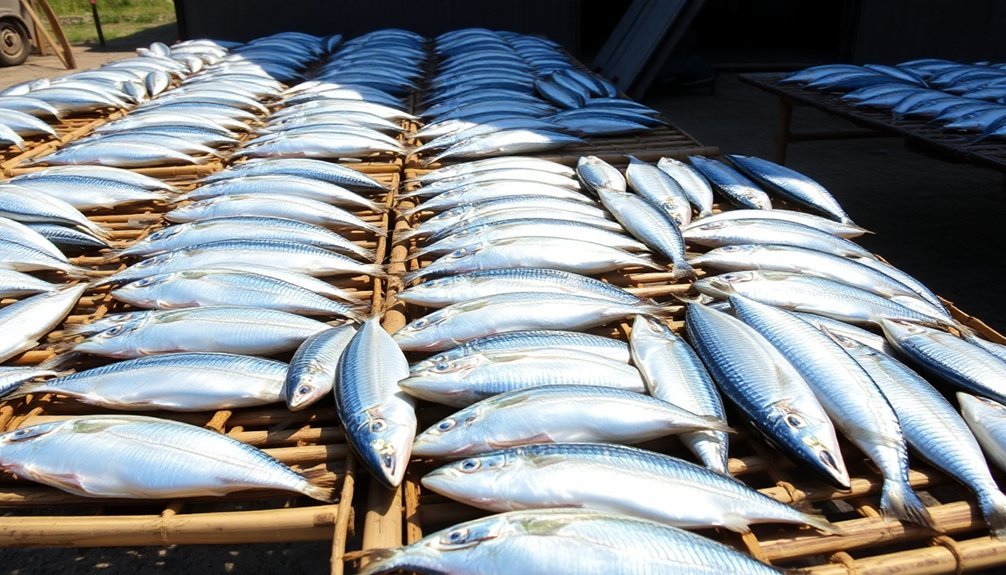
Essential Tools and Equipment
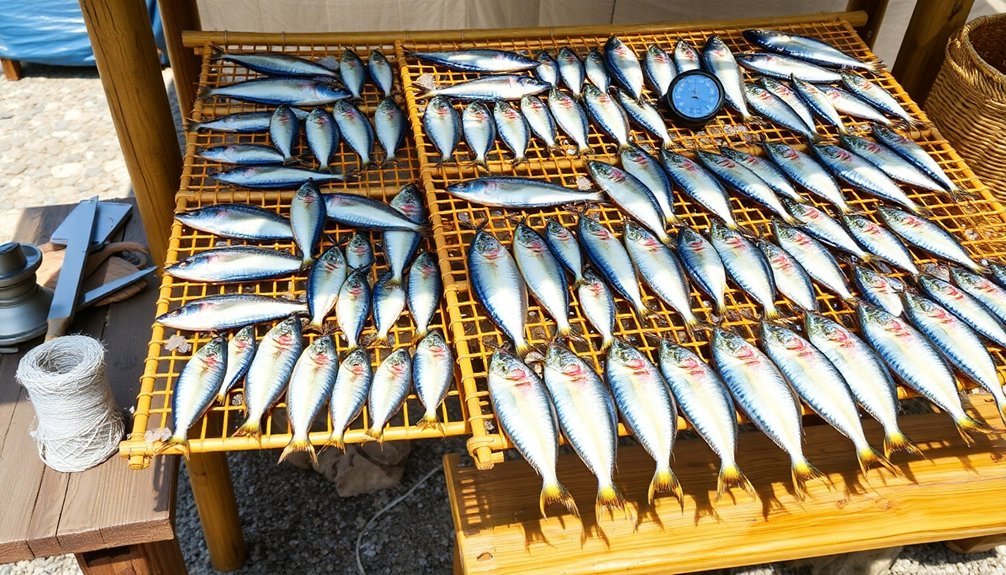
You'll need a basic setup of clean mesh racks or lattice structures to keep your fish elevated and properly spaced for even air circulation during the drying process.
To protect your drying fish from weather elements, set up your drying station in a covered area that still allows good airflow, or use portable covers that can shield against rain and direct sunlight.
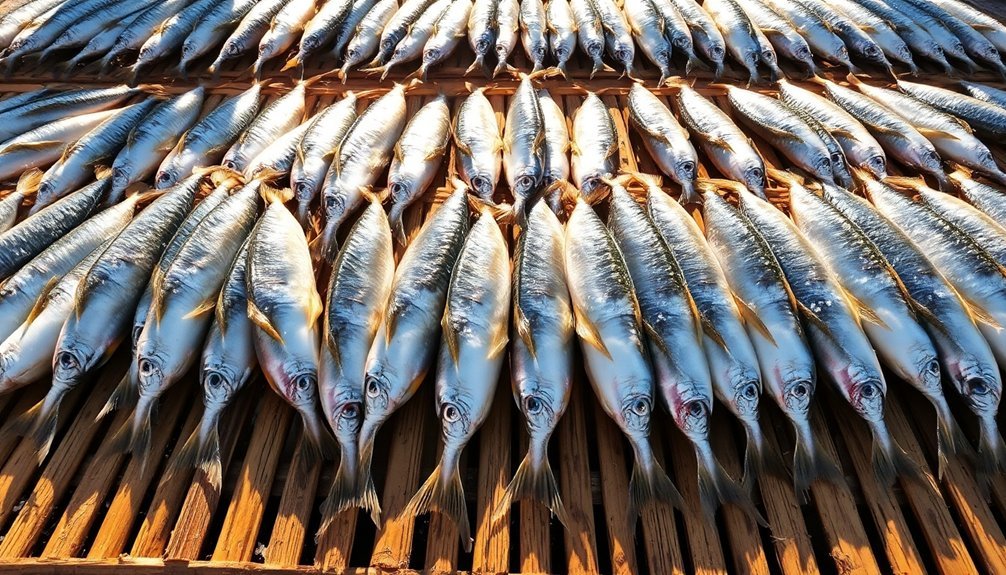
Consider using bamboo or wickerwork frames for smaller fish pieces, and always position your drying racks away from areas where insects or animals might interfere with the process. While traditional sun drying takes longer, positioning your racks to achieve uniform hot air distribution will help speed up the drying process significantly.
Basic Fish Drying Setup
Successfully air-drying fish requires a well-organized setup with specific tools and equipment.
You'll need to start with a proper fish scaler and a deba or fillet knife for initial preparation, along with a sturdy cutting board. Keep a bamboo strainer handy for its anti-bacterial properties when cleaning and draining the fish.
Set up your workspace with baking trays and paper towels to manage moisture during preparation. You'll want clean water for washing and a brine solution ready for soaking.
Position your drying racks or mats in an area with good airflow, and if you're in a humid climate, consider using a dehydrator for controlled drying.
For larger fish, you'll need poles or lines for hanging, while smaller pieces can go on low bamboo or wickerwork frames.
Don't forget to prepare your drying basket to protect the fish from pests. Keep fine salt nearby for layering between fish pieces, and have weights ready for the salting process.
If you're processing shark fins or similar delicate parts, arrange cane or sticks to hold them open while drying.
Protection From Weather Elements
Proper protection from weather elements determines the quality of your air-dried fish. You'll need to shield your fish from direct sunlight, rain, and extreme temperatures while ensuring proper ventilation. Use raised platforms or high racks with bamboo strainers to maintain air circulation, and employ canopies or umbrellas during peak sun hours.
When rain threatens, move your fish to a dry shelter or cover them with waterproof tarpaulins. Keep the drying area elevated to prevent water accumulation, and consider using mechanical dryers during humid conditions.
| Weather Element | Protection Method | Essential Tools |
|---|---|---|
| Sunlight | Shadow drying | Canopies, umbrellas |
| Rain | Shelter coverage | Tarpaulins, indoor space |
| Pests | Barrier protection | Mesh nets, screens |
| Temperature | Control exposure | Temperature monitors |
| Humidity | Air circulation | Raised platforms, fans |
To prevent contamination, cover your fish with fine mesh to keep away flies and birds. Apply saturated salt solutions with calcium propionate to inhibit microbial growth. Monitor temperature and humidity levels regularly, and adjust your drying setup accordingly. You'll achieve the best results by maintaining consistent drying conditions and protecting against all weather elements simultaneously.
Fish Preparation Steps
Begin your fish preparation by cleaning and gutting your selected fish, making certain to remove all internal organs, blood vessels, and membranes from the belly cavity.
You'll need to scale the fish completely and rinse it thoroughly under cold water to remove any remaining debris or blood.
Finally, create strategic cuts along the fish's body, including butterfly or fillet cuts and slashes near the spine, which will guarantee even drying and proper air circulation throughout the process.
Clean and Gut First
Before air-drying fish, thorough cleaning and gutting are essential steps that prevent spoilage and guarantee food safety.
You'll need to prepare your workspace first by laying down newspaper or a disposable surface and gathering your tools: a sharp knife, cutting board, and a disposal bucket.
Start the cleaning process by making a careful incision from the fish's anal vent toward the head, being mindful not to puncture the innards.
Once you've created the opening, spread the cavity and remove all internal organs, disposing of them in your bucket.
Don't forget to remove all fins, as they can be sharp and interfere with the drying process.
- Remove the bloodline by gently scraping it out with your thumbnail or knife, taking care not to damage the flesh.
- Cut off the head behind the gills if desired, and remove the gills completely.
- Rinse the cavity thoroughly under cold running water to remove blood and remaining bits.
- Pat the fish completely dry with paper towels or a clean muslin cloth.
For best results, confirm your fish feels smooth and clean before proceeding to the drying stage.
Scale and Rinse Thoroughly
With your fish cleaned and gutted, scaling comes next in the preparation process. Use a fish scaler or the back of a knife to remove all scales, working from tail to head in steady strokes. You'll need to be thorough, as leftover scales can trap moisture and bacteria, potentially spoiling your fish during the drying process.
Once you've removed the scales, rinse your fish thoroughly under cold running water. Pay special attention to the cavity and gill areas, ensuring you remove any dirt, blood, or debris. If you notice a black membrane in the belly cavity, remove it completely.
Don't forget to check for and remove the blood vessel that runs along the spine, as this can cause unpleasant fishy odors later.
After rinsing, it's essential to dry your fish properly. Use paper towels to pat the fish dry both inside and out, including any cuts or slashes you've made. You'll want to remove all excess moisture to prepare for proper air-drying.
Make sure both the surface and cavity are completely dry before moving on to the next steps in the drying process.
Make Strategic Cuts
Strategic cuts play an essential role in preparing your fish for air-drying. The way you cut your fish determines how evenly and efficiently it'll dry, ultimately affecting the quality of your final product.
For fish over 8 inches, you'll need to remove the head first, while smaller fish can retain their heads if you prefer.
When cutting your fish, follow these essential steps:
- Butterfly small and medium-sized fish by cutting them down to the tail and spreading them open flat – this creates maximum surface area for efficient drying.
- Make transverse cuts approximately 3-4 inches apart across the flesh, which helps guarantee even drying throughout the thicker portions.
- For larger fish, cut them into uniform strips about ¼ to ⅜ inch thick to promote consistent drying.
- Create vertical cuts from head to tail when splitting fish like cod, and don't forget to remove the black membrane from the belly cavity.
Remember to keep your cuts precise and consistent.
If you're working with bigger fish, make deeper scoring cuts into the flesh to allow better salt penetration and more thorough drying. These strategic cuts will guarantee your fish dries properly and maintains its quality throughout the process.
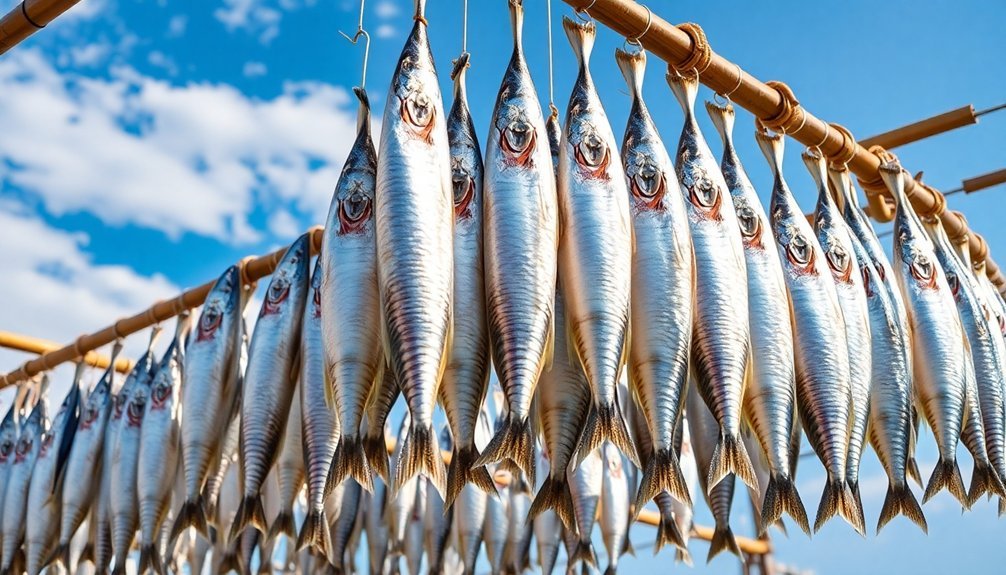
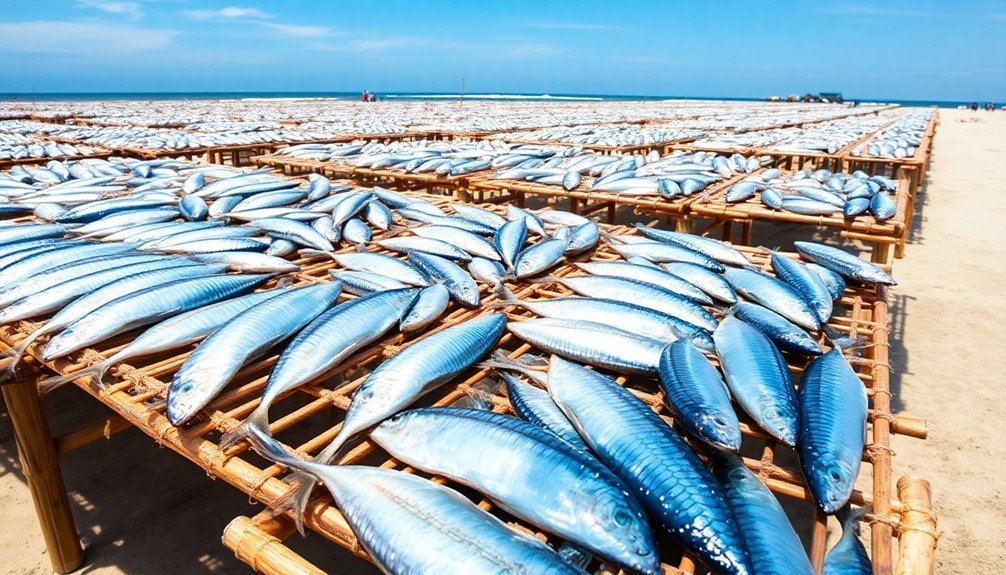
Finding the Perfect Drying Spot
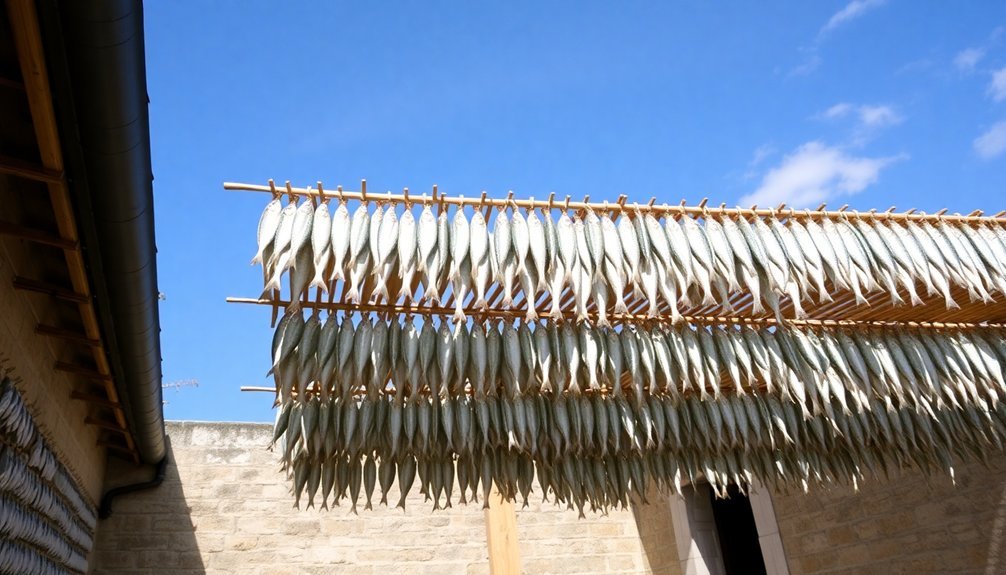
Selecting the right spot for air-drying fish can mean the difference between perfectly preserved seafood and a spoiled catch. You'll want to choose an elevated location that offers protection from strong winds while guaranteeing maximum sun exposure throughout the day.
Look for a spot with good drainage to prevent water accumulation, and make sure it's easily accessible for regular monitoring. If you're near a water source, that's ideal for processing fresh catch, but confirm you're high enough to avoid excess humidity.
| Feature | What to Look For |
|---|---|
| Elevation | Choose higher ground for better air circulation |
| Sun Exposure | Confirm direct sunlight with minimal shade |
| Wind Protection | Partial shelter from strong winds |
| Drainage | Well-draining surface to prevent water pooling |
| Accessibility | Easy access for monitoring and maintenance |
Set up your drying racks or lines facing east to west to maximize sun exposure. You'll need enough space to arrange your fish without overcrowding, allowing air to circulate freely between pieces. If you're using ground-level drying, lay down clean mats or nets to keep your fish off the bare earth.
Weather Conditions for Success
When you're air-drying fish, success hinges on maintaining temperatures between 64°F and 90°F while keeping relative humidity below 75%.
You'll need steady airflow to whisk away moisture, but watch for excessive winds that can dry the surface too quickly, creating an uneven result.
While timing varies by region, choosing a dry season with predictable weather patterns will give you the most consistent drying conditions.
Temperature and Humidity Levels
Success in air-drying fish heavily depends on proper temperature and humidity conditions.
You'll want to maintain temperatures between 20°C and 30°C for ideal results, though tropical conditions can handle higher temperatures up to 63.4°C. Keep in mind that excessive heat can cook the fish rather than dry it, so monitoring is essential.
The ambient humidity level plays an important role in the drying process. You'll achieve the best results when relative humidity stays below 75%, as higher levels can cause your fish to reabsorb moisture.
During the drying process, you should regularly check both temperature and humidity levels every two hours using thermocouples and multimeters.
Here are key points to guarantee successful air-drying:
- Monitor temperature throughout the day to prevent overheating, especially during peak sun hours.
- Choose dry-season periods when possible, as they offer more consistent drying conditions.
- Keep humidity levels below 75% to prevent moisture reabsorption.
- Check weather forecasts to avoid unexpected rain that could disrupt the drying process.
Remember that seasonal variations will affect drying times and final moisture content, so you'll need to adjust your approach accordingly.
Wind Direction and Speed
Proper wind conditions play an essential role in air-drying fish effectively. Position your drying racks to maximize exposure to prevailing winds, ensuring good cross ventilation throughout the drying area. You'll want wind speeds between 1-2 m/s for ideal results, though speeds up to 3 m/s can help combat high humidity conditions.
Keep your drying setup in an open area away from obstructions, and elevate your racks to improve air circulation. If natural wind speeds are too low, you can use mechanical fans to enhance airflow. For protection against strong winds, install cardboard slats or plastic flaps to control air movement and prevent dust contamination.
You'll need to monitor wind conditions continuously and adjust your setup accordingly. During rainy periods, cover your fish or move them indoors to prevent moisture reabsorption. At night, especially in humid conditions, pile and cover your fish for protection.
Consider using screens or nets to keep insects away, as wind patterns can affect their presence. If you're using a solar dryer, you can enhance natural wind effects by creating a convective flow of warm air, which will help maintain consistent drying rates throughout the process.
Seasonal Timing Matters
Just as wind patterns affect your drying setup, choosing the right season and weather conditions will make or break your fish-drying success.
You'll need warm, dry weather with plenty of direct sunlight to achieve ideal results. High temperatures speed up the drying process, but watch out for extreme heat that can cause case hardening, where the outside dries too quickly while the inside remains moist.
For successful air-drying, you'll want to pay attention to these critical weather factors:
- Relative humidity should stay below 75% – higher levels will slow drying and risk spoilage
- Temperature needs to be warm but not scorching to prevent case hardening
- Direct sunlight exposure is essential throughout the drying period
- Air quality must remain clean and free from pollutants
Don't attempt to dry fish during rainy seasons or in highly humid conditions.
If you're in a cooler climate, consider using additional heat sources like birch wood to support the process.
Remember to protect your fish from nighttime moisture by either covering them with plastic or moving them to a dry indoor location.
Regular monitoring and weather forecasting will help you adjust your approach as conditions change.
Natural Drying Process
The gentle dance of sun and wind forms the foundation of natural fish drying. When these elements work together, they create ideal conditions for removing moisture from your fish. You'll want to aim for areas with low relative humidity (below 75%) and good air circulation to speed up the drying process.
Before you begin drying, prepare your fish properly by cleaning and removing all blood and viscera. Score or cut larger fish to increase the surface area – this will help them dry more evenly and quickly. You can also salt or brine your fish beforehand to draw out additional moisture.
Choose your drying method based on your available resources. While ground drying is simple, it's prone to contamination. Instead, use elevated racks or hang your fish on poles to maximize exposure to sun and wind while keeping them clean.
During the 5-7 day drying period, you'll need to turn your fish regularly for even drying. Watch for weather changes, as high humidity or rain can compromise your drying process.
At night, either cover your fish or use press-piling with weights to encourage moisture movement to the surface. This helps prevent case hardening, where the outside dries too quickly while the inside remains moist.
Protection From Insects
Protecting your drying fish from insects presents a critical challenge, especially in tropical and humid conditions. Blowflies, beetles, and mites can infest your fish during both drying and storage phases, potentially making up to 60% of the product unfit for consumption.
You'll want to implement protective measures from the start to prevent these unwanted visitors from ruining your efforts.
Natural herbal treatments offer effective protection against insect infestation. You can apply turmeric or neem extracts, with turmeric showing superior repellent properties. While higher concentrations might slightly darken your fish, they'll maintain the overall texture and appearance.
- Cover your drying setup with a tent drier or protective net to prevent flies and birds from accessing the fish.
- Pre-treat your fish with a 2-5% salt solution before drying to reduce infestation risk.
- Consider using a combination of turmeric (3%) and salt (15%) for enhanced protection.
- Opt for cool, windy conditions below 50°F when possible, as insects are less active in these temperatures.
Remember to inspect your fish regularly throughout the drying process and maintain strict hygiene standards to guarantee a safe, insect-free final product.
Testing Fish for Doneness
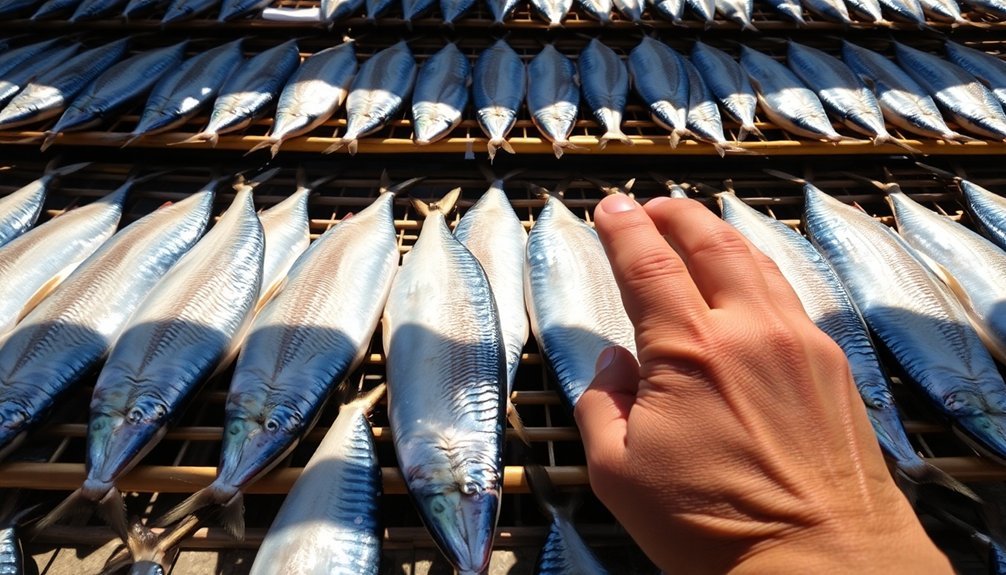
During the air-drying process, determining when your fish is properly done requires both attention to detail and reliable testing methods. You'll want to employ multiple checking techniques to verify your fish has reached the ideal level of dryness and safety for consumption.
| Method | Technique | Result Indicator |
|---|---|---|
| Skewer Test | Insert metal skewer for 5 seconds | Warm (not hot) = perfect |
| Knife Check | Insert thin blade for 3 seconds | Hot for white fish, warm for salmon |
| Visual Inspection | Fork twist and color check | Flakes easily, opaque center |
To get the most accurate results, you'll need to focus on the thickest parts of the fish during testing. While a thermometer offers the most precise measurements, targeting 130°F for white fish and 145°F as per USDA recommendations, you can also rely on the skewer method for a traditional approach. Insert the skewer into the thickest section, hold it for five seconds, then press it to your wrist – it should feel warm but not hot. Remember that visual checks alone aren't always reliable, as flaking can indicate overcooking rather than proper doneness.
Proper Storage Methods
Successfully preserving your air-dried fish hinges on proper storage methods that keep out moisture, pests, and contaminants.
You'll need airtight containers like vacuum-sealed bags, plastic zipper bags, or glass mason jars to protect your dried fish. Make sure these containers are thoroughly clean and dry before use, and don't forget to label them with the fish type and drying date.
Choose a cool, dry storage location like a cold cellar or temperature-controlled room. You'll want to keep the area well-ventilated and use desiccants or silica gel packets to combat moisture.
Regular inspection is essential to catch any signs of spoilage early.
Here's what you should check during your routine inspections:
- Container integrity – look for cracks, loose lids, or damaged seals
- Moisture presence – check for condensation or dampness inside containers
- Signs of pests – examine for droppings, holes, or other evidence of infestation
- Fish condition – inspect for mold, unusual odors, or texture changes
If you're planning for long-term storage, consider freezing your dried fish.
Remember to rotate your stock, using older batches first, and maintain proper records of storage conditions and inspection dates.
Traditional Cooking Techniques
Ancient culinary traditions have shaped the way we prepare air-dried fish, with methods passed down through generations across coastal communities worldwide.
You'll find two primary cooking methods dominate these traditions: steaming and grilling.
For steaming, you'll want to slice your dried fish into bite-sized portions. A traditional Chinese approach involves steaming the fish with dried tangerine peel (Chen Pi), which adds a subtle citrus aroma and complements the fish's concentrated flavors.
You'll know the fish is ready when it's heated through but still maintains its firm texture.
If you're opting for grilling, brush the fish with olive oil to prevent sticking and enhance its natural flavors. This method is particularly popular in Mediterranean cuisines, especially in the Cyclades.
You'll need to watch the fish carefully as it cooks, as the drying process has already reduced its moisture content. Once it's heated through and slightly charred, garnish with fresh parsley.
Regardless of your chosen method, finish your dish with a drizzle of olive oil and a squeeze of fresh lemon juice.
These final touches brighten the fish's intense flavors and complete the traditional presentation.
Frequently Asked Questions
Can I Sun-Dry Fish During Winter Months?
Yes, you can sun-dry fish during winter. The cold, dry weather's actually ideal for preventing bacterial growth, and though winter sunlight's weaker, it's still effective. Just make certain you've got clear skies and low humidity.
How Long Can Properly Dried Fish Last Without Refrigeration?
Your properly dried fish can last 6-12 months without refrigeration if you store it in airtight containers in a cool, dry place. You'll need to keep it moisture-free and regularly check for signs of spoilage.
What Are Signs That Sun-Dried Fish Has Gone Bad?
You'll know your dried fish has gone bad if you notice mold growth, a strong putrid smell, maggots, unusual discoloration, or a slimy texture. Also watch for insect infestations or an off-putting sour taste.
Can I Sun-Dry Frozen Fish After Thawing?
You shouldn't sun-dry thawed fish as it's more prone to bacterial growth and has compromised texture. There's a higher risk of spoilage since thawed fish contains excess moisture and may not dry properly.
Is It Safe to Sun-Dry Fish in Urban Environments?
You shouldn't sun-dry fish in urban environments due to air pollution, hygiene risks, and contamination hazards. It's safer to use indoor drying methods or controlled environments to protect your fish from urban pollutants.
In Summary
Now you're ready to enjoy your sun-dried fish! You've learned the traditional methods of preserving fish through natural air-drying, creating a nutrient-rich, long-lasting food source. Remember to store your dried fish in airtight containers and check regularly for any signs of moisture. With proper preparation and storage, you'll have delicious sun-dried fish to enhance your meals throughout the year.


Leave a Reply