
You'll get the best results using small, firm tomatoes like San Marzano or Roma varieties for oil preservation. Start by washing and drying your tomatoes thoroughly, then cut them in half and remove seeds if desired. You can dry them using a dehydrator at 135-140°F for 10-18 hours or in your oven at 170°F for about three hours until they're leathery but still pliable. Once dried, pack the tomatoes in sterilized glass jars, cover completely with high-quality olive oil, and store in a cool, dark place. For ideal safety and flavor, refrigerate any jars containing added herbs or garlic. There's much more to discover about perfecting your oil-preserved tomatoes.
Best Tomatoes for Oil Preservation

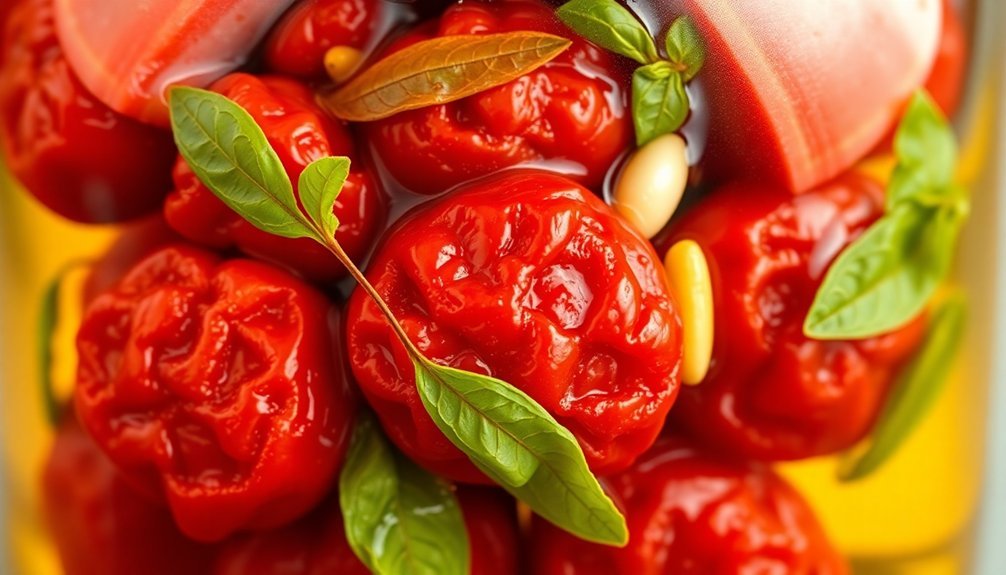
Finding the right tomatoes for oil preservation can make or break your final product. You'll want to focus on smaller varieties like cherry and grape tomatoes, which are ideal due to their sweet flavor profile and manageable size. San Marzano tomatoes are another excellent choice, thanks to their rich taste and lower water content, making them perfect for drying and preserving.
When selecting tomatoes, look for firm yet tender specimens with thin skins, as they'll roast and preserve more evenly. You'll achieve the best results with uniformly sized tomatoes, which guarantee consistent preservation throughout your batch. Enhanced flavor preservation comes naturally when using high-quality olive oil during storage. Choose varieties that offer a balance of sweetness and acidity, as this combination will develop into complex flavors during the preservation process.
For best outcomes, preserve your tomatoes during summer and early fall when they're at peak ripeness. If you're working with mixed cherry tomatoes, you'll create an interesting variety of flavors in your preserved batch.
Even slightly overripe tomatoes can work well with the sott'olio method, though fresh, peak-season produce will give you the most vibrant flavor. By preserving during the harvest season, you'll enjoy authentic tomato taste year-round.
Essential Equipment and Tools
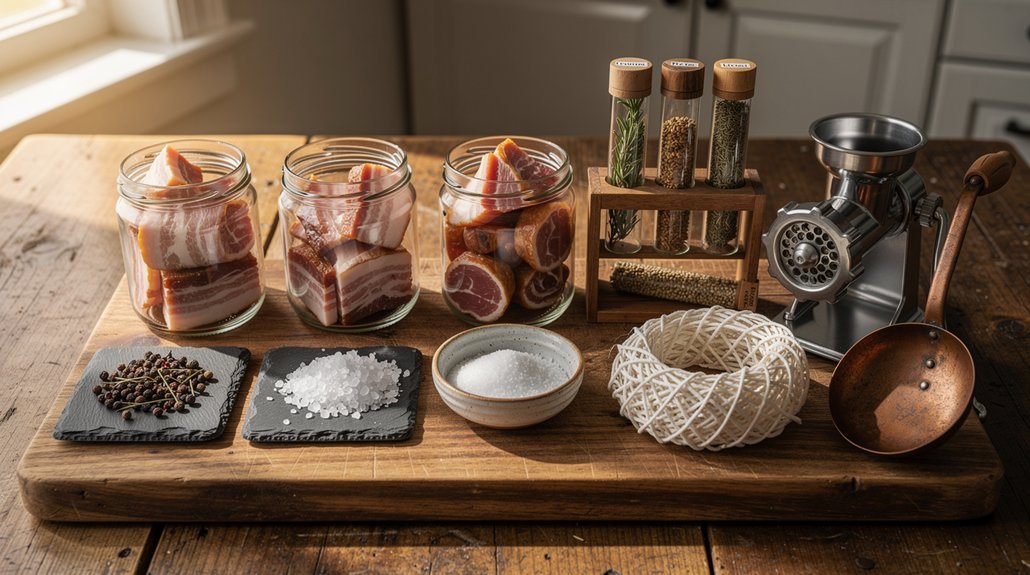
A well-equipped kitchen is essential for preserving oil-packed tomatoes successfully. You'll need both dehydrating equipment and storage containers to complete the process properly. For dehydrating, you can use either a food dehydrator or your oven with a baking sheet. If you're using an oven, keep parchment paper and a wooden spoon handy – you'll use the spoon to prop the oven door open slightly during the drying process. It's important to maintain a temperature of 135 to 145 degrees for optimal drying results.
For storage, gather glass containers like mason jars with their corresponding lids and rings. You'll want either half-pint or pint sizes, depending on your needs. Don't forget to have clean kitchen towels ready for drying your sterilized jars. If you plan to freeze any portions, keep plastic vacuum seal bags available.
Your tomato preparation tools should include a sharp knife, cutting board, colander for draining, and a butter knife for removing air bubbles from packed jars.
Finally, stock up on the essential preserving ingredients: olive oil, vinegar (red wine, white wine, or apple cider), and salt. If you're planning to add extra flavor, keep herbs, garlic, and black pepper on hand.
Preparing Your Fresh Tomatoes

Tomato selection forms the vital first step in creating delicious oil-packed preserves. You'll want to choose fresh, firm tomatoes without blemishes, preferring plum or Roma varieties for their meaty texture and seasonal ripeness. Any small tomato variety will work, but make certain they're free from defects to maintain quality during storage.
High-quality extra virgin olive oil is essential for achieving the best preservation results and flavor enhancement. Once you've selected your tomatoes, wash them thoroughly and pat them dry to remove excess moisture. Cut off the top core and slice each tomato in half, removing seeds and pulp if you prefer a less watery final product.
Now's the time to enhance flavors by sprinkling sea salt over your tomatoes, along with fresh herbs like rosemary, thyme, or basil. Don't forget to add garlic cloves and black pepper if you'd like additional depth of flavor.
For the vital heating step, you have several options. You can bake the tomatoes at 300°F for 20-25 minutes to split the skins, or opt for a longer drying process at 170°F for about three hours with the oven door slightly open.
Let the tomatoes cool completely before handling, at which point you can easily remove the peels if desired.
Drying Methods and Techniques
Properly drying your tomatoes sets the stage for successful oil-packed preservation. You'll need to choose between three main methods: electric dehydrator, oven drying, or sun drying.
If you're using an electric dehydrator, slice your cleaned tomatoes into ¼ to ½-inch pieces, arrange them with ½-inch spacing on the trays, and dry at 135-140°F for 10-18 hours. Remember to rotate the racks and turn the tomatoes periodically.
For oven drying, place your sliced tomatoes on baking sheets and dry at 170°F (or 250°F with the door propped) for 3-12 hours. You'll need to turn the tomatoes every few hours and press them down to help release moisture.
Sun drying requires temperatures above 90°F and low humidity. Place halved tomatoes cut-side up on trays, cover with netting, and bring them in at night. This method needs consistent monitoring and protection from insects.
Regardless of your chosen method, aim for a leathery texture. Your tomatoes should be pliable but not sticky when done. For best results, use plum tomatoes and remove seeds before drying. Make a small slit in thicker pieces to speed up the process.
Packing Tomatoes in Oil

Once you've dried your tomatoes to the perfect leathery texture, they're ready for oil packing – an essential preservation step that requires careful attention to detail.
Before packing, you'll need to dip each dried tomato piece in vinegar, which helps increase acidity and create a safer preservation environment. Let the excess vinegar drip off completely before proceeding with the packing process.
When you're ready to pack, verify you're using sterilized jars and follow these critical steps:
- Press the tomatoes firmly into the jar, removing as much air as possible while filling to the jar's shoulders
- Pour high-quality olive oil over the tomatoes until they're completely submerged
- If you want to add dried herbs or garlic, remember you must refrigerate and use within 4 days
- Keep the tomatoes fully covered with oil at all times, even during use
Store your oil-packed tomatoes in a cool, dark place if they're unseasoned, or refrigerate them if you've added any flavorings.
While they can last up to 6 months, always check for any signs of spoilage before consuming. The oil you've used can serve double duty in salad dressings or as a flavorful cooking medium.
Safe Storage Guidelines
Safe storage of oil-packed tomatoes requires careful attention to both temperature and environment. Before opening, you'll want to store your jars in a cool, dark place away from direct sunlight to maintain quality and flavor. Make certain the jars are tightly sealed, and they'll keep for 1-2 years in these conditions.
Once you've opened a jar, you must refrigerate it immediately. You'll notice the olive oil might become cloudy when chilled – don't worry, this is normal and will clear up at room temperature. Keep the tomatoes submerged in oil and use them within 2-3 weeks of opening.
To prevent botulism, you must guarantee your tomatoes are properly dried until they're leathery or crisp before storage. Don't store tomatoes with skins on in oil, as this isn't safe. Add bottled lemon juice if needed to acidify the tomatoes, and always check for spoilage by smelling before use.
For long-term storage of unopened jars, keep them in a cool, dark place. While they'll stay safe for up to a year, they're best used within 6 months. The tomatoes may darken over time but will remain safe and flavorful.
Using Oil Preserved Tomatoes
Oil-preserved tomatoes can transform your everyday cooking with their concentrated, rich flavor and versatile applications.
You'll find these tomatoes perfect for quick recipes like bruschetta toppings, pizza additions, and charcuterie board elements, while they also shine in more complex dishes such as risotto and pasta.
To enhance their natural taste, try adding fresh herbs like rosemary and thyme, or spice things up with grated ginger and chili while preparing your preserved tomatoes.
Flavor Enhancement Tips
Elevating your oil-packed tomatoes from good to exceptional is all about mastering flavor combinations and infusion techniques.
You'll discover that classic Italian pairings like basil and garlic create a robust foundation, while woody herbs such as rosemary and thyme add depth and complexity to your preserved tomatoes.
For a more adventurous flavor profile, you can experiment with heat elements and international influences.
Try incorporating chili oil or ginger for an Asian twist, or add black pepper and sea salt to enhance the natural sweetness of the tomatoes.
Don't forget to contemplate textural elements by combining your oil-preserved tomatoes with complementary ingredients.
Here are four essential flavor enhancement combinations you can try:
- Basil oil + garlic + grated Parmigiano-Reggiano for an authentic Italian taste
- Mint oil + crumbled feta + lemon zest for a Mediterranean flair
- Rosemary + thyme + toasted pine nuts for a rustic flavor
- Chili oil + fresh ginger + black pepper for a spicy kick
Remember to adjust these combinations according to your taste preferences, and don't hesitate to create your own unique flavor profiles using the base ingredients as inspiration.
Quick Recipe Ideas
From quick weeknight dinners to elegant appetizers, oil-preserved tomatoes can transform ordinary dishes into flavorful Italian-inspired meals. You'll find endless possibilities for incorporating these versatile ingredients into your favorite recipes.
For a classic Italian approach, toss the tomatoes with spaghetti, garlic, and fresh basil for an effortless pasta dish. Create a stunning caprese salad by combining them with fresh mozzarella, basil leaves, and a drizzle of balsamic vinegar.
For a modern twist, mix them into quinoa or grain bowls with arugula and feta cheese. Elevate your sandwiches by layering oil-preserved tomatoes in paninis or using them as a topping for bruschetta. They'll add moisture and rich flavor to burgers, wraps, and flatbreads.
You can even blend them into spreads or tapenades for extra depth. Don't forget breakfast options – fold these tomatoes into omelets or frittatas for a Mediterranean start to your day.
For dinner, add them to risotto, stuff them into bell peppers, or use them as a pizza topping. They'll enhance soups, stews, and casseroles with their concentrated flavor and silky texture.
Frequently Asked Questions
Can I Reuse the Oil From Previously Stored Tomatoes for a New Batch?
Yes, you can reuse oil from stored tomatoes for a new batch if it's properly refrigerated and shows no signs of spoilage. Just make certain it's clean, stored in an airtight container, and inspect before use.
What Happens if White Spots Appear on My Oil-Packed Tomatoes?
If you spot white spots on your oil-packed tomatoes, don't eat them. They're likely signs of mold or bacterial growth, which can be dangerous. Discard the entire batch immediately to avoid health risks.
Should Homegrown Tomatoes Be Treated Differently Than Store-Bought Ones?
Yes, you'll need to handle homegrown tomatoes differently since they're picked riper. Store them at room temperature until fully ripe, then refrigerate. They'll have better flavor but shorter shelf life than store-bought ones.
Why Did My Tomatoes Float to the Top Despite Proper Packing?
Your tomatoes probably floated because they're less dense than the surrounding liquid. When tomatoes release water during processing, they become lighter and naturally rise, even with proper packing. It's a common occurrence.
Can I Mix Different Tomato Varieties in the Same Storage Jar?
Yes, you can mix different tomato varieties in the same jar. Just make sure they have similar ripeness levels and acidity. It's best to combine similar types like plum varieties together for consistent results.
In Summary
You'll find these homemade oil-packed tomatoes are worth the effort, delivering intense flavor to your dishes year-round. Once you've mastered the preservation process, you can experiment with different herbs and seasonings. Remember to follow proper storage guidelines to guarantee food safety, and you'll have delicious tomatoes ready whenever you need them. They're perfect for pasta, salads, or eating straight from the jar.

Leave a Reply