Sun-dried herbs burst with flavor because the slow drying process concentrates their essential oils while creating complex secondary compounds like alcohols and aldehydes. When you dry herbs naturally below 100°F, you'll preserve more nutrients and intensify their natural flavors up to four times compared to fresh herbs. Your dried herbs will pack so much punch that you'll only need to use about ¼ of the amount you'd use fresh. The secret lies in proper preparation and patience – letting nature transform your herbs through gentle evaporation and chemical changes. There's much more to discover about maximizing these concentrated flavors in your kitchen.
The Science Behind Sun-Drying

For centuries, sun-drying herbs has relied on precise environmental conditions to preserve their essential flavors and medicinal properties.
You'll need a warm, dry location that maintains around 100 degrees Fahrenheit with humidity levels at 60% or below to achieve ideal results. While sunlight is essential to the process, direct exposure can actually harm your herbs by bleaching them and diminishing their flavors.
To maximize flavor retention, you'll want to gather your herbs in the morning after the dew has evaporated. Proper air circulation plays an important role, so tie your herbs in small bunches or spread them in single layers on screens. Using a DIY solar dryer can significantly improve the drying efficiency of your herbs.
You're aiming for indirect sunlight, which helps preserve the natural oils and vibrant colors of your herbs.
The drying process typically takes 2-4 days under perfect conditions. You'll know your herbs are properly dried when they crumble easily and their stems become brittle.
Don't rush the process with excessive heat, as this can lead to flavor loss. Different herbs dry at varying rates due to their moisture content, so you'll need to monitor each variety separately.
Testing for complete dryness is essential – store a sample in a sealed jar for a week to check for any remaining moisture.
Benefits of Natural Drying Methods
Natural drying methods offer three distinct advantages that make them the preferred choice for preserving herbs. You'll retain more nutrients, flavors, and essential oils compared to artificial drying methods, while the process concentrates these elements to create more potent seasonings. In fact, you'll need only a quarter of the amount of dried herbs compared to fresh ones in your recipes. The best time to harvest herbs for drying is in the morning after the dew has dried but before intense sunlight hits the plants.
When you choose natural drying methods, you'll gain complete control over the preservation process. Whether you opt for air drying with simple twine, oven drying at low temperatures, or using a dehydrator with precise settings, you can monitor and adjust the conditions to achieve your desired results.
Each method offers unique benefits: air drying preserves magical properties and fills your space with calming aromas, oven drying provides quick results in humid environments, and dehydrators offer consistent quality with minimal supervision.
You'll also save money by drying your own herbs instead of buying pre-packaged options. Plus, you'll enhance your dishes' flavors naturally, reducing the need for additional salt or sodium while knowing exactly how your herbs were processed and preserved.
Preparing Herbs for Sun-Drying
Successful sun-drying of herbs begins with proper preparation techniques that build upon the benefits of natural preservation methods.
You'll want to harvest your herbs in the early morning after the dew has evaporated, selecting stems about 6 inches below the flower buds when the essential oils are at their peak concentration.
Start by thoroughly cleaning your herbs in cool water, then gently pat them dry to remove excess moisture.
You'll need to inspect each herb carefully, removing any bruised, soiled, or imperfect leaves to guarantee the highest quality dried product.
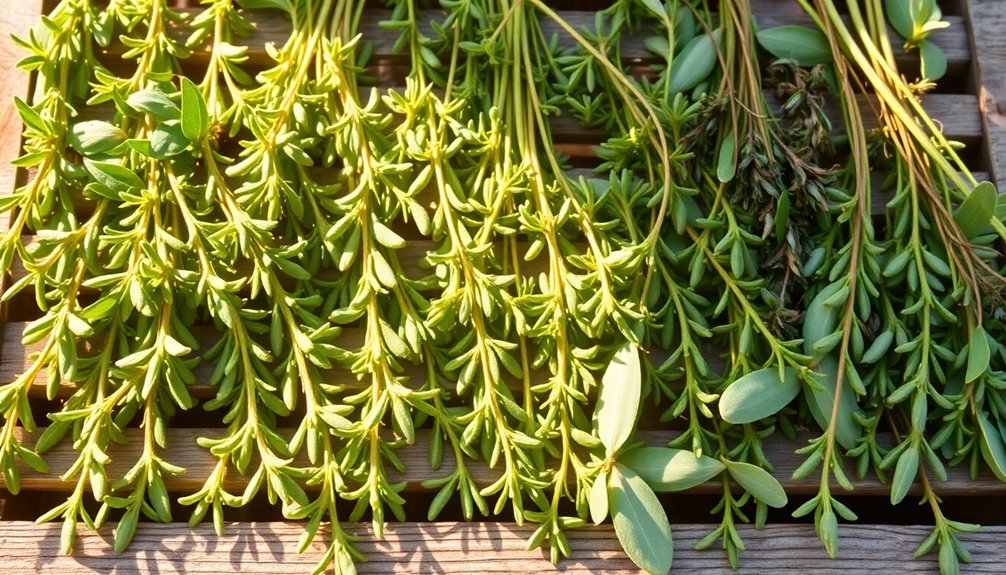
For herbs like basil and mint, remove the leaves from their stems, while smaller-leaved varieties like oregano can remain on their stalks.
Once cleaned, you'll need to arrange your herbs properly for drying. Remember to avoid overlapping leaves to ensure even and thorough drying of each herb.
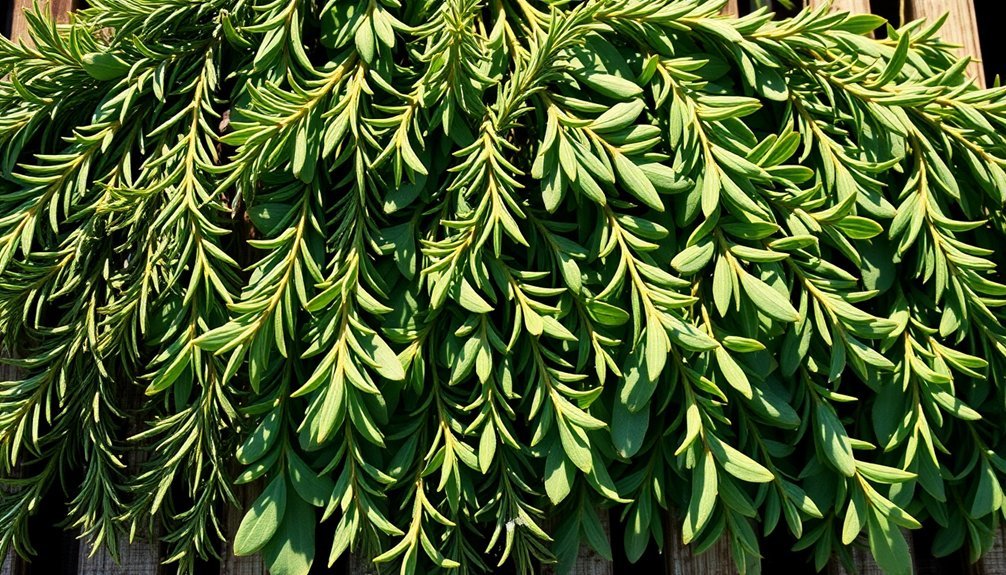
Create small bundles of sturdy herbs like rosemary and sage, securing them with twine.
For tender-leafed varieties, use paper bags with ventilation holes or lay them in a single layer on drying trays.
If you're using a flat surface, consider weighing down the herbs with a stick to prevent them from blowing away during the drying process.
Optimal Weather and Climate Conditions
Creating the perfect environment for sun-drying herbs requires careful attention to temperature, humidity, and light exposure. While sun-drying might seem straightforward, you'll need to monitor specific conditions to achieve the best results.
For ideal flavor retention, you'll want to maintain temperatures between 95°F and 115°F (35°C to 43°C). If you're in a high-humidity area, you might need to increase the temperature slightly, up to 125°F, to guarantee proper moisture removal. However, don't exceed these temperatures, as higher heat will cause significant flavor and color loss.
You'll need to guarantee good air circulation by hanging herbs in small clusters or using paper bags with ventilation holes. Don't overcrowd your herbs, as this can trap moisture and lead to mold growth.
Although you're sun-drying, you'll want to avoid direct sunlight, which can degrade essential oils and vitamins. Instead, choose a well-ventilated, shaded area away from moisture sources like sinks or dishwashers.
If you're experiencing consistently high humidity, you might want to reflect on moving your drying operation indoors, where you'll have better control over environmental conditions and can better preserve your herbs' color and flavor.
Flavor Development During Drying

When you sun-dry herbs, you're activating a natural concentration process where the volatile oils become more potent as moisture evaporates from the plant cells.
You'll notice that heat from the sun releases these concentrated flavors, though it's important to maintain temperatures below 100°F to prevent flavor loss.
The slow drying process gradually intensifies the herb's essential oils, creating deeper and more complex flavor profiles, even as new compounds form through chemical reactions.
Natural Oil Concentration Process
Through the natural drying process, herbs undergo a remarkable transformation in their flavor profile as water content diminishes and essential oils become more concentrated. As water evaporates, you'll find that the herbs' essential oils become more concentrated relative to their mass, though some oils are inevitably lost during the process.
You'll notice that different types of herbs concentrate their oils differently. Resinous herbs like oregano, thyme, and rosemary retain their flavors better because they naturally contain higher concentrations of volatile oils. In contrast, fine herbs such as basil, parsley, and dill tend to lose more of their delicate flavors during drying.
The way you dry your herbs greatly impacts their oil concentration. While sun drying is common, it's not always ideal because ultraviolet light can trigger chemical changes that degrade the essential oils. You'll get better results using shade drying, which helps preserve both the oils and color.
During drying, your herbs will develop secondary aroma compounds like alcohols and aldehydes, which contribute to their final flavor profile. These chemical changes, combined with the concentration of remaining oils, create the distinctive taste of dried herbs.
Heat-Activated Flavor Release
During the drying process, temperature plays a significant role in how herbs develop and release their flavors. When you're drying herbs, it's essential to maintain temperatures below 100°F to preserve the essential oils stored in their cell walls. High temperatures can degrade these oils, resulting in substantial flavor loss, which is why sun drying isn't recommended for ideal flavor retention.
To maximize flavor development, you'll want to focus on controlled drying methods that protect the herbs' natural compounds. Here are three key approaches for ideal flavor release:
- Use a food dehydrator set to 90-100°F for precise temperature control and consistent results.
- Choose gentle air drying indoors for hardy herbs like sage and rosemary to maintain color and flavor intensity.
- Monitor the drying process regularly, checking that herbs crumble easily between your fingers when they're done.
When you cook with dried herbs, you'll notice that heat activates their flavor compounds differently from fresh herbs. The concentrated oils release gradually as they rehydrate during cooking, especially in stronger herbs like bay leaf and rosemary.
You'll get the best results by storing your dried herbs in a cool, dark place to maintain their strong flavors.
Slow Flavor Intensification
The chemical transformation of herbs' flavors throughout the drying process reveals a fascinating progression of taste development. As moisture slowly leaves your herbs, you'll notice the formation of secondary aroma compounds, including alcohols, aldehydes, peroxides, and ketones. These new compounds can actually make up a significant portion of your dried herbs' final flavor profile.
You'll find that different herbs intensify their flavors in distinct ways. Resinous herbs like oregano, thyme, and rosemary will concentrate their flavors more effectively than delicate herbs such as basil or parsley. That's why you'll need to use less of these dried herbs in your cooking compared to their fresh counterparts.
The key to maximizing this flavor intensification lies in your drying method. You'll want to avoid direct sunlight and high temperatures, which can degrade essential oils. Instead, opt for indoor air drying or low-temperature oven drying with the door slightly ajar.
During the process, cell walls rupture and oxidation occurs, releasing new compounds that contribute to the herb's complex flavor profile. Remember, proper storage in a cool, dark place will help preserve these intensified flavors for up to a year.
Storing Your Sun-Dried Treasures
After spending time and effort drying your herbs, proper storage becomes vital for maintaining their flavor and potency. You'll want to guarantee your herbs are completely dry before storing them – they should crumble easily between your fingers and feel crispy to the touch. This significant step prevents mold growth and preserves their intense flavors.
For peak storage, you'll need:
- Airtight containers – preferably glass jars or metal tins with secure lids to prevent oxygen degradation
- A cool, dry storage location – away from heat sources like stoves and humid areas such as bathrooms
- Protection from sunlight – using dark-colored glass or storing in closed cabinets
Don't use plastic containers, as they can leach chemicals into your herbs. Instead, opt for glass jars with screw-top or clamp-on lids, and always label them with the herb type and preservation date.
Root cellars, pantries, and cool cupboards make excellent storage locations. If your kitchen gets lots of sunlight, consider using curtains or finding an alternative storage space.
With proper storage, your sun-dried herbs will maintain their robust flavors and aromatic qualities for months to come.
Cooking With Sun-Dried Herbs

Now that your herbs are safely stored, let's explore their remarkable cooking potential. You'll find that sun-dried herbs pack three to four times more flavor punch than their fresh counterparts, thanks to the concentration of volatile oils during the drying process. This intensification creates deeper, more robust flavors that work beautifully in your cooking.
When using dried herbs, add them early in the cooking process, especially for dishes with longer cooking times like soups, stews, and braises. This allows the herbs to rehydrate and release their full flavor potential. You'll want to use about 1-2 teaspoons for every six servings, as their concentrated nature means a little goes a long way.
Try adding bay leaf, rosemary, or sage when you need dominant flavors, or experiment with basil and oregano in marinated dishes. You can even incorporate dried herbs into unexpected treats like sorbets or summer drinks.
Remember that while dried herbs excel in cooked dishes, some varieties like burnet, chervil, and parsley are best used fresh, as they lose their distinctive flavors when dried. Your dried herbs will complement rather than overwhelm your dishes when used appropriately.
Frequently Asked Questions
Can Sun-Dried Herbs Be Rehydrated Before Use in Cooking?
You don't need to rehydrate sun-dried herbs before cooking. Instead, add them directly to your dish during cooking, where they'll naturally rehydrate and release their concentrated flavors into your food.
Do Certain Herbs Lose Their Medicinal Properties During Sun-Drying?
While some herbs retain significant medicinal properties during sun-drying, you'll notice slight losses. Most herbs keep their antioxidants and bioactive compounds, but basil may lose more properties compared to oven-dried alternatives.
How Do Pesticides Affect the Sun-Drying Process of Herbs?
You'll notice pesticides become more concentrated during sun-drying, increasing 1.27-5.19 times as moisture evaporates. They can also affect your herbs' drying rate and might impact the final quality of your dried product.
Which Herbs Should Never Be Sun-Dried Together?
You shouldn't dry strong herbs like sage and rosemary with delicate ones like basil and parsley. Also, don't mix herbs with different moisture levels, as this can lead to uneven drying and flavor contamination.
Is Morning or Afternoon Sun Better for Drying Herbs?
You'll get better results drying herbs in morning sun rather than afternoon. Morning sun helps preserve essential oils and color, while afternoon sun can drain flavor and cause wilting. Choose early hours for best results.
In Summary
Now that you've learned the art of sun-drying herbs, you're ready to capture nature's most potent flavors. Whether you're drying basil, thyme, or oregano, remember that patience and proper conditions are key. By following these guidelines, you'll create intensely flavored herbs that'll elevate your cooking. Store your sun-dried treasures properly, and you'll enjoy their concentrated essence for months to come.


Leave a Reply