When you sun-dry fish, you're using two powerful preservation methods at once: dehydration and salt curing. The drying process removes moisture that bacteria need to grow, while salt creates an environment where harmful microorganisms can't survive. The sun's heat drives out water through evaporation until the fish reaches a low moisture content that's inhospitable to spoilage. You'll also need proper air circulation and the right humidity levels during drying, plus appropriate storage in airtight containers afterward. Understanding these key factors will help you master this ancient preservation technique that's still effective today.
The Science Behind Fish Drying

The science behind sun-drying fish centers on two fundamental phases: the constant rate period and falling rate period. During the constant rate period, you'll notice moisture evaporating from the fish's surface, while internal moisture continuously moves outward. The speed of this process depends on three key factors: air temperature, humidity levels, and how fast the air moves around your fish. When done properly, traditional drying methods can retain most of the fish's nutritional content.
Once the falling rate period begins, the process becomes more complex. The fish's characteristics now play an important role – its thickness, fat content, and internal temperature all affect how quickly remaining moisture can reach the surface. You'll find that fatty fish take longer to dry than lean ones, and thicker cuts need more time as the moisture must travel further.
The preservation magic happens as you reduce the fish's water content. By removing moisture, you're creating an environment where microorganisms can't thrive. The process lowers the water activity (aw), which makes it difficult for bacteria, yeasts, and molds to survive. This also slows down enzymatic and chemical reactions that cause spoilage, allowing your dried fish to remain stable at room temperature for extended periods.
Traditional Fish Preparation Methods
Understanding the science of fish drying sets the stage for mastering traditional preparation methods that have stood the test of time. To begin, you'll need to thoroughly clean your fish by scaling, gutting, and washing it to remove all traces of blood and blood vessels.
Don't forget to remove the blood vessel along the spine, as this prevents fishy odors from developing.
Create strategic cuts that'll enhance the drying process by making deep slashes to the bone along the spine and top fin. You'll want to prop these cuts open using toothpicks, which allows better air circulation and sun penetration.
Before moving forward, verify you've dried the fish completely with paper towels. Low humidity conditions are crucial for successful drying.
The next vital step involves proper salting. You'll need about one-third of the fish's weight in salt, applying it:
- Generously on the outer surface
- Throughout the inner cavity
- Deep into the slashes you've made
This salting process is essential for preservation, but remember you can adjust the duration based on your preferred saltiness level.
Once you've completed the salting, thoroughly wash the fish to prepare it for the drying phase.
Essential Tools and Equipment

You'll need proper drying racks or platforms to guarantee your fish dries evenly and stays clean during the preservation process.
Your racks should be sturdy, preferably made of mesh material for better airflow, and positioned in direct sunlight for ideal drying efficiency.
Quality control tools, such as moisture meters and clean storage containers, help you monitor the drying progress and maintain the safety of your preserved fish.
The process can be enhanced with mechanical drying systems that provide more controlled conditions than traditional sun drying.
Drying Racks and Platforms
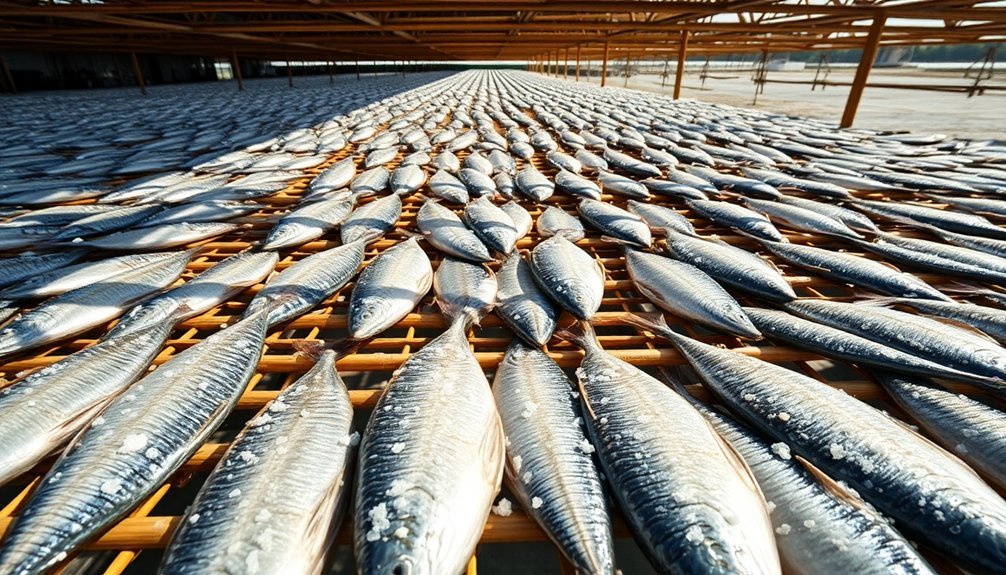
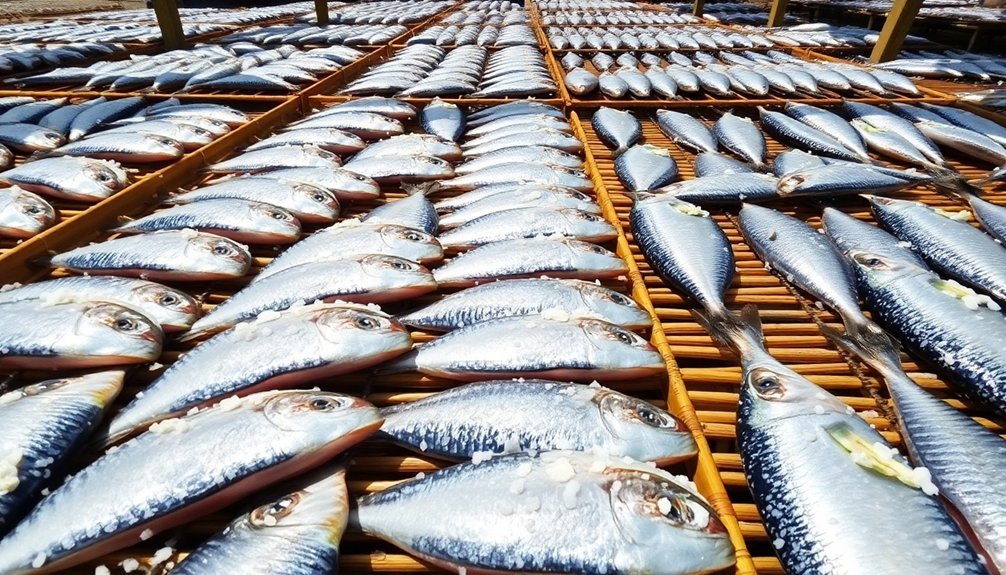
Proper drying racks and platforms form the backbone of successful sun-dried fish preservation. You'll need either wooden or metal structures raised about one meter off the ground, covered with food-grade mesh to keep your fish secure.
These elevated platforms greatly reduce drying time from three days to just eight hours while protecting your catch from dust, sand, and unwanted animal visitors.
When you're using well-designed drying racks, you'll notice these key features:
- A durable, rot-proof surface that maintains cleanliness
- Improved air circulation that dries fish from both top and bottom
- Protection from ground contamination and easy covering during rain
You're not just improving the drying process; you're investing in better product quality and market value.
These racks have proven successful across multiple regions, from Tanzania's coastal areas to Uganda's lake sardine processing. They're particularly effective during peak seasons when you need to dry multiple batches in a single day.
Tools for Quality Control
Once your drying racks are set up, the right quality control tools will determine your success in sun-dried fish preservation.
You'll need reliable thermometers and hygrometers to monitor temperature and humidity levels consistently, ensuring ideal drying conditions and preventing bacterial growth. An anemometer helps you measure air velocity, which is vital for proper drying and reducing microbial contamination.
For microbiological safety, you'll require testing equipment to perform Total Plate Count analyses and check for specific pathogens. A water activity meter is essential to verify that your dried fish maintains an Aw level below 0.85, making it shelf-stable.
You should also invest in biochemical testing tools to assess protein content and other nutritional values.
Don't forget packaging equipment – you'll need proper sealing tools for HDPE or LDPE bags to create airtight conditions.
Quality assurance tools include HACCP monitoring devices, sanitation testing equipment, and documentation systems to track critical control points.
These tools help you maintain ISO 9000 standards and implement effective TQM practices, ensuring your sun-dried fish meets international safety and quality requirements.
Best Fish Selection Tips
When selecting fish for sun-drying, lean varieties like cod, halibut, and sea bass offer the best results and longest preservation times. Unlike fatty fish that spoil quickly due to their high oil content, lean fish maintain their quality throughout the drying process and can last 6 to 12 months when properly preserved.
The size of your fish will determine how you'll need to prepare it for drying. You'll want to take into account these preparation guidelines:
- Small fish under 8 inches can be butterfly cut and dried with heads intact
- Medium-sized fish should be split open from head to tail, spread flat
- Large fish need to be cleaned, headed, and cut into smaller portions
When you're choosing between bold or mild-flavored fish, remember that stronger flavors tend to survive the drying process better.
You'll need to make even cuts through thicker portions to guarantee uniform drying. For storage, you can preserve your dried fish in vacuum-sealed bags, plastic zipper bags, or glass mason jars. Keep them in a cool, dry place or freeze them to extend their shelf life even further.
Salt Curing Process
The salt curing process forms the backbone of traditional fish preservation methods. When you're curing fish, you'll need to coat the fillets with a mixture of salt, sugar, and spices. This mixture doesn't just add flavor; it triggers an essential preservation process by drawing moisture out of the fish flesh, creating an environment where harmful bacteria can't survive.
You'll want to layer your fish in a container, adding generous amounts of salt between each layer. As the salt penetrates the flesh, it changes the protein structures, altering both texture and flavor while preventing rancidity in fatty fish. The curing period typically lasts between 2 to 10 days, depending on your fish's size and type.
You can enhance your salt-cured fish by combining it with other preservation methods. Cold smoking (below 85°F) or hot smoking will add complexity to the flavor, while additional drying will further extend shelf life.
If you're planning for long-term storage, vacuum sealing and freezing can preserve your fish for up to a year. Remember, before eating, you'll need to soak the fish in water to remove excess salt and achieve the right flavor balance.
Natural Sun Drying Steps
Sun-drying success begins with proper fish preparation and setup. You'll need to thoroughly clean your fish, remove the internal organs, and make strategic cuts to guarantee even drying. Remember to scale the fish and remove the head if needed.
Once cleaned, you can begin arranging your drying setup in a well-ventilated area with direct sunlight.
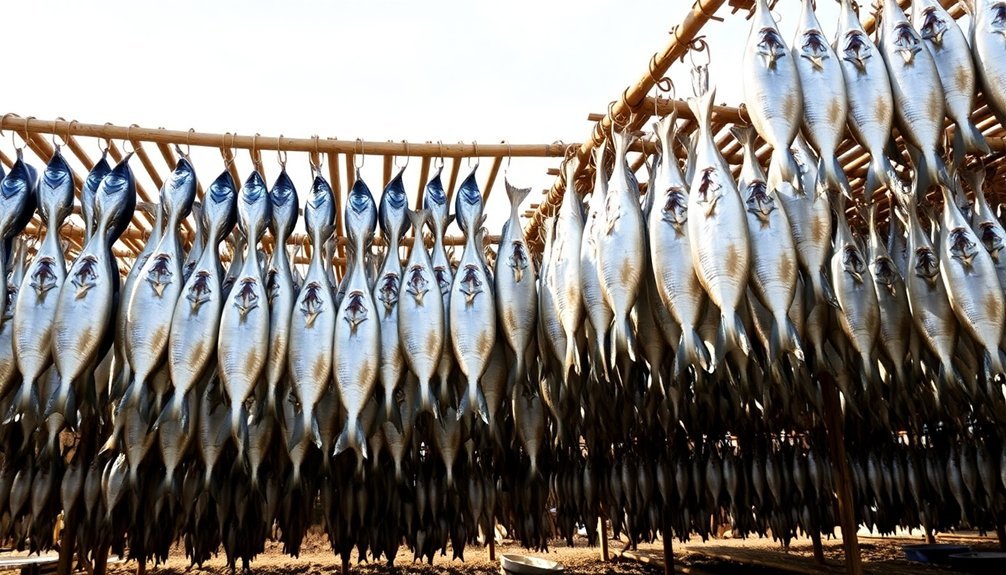
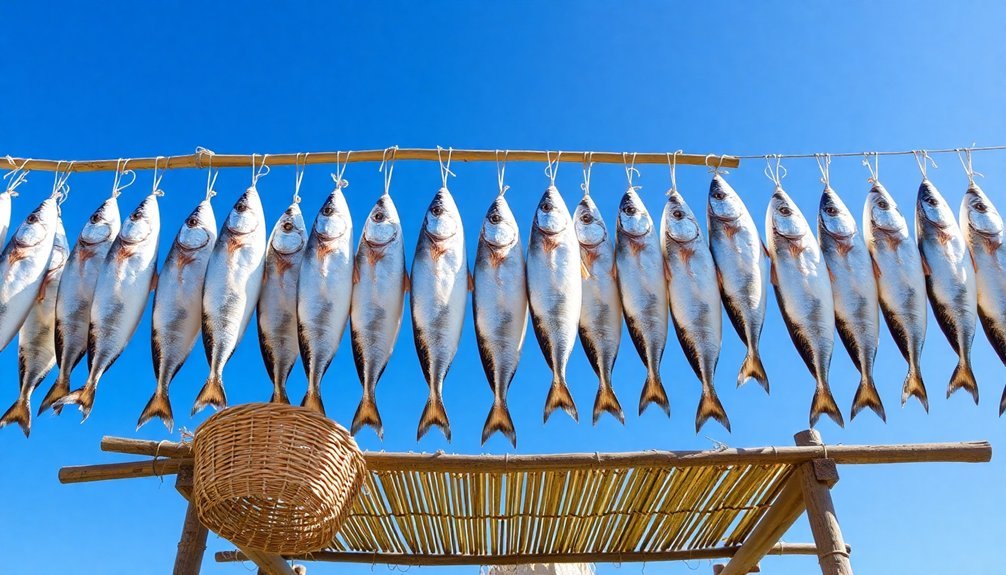
Position your fish using one of these effective methods:
- Hang them by their tails using strong twine or rope, allowing air to circulate freely around each fish
- Thread them onto bamboo skewers in rows, spacing them apart for ideal airflow
- Lay them flat on clean drying racks covered with protective cheesecloth
You'll want to start the drying process early in the morning, repositioning your fish throughout the day for even exposure.
Continue this process for several days, bringing the fish inside each evening and checking for moisture. Once completely dried, store your fish in airtight containers in a cool, dry place.
Keep checking periodically for any signs of mold or moisture. With proper storage away from heat and humidity, your sun-dried fish can maintain its quality for months.
Weather and Drying Conditions
You'll need ideal temperatures between 30-35°C and humidity levels below 75% to successfully sun-dry your fish.
Good air circulation from wind helps achieve uniform drying while preventing moisture buildup that could lead to mold growth.
Direct sunlight exposure is essential for effective drying, so position your drying racks in areas that receive maximum sunlight throughout the day.
Temperature and Humidity Impact
Weather conditions play a vital role in the success of sun-dried fish preservation, with temperature and humidity being the two most influential factors.
You'll find that ideal drying occurs at temperatures between 31°C and 34°C, while relative humidity should ideally stay around 50-60%. These conditions help reduce moisture content effectively, which is essential for preventing microbial growth and spoilage.
When you're drying fish in the sun, you'll notice these key visual indicators of proper drying conditions:
- Fish flesh becomes firm and develops a consistent, non-glossy surface
- The color changes gradually from translucent to opaque
- Edges start to curl slightly as moisture evaporates
If you're dealing with high humidity levels above 60%, you'll need to extend the drying time, as moisture evaporation slows down considerably.
It's important to understand that your fish needs to reach about 25% moisture content for proper preservation. When temperatures rise above 34°C, you'll get faster drying results, but you'll need to monitor the process carefully to prevent protein damage.
In controlled environments like solar dryers, you can maintain more consistent conditions than traditional sun drying, leading to better quality preservation.
Wind Speed Benefits
A steady breeze plays an essential role in fish drying, with higher wind speeds greatly improving the preservation process. When wind moves across your drying fish, it breaks down the slow-moving air layer surrounding the food, allowing moisture to evaporate more quickly.
You'll find that higher air velocities, particularly around 3.5 m/s, achieve remarkably better drying rates compared to still air conditions.
The wind's impact is most noticeable during the constant rate period, where surface moisture steadily evaporates from your fish. As air flows across the surface, it prevents moisture saturation and maintains consistent drying conditions.
You'll want to position your drying racks to maximize wind exposure, ensuring the air can circulate freely around each piece of fish.
During nighttime, you'll need to store your fish in a dry place to prevent moisture reabsorption. If you're using mechanical or solar dryers, fans can simulate natural wind conditions, providing controlled airflow that helps achieve drying efficiencies up to 74.3%.
This consistent airflow also prevents case hardening – a condition where the surface dries too quickly, trapping moisture inside and potentially leading to spoilage.
Sunlight Exposure Requirements
While wind speed promotes effective drying, proper sunlight exposure determines the ultimate success of your fish preservation efforts.
You'll need 5-7 days of consistent sunlight in ideal conditions, though smaller pieces might dry in 2-3 days. Hot, dry weather greatly speeds up the process, while humid or rainy conditions can extend drying time beyond a week and increase spoilage risk.
To guarantee even drying, you'll need to:
- Spread fish on clean, raised platforms or racks exposed to direct sunlight
- Turn the fish once or twice daily for uniform exposure
- Cover partially dried fish with polythene sheets during evenings to protect from moisture
The intense heat from sunlight triggers water evaporation within the fish, creating a preservation effect through dehydration. This reduced moisture content prevents microbial growth and enzymatic processes that cause spoilage.
For best results, you'll want to arrange your fish on suitable drying equipment like platforms, rocks, or hanging lines. The combination of proper sunlight exposure and low humidity guarantees rapid moisture extraction, making your sun-dried fish stable at most ambient temperatures.
Signs of Properly Dried Fish
Seasoned fish enthusiasts know that properly dried fish exhibits distinct characteristics that indicate successful preservation. When you're checking your dried fish, look for a firm yet pliable texture that doesn't break when bent. The color should be a consistent reddish or orange-brown tone, and the fish should be transparent without any signs of decay.
You'll want to verify your dried fish doesn't show any moisture content or fungal growth, as these are clear indicators of improper drying. The aroma should be mild, similar to a cucumber if you're making high-quality balyk, and shouldn't have an overpowering fishy smell.
| Characteristic | What to Look For |
|---|---|
| Texture | Firm, pliable, doesn't break when bent |
| Color | Reddish or orange-brown, transparent |
| Moisture | No visible moisture or fungal growth |
| Smell | Mild, cucumber-like for balyk |
The taste shouldn't be overly salty or bitter, and the fish should maintain its structural integrity. You'll know you've achieved proper drying when the moisture content reaches 25% or below. This level of dryness verifies your fish will resist bacterial growth while maintaining its quality for extended storage.
Safe Storage Practices
Proper storage practices can make the difference between preserving your sun-dried fish for months or losing it to spoilage within days. To maximize shelf life, you'll need to handle your dried fish with completely dry hands and use appropriate storage containers that keep moisture and air out.
When storing your sun-dried fish, wrap it in newspaper before placing it in an airtight, moisture-proof container. Don't stack the pieces; instead, arrange them in a single layer to prevent moisture buildup. Keep the container in a cool, dry place away from direct sunlight and strong-smelling foods.
For peak preservation, you should:
- Check your dried fish every two weeks for signs of moisture or mold
- Microwave it for 30 seconds to maintain dryness, then let it cool completely
- Rotate older stock to the front to guarantee even usage
Remember to label and date your containers so you can track storage time.
If you're planning for long-term storage, consider vacuum sealing your dried fish. By following these practices and regularly inspecting your stored fish, you'll maintain its quality and prevent spoilage for months to come.
Common Problems and Solutions
Your sun-dried fish can quickly become ruined by mold growth and insect infestation if you don't take proper preventive measures.
You'll need to guarantee your drying area is well-ventilated and use protective nets or tent driers to keep insects, birds, and other pests away from your fish during the drying process.
To combat mold growth, you should maintain proper salt concentrations (2-5%) and avoid drying fish during periods of high humidity or rainfall.
Preventing Mold Growth
Three critical factors determine whether mold will grow on your sun-dried fish: moisture content, storage conditions, and preservative treatments. To effectively prevent mold, you'll need to control all these elements throughout the preservation process.
Start by drying your fish to a low moisture content, as this creates an unfavorable environment for microbial growth. You can use either traditional sun-drying or advanced techniques like mechanical dryers that provide better control over the drying conditions.
For maximum protection against mold, contemplate these proven preservation methods:
- Apply a 1.0% sorbistat solution to your dried fish, which can prevent mold growth for up to five months.
- Use proper salting techniques with a salt-to-fish ratio between 1:3 and 1:10, followed by thorough drying.
- Store your dried fish in sealed cellophane bags in a cool, dry place where humidity stays below 75%.
Don't let your fish be exposed to temperatures between 30-35°C or high humidity, as these conditions promote mold growth.
If you're using traditional drying methods, protect your fish from dew and night moisture. For better results, you might want to contemplate advanced drying techniques that offer more consistent moisture removal and better quality control.
Insect Infestation Control
Devastating insect infestations pose four major threats to sun-dried fish: flies, beetles, mites, and their larvae. During rainy seasons, high humidity levels (70-80%) create perfect conditions for these pests to multiply, leading to losses of up to 20% of your product.
You'll need to focus on controlling two critical factors: temperature and moisture. While insects thrive between 25°C and 35°C, extreme temperatures can kill them. More importantly, you must keep moisture levels low through proper drying, as fully-cured fish becomes naturally resistant to pest attacks.
To protect your sun-dried fish effectively, you've got several proven methods at your disposal. Salting is particularly effective – using 13% or more salt prevents insect growth at all stages. You can also employ tent or funnel sun driers to reduce infestation risks.
While traditional insecticides might seem tempting, you should avoid them due to health concerns.
For best results, you'll want to combine these approaches with proper handling and sanitation practices. Consider using mechanical dryers when possible, as they offer faster, more hygienic drying that greatly reduces insect infestation risks.
During storage, monitor humidity levels regularly and maintain proper ventilation to keep your product safe.
Reviving Dried Fish for Cooking
The transformation of dried fish back to a cooking-ready state requires careful attention to rehydration techniques. You'll need to soak your dried fish in water for 2-4 hours, depending on its thickness and size. To speed up this process, start with hot water or combine the dried fish with boiling water in a thermos or insulated container.
For ideal rehydration results, you can follow these preparation methods:
- Soak the fish in hot water for 5-10 minutes before bringing it to a boil
- Place the fish in a freezer bag with boiled water and let it sit
- Use a thermos food jar filled with hot water for gradual rehydration
Once your fish is properly rehydrated, you'll have numerous cooking options. You can incorporate it into hearty dishes like fish chowder, cod casserole, or Fish-a-Roni.
For added flavor and texture, try mixing the rehydrated fish with mashed potatoes or macaroni. You can also grill or bake the fish after rehydration, enhancing its taste through marinating or basting with your favorite sauces.
Remember that proper rehydration is vital for restoring the fish's original texture and making it suitable for cooking.
Frequently Asked Questions
Can Sun-Dried Fish Still Spoil if Exposed to High Humidity?
Yes, your sun-dried fish will spoil when exposed to high humidity. It'll absorb moisture from the air, leading to microbial growth and spoilage. You'll need to store it in airtight containers to prevent this.
How Does the Nutritional Value Change After the Drying Process?
You'll notice higher protein, vitamin D, and some mineral levels in sun-dried fish. However, you'll lose moisture, some amino acids, and vitamins A, E, and K during drying. Fat content rises while carbohydrates decrease.
Why Do Some Dried Fish Develop a White Powdery Coating?
You'll notice white powder on dried fish when salt crystallizes on the surface, or when insects and fungi infest it. This coating can also appear if there's chemical residue from pesticides used during processing.
Are There Specific Fish Species That Should Never Be Sun-Dried?
You shouldn't sun-dry extremely fatty fish like tuna, mackerel, or salmon. They're more prone to spoilage and rancidity. These oily species can become brittle and develop off-flavors during the drying process.
Can Sun-Dried Fish Be Safely Consumed During Pregnancy?
You can safely eat sun-dried fish during pregnancy. It's rich in protein and beneficial nutrients for fetal development. Just verify it's from reliable sources and properly processed to avoid any contamination risks.
In Summary
Sun-dried fish's remarkable shelf life comes down to the perfect combination of salt curing and dehydration. You'll find that removing moisture prevents bacterial growth while salt acts as a natural preservative. When you've properly dried and stored your fish in a cool, dark place with good airflow, it'll stay edible for months. Remember to check periodically for any signs of mold or unusual odors to guarantee your dried fish remains safe to eat.


Leave a Reply