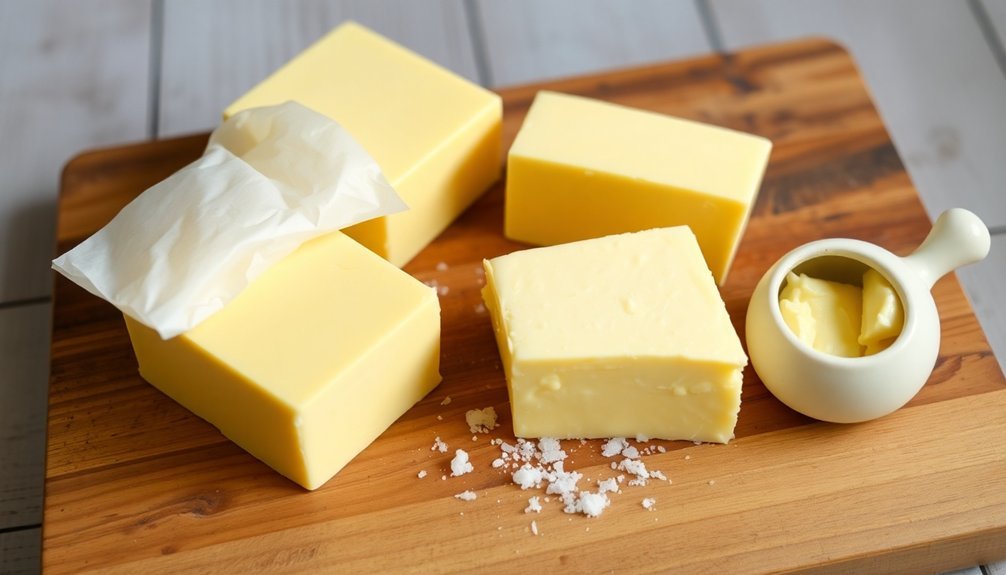
You'll discover that cultured farm butter is a luxurious, tangy spread made by fermenting cream with beneficial bacteria before churning. Unlike regular butter, it offers a complex flavor profile with nutty, slightly sour notes that enhance both sweet and savory dishes. You'll need quality heavy cream, culturing agents like buttermilk or yogurt, and basic kitchen equipment to get started. The process involves fermenting at room temperature for 24-48 hours, followed by churning and washing the butter to achieve that perfect texture. From flaky pastries to artisanal breads, this traditional method reveals a world of culinary possibilities you won't want to miss.
What Makes Cultured Butter Special
Craftsmanship sets cultured butter apart from its conventional counterpart. Through a careful fermentation process using specific bacterial cultures, this premium butter develops a distinctive flavor profile that you won't find in regular butter. Ancient European dairy practices contributed to the development of this traditional butter-making method.
You'll notice a subtle tanginess complemented by delicate notes of hazelnuts and buttermilk, creating a more complex and sophisticated taste experience.
The fermentation process doesn't just enhance flavor – it transforms the butter's texture into something remarkably different. You'll discover a creamier, fluffier consistency that's become a favorite among professional chefs and serious bakers. The longer the fermentation period, the more pronounced these unique characteristics become.
What's particularly special about cultured butter is its enhanced functionality in cooking and baking. The bacterial cultures infuse the butter with beneficial compounds that improve its performance in the kitchen.
You'll find it creates flakier pastries, richer sauces, and more flavorful dishes overall. The fermentation process also introduces beneficial bacteria like Lactococcus lactis and Leuconostoc mesenteroides, which not only contribute to the butter's distinctive qualities but also provide potential digestive benefits.
Essential Ingredients and Equipment
With the unique qualities of cultured butter in mind, let's focus on what you'll need to make it at home. You'll want to start with high-quality heavy cream containing 40% butterfat, preferably from grass-fed or Jersey cows. Avoid ultra-pasteurized cream containing stabilizers or additives, as these will interfere with the culturing process.
For culturing, you'll need either cultured buttermilk, plain unsweetened yogurt with live cultures, or cultured sour cream. You can also use retained buttermilk from previous batches. The cream's temperature should be between 50-60°F when you're ready to churn. The process typically takes 1-2 days to ferment at room temperature.
Your equipment list should include a tight-lidded container for culturing, a fine-mesh strainer, and either a stand mixer with whisk attachment, food processor, or hand mixer for churning.
You'll also need cheesecloth or a nut milk bag for straining, and bowls for washing the butter. Cold water is essential for washing, and you'll want ice water for the final rinse.
Don't forget a spatula for handling the butter and proper storage containers for the finished product.
The Fermentation Process
The fermentation process transforms ordinary cream into the foundation of cultured butter through a carefully controlled aging period.
Using beneficial probiotic bacteria promotes gut health and digestive wellness during fermentation.
You'll need to maintain room temperature conditions between 70°F to 75°F (21°C-24°C) throughout the fermentation, which typically takes 24 to 48 hours.
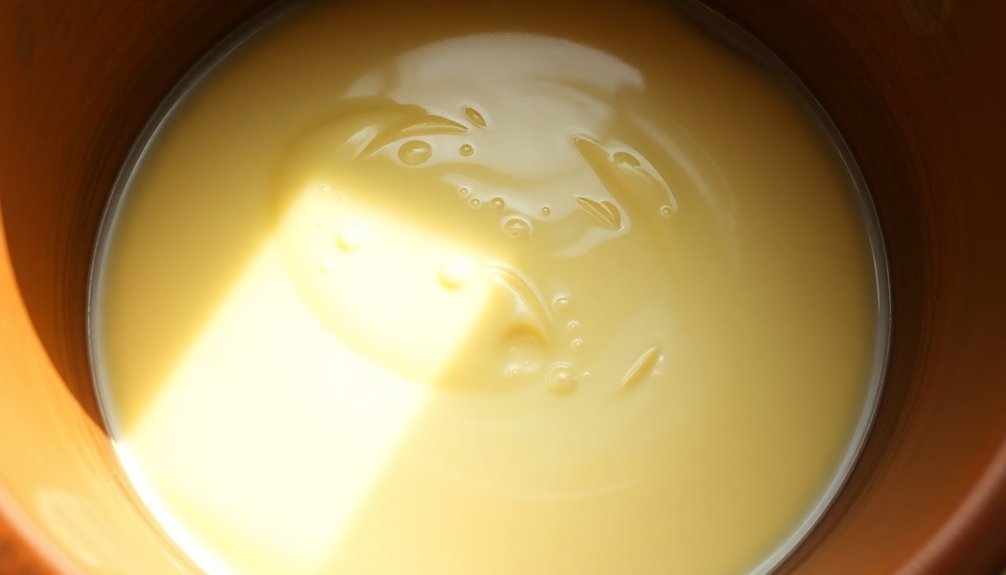
Start by thoroughly mixing your cream with the culturing agent, whether it's buttermilk, yogurt, or crème fraîche with live cultures.
Place the mixture in a clean, sanitized container and cover it with a clean cloth. You'll want to let it sit undisturbed, though you can periodically check its progress by smell.
As fermentation progresses, you'll notice the cream becoming thicker and developing a distinctive tangy aroma.
The process is complete when your cream has a pronounced buttery smell and has noticeably thickened.
Don't rush this step – it's vital for developing the complex flavors that make cultured butter special.
Once fermentation is complete, chill the mixture in the refrigerator for at least an hour.
This firming of the butterfat is essential for successful churning later.
You can save the resulting buttermilk to culture your next batch.
Churning Methods and Techniques
Successfully churning cultured cream into butter requires choosing the right method for your needs and equipment.
You'll find several effective approaches, each with distinct advantages and time requirements.
The traditional hand churning method uses a hand-crank butter churn with about 4 pints of cream. While it's the most time-intensive option at 30-45 minutes, you'll witness the complete transformation through whipped, stiff, and separation stages.
For a mechanical approach, you can use a food processor or stand mixer, filling it 25-50% with chilled cultured cream. This method reduces churning time to 10-20 minutes but requires covering the bowl to prevent splattering.
If you're using a blender, fill it 25-40% with chilled cream and process for 10-20 minutes. You'll need to avoid appliances that generate excessive heat, as this can melt your developing butter.
For a simple, equipment-free option, try the jar shaking method. Fill a jar halfway with cultured cream, secure the lid, and shake until butter forms. While this method is more labor-intensive, it's ideal if you're making small batches or don't have specialized equipment.
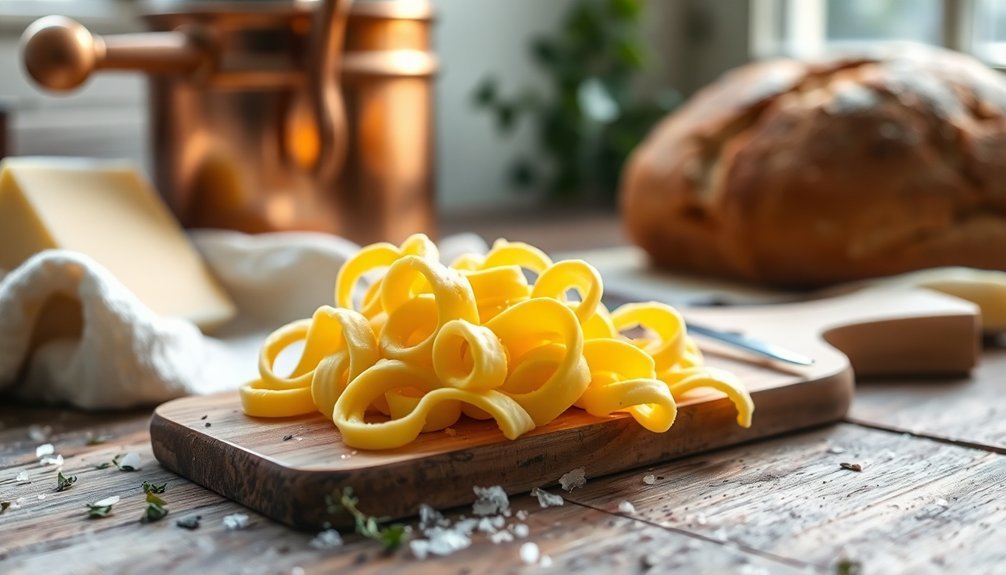
Butter Washing and Shaping
Proper washing and shaping transforms your freshly churned butter into a refined, long-lasting product.
You'll need to wash your butter thoroughly with very cold water until it runs clear, typically requiring 4 to 6 washes. Press the butter against your bowl's edge or use a spatula to release excess buttermilk, then strain through a fine-mesh strainer or cheesecloth. This washing process is essential as it prevents spoilage, extends storage life, and guarantees a cleaner taste.
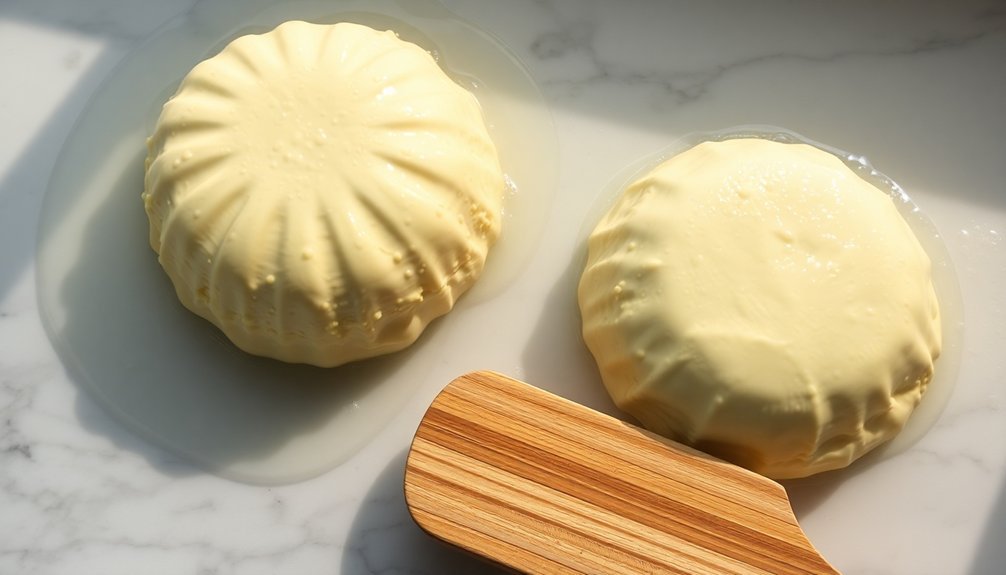
Once you've removed all the buttermilk, you're ready to shape your creation. You'll find silicone molds are the most user-friendly option, though you can also use a butter paddle on a wet cutting board. Work with room-temperature butter for easier molding, and fill your chosen molds completely to avoid air pockets. Level the top with a butter knife's back, and secure any 3D molds with binder clips to prevent leakage.
Tap the mold gently to release trapped air bubbles. For the final step, place your molded butter in the freezer for 2-4 hours until firm, keeping it away from heat to maintain its shape.
Flavor Profiles and Uses
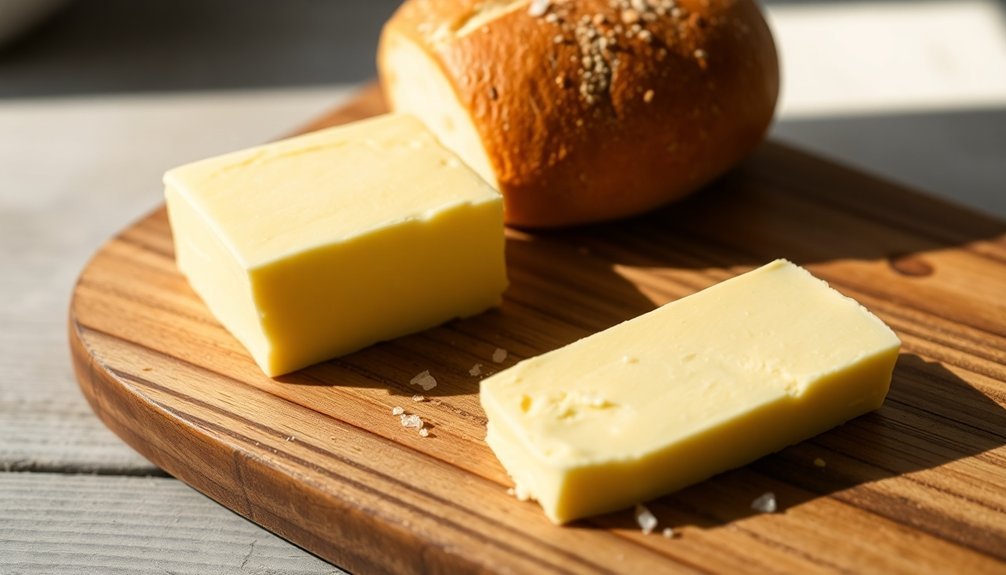
You'll notice cultured farm butter's distinct tangy and nutty profile immediately sets it apart from regular butter, offering complex flavors that develop during fermentation.
This rich, complex butter shines in artisanal baking, particularly in recipes like shortbread and pound cake where butter's flavor takes center stage.
Beyond basic cooking applications, cultured butter's unique characteristics make it perfect for elevating everything from marinades to compound butters, while its fermented nature adds stability and extended shelf life.
Rich Tangy Notes
The distinctive tang of cultured butter sets it apart from its conventional counterpart, offering a fuller, slightly nutty profile that enhances both savory and sweet dishes. You'll notice pronounced buttermilk and hazelnut notes that develop during the fermentation process, creating a more complex flavor experience that masks any potential off-flavors from pasteurization or farm conditions.
- Perfect for biscuits, pancakes, and shortbread where butter's flavor takes center stage
- Ideal for marinating organ meats and soaking chicken, adding depth to pâtés
- Excellent in ranch dressing and fried chicken recipes
- Great for making crème fraîche by re-inoculating cultures into fresh cream
When you're working with cultured butter, you're getting more than just a spread – you're incorporating a fermented food that's rich in beneficial bacteria like Lactococcus lactis and *Leuconostoc mesenteroides*.
These cultures are similar to those found in other fermented foods like sauerkraut and kimchi. The longer fermentation time not only develops better aromas but also increases the butter's stability, giving you a product that's more resilient without refrigeration while offering a silky smooth texture in your finished dishes.
Perfect for Artisanal Baking
Building on the rich tangy characteristics of cultured butter, its distinct flavor profile makes it particularly valuable for artisanal baking. You'll find its fuller, slightly nutty flavor and tangy undertones enhance both sweet and savory baked goods.
The fermentation process creates complex, well-rounded notes reminiscent of hazelnuts and buttermilk, making it ideal for recipes where butter's flavor takes center stage.
You'll get the best results using cultured butter in shortbread, pound cake, and artisanal breads where its unique taste can shine through. While it's less suitable for recipes where other ingredients dominate, like chocolate chip cookies or heavily spiced cakes, it works wonderfully in simple pastries and on fresh-baked toast.
The butter's tanginess perfectly balances sweet ingredients like honey and jams.
To maximize cultured butter's potential in your baking, bring it to room temperature before use and incorporate it gently into your mixtures. You'll find it pairs exceptionally well with fresh herbs and spices, adding depth to your creations.
Store it in an airtight container to preserve its distinctive flavor profile and guarantee the best results in your artisanal baking endeavors.
Beyond Basic Butter
Moving beyond conventional butter, cultured varieties offer distinctive flavor profiles that transform everyday dishes into gourmet experiences.
You'll discover a fuller, slightly nutty taste with tangy undertones that develop through careful fermentation by lacto acid bacteria. These beneficial bacteria create compounds that elevate the butter's flavor from mild to remarkably complex, often featuring notes of buttermilk and hazelnuts.
When you're ready to explore cultured butter's culinary potential, consider these versatile applications:
- Spread it on artisanal bread to fully appreciate its distinct flavor nuances
- Incorporate it into pie crusts and shortbread for an enhanced, tangy dimension
- Pair it with fresh radishes and coarse salt for a simple yet sophisticated appetizer
- Use it in pound cakes and biscuits to achieve deeper, more complex flavors
You can store your cultured butter in the refrigerator for up to three weeks or freeze it for nine months without compromising its quality.
The fermentation process not only creates its signature taste but also helps preserve the butter naturally, giving you more time to experiment with its rich, complex flavors in your cooking adventures.
Storage and Preservation Tips
If you're looking to store your cultured farm butter properly, start by wrapping it tightly in wax paper and placing it in the refrigerator's coldest section for up to a month of freshness.
You'll want to take your butter out a few hours before use to achieve spreadable consistency at room temperature.
For extended storage of 4-6 months, wrap your butter securely in wax paper and freezer bags before freezing, ensuring you maintain both flavor and texture when properly thawed.
Proper Refrigeration Methods
Proper storage makes all the difference in preserving cultured butter's rich, tangy flavor and extending its shelf life. When you've finished making your cultured butter, you'll need to store it correctly to maintain its quality. You can keep it in the refrigerator for up to a month or even longer when it's properly wrapped and protected from strong odors.
Before refrigerating your butter, you'll want to remove all traces of buttermilk by massaging it under cold water until the water runs clear. Use a spatula to press the butter against a fine-meshed sieve, which helps release any remaining liquid. This thorough washing process is essential for preventing spoilage and extending shelf life.
- Wrap your butter in wax paper or cling film, or place it in a sealed glass container
- Store in a cool, dry part of the refrigerator away from strong-smelling foods
- If using a French butter bell, only store salted cultured butter at room temperature
- Divide into smaller portions before wrapping to minimize exposure to air
Remember to keep your separated buttermilk in a different container in the fridge, where it'll stay fresh for up to two weeks.
Freezing For Long Term
Freezing offers the best solution for long-term storage of your cultured butter, extending its shelf life up to 6 months while preserving its distinctive tangy flavor. While your butter can remain safe beyond this timeframe, you'll get the best quality within the recommended storage period.
Before freezing, divide your butter into portions you'll likely use at once. Wrap each portion tightly in wax paper or foil, then place them in freezer bags to prevent freezer burn. You'll find it helpful to pre-slice your butter into manageable pieces, making it easier to use later without thawing the entire block.
When you're ready to use your frozen butter, you've got several options. For recipes requiring melted butter, you can use it straight from the freezer. If you need softened butter quickly, try grating it while frozen. For traditional uses, thaw it overnight in your refrigerator, or use short microwave intervals for immediate needs.
Store your frozen butter in airtight containers away from strong-smelling foods to prevent flavor transfer. Don't forget to label your containers with the date, ensuring you'll use the oldest butter first. You can even freeze any leftover buttermilk for later use.
Frequently Asked Questions
Can I Make Cultured Butter if I'm Lactose Intolerant?
You can try making cultured butter since it has less lactose than regular butter. The fermentation process reduces lactose content, making it more tolerable. If you're highly sensitive, consider making ghee instead.
How Do I Fix Cultured Butter That's Too Sour?
If your cultured butter is too sour, you can rinse it thoroughly with cold water, add a pinch of salt, and guarantee it's properly chilled. Next time, reduce fermentation time and use less culturing agent.
Why Did My Cultured Butter Turn Grainy or Separate?
Your butter's likely grainy due to improper cooling temperatures or slow cooling. You'll need to maintain consistent temps between 24-28C and cool it rapidly. Over-churning or poor ingredient quality can also cause separation.
Is Homemade Cultured Butter More Cost-Effective Than Store-Bought?
You'll generally save money making cultured butter at home, especially since you'll get buttermilk as a bonus product. With $12 worth of ingredients, you can make two pounds of butter versus buying it for $8-16.
Can I Use Plant-Based Cream to Make Cultured Butter?
Yes, you can make cultured butter using plant-based options like cashew cream or coconut milk. You'll need to blend them with probiotics and let them ferment for 24-48 hours to develop that signature tangy flavor.
In Summary
You've now mastered the art of making cultured butter at home. When you're using quality cream and proper culturing techniques, you'll create butter that's tangy, complex, and far superior to standard store-bought varieties. Store your homemade cultured butter properly, and you'll enjoy its rich flavors for weeks to come. Don't forget to save that buttermilk – it's perfect for baking and cooking!


Leave a Reply