
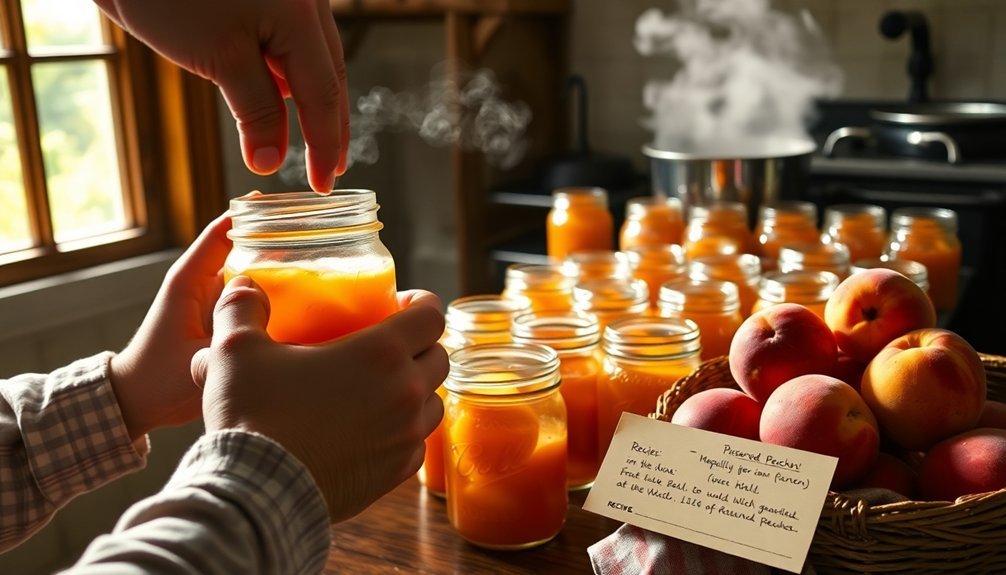
Your grandmother's canning secrets are more than just recipes – they're a legacy of love and wisdom preserved in glass jars. You'll need clean Mason jars, proper tools like jar lifters, and fresh ingredients to follow her time-tested methods. Start with water bath canning for high-acid foods like pickles and fruit preserves, ensuring you maintain proper temperatures and sterilization. Don't forget to label each jar with processing dates and special notes, just like Grandma did. By carrying on these traditional preservation techniques, you're not just storing food – you're keeping precious family memories alive for generations to come.
A Legacy in Glass Jars

One glance at an old kitchen shelf lined with carefully preserved foods tells a story of time-tested preservation methods.
You'll notice how dramatically canning techniques have evolved from your grandmother's era to today's scientifically proven approaches.
In the past, you might've seen family members using open kettle canning, sealing jars with paraffin wax, or even attempting oven canning methods.
While these traditional techniques served their purpose at the time, they've since been replaced by safer, more reliable processes.
You won't want to use those outdated methods, as they can lead to contamination and spoilage.
Today's modern canning relies on two primary techniques you can trust: water bath canning for high-acid foods and pressure canning for low-acid items.
You'll need proper Mason jars, not recycled containers, along with specific tools like jar lifters and headspace gauges.
When you follow these current methods, you're ensuring your preserved foods will last 5-7 years when stored properly.
Using a FoodSaver machine can help remove oxygen from jars and extend their shelf life even further.
Each sealed jar represents more than just preserved food – it's a bridge between traditional food preservation wisdom and modern food safety science.
Safety First, Just Like Grandma
Your grandmother's canning wisdom rings true today: clean jars and proper safety steps prevent deadly botulism contamination.
You'll need to monitor temperatures precisely throughout the process, ensuring your pressure canner maintains the right heat levels for the specified time.
Recording these time-tested techniques through careful documentation helps preserve valuable family traditions for future generations.
Clean Jars Save Lives
When preserving food at home, clean jars aren't just a suggestion – they're essential for preventing food-borne illness and ensuring your preserves stay fresh.
Before you begin, carefully inspect each jar for chips or cracks, discarding any damaged ones that won't seal properly. Following trusted canning guidelines from reliable sources like the National Center for Home Food Preservation helps ensure success. Wash your jars thoroughly with detergent, either by hand or in the dishwasher, and keep them warm until you're ready to use them.
For altitudes below 1,000 feet, you'll need to sterilize your jars by submerging them in boiling water for 10 minutes. However, if you're processing your preserves for 10 minutes or longer, you can skip this step.
Place your clean jars right-side-up on a rack in your canner, covering them with water by one inch.
Always use new lids to guarantee a proper seal – this isn't a place to cut corners. Before sealing, wipe the jar rims clean of any food residue and apply the lids and bands firmly but not too tight.
Once your jars have cooled, remove the bands, label everything clearly with dates and contents, and store your preserves in a cool, dark place for up to a year.
Proper Processing Prevents Botulism
Lurking in improperly canned foods, botulism poses a deadly threat that's easily preventable with the right processing methods. A single teaspoon of botulism toxin can kill 100,000 people, and home-canned foods account for over 90% of foodborne botulism cases.
You'll need to match your canning method to your food type. High-acid foods like jams, jellies, and fruits are safe with boiling water bath canning, as the acid prevents botulism growth. However, low-acid foods including vegetables, meats, and seafood require pressure canning to reach the necessary 240°F temperature that kills dangerous spores.
Here's what you must do to guarantee safe pressure canning:
- Use a properly calibrated pressure canner and vent it for 10 minutes before processing.
- Adjust your pressure settings based on your elevation (11 psi up to 2,000 ft. for dial gauge canners).
- Follow tested recipes exactly – no substitutions or old-fashioned methods.
Remember that C. botulinum spores survive ordinary boiling, so don't take shortcuts with low-acid foods. Always use new lids, sterilized jars, and current USDA-approved canning procedures to protect your family from this lethal toxin.
Temperature Monitoring Matters Most
Throughout the canning process, precise temperature monitoring stands as your first line of defense against foodborne illness.
You'll need to pay careful attention to the danger zone between 40°F and 140°F, where harmful bacteria multiply rapidly. For safe preservation, you must heat your foods to the correct temperature based on their acidity level.
If you're working with high-acid foods like pickles or fruit preserves, you'll use the boiling water bath method at 212°F. For low-acid foods such as vegetables and meats, you must use a pressure canner to reach temperatures between 240°F and 250°F.
Don't try to substitute one method for the other – these temperatures aren't interchangeable.
Monitor your storage conditions just as carefully as your processing temperatures. Keep your finished jars in a space between 50°F and 70°F for ideal preservation, and never store them above 95°F.
You'll want to use reliable temperature monitoring equipment and keep detailed records of your processing times and temperatures. If you're unsure about your temperature readings or notice any signs of spoilage, don't take chances – discard the food immediately.
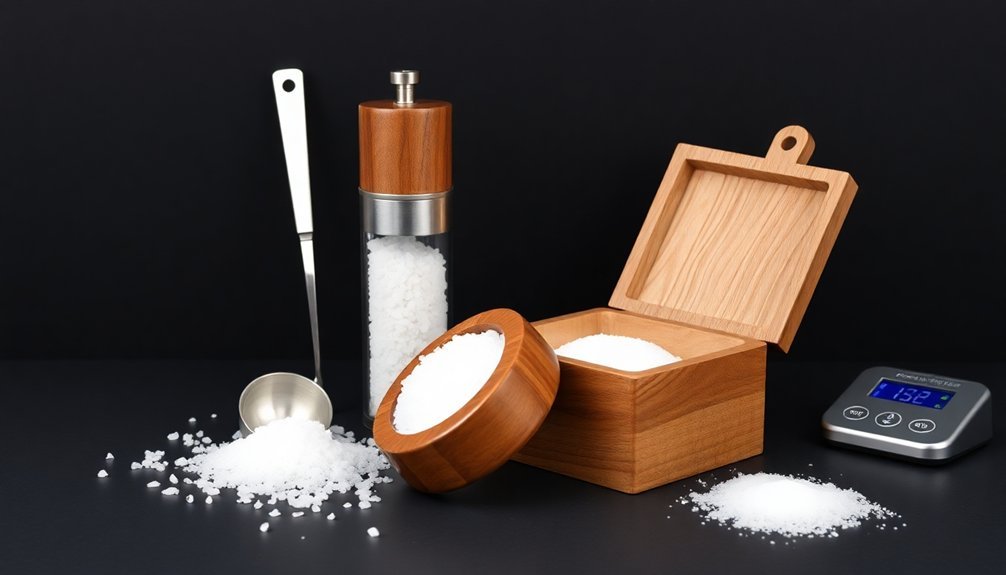
Essential Tools of the Trade

You'll need both classic and modern canning equipment to preserve food safely at home, just like your grandmother did generations ago.
While Grandma might've relied on basic Mason jars and a simple pot, today's essential toolkit includes specialized items like pressure canners, jar lifters, and magnetic lid wands that make the process easier and safer.
Along with the traditional tools that haven't changed – like heavy-bottomed pots and durable glass jars – these modern additions help guarantee your preserved foods meet current safety standards while maintaining that time-honored quality.
Must-Have Canning Tools Today
Successful canning starts with having the right tools on hand. You'll need essential jar-handling equipment like a jar lifter for safe transfers, a magnetic lid lifter for wet lids, and a handle-coated jar wrench to achieve proper lid tightness.
Don't forget the long tongs and jar funnel to make filling your containers mess-free and efficient. Proper sealing is vital for food safety, so you'll want to invest in tools that guarantee airtight preservation. A bubble popper helps remove trapped air and measure headspace, while new canning lids with intact rubber seals assure freshness.
Your basic setup should include a water bath canner tall enough to cover your jars and a rack to prevent direct bottom contact. For the best canning results, remember these critical steps:
- Always sterilize your tools and jars before starting
- Use precise measurements with dedicated measuring cups
- Clean jar rims with vinegar before sealing
Keep stainless steel utensils, a colander, and kitchen towels nearby for efficiency. A vegetable chopper can speed up your prep work when processing large batches, making your canning sessions more productive and enjoyable.
Grandma's Secret Equipment Picks
While modern canning tools offer convenience, time-tested wisdom from grandmothers reveals you don't need fancy equipment to preserve food safely.
You'll find that a basic stainless steel or enamel stock pot with a lid can serve just as well as a dedicated canning pot, as long as it's tall enough to cover your jars with two inches of water.
Don't worry if you're missing a proper canning rack – you can create your own using heat-resistant materials. The key is guaranteeing your jars don't sit directly on the pot's bottom and that heat circulates evenly.
You'll also need a way to safely handle hot jars; while a proper jar lifter is ideal, you can temporarily use sturdy tongs with rubber grips.
For filling jars, you'll want a funnel to prevent spills and guarantee clean jar rims. A standard kitchen funnel can work in a pinch, though a proper canning funnel fits mason jars perfectly.
Remember, you can often find these tools at second-hand stores or garage sales, just as your grandmother might've done.
The most important thing is that your equipment keeps you safe and helps maintain proper food preservation standards.
The Perfect Pickle Recipe
Creating crispy, flavorful pickles starts with selecting the right ingredients and following proper preparation techniques. You'll want to choose Persian or small pickling cucumbers, fresh dill, and garlic as your base ingredients. The brine mixture combines vinegar, water, and pickling salt, while optional spices like peppercorns and mustard seeds add depth to your pickles.
For the best results, follow these essential steps:
- Prepare your cucumbers by slicing them into your preferred shape and soaking them in an ice bath to maintain crispness.
- Layer your clean jars with cucumbers, fresh dill, and sliced garlic, leaving appropriate headspace at the top.
- Heat your brine mixture until the salt dissolves, then let it cool to room temperature before pouring over your cucumbers.
If you're making refrigerator pickles, they'll last several weeks when properly stored. For longer preservation, use the canning method, which allows your pickles to last for months.
Remember to wait 1-3 months before opening canned pickles to achieve the best flavor, and always check your seals after 24 hours if you've processed them in a water bath.
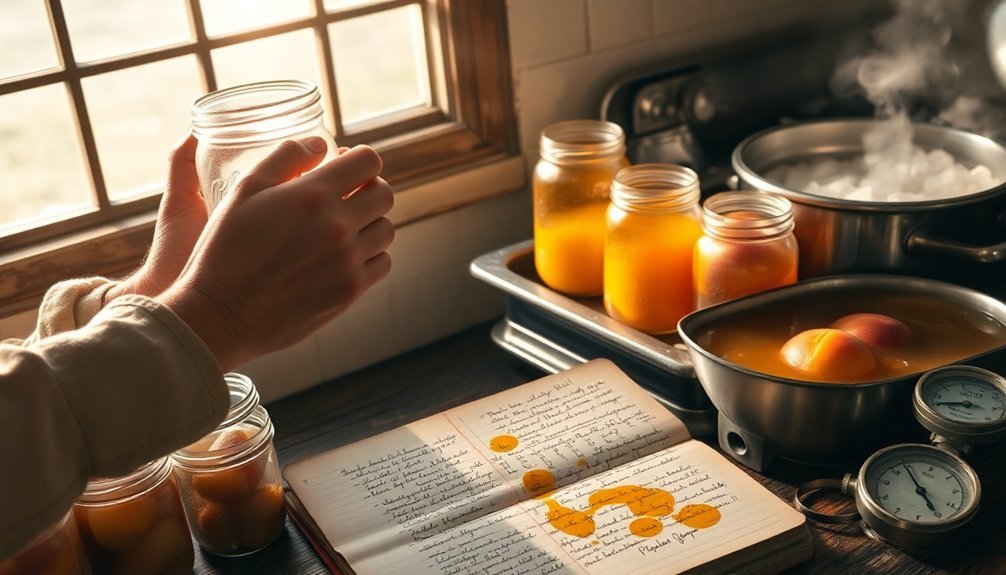
Secrets of Water Bath Canning

Now that you've mastered pickle-making, water bath canning opens up a world of food preservation possibilities.
You'll need essential equipment including a water bath canner with a rack, mason jars, new lids, ring bands, and a jar lifter. Don't forget to grab a bubble freer and some paper towels for cleanup.
Before you start, fill your canner with enough water to cover the jars by one inch. You'll want to sterilize your jars in the hot water for about 10 minutes, while sanitizing new lids separately.
Always check your jars for cracks and wash your hands thoroughly before handling any equipment or food.
When you're ready to process, lower your filled jars carefully into the canner, ensuring they don't touch each other. Once the water reaches a rolling boil, start your timer and maintain that boil throughout the entire processing time.
After processing, let the jars rest in the water for five minutes, then remove them with your jar lifter. Place them on a wire rack to cool completely.
You'll know you've succeeded when you hear the satisfying "ping" of each lid sealing. Don't forget to label your jars once they're cool.
Pressure Canning Through the Generations
Unlike water bath canning, pressure canning stands out as the only safe method for preserving low-acid foods like vegetables, meats, and broths.
You'll need a proper pressure canner – not a pressure cooker – and must guarantee it's in perfect working condition before starting. Check the rubber gasket, clean all vents, and verify you've got the right size for your needs.
Before you begin, you'll want to sterilize your jars and prepare your workspace properly. Fill your canner with 2-3 inches of water, and remember to vent it for 10 minutes before pressurizing.
When packing your jars, leave about an inch of headspace and cover the contents with boiling water or natural juices.
Here are three essential steps for successful pressure canning:
- Follow USDA-approved pressure and time charts specific to your food type
- Adjust processing time for high altitude if necessary
- Allow the canner to cool naturally before removing the lid
After processing, place your jars on an insulated surface away from drafts.
Listen for the satisfying "pop" of the lids sealing, and always label your jars with the processing date. Store them in a cool, dry place, and inspect carefully before use.
Seasonal Harvest Planning
Your backyard garden's peak production will determine your canning schedule, with most vegetables reaching their prime from mid-summer through early fall.
You'll want to store your freshly harvested produce properly – in cool, dark places or refrigerated – while you're preparing your canning supplies and workspace.
Understanding when to plant specific crops means working backward from your ideal harvest dates, so you'll need to start cool-weather crops like peas and lettuce in early spring, while heat-loving plants like tomatoes and peppers shouldn't go into the ground until after all danger of frost has passed.
Peak Garden Production Times
Planning for peak garden production requires understanding the natural rhythms of seasonal harvests throughout the year. You'll find that each season brings its own unique bounty, with summer being the most prolific time for fresh vegetables.
During June and July, you'll need to stay on top of harvesting green beans, peas, squash, and cucumbers to guarantee continuous production.
To maximize your garden's potential, focus on these critical timing windows:
- Start your spring planting between March and May, focusing on early crops like broccoli, cabbage, and spinach that you'll harvest in June and July.
- Time your fall garden plantings from mid-July to September, targeting cold-hardy vegetables like beets, carrots, and turnips for harvest through December.
- Use January and February to prepare for the upcoming season by reviewing your previous year's successes and planning your garden layout.
You'll want to preserve your harvest at its peak freshness, particularly during the summer months when vegetables are producing heavily.
Keep a close eye on your crops, and harvest regularly to encourage continued production. When you notice onions and potatoes with two-thirds of their tops dying down, it's time to harvest and store them for winter use.
Crop Storage Before Canning
Proper storage of freshly harvested crops serves as an essential bridge between garden production and canning. Before you begin processing your vegetables, you'll need to store them correctly to maintain their peak quality and nutritional value.
For root vegetables, you'll want to harvest them when the soil is dry, trim the tops, and wash off excess dirt. Let them dry thoroughly before storing them in plastic bags or damp mediums like sand or peat moss at 32-40°F with high humidity.
When it comes to potatoes, wait two weeks after the foliage dies before harvesting, then air dry the skins for a day. Store them in dark conditions at 40°F.
If you're planning to can squash or pumpkins, harvest them before frost hits, leaving some stem attached. You'll need to cure them for 10 days at 80-85°F, except for acorn squash. Store them at 55-60°F in a dry place.
Sweet potatoes require special attention – harvest before frost, cure them in a warm, dark, well-ventilated space, then store at 60°F. Never let their storage temperature drop below 50°F, as this can affect their quality for canning.
When to Plant What
A gardener's success with canning starts months before the first jar is sealed. You'll need to carefully time your plantings to guarantee a steady harvest flow that aligns with your preservation schedule. Understanding your region's growing season and frost dates is essential for maximizing your garden's yield for canning.
Your spring planning begins in January when you'll inventory supplies and map out your garden. By April, you're ready to plant early crops like cabbage and broccoli, followed by determinate tomatoes and peas in May.
Summer brings waves of harvests, from June's green beans and new potatoes to July's tomatoes and corn, perfect for immediate canning.
Here's what you must monitor for peak canning results:
- Plant timing windows: Start cool-season crops early, warm-season crops after frost, and succession plant beans every two weeks
- Harvest maturity dates: Track days-to-harvest for each crop to prevent overripe produce
- Processing capacity: Stagger plantings to avoid overwhelming your canning schedule
Fall extends your canning season with apples, root vegetables, and winter squash, while winter months are ideal for citrus preserves and planning next year's garden.
From Garden to Pantry
Successful home canning starts well before you fill your first jar, beginning with thoughtful garden preparation and precise harvesting techniques.
You'll want to enrich your soil with fertilizer and compost, focusing on vegetables that are ideal for canning like green beans, tomatoes, cucumbers, squash, and okra. Plant a diverse selection, but stick to what you'll actually use to avoid waste.
When it's time to harvest, you'll need to move quickly. Gather your produce at peak ripeness and process it within 6-12 hours for the best results. Clean and prepare your vegetables thoroughly, removing any spoiled portions to guarantee safety and quality.
You'll use two main canning methods: water bath canning for high-acid foods and pressure canning for low-acid foods. Make sure you're using sterilized Mason jars with self-sealing lids, and fill them to the proper level, leaving adequate headspace.
Remove air bubbles and process according to your recipe's instructions, adjusting times for your altitude. Once processed, let the jars cool completely and check for proper seals.
Don't forget to label each jar with the processing date before storing them in a cool, dry place.
Fruit Preserves and Family Traditions

Making fruit preserves connects generations through time-honored traditions that go far beyond simple food preservation. When you create these sweet, homemade delicacies, you're not just putting up fruit – you're continuing a legacy that's been passed down through your family line.
The process of selecting seasonal fruits, preparing them with care, and following time-tested recipes creates powerful memories and strengthens family bonds.
You'll find that each season brings its own special fruits, from summer strawberries to winter plums, making preserve-making a year-round family activity. Through careful sterilization, proper sugar ratios, and traditional canning methods, you're ensuring these treasured preserves will last long enough to grace holiday tables and special occasions.
Here's why preserving fruit matters to your family's heritage:
- It creates opportunities for multiple generations to work together, sharing stories and techniques.
- You're maintaining authentic family recipes that might otherwise be lost to time.
- The finished preserves become meaningful gifts that carry emotional significance and keep traditions alive.
The flavors you create today will become tomorrow's cherished memories, connecting your family's past to its future.
Time-Tested Kitchen Wisdom
Beyond the art of preserving fruits lies a deeper treasury of kitchen wisdom that's been refined through generations of everyday cooking. When you open your grandmother's recipe book, you'll find more than just instructions – you're uncovering a legacy of culinary knowledge passed down through time-tested methods and loving hands.
Those splattered pages and handwritten notes tell stories of countless family gatherings, where recipes weren't just followed but perfected. You'll discover how your ancestors adapted their cooking techniques, balancing traditional methods with practical innovations. Each recipe serves as a chapter in your family's story, connecting you to your heritage while offering opportunities to create your own variations.
You can honor these traditions while adding your modern touch. Whether you're recreating Grandma's signature dishes or adding contemporary ingredients to classic recipes, you're keeping family traditions alive.
These cherished recipes offer more than sustenance – they're therapeutic connections to your roots, providing a mindful break from today's fast-paced world. By preserving and practicing these kitchen secrets, you're ensuring that future generations will continue to benefit from this practical, time-tested wisdom.
Troubleshooting Common Canning Problems
When your carefully prepared canning project doesn't turn out as expected, understanding common problems can help you avoid future mishaps.
Watch for failed seals, which often result from food residue on jar rims or reused lids. You'll need to use new lids every time and guarantee they're properly softened in boiling water before use.
Breaking jars can be prevented by managing temperature changes carefully. Don't expose hot jars to cold air, and make certain your jars and canner water are at similar temperatures.
If you're losing liquid during processing, you're likely experiencing either over-processing or improper headspace measurements.
- Check jar rims for chips and clean them thoroughly before each use
- Maintain consistent temperatures throughout the canning process
- Follow tested recipes precisely to guarantee proper pH levels and food safety
Post-shelving seal failures often signal deeper issues with your canning process.
You'll want to verify that you're using approved recipes and appropriate pH levels, especially when canning acidic foods.
Store your finished jars in a cool, dry place, and always check for signs of fermentation or spoilage before consuming.
Creating Your Family Recipe Book
A family recipe book preserves cherished traditions and cooking secrets for generations to come. To start your own collection, you'll need to choose the right platform that matches your vision. Popular options like CreateMyCookbook and Heritage Cookbook offer customizable templates and binding styles that work well in the kitchen.
Begin by gathering recipes from relatives, writing down those passed-down verbally, and documenting any variations that have evolved over time. When organizing your cookbook, you can arrange recipes traditionally by course or create unique sections based on family events and holidays.
Don't forget to include the stories behind special dishes – they're what make your cookbook truly personal.
Once you've collected your content, select a template that fits your family's style and start adding recipes, photos, and memories. Include a detailed table of contents for easy navigation, and choose a binding style that suits your needs.
Before publishing, carefully review the digital proof for any errors. Many platforms offer both printed and digital versions, so family members can choose their preferred format.
Remember to order enough copies for everyone who wants to preserve these precious family traditions.
Frequently Asked Questions
How Do You Adapt Modern Dietary Restrictions to Traditional Family Canning Recipes?
You can adapt traditional canning recipes by using sugar-free fruit juices, omitting salt, and substituting ingredients while maintaining safety. Always follow USDA processing times and verify changes won't compromise food safety standards.
Can I Substitute Artificial Sweeteners in Grandma's Preserves Recipes?
You can substitute artificial sweeteners, but you'll need to modify the recipe considerably. Use Pomona Pectin for proper setting, and expect different textures. Keep your preserves refrigerated since artificial sweeteners don't preserve like sugar.
What's the Best Way to Document Family Stories Alongside Canning Recipes?
Record your family's stories while canning together – you'll capture authentic memories. Take photos, write down spoken tips, and include handwritten notes about who taught each recipe and when they first made it.
How Long Can Properly Sealed Heirloom Canning Recipes Last in Storage?
Your properly sealed canned goods can last up to 12 months in ideal conditions, though some recipes may extend to 18 months. You'll need cool, dark storage below 75°F to maintain quality and safety.
Should I Adjust Grandma's Recipe if Using Different Sized Modern Jars?
You shouldn't adjust old recipes for different jar sizes. Use current, tested recipes from reliable sources to guarantee safety. If you want to preserve family recipes, have them reviewed by your local Extension Office first.
In Summary
You've now got the knowledge to carry forward your family's canning traditions with confidence and pride. As you fill each jar with homemade preserves and pickles, you're not just putting up food – you're bottling memories and wisdom passed down through generations. Start your own recipe book, share these techniques with your children, and keep your grandma's canning legacy alive for years to come.
Leave a Reply