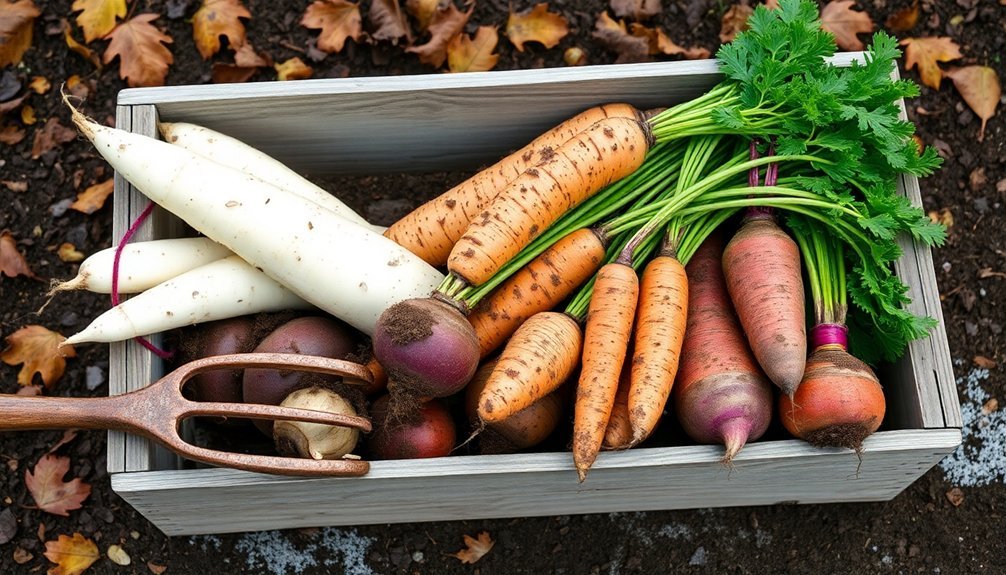
You'll want to harvest root vegetables when they've reached peak maturity and after the first light autumn frosts, which naturally enhance their flavor and storage potential. For carrots, look for 5-inch lengths and 3/4 to 1 1/2-inch diameters, while beets should be golf ball-sized after 6-8 weeks. Choose a clear, dry day when the soil isn't waterlogged, and harvest during cool morning hours after any frost has thawed. Handle roots gently, avoid washing them, and trim the tops to about half an inch. Following proper harvest timing and handling techniques will determine how well your roots keep throughout the winter months.
Signs of Root Vegetable Maturity
Success in harvesting root vegetables depends on recognizing the right signs of maturity. You'll need to monitor both size and development to determine when your root crops are ready for storage.
For standard carrots, look for roots that are at least 5 inches long and between 3/4 to 1 1/2 inches in diameter. Beets should reach golf ball size, which typically occurs six to eight weeks after planting.
Many root vegetables will give you visual clues when they're mature. You'll notice bulb formation at the soil surface for crops like beets, turnips, and rutabagas. While carrots and parsnips show less prominent bulbing, you can brush away soil to check their shoulder development. Harvesting during cooler weather conditions will help maintain optimal flavor and texture.
For potatoes and sweet potatoes, wait until the plant tops begin dying down, then let them cure in the ground for an additional week or two to set their skins.
Timing from planting date also helps indicate maturity. You can harvest radishes within a few weeks, while beets take six to eight weeks.
Turnips and rutabagas need 60 to 90 days, and garlic typically matures around 90 days when its tops start drying.
Best Weather Conditions for Harvesting
You'll get the best results when harvesting root vegetables on clear, dry days after a light morning frost, which can enhance their natural sweetness.
Regular checks of the root shoulders visible help determine optimal harvest timing for storage-ready vegetables.
Work with soil that's dry but not parched, as this makes it easier to lift the roots without damaging them and prevents excess dirt from clinging to the harvest.
It's essential to avoid harvesting during or right after heavy rain periods, as wet soil can lead to storage problems and increase the risk of your roots rotting during long-term storage.
Dry Soil, Clear Days
Picking the right weather conditions makes all the difference when harvesting roots for storage. You'll want to choose clear, dry days when the soil has just the right moisture balance – not too wet and not too waterlogged. In the weeks before harvest, reduce your watering to help harden off the roots and create ideal digging conditions.
When you're ready to harvest, wait for a day without rain. You'll find it's much easier to dig up roots when the soil is on the drier side, and you're less likely to damage them during the process. The clear weather also promotes better air circulation, which helps prevent fungal diseases that could compromise your harvest. Consider storing your harvested roots in sand or a pit to maintain optimal preservation temperatures.
Cool temperatures on clear days work to your advantage by slowing down the roots' metabolic processes, which helps them store longer.
You'll want to avoid harvesting during or right after rainfall, as wet conditions can lead to soil compaction and root damage. If your soil is too wet, wait a few days until it dries out sufficiently. This patience will pay off with healthier roots that are better suited for long-term storage.
After Light Morning Frost
Light morning frosts provide ideal conditions for harvesting many root vegetables, actually enhancing their flavor and storage potential. You'll find that rutabagas particularly benefit from several light frosts, developing a sweeter taste before you harvest them at 4 to 5 inches in diameter.
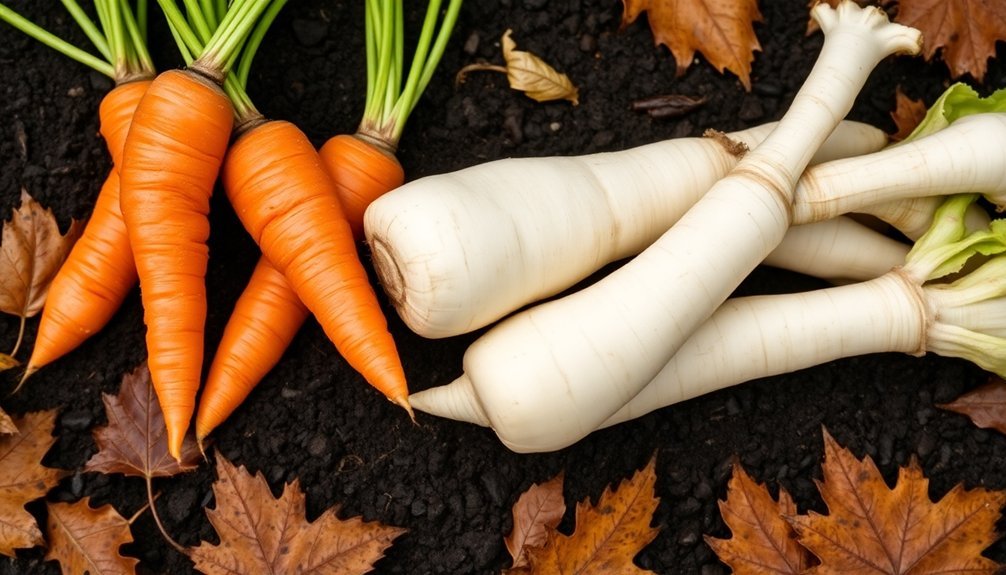
Similarly, parsnips and carrots can remain in the ground after frost without damage, allowing you to harvest them later.
When you're harvesting after a light frost, you'll want to wait until the ground thaws slightly to avoid damaging the roots. Once you dig them up, trim the foliage to within 1/2 inch of the roots for beets, carrots, and turnips.
Don't wash the roots; instead, gently remove excess soil by rubbing them carefully to prevent cuts and bruises that could lead to rot during storage.
If you're planning to leave some roots in the ground for later harvest, protect them with a thick 12 to 18-inch layer of straw or leaves. This mulch barrier will prevent the ground from freezing solid and allow you to continue harvesting throughout the colder months.
Just remember to complete your main harvest before the ground freezes permanently.
Avoiding Heavy Rain Periods
Successful root harvesting depends heavily on proper timing and weather conditions. You'll want to avoid harvesting during or immediately after heavy rainfall, as waterlogged soil can lead to root rot and damage. Instead, wait for dry spells or until the soil has dried slightly from recent precipitation.
When you're planning your harvest, check that the soil is firm enough to support the roots but not overly wet. You'll find that harvesting in these conditions helps prevent bruising and breakage during the extraction process.
The ideal soil temperature should range between 32 and 75°F, which provides prime conditions for both the harvest and the roots' integrity.
For specific crops like garlic and onions, you'll need to reduce watering 2-4 weeks before harvest. With potatoes, decrease irrigation in the weeks leading up to harvest to prevent waterlogged conditions.
If you're growing root vegetables like carrots and beets, aim to harvest during dry weather when the soil maintains good structure. This timing guarantees your crops will be in the best condition for long-term storage, reducing the risk of rot and maintaining quality throughout the storage period.
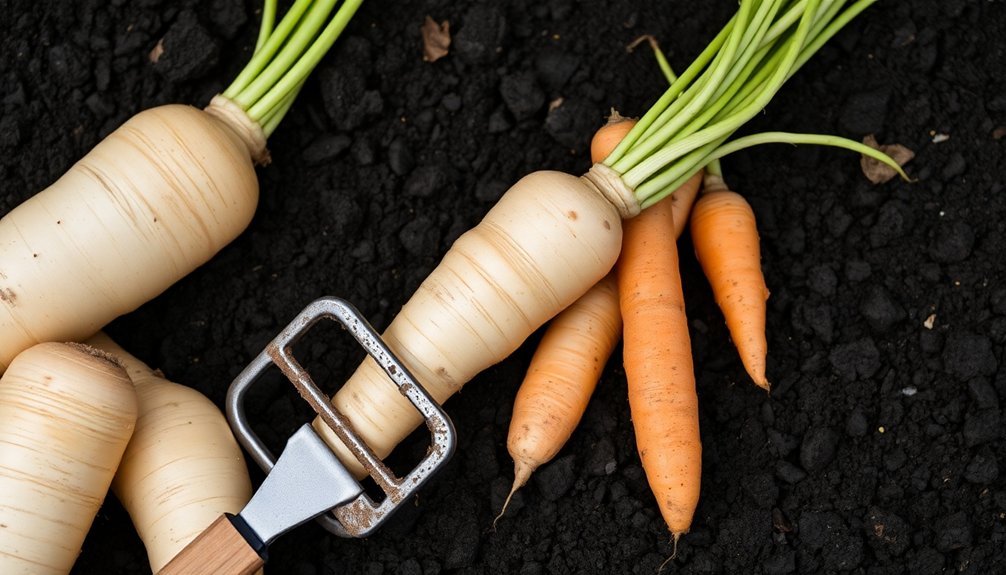
Proper Tools and Equipment
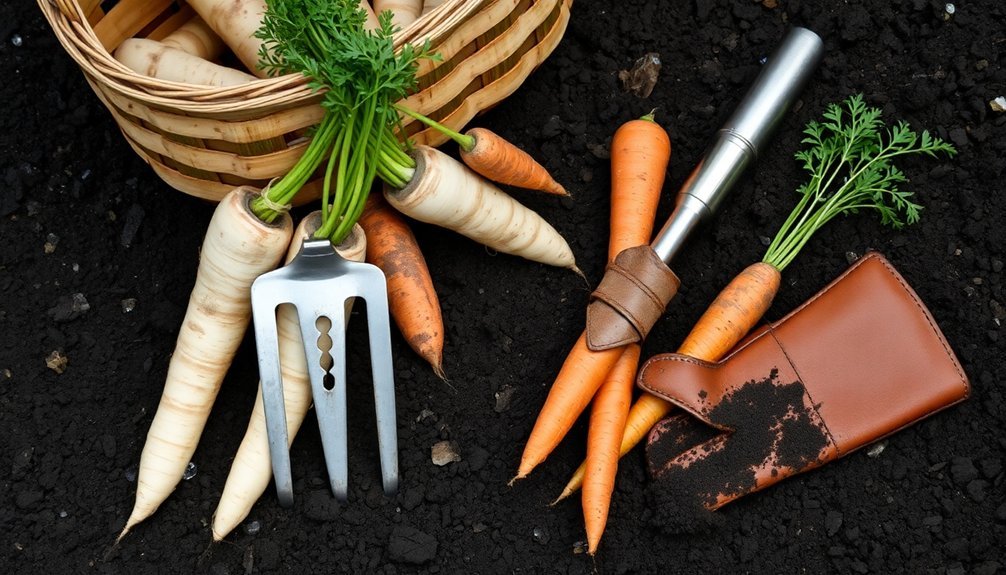
Harvesting roots efficiently requires a variety of specialized tools, from simple manual implements to sophisticated mechanical harvesters.
If you're working on a small scale, you'll find the KW-5 manual tool particularly useful with its eight 35-cm nails and leverage-based design that reduces back strain. This strong steel tool makes digging potatoes and other root vegetables considerably easier.
For medium-sized operations, you'll want to take into account a walk-behind tractor setup with tools like the Aldo Biagioli Potato Digging Plow. You'll need at least an 8 hp tractor with wheel weights, and you'll appreciate its adjustable depth settings for various root crops. The tool carrier mounting system guarantees stable operation compared to tow-hitch alternatives.
If you're managing a large operation, you'll benefit from specialized machines like the WERINGEN RVS-1. These harvesters feature vibrating sieves to separate vegetables from soil and conveyor systems for efficient collection.
For delicate crops, you might opt for electric-powered machines from BASSI SEMINATRICI, which offer adjustable wheelbases and reduced noise pollution.
Whatever your scale, choosing the right equipment will considerably impact your harvesting efficiency and crop quality.
Soil Preparation Before Digging
You'll want to check that your soil is dry before harvesting roots, as this helps prevent excess dirt from clinging to the roots during removal.
The ideal soil moisture should feel like a wrung-out sponge – moist enough to hold together but not wet enough to form muddy clumps.
Working in these conditions not only makes your digging easier but also protects the soil structure and helps maintain proper aeration for future plantings.
Dry Soil Benefits
Dry soil's benefits for root harvesting extend far beyond simple convenience. When soil dries, its mechanical properties change in ways that can actually improve your harvest quality. You'll find that drier conditions create stronger soil structure, which helps maintain root integrity during harvesting and reduces the risk of damage to your crops.
In clay soils, you'll notice particularly favorable harvesting conditions as the soil shrinks while drying. This natural shrinking process makes it easier for you to extract roots without breaking them, especially when compared to wet, sticky conditions.
While compacted soil typically restricts root growth, the natural drying process can help create small fissures that make root removal more manageable.
You'll also benefit from improved crop quality when harvesting from dry soil. Roots grown in drier conditions often develop stronger, more lignin-armored structures, making them more resilient during storage.
The lower water content in dry-grown roots typically results in better concentration of nutrients and flavors, which you'll appreciate during long-term storage. Additionally, roots that have adapted to drier conditions tend to be more robust and less prone to damage during the harvesting process.
Optimal Digging Conditions
Before breaking ground, proper soil preparation sets the stage for successful root harvesting. You'll want to verify your soil is moist but not waterlogged, as this makes digging easier and prevents root damage.
If you're working with heavy clay soil, build raised beds 4-5 inches high and 12-24 inches wide to improve drainage and soil structure.
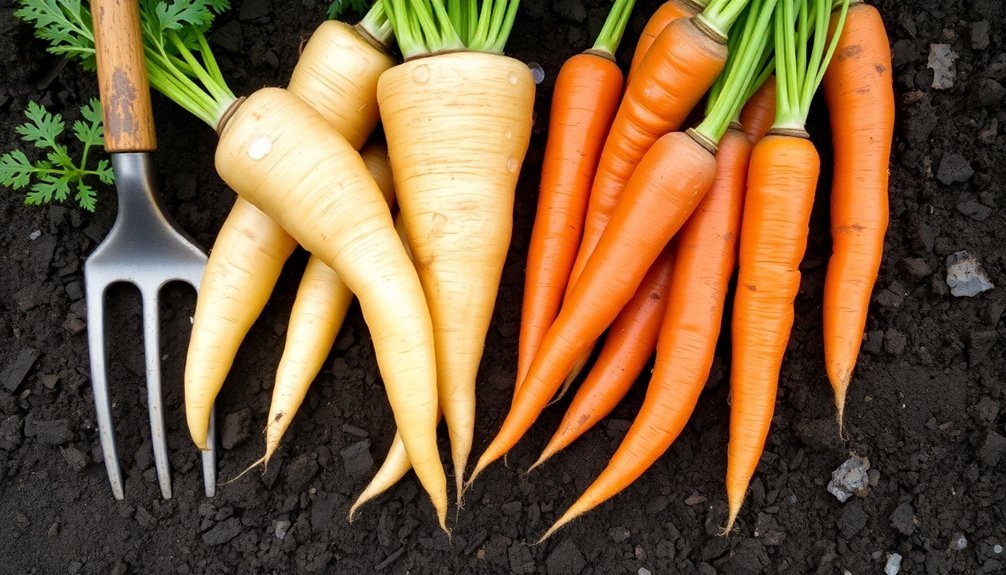
For best results, incorporate sand and organic matter into your soil, particularly if you're growing longer-rooted crops like carrots and parsnips. These vegetables need loose, unobstructed soil to develop properly.
While beets and radishes can tolerate heavier soils, they'll still benefit from improved drainage and aeration.
Start your soil preparation about two weeks before your area's last frost date. You'll need to flatten and smooth the soil surface to promote even growth.
If you're using raised beds, remember they may need rebuilding each spring as they naturally settle.
When it's time to harvest, use appropriate tools for your operation size – hand tools for small gardens or mechanical harvesters for larger plots.
Don't pull roots directly from the soil; instead, carefully clear away soil around them to prevent breakage.
Correct Handling During Harvest
During the harvest, proper handling of root vegetables is essential to prevent damage and assure successful long-term storage. You'll need to follow specific steps to guarantee your roots remain intact and suitable for storage.
Start by loosening the soil around your vegetables using a garden fork or shovel. Work carefully to avoid damaging the roots, and verify the soil is sufficiently loose before attempting to pull them up. Once the soil is prepared, grasp the tops firmly and pull with steady, even pressure.
| Step | Action | Key Point |
|---|---|---|
| 1 | Loosen Soil | Use garden fork without piercing roots |
| 2 | Pull Roots | Apply steady, even pressure |
| 3 | Clean Roots | Shake off dirt, don't wash |
| 4 | Trim Tops | Cut to 1 inch above root |
| 5 | Handle Gently | Avoid bruising or breakage |
After pulling the roots, you'll want to remove excess soil by gently shaking or dry brushing them. Don't wash the roots, as moisture can lead to rot during storage. Finally, trim the leafy tops to about an inch above the root to prevent moisture loss and maintain freshness.
Drying and Curing Methods
Proper drying and curing methods are essential steps in preserving your harvested roots for long-term storage. You'll find several effective methods to dry your roots, with oven drying and air drying being the most reliable options.
If you're using an oven, set it to its lowest temperature and keep the door slightly open for 6-8 hours until the roots become brittle. For air drying, spread your roots in a single layer on screens or wooden boards in a warm, ventilated area for 3-7 days.
Once your roots are dried, you'll need to cure them properly to guarantee long-term preservation. Start by pasteurizing them at 160°F for 10 minutes to eliminate any insects or eggs.
Then, test their dryness by storing them in sealed jars for a week, checking regularly for moisture. If you spot any condensation, you'll need to dry them further.
Store your dried and cured roots in dark glass jars or tins, avoiding cardboard or paper containers that can absorb essential oils. Keep them whole until you're ready to use them, and store them in a cool, dark place with good air circulation to maintain their quality.
Preparing Roots for Storage
To guarantee successful root storage, you'll need to carefully prepare your harvest by selecting only the highest quality specimens. Choose firm, unblemished roots that are mature but not oversized – beets should be 1½ to 3 inches in diameter, while turnips should be harvested before they become too fibrous. Check each root for signs of damage, disease, or pest infestation.
Don't wash your roots before storing them; instead, gently brush off excess soil. You'll need to trim the leafy tops from carrots, beets, and turnips to prevent moisture loss, but leave a short stem on potatoes and sweet potatoes. For onions and garlic, cut the tops while leaving a small stub intact. Remove any damaged or bruised specimens that could lead to spoilage.
When packaging your roots, layer them carefully using materials like sand, sawdust, or dry leaves to maintain proper humidity. Place them in a single layer within boxes or containers to guarantee adequate ventilation. If you're using crates, alternate layers of newspaper between the roots.
Keep different vegetable types separated to prevent moisture transfer, and avoid mixing them in the same container.
Root Cellar Storage Techniques
Successful root cellar storage hinges on maintaining precise environmental conditions that mirror nature's autumn climate. You'll need to keep temperatures between 32-40°F (0-4°C) and humidity levels at 85-95% to prevent your roots from freezing, sprouting, or withering. These conditions create the ideal environment for long-term storage while preventing mold growth and decay.
Proper ventilation is essential for your root cellar's success. You'll want to install fans to circulate air and regulate humidity, removing harmful ethylene gas that can speed up spoilage. Consider using smart devices to automate your ventilation system for consistent results.
You'll need to organize your storage space efficiently, keeping different crops separated while ensuring proper air flow. Monitor your cellar regularly with thermometers and hygrometers, removing any spoiled produce immediately to prevent contamination.
While root vegetables like potatoes, carrots, and beets share similar storage needs, you'll find that late-maturing varieties store better than early ones. Most root crops prefer dark, moist conditions, but you can successfully store various vegetables together by maintaining average ideal conditions throughout your cellar.
Frequently Asked Questions
Can Root Vegetables Continue to Grow if Left in the Ground Over Winter?
No, your root vegetables won't continue growing during winter as they become dormant. While they'll survive if properly mulched, they'll start growing again in spring when temperatures warm up and daylight increases.
How Do Companion Plants Affect the Harvest Timing of Root Vegetables?
Your companion plants can speed up or delay root vegetable harvesting. Fast-growing plants like radishes mark rows early, while deep-rooted companions improve soil structure, letting you harvest when roots reach ideal size.
What Causes Roots to Develop a Bitter Taste Before Harvesting?
You'll find roots develop bitterness when they're left in the ground too long, face temperature fluctuations, or experience stress from poor growing conditions. Plant maturity and environmental factors greatly impact their taste development.
Do Different Varieties of the Same Root Vegetable Have Different Harvest Times?
Yes, you'll find that varieties within the same root vegetable can have different maturity times. For example, spring radishes mature in 3-4 weeks, while winter radishes take 50-60 days to reach harvest size.
Can You Harvest Root Vegetables During or Immediately After Heavy Rainfall?
You shouldn't harvest root vegetables during or right after heavy rainfall. It'll increase your risk of bacterial contamination, promote rot, and the wet soil can damage your crops. Wait at least 24 hours after rain.
In Summary
Now that you've learned the best time and methods for harvesting root vegetables, you'll be ready to maximize your storage success. Remember to check for maturity signs, harvest in dry conditions, and handle your roots gently. Don't skip the essential drying and curing steps. With proper preparation and storage techniques, you'll enjoy your home-grown root vegetables throughout the winter months.


Leave a Reply