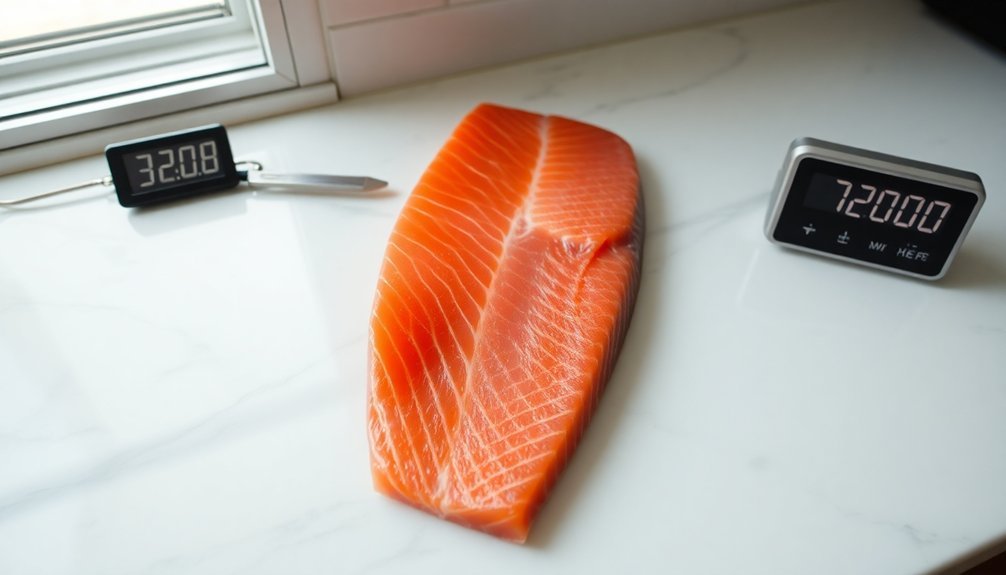
To achieve perfect gravlax, you'll need to maintain a consistent temperature between 38-40°F (3-4°C) in your refrigerator's bottom shelf. The curing time depends on your desired texture: 24 hours for a light cure, 36-48 hours for medium, or 48-72 hours for hard cure. You'll want to use a 1.5:1 salt-to-sugar ratio, with salt at 3% of your fish's weight. Keep the salmon tightly wrapped and weighted with 2-4 pounds of pressure, turning every 12-24 hours for even curing. Understanding these key variables, along with proper storage techniques and salmon selection, will elevate your gravlax to restaurant quality.
The Science Behind Gravlax Curing
The science behind gravlax curing relies on a delicate balance of salt, sugar, and time. When you cure gravlax, salt actively draws moisture from the fish cells while simultaneously restoring proteins, which results in a firmer texture. The type of salt you choose matters greatly – rock salt provides even curing, while coarse or kosher salt penetrates more quickly into the flesh.
You'll need to combine sugar with salt in equal proportions, typically using 50% of your salmon's weight in total cure mixture. This combination doesn't just balance flavors; it helps concentrate the fish's natural taste while controlling moisture extraction. This modern curing approach evolved from the traditional pine needle burial method used in 14th century Scandinavia.
You're fundamentally transforming the salmon's texture and intensifying its flavor through this process. During curing, you'll notice the fish becoming progressively firmer as time passes. The process takes between 12 hours to 3 days, depending on your desired result.
For ideal curing, you'll want to turn the fish every 12 hours and guarantee proper drainage of released liquids. Adding weights on top of your gravlax helps compress the cells, making salt penetration more effective and moisture extraction more efficient.
Perfect Temperature Control Methods
You'll need to regularly check your refrigerator's temperature zones since different areas can vary by several degrees, with the bottom shelf typically being the coldest and most stable for gravlax curing.
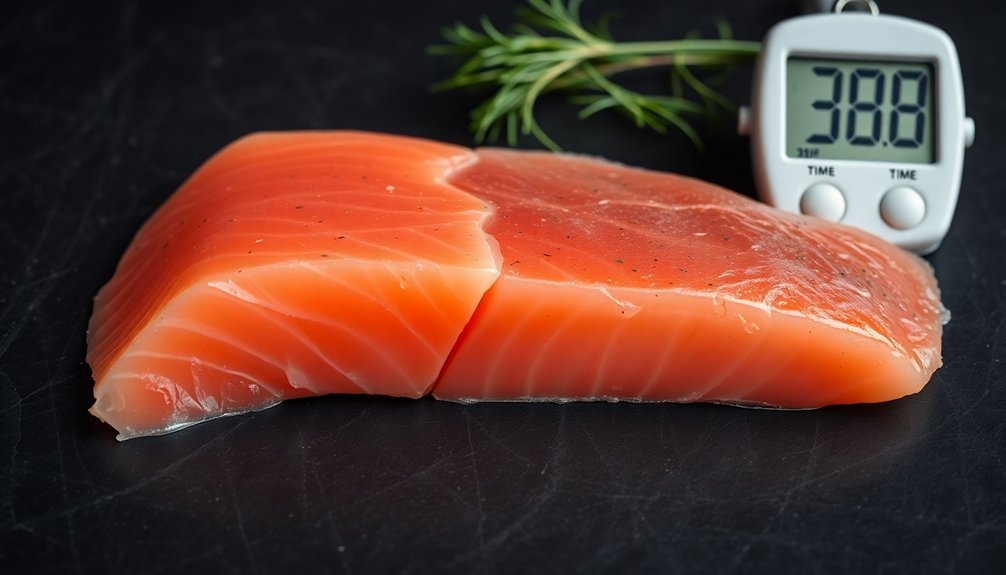
To maintain the ideal 38-40°F range, place a reliable thermometer next to your wrapped salmon and monitor it daily, adjusting your fridge settings if needed.
Keep your gravlax containers tightly sealed to prevent temperature fluctuations from door openings, while ensuring the weight remains evenly distributed across the fish.
The salt-curing process requires consistent temperature control for 2-5 days depending on your desired texture.
Monitor Fridge Zones Carefully
Mastering temperature control in your refrigerator stands as the cornerstone of perfectly cured gravlax. You'll need to maintain a consistent temperature below 5°C (41°F) throughout the curing process, focusing on proper zone management within your fridge.
| Zone Type | Temperature Range | Best For |
|---|---|---|
| Bottom Shelf | 0-2°C (32-36°F) | Gravlax Storage |
| Middle Shelf | 2-4°C (36-39°F) | Dairy Products |
| Top Shelf | 3-5°C (37-41°F) | Ready-to-Eat Items |
| Door | 4-5°C (39-41°F) | Condiments |
You'll want to position your gravlax on the bottom shelf, where it's typically coldest. Don't overcrowd your fridge, as this can disrupt air circulation and create temperature inconsistencies. Use shelf dividers to maintain proper airflow, and keep your curing salmon away from any warm air vents.
During the curing process, you'll need to monitor the temperature regularly using a reliable thermometer. When rotating the gravlax every 12-24 hours, do it quickly to minimize temperature fluctuations. If you're transporting the gravlax, use an insulated container with ice packs and keep the transit time under two hours to maintain ideal temperature control. The entire curing time requires between 36 hours to 3 days for optimal results, depending on your desired taste and texture.
Keep Containers Well-Sealed
Airtight sealing techniques form the foundation of successful gravlax preparation. You'll need to guarantee your containers and wrapping methods prevent any juice leakage, which can affect the curing process and potentially contaminate other items in your refrigerator.
Start by wrapping your salmon tightly in multiple layers of plastic wrap, then secure it in a zip-lock bag for additional protection against leaks.
For ideal results, place your wrapped salmon in a baking dish or container that can catch any escaping juices. You'll want to turn the package every 12-14 hours to redistribute the liquids and guarantee even curing. During the 2-3 day curing period, maintain consistent pressure by using weights or bungee cords to secure the wrapping.
Here are three visual indicators that your container is properly sealed:
- No liquid pooling around the edges of your container
- Plastic wrap remains taut and unwrinkled against the salmon
- The zip-lock bag maintains its seal with no signs of leakage at the corners
Remember to baste the salmon periodically with any collected juices to maintain proper moisture levels throughout the curing process.
Thermometer Placement Matters
For successful gravlax preparation, proper thermometer placement plays a critical role in maintaining safe curing temperatures. You'll need to position your thermometer in the center of your refrigerator, away from walls and direct cold air vents, to get the most accurate readings. Check these readings twice daily and maintain a temperature below 5°C (41°F).
| Location | Best Practice |
|---|---|
| Center Shelf | Place main thermometer here for most accurate overall reading |
| Near Gravlax | Position secondary thermometer close to curing fish |
| Away from Vents | Keep 6 inches minimum distance from cold air outlets |
| Door Area | Avoid placing thermometers here due to temperature fluctuation |
| Bottom Shelf | Monitor this area if storing gravlax here |
You'll want to use digital thermometers for precise measurements and consider installing multiple monitoring points if you're curing larger batches. Be certain you're keeping a temperature log to track any fluctuations that might affect your curing process. Regular calibration of your thermometers guarantees you're getting accurate readings throughout the 48-72 hour curing period. This careful monitoring helps prevent both under-curing and over-curing while maintaining food safety standards are met.
Timing Your Gravlax Recipe
The perfect gravlax recipe depends on three key timing factors: your desired cure level, the thickness of your salmon, and proper refrigeration temperature.
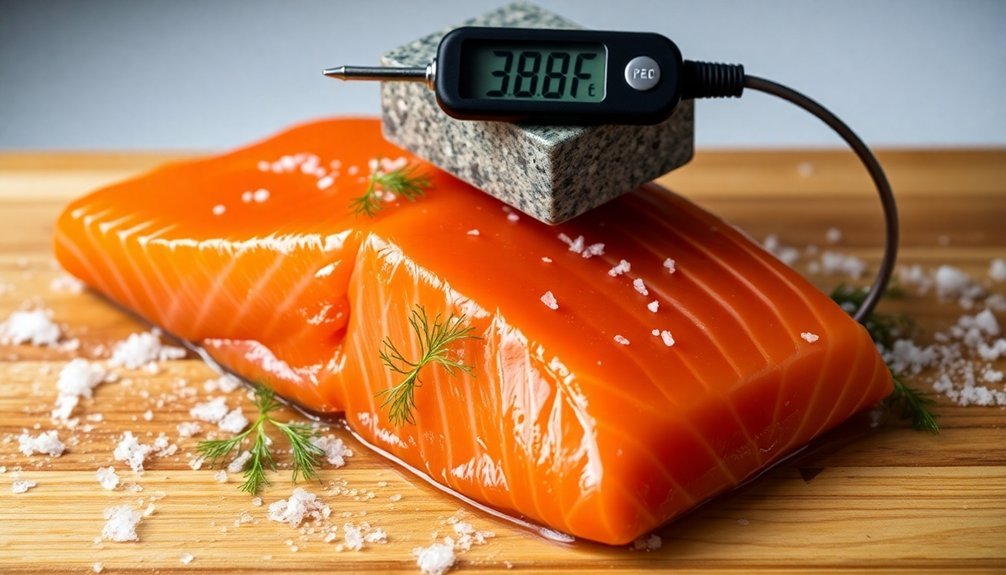
You'll need to maintain a temperature below 40°F (4°C) throughout the curing process to guarantee food safety and best results.
For your desired cure level, you've got three main options:
- Light cure (24 hours): Your salmon will maintain a soft, sashimi-like texture with mild flavor – ideal for thin cuts and tail pieces.
- Medium cure (36-48 hours): You'll achieve a balanced, medium-firm texture with developing flavors – perfect for most general purposes.
- Hard cure (48-72 hours): You'll get fully infused flavors and a firm yet silky texture – best for thick, center-cut portions.
Your salmon's thickness directly impacts curing time. Thinner cuts like tail pieces cure quickly in 24 hours, while thicker center-cut portions need 48 hours or more for even curing.
While some recipes suggest turning the salmon every 12 hours or using weights, these steps aren't essential.
Once cured, you can store your gravlax in the refrigerator for up to two weeks or freeze it for up to two months.
Salt Ratios Matter
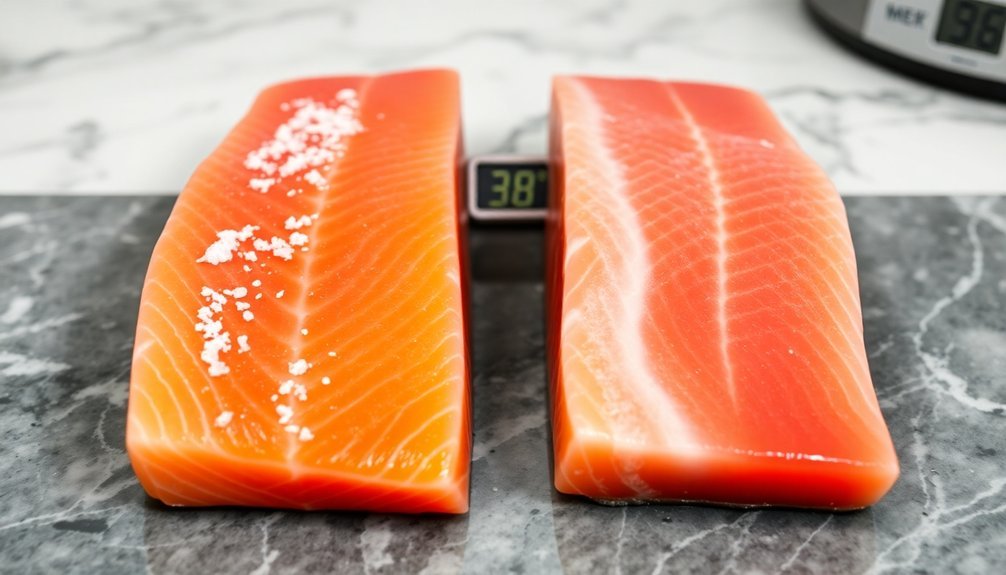
When making gravlax, you'll need to carefully consider the ratio of salt to fish weight, typically using 2-3% salt by weight of the fish for ideal results.
You'll find that kosher salt, with its larger flakes and clean taste, works better than rock salt, which can leave mineral undertones in your finished product.
These ratios aren't just about taste – they're essential for proper curing and food safety, ensuring your gravlax reaches the right texture while remaining safe to eat.
Salt-to-Fish Weight Ratios
Understanding proper salt ratios stands as the cornerstone of successful gravlax preparation. You'll need at least 3% of the fish's weight in salt to guarantee a safe and effective cure. For a 4-pound filet (1800 grams), this translates to a minimum of 55 grams of salt, though using a full cup offers better safety margins.
When balancing salt with sugar, you'll want to take into account your flavor preferences. A salt-heavy ratio (1.5:1 salt to sugar) creates a more savory profile, while increasing the sugar content produces a sweeter result. The salt doesn't just add flavor – it firms the texture and helps preserve your fish.
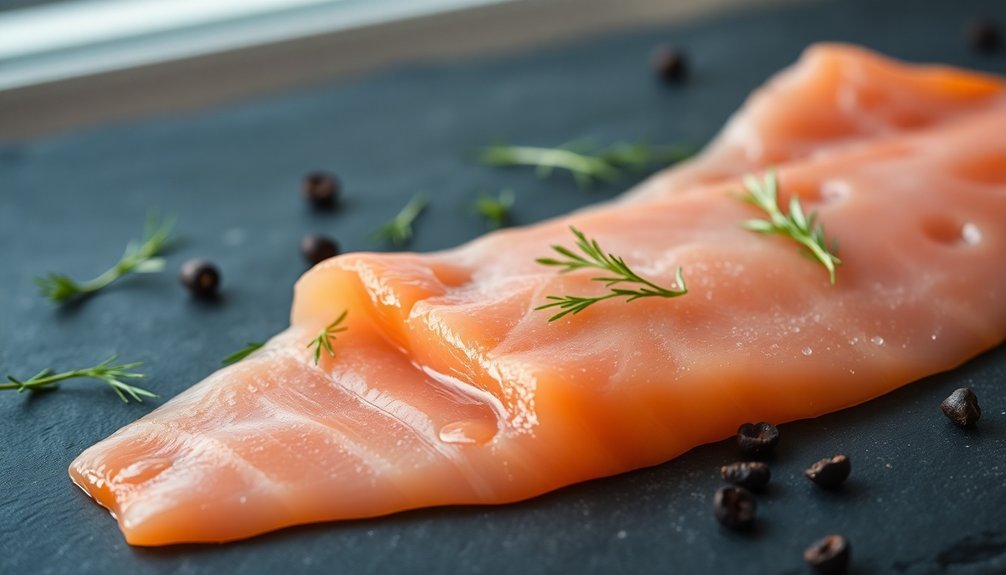
For the perfect gravlax visualization, picture these essential steps:
- A glistening salmon fillet completely blanketed in a crystalline mixture of salt and sugar
- Fragrant herbs and spices scattered across the surface, creating a colorful mosaic
- The fillet wrapped tightly in clear plastic, with moisture beads forming as the cure begins its work
For an 8-ounce fillet, you'll need about 2 tablespoons each of salt and sugar, adjusting the ratio based on your taste preferences while guaranteeing complete coverage of the fish.
Kosher Vs Rock Salt
Selecting between kosher and rock salt profoundly impacts your gravlax's final texture and cure consistency.
If you're using kosher salt, you'll notice faster penetration due to its finer grains, which results in a firmer, drier surface. However, this quick penetration can create a more pronounced contrast between the surface and interior of your salmon.
Rock salt, with its larger grains, offers more even curing from surface to center and better preserves the salmon's natural moisture. While it takes longer to achieve your desired cure level – up to 72 hours for a hard cure compared to kosher salt's 48 hours – you'll get more uniform results throughout the fish.
You'll need to adjust your timing based on your salt choice. For kosher salt, plan on 36 hours for a medium cure or 48 hours for a hard cure. With rock salt, allow 36 hours for medium and 72 hours for a hard cure.
Whichever salt you choose, remember to cure your salmon in the refrigerator, turn it periodically during the process, and let it rest for at least 12 hours after curing to guarantee even salt distribution.
Weight and Pressure Techniques
The application of weight and pressure plays an essential role in creating perfect gravlax. You'll want to apply 2-4 pounds of weight to help your salmon shed moisture faster and take on the cure more efficiently.
While weights are optional, they'll greatly speed up the curing process and contribute to that signature silky texture that makes gravlax so special.
For even pressure distribution, you'll need a flat, nonreactive surface like a baking dish. Place your salmon in the dish, cover it with cure and dill, then add weight using one of these methods:
- Stack another baking tray on top and add canned goods or jars
- Place the salmon in a Ziploc bag under a plate with refrigerator items on top
- Use bungee cords to secure two dishes together, creating consistent pressure
Keep the pressure applied for the entire 2-3 day curing period. You might want to turn the salmon every 12-24 hours to redistribute the juices, though this isn't always necessary.
When the fish feels firm and consistent throughout, you'll know it's ready to rinse and serve.
Storage Best Practices
Proper storage of your gravlax means the difference between a delicacy that lasts for weeks and one that spoils quickly.
You'll need to maintain a consistent temperature below 40°F (4°C) in your refrigerator to guarantee ideal preservation and safety of your cured salmon.
The duration your gravlax will last depends on its curing time. If you've done a 36-hour cure, expect it to keep for 3 days when stored properly.
Medium cures (36-48 hours) will last 2-3 days, while hard cures (3-day cure) can extend shelf life to 5 days.
When you've wrapped your gravlax tightly in plastic or parchment paper, you can achieve up to 2 weeks of storage time.
You'll get the best results by keeping your gravlax whole and slicing it only when needed.
Store it in an airtight container to prevent contamination.
If you need longer storage, you can freeze your gravlax for up to 2 months, but don't freeze it if you've used previously frozen salmon.
When you're ready to use frozen gravlax, thaw it in the refrigerator for 24 hours before serving.
Choosing Quality Salmon
When crafting delicious gravlax, your choice of salmon makes all the difference. You'll want to source your fish from a trusted market or fishmonger who receives fresh deliveries 2-3 times per week. For ideal safety and quality, opt for farmed salmon like Atlantic or Alaskan varieties, as they're raised on feed pellets, greatly reducing the risk of parasites.
While wild salmon might seem like a more natural choice, it's best reserved for cooking due to its higher parasite risk. Instead, look for sushi- or sashimi-grade labels on your farmed salmon. The fish should have a clean, oceanic smell – if there's any hint of fishiness, it's not fresh enough for gravlax.
Here's what to look for when selecting your salmon:
- Firm, glossy flesh that springs back when gently pressed
- Clear, bright eyes (if buying a whole fish) and metallic, tightly-attached scales
- Moist, translucent meat without any brown spots or discoloration
Before beginning the curing process, carefully remove all pin bones, rinse the fillet under cold water, and pat it dry with paper towels.
Handle the fish gently to preserve its texture and store it properly refrigerated until you're ready to begin.
Frequently Asked Questions
Can I Use Citrus Juice to Enhance the Curing Process?
Don't use citrus juice in your gravlax cure as it'll disrupt the drying process and cook the fish. Instead, you should stick to citrus zest, which adds flavor without compromising the cure's effectiveness.
Does Smoked Salmon Work as a Substitute for Gravlax?
While you can substitute smoked salmon for gravlax, you'll notice significant differences. Smoked salmon has a stronger, smokier taste, while gravlax offers a milder, fresher flavor with distinctive dill notes.
Why Does My Gravlax Sometimes Develop a Metallic Taste?
If you're experiencing a metallic taste in your gravlax, it could be due to your medications, dental issues, nutritional deficiencies, or environmental factors – not necessarily the gravlax itself affecting your taste perception.
Can I Reuse the Curing Mixture for Another Batch?
No, you shouldn't reuse the curing mixture. It's already absorbed moisture from the previous salmon, which reduces its effectiveness and can compromise food safety. Always use fresh ingredients for each new batch of gravlax.
Is It Safe to Cure Gravlax Without Alcohol or Aquavit?
Yes, you can safely cure gravlax without alcohol or aquavit. Your salt and sugar cure will effectively preserve the salmon when you maintain proper refrigeration, handling, and storage techniques. Remember to keep it below 40°F.
In Summary
You'll achieve the best gravlax results by maintaining temperatures between 34-38°F throughout the curing process, allowing 36-48 hours for proper salt penetration. Remember to use a 2:1 salt-to-sugar ratio and apply consistent pressure with weights. Always start with sushi-grade salmon and store your finished gravlax properly wrapped in the refrigerator for up to a week. With these techniques, you'll create perfectly cured gravlax every time.


Leave a Reply