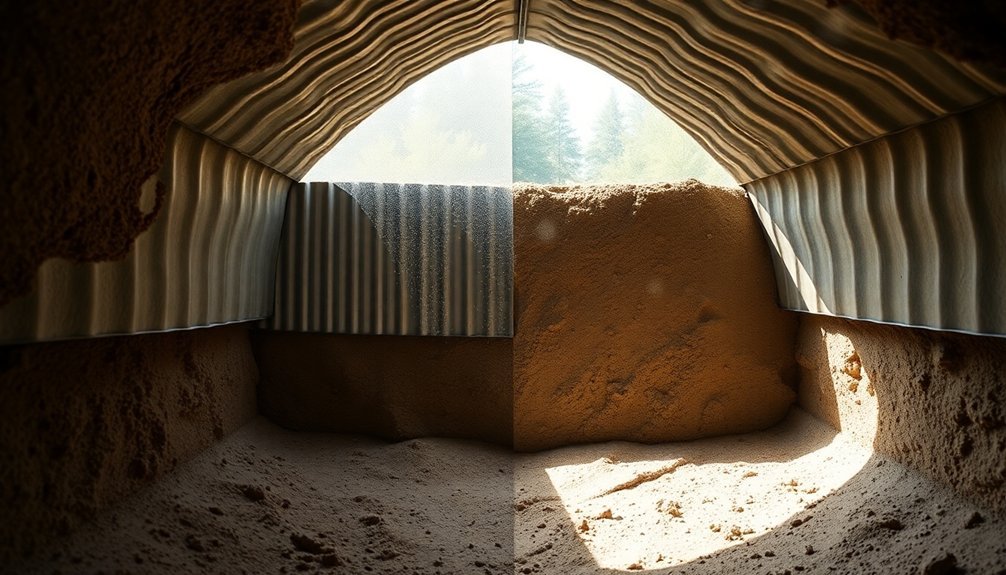
Lining your root cellar's earthen walls creates an important barrier that solves multiple storage challenges at once. You'll protect against soil and water pressure while preventing collapse and erosion of the underground structure. The right wall treatment helps manage moisture levels, keeping humidity at that sweet spot between 85-95% for ideal food preservation. You'll also gain better temperature control, as proper lining works with the earth's natural insulation to maintain those vital 32-40°F storage temperatures. Plus, a well-lined wall keeps unwanted pests out of your precious food stores. Understanding the full benefits of wall lining can transform your root cellar's effectiveness.
Structural Benefits of Wall Lining
Properly lining your root cellar's earthen walls provides essential structural benefits that guarantee long-term stability and safety.
When you line your walls, you're creating a robust barrier that can effectively withstand external pressures from soil and water weight, preventing potential collapse and erosion issues that often plague unlined cellars.
A proper lining with rebar reinforcement layers provides critical structural strength to the walls. You'll find that proper wall lining helps distribute the backfill's weight evenly across the entire structure, reducing stress points that could lead to failure.
This is particularly vital if you're dealing with unstable soil conditions or high water tables.
The lining system works to transfer loads effectively to the foundation, ensuring your cellar maintains its structural integrity even when supporting additional structures above.
Keeping Moisture at Bay
You'll need to properly manage moisture in your root cellar's walls to prevent structural damage and decay over time.
Installing proper drainage systems, including French drains and waterproof coatings, helps control underground water flow and protects your earthen walls from water infiltration.
Managing condensation through ventilation and moisture barriers will keep your walls dry and prevent the seepage that can compromise both the structure and your stored goods. Applying interior DryLok coating helps create an effective barrier against unwanted moisture penetration.
Drainage Prevents Wall Damage
In root cellars, moisture poses a constant threat to wall integrity. When water seeps through walls and collects on gravel floors, it creates a continuous cycle of evaporation and condensation. You'll need proper drainage to prevent structural damage and maintain a stable environment. Using mold-resistant materials for interior surfaces helps prevent deterioration in high-humidity conditions.
| Problem | Solution |
|---|---|
| Saturated Soil | Install French drains and perforated pipes |
| Wall Pressure | Reinforce with #3 or #4 rebar and anchoring |
| Moisture Seepage | Apply DryLok or waterproof coatings |
| Ceiling Drips | Add rigid foam insulation and 6-mil poly |
| Soil Erosion | Plant groundcover and install rain gutters |
You'll want to protect both interior and exterior surfaces. On the inside, apply waterproof coatings to reduce moisture penetration. For the exterior, install barriers and drainage systems to direct water away from the walls. Don't forget to place a plastic sheeting layer over the gravel floor to prevent ground moisture from rising.
Keep trees and shrubs with aggressive root systems far from your foundation to prevent structural damage. Instead, opt for stabilizing groundcover plants that won't threaten your walls. Remember, proper drainage isn't just about preventing dampness—it's essential for maintaining your root cellar's structural integrity for years to come.
Managing Underground Water Flow
Successful water management beneath your root cellar starts with understanding how groundwater moves. When water saturates the soil around your cellar, it'll naturally flow toward the lowest point. You'll need a thorough drainage system to protect your structure and direct this water away from your foundation.
Install a French drain system that includes these essential components:
- A perimeter drainage pipe wrapped in landscape fabric to prevent soil infiltration
- A bed of coarse gravel surrounding the pipe to facilitate water movement
- A slight downward slope in the pipe to guarantee proper water flow
- A designated outlet point where water can safely discharge away from the structure
You'll want to lay down a solid rock base before pouring concrete, especially if you're dealing with sandy soil or a high water table.
Place a layer of plastic sheeting over your gravel floor to block rising moisture, and don't forget to install a drainboard as a capillary break. This combination of barriers will prevent water from wicking through your concrete foundation.
Remember that proper underground water management isn't just about handling current flow – it's about anticipating and preventing future moisture problems.
Control Seepage and Condensation
Persistent moisture poses two major threats to root cellars: seepage through walls and condensation from temperature differences. You'll need to address both issues to protect your stored produce and maintain structural integrity.
To prevent seepage, start by applying a waterproof barrier to your cellar's exterior walls. Use products like DryLok on interior surfaces for added protection, and install proper rain gutters above to keep soil around the walls from becoming saturated. A plastic liner provides another effective barrier against moisture infiltration.
You can manage condensation by maintaining humidity levels between 85-95% and monitoring temperature fluctuations. Don't let warm outside air enter your cooler cellar space, as this creates instant condensation. Instead, use vents or fans to regulate airflow, and consider placing moisture-absorbing materials like charcoal or rice throughout the space.
Protect your floor by laying plastic sheeting over gravel and installing a French drain along the exterior base. Reinforce walls with rebar and guarantee footings extend below the frost line.
Top it off with rigid foam insulation on the roof's exterior to prevent water penetration. These measures will create a dry, stable environment for your root cellar.
Temperature Control Made Simple
You'll find that your root cellar's earthen walls naturally maintain a steady temperature, thanks to soil's poor heat conductivity and insulating properties.
By placing intake vents low and outlet vents high, you're creating an effective flow of cool air that follows the natural convection principle of warm air rising and cool air sinking.
Your cellar's positioning six feet underground takes advantage of the earth's year-round average temperature, providing consistent cooling without mechanical intervention.
Cool Air Flow Management
Maintaining proper airflow in your root cellar is essential for keeping stored produce fresh and preventing spoilage. You'll need to understand how air naturally moves through your space to create an effective circulation system. Since hot air rises and cool air sinks, positioning your vents strategically will maximize this natural convection process.
Place vents on opposite sides of your cellar, with exhaust vents near the top and intake vents near the bottom. You can enhance airflow by opening vents at night when outside temperatures are coolest. This setup helps remove ethylene gas and unwanted odors while maintaining ideal temperature and humidity levels.
- Install adjustable vents to control humidity and prevent excess condensation
- Position produce requiring coolest temperatures on lower shelves where cool air settles
- Use fans with porous materials to improve air circulation and maintain humidity
- Consider automated systems to regulate temperature and airflow consistently
If you're in an arid climate, you'll need to add moisture back into the circulating air. You can achieve this by spraying water on porous materials or letting the earth's natural moisture help maintain humidity levels in underground cellars.
Natural Insulation Benefits
Root cellars harness the earth's remarkable insulation properties to maintain ideal storage conditions with minimal effort. Since soil is a poor heat conductor, you'll benefit from naturally stable temperatures once you're about 6 feet underground. The earth's natural moisture helps maintain peak humidity levels, reducing your need for additional insulation materials.
You'll appreciate how your underground cellar protects your stored goods from extreme temperatures year-round. By connecting uninsulated masonry floors directly to deep soil, you're creating a natural temperature control system. Remember to install proper drainage and structural support to prevent water damage and wall failure.
| Natural Benefit | Your Advantage | Long-term Impact |
|---|---|---|
| Earth's Insulation | Zero energy costs | Sustainable storage |
| Temperature Stability | Consistent food preservation | Reduced food waste |
| Moisture Control | Natural humidity regulation | Better produce quality |
| Structural Protection | Long-lasting construction | Lower maintenance |
| Energy Independence | Off-grid capability | Environmental benefits |
Fighting Off Unwanted Pests
A well-protected root cellar requires constant defense against unwanted visitors. You'll need to take proactive steps to prevent pests from making your storage space their new home. Start by thoroughly sealing all potential entry points with caulk and hardware cloth, paying special attention to gaps around pipes, vents, and doors.
Create multiple layers of defense by implementing these essential protective measures:
- Line your walls and shelving with pest-resistant materials, making it difficult for rodents to chew through or insects to infiltrate.
- Maintain ideal humidity levels using desiccants or water trays, as moisture imbalances can attract unwanted critters.
- Apply natural repellents like peppermint, spearmint, or diatomaceous earth around sealed areas and strategic locations.
- Remove spoiled produce immediately and keep the space clean to avoid attracting pests with food odors.
Don't forget to regularly inspect your root cellar for new gaps or potential entry points.
By combining physical barriers with natural deterrents, you'll create an environment that's inhospitable to pests while remaining safe for your stored produce.
Remember that consistent maintenance of these protective measures is key to long-term pest prevention.
Long-Term Storage Success
You'll maximize your root cellar's effectiveness by maintaining consistent temperatures through proper wall insulation and earth coverage, keeping produce at the ideal 32-35°F range.
A well-designed ventilation system helps control humidity levels while preventing condensation and mold growth that could spoil your stored goods.
Timing your harvest correctly and monitoring storage conditions regularly guarantees your vegetables and fruits remain fresh throughout the winter months.
Consistent Temperature Protection
Successfully storing food in your root cellar depends heavily on maintaining consistent temperatures between 32 to 40 degrees Fahrenheit. When you line your earthen walls properly, you'll create a natural barrier that helps regulate these important temperatures while slowing down ethylene gas release from your stored crops.
Your root cellar's location and construction materials play significant roles in temperature control. By building into a hillside or going underground, you'll harness the earth's natural insulation properties, which help maintain stable conditions year-round. Choose a north-facing slope or shaded area to minimize direct sunlight exposure and prevent unwanted temperature fluctuations.
For ideal temperature protection, consider these essential wall-lining strategies:
- Install rigid foam insulation boards directly against earthen walls to enhance temperature regulation.
- Use concrete or stone materials to create a sturdy, insulating barrier.
- Incorporate earthbags filled with soil as a cost-effective insulation method.
- Seal all joints and connections thoroughly to prevent temperature leaks.
Ventilation System Benefits
Proper ventilation serves as the cornerstone of long-term food storage success in your root cellar. By installing vents on opposite ends of your cellar, you'll create an effective airflow pattern that removes stale air and maintains perfect storage conditions.
Position your outlet vents near the ceiling to expel warm air and ethylene gases, while placing intake vents close to the ground to draw in cooler air.
You'll protect your stored produce from premature spoilage by maintaining ideal humidity levels between 60-80%. When your ventilation system works efficiently, it prevents excess moisture that leads to mold growth while avoiding the low humidity that causes produce to shrivel.
Consider adding a humidistat to monitor these levels accurately.
To maximize your ventilation system's effectiveness, make sure you're using 4-inch diameter ductwork and covering all vents with mesh screens to keep pests out.
You can enhance air circulation by installing a fan to create negative pressure, drawing in fresh air more efficiently. Opening your vents overnight will help you take advantage of cooler temperatures, while proper vent placement eliminates the need for frequent adjustments to maintain perfect storage conditions.
Harvest Timing Maximization
Timing your harvest precisely can make the difference between produce that lasts all winter and crops that spoil prematurely.
You'll need to strategically plan your planting schedule to guarantee your root cellar stays filled with fresh produce throughout the storage season. By implementing succession planting and carefully selecting storage-friendly varieties, you can maximize your cellar's potential.
Start by mapping out your garden space and planning your harvests around your cellar's capacity. You'll want to coordinate your plantings so that cool-season crops mature just as temperatures begin to drop, guaranteeing ideal storage conditions from the start.
- Plant root vegetables and winter squash in late summer for fall harvest and winter storage
- Start indoor seedlings four weeks before transplanting to extend your growing season
- Use succession planting techniques to stagger harvests and prevent overwhelming your storage space
- Rotate crops through dedicated garden areas to maintain soil health and consistent yields
Your harvest timing should align with ideal storage conditions of 35-55°F and 80-95% humidity.
When you coordinate these factors effectively, you'll create a continuous supply of storable produce that maintains its quality throughout the winter months.
Essential Drainage Solutions
To protect your root cellar from water damage, you'll need a detailed drainage system that works from the outside in. Start by applying a waterproof barrier coating to your exterior block walls and confirm it extends all the way to the foundation.
Install rain gutters on your topside structure to prevent excess water from saturating the soil around your cellar walls.
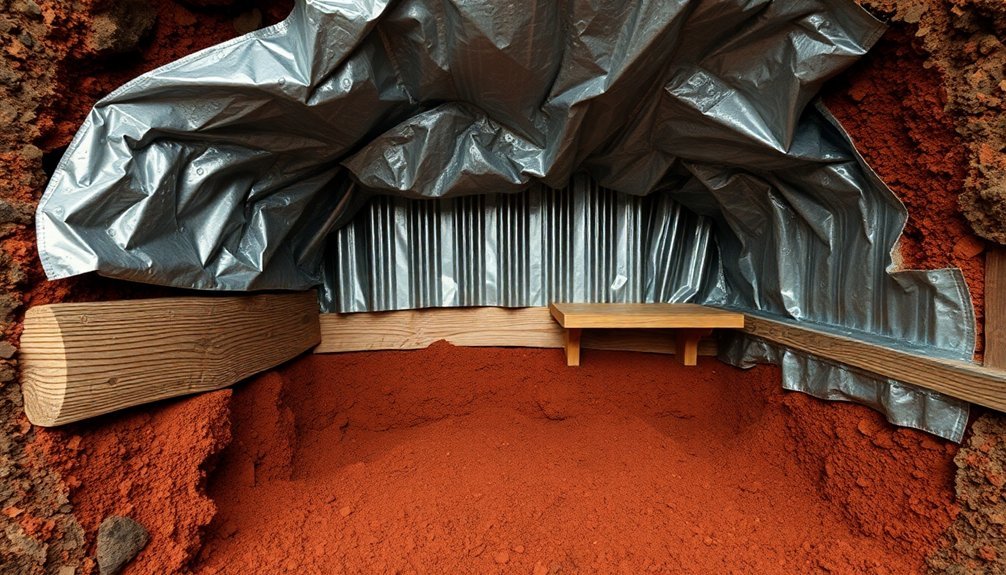
Create a complete drainage layer by back-filling with a 6-inch gravel barrier around the exterior walls. Position sheets of tin 6 inches from the wall and fill this space with gravel. You'll want to maintain at least 4 inches of gravel both at ground level and halfway up the walls.
Install a French drain along the base of your underground walls, connecting it to perforated plastic drainfield pipe laid on a downward slope.
Don't forget your interior moisture management. Apply DryLok or similar waterproof coating to interior walls and lay plastic sheeting over the gravel floor.
You'll need proper ventilation too – install air vent pipes diagonally across the cellar with screened exits above ground level. Use multiple chimneys of varying lengths to account for height differences and confirm consistent air circulation.
Earth Pressure Management
While drainage protects against water damage, managing earth pressure stands as your next major challenge in root cellar construction. You'll need to implement specific structural elements to prevent wall collapse and guarantee long-term stability. Start by extending your footings below the frost line and incorporating rebar in a grid pattern – horizontal bars every foot and vertical ones every two feet.
Your walls must be designed to handle significant earth pressure. Consider these critical elements:
- Use pressure-treated wood or durable options like black locust or cypress for wall construction
- Install retaining walls at an angle to distribute pressure more evenly
- Backfill with gravel rather than soil to reduce pressure and improve drainage
- Reinforce the roof with steel channels or I-beams for added support
Don't forget about soil expansion issues, which can crack your walls over time. You'll want to keep the floor higher than the outside soil level and install proper drainage pipes.
Apply waterproofing compounds to your walls' exterior surfaces, and consider creating an anteroom to better control temperature fluctuations.
Maintaining Ideal Humidity Levels
Along with proper drainage and pressure management, maintaining perfect humidity levels stands as an essential factor in your root cellar's success. Your stored vegetables require high humidity levels between 85-95% to prevent drying out and maintain their freshness and flavor.
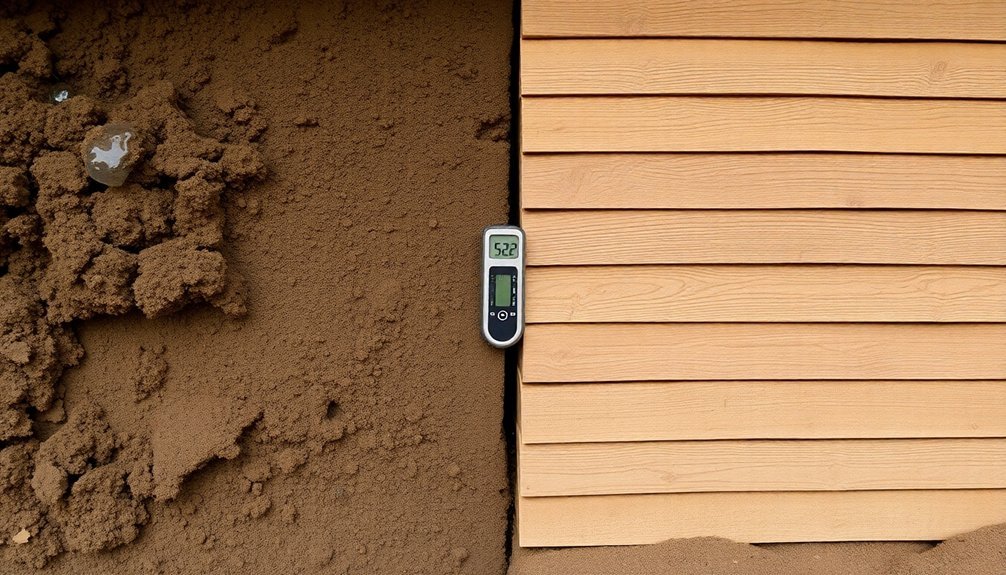
Without proper humidity control, you'll face premature spoilage and loss of food quality. You'll need to monitor humidity levels using a hygrometer and implement effective control methods. Consider installing vents covered with mesh for proper air circulation while keeping pests out.
You can create ideal moisture conditions by using sealed or perforated plastic containers and incorporating moisture-absorbing materials like charcoal or rice where needed.
When lining your earthen walls, remember that the natural earth moisture contributes to maintaining perfect humidity. However, you'll want to avoid excess moisture that can lead to mold growth or rot.
Create a balanced environment by including an ante-chamber for better climate control and ensuring proper ventilation. Don't forget to separate ethylene-producing foods from your root vegetables to prevent accelerated spoilage.
With careful attention to humidity management, you'll greatly extend the shelf life of your stored produce.
Seasonal Climate Adaptations
During seasonal changes, your root cellar requires specific adaptations to maintain ideal storage conditions.
You'll need to actively manage ventilation during spring shift by opening vents at night and closing them in the morning to trap cooler air.
When fall arrives, focus on protecting against cold by insulating walls with straw bales and sealing any gaps around doors and windows.
Natural temperature regulation plays a vital role in your cellar's performance.
You'll want to maintain temperatures just above freezing (32-35°F) for best storage, using the earth's natural cooling properties.
During fall nights, let cold air flow in to gradually lower the cellar's temperature.
For supplemental cooling, especially in summer, you can:
- Store blocks of ice made during winter months
- Fill approximately one-third of your cellar volume with ice
- Use drip irrigation systems for efficient ice-making
- Install a drainage system for melt water collection
Wall Protection Fundamentals
Proper wall protection serves as the cornerstone of a durable root cellar that'll withstand years of use.
You'll need to start by lining your earthen walls with moisture-managing materials like straw and dried leaves, which create a protective barrier against erosion and excess moisture. These natural materials work alongside landscape cloth to prevent water from seeping into your storage space.
For structural integrity, you'll want to reinforce your walls using earthbags filled with excavated soil, supported by a systematic rebar grid.
Install horizontal rebar every foot and vertical rebar every two feet to guarantee maximum stability. Don't forget to flare the sides of your excavation to prevent cave-ins and maintain wall strength.
To combat moisture issues, you'll need to install perforated drainpipes around the outer walls and below the soil surface.
Apply Flex Seal to vulnerable areas and make certain your floor slopes toward the entrance for natural drainage.
When building your walls, compact the soil and gravel mix thoroughly to prevent future settling.
Remember to anchor the walls securely to the front of the root cellar, utilizing their angled shape for additional support.
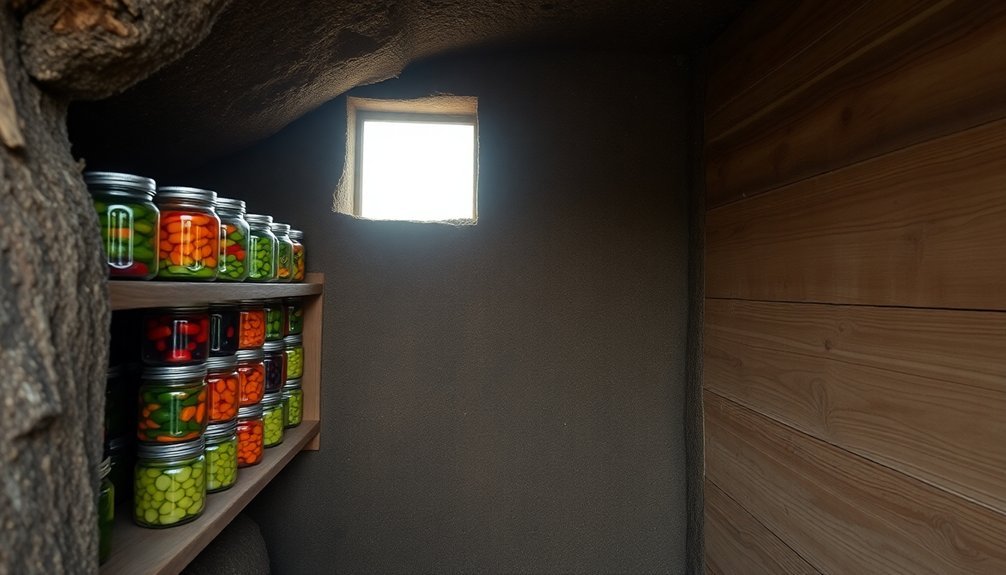
Food Preservation Enhancement
Effective food preservation in your root cellar depends heavily on the natural properties of earthen walls. These walls create an environment that mimics ideal autumn conditions, allowing you to store your harvest for extended periods.
You'll find that properly maintained earthen walls regulate temperature between 32-40°F (0-4°C) and maintain humidity levels of 85-95%, essential factors for keeping your vegetables fresh.
The earth's natural thermal mass works to your advantage by:
- Absorbing and releasing heat slowly, preventing temperature fluctuations that could spoil your produce
- Creating a consistently humid environment that keeps root vegetables from drying out
- Facilitating natural air circulation that removes harmful ethylene gas
- Providing darkness that slows down the natural decay process
You'll notice that these conditions work together to greatly extend your produce's shelf life.
The earthen walls' ability to maintain stable temperatures prevents premature sprouting in potatoes and other root vegetables, while the high humidity levels preserve freshness and flavor.
When you combine these factors with proper ventilation, you're creating an ideal environment that can keep your vegetables fresh for months.
Root Cellar Longevity Factors
Building on the natural properties of earthen walls, several key factors determine your root cellar's long-term success. First, you'll need to maintain a consistent temperature between 32-40°F (0-4°C), which you can achieve by building below the frost line and choosing a north-facing slope location with minimal sun exposure. The earth's natural insulation helps stabilize these temperatures.
Your cellar's longevity also depends on proper humidity control, ideally between 85-95%. You'll want to incorporate natural materials like dirt and gravel to regulate moisture levels while ensuring adequate drainage to prevent water damage. Different crops require different humidity levels, so you'll need to plan your storage accordingly.
Effective ventilation is essential for your cellar's durability. You'll need proper vents with mesh covers to prevent pest intrusion while allowing air circulation that removes harmful ethylene gas and prevents mold growth.
Additionally, maintaining complete darkness in your storage area is vital, as light exposure can trigger sprouting and accelerate food deterioration. While you can install lighting for visibility, it shouldn't be left on continuously, as this could compromise your cellar's preservation environment and overall longevity.
Frequently Asked Questions
What Materials Are Best for Lining a Root Cellar's Walls?
You'll want to use rigid foam or closed-cell spray foam for insulation, covered with cement board or fiberglass drywall. Don't forget to add a water barrier outside and finish with mold-resistant paint.
How Much Does Professional Root Cellar Wall Lining Typically Cost?
You'll typically spend between $10,000 to $55,000 for professional root cellar wall lining, depending on whether it's above or below ground. This includes labor costs, materials, and necessary installation work.
Can I Line My Root Cellar Walls Myself as a DIY Project?
You can definitely line your root cellar walls as a DIY project. With proper materials like concrete, stones, and vapor barriers, plus careful preparation and installation techniques, you'll save money while creating effective protection.
How Often Should Root Cellar Wall Lining Be Inspected and Replaced?
You'll need to inspect your root cellar's wall lining annually and after severe weather events. Replace it when you notice significant damage, moisture problems, or reduced insulation effectiveness – typically every 5-10 years, depending on materials used.
Will Different Wall Lining Materials Affect the Taste of Stored Foods?
Most natural linings like concrete or earthen plaster won't affect your food's taste. However, you'll want to avoid metal liners and certain plastics that might leach chemicals and alter food flavors during storage.
In Summary
You'll find that lining your root cellar's earthen walls is a vital investment in your food storage success. Not only will it protect against moisture damage and pest invasions, but it'll also help maintain consistent temperatures year-round. By taking this essential step, you're maximizing your cellar's longevity and ensuring your stored produce stays fresh longer. It's a simple upgrade that pays off in preserved harvests and reduced maintenance.


Leave a Reply