You'll need to build your earth pit food storage system on high ground with good drainage and stable soil conditions. Start by digging a 4-foot-deep bell-shaped or cylindrical pit, then line it with straw or dried leaves for insulation. Install a vertical wooden duct system for air circulation and create a well-designed access hatch above ground level. Add compartments using natural materials like clay, timber, and gravel for structural support. Don't forget to incorporate drainage trenches around the perimeter and maintain a 2-degree slope from center to edge. The success of your traditional storage system depends on mastering these essential elements.
Selecting the Perfect Location
Three critical factors determine the ideal location for an earth pit storage system: elevation, soil composition, and proximity to work areas.
You'll want to position your pit at the highest point in the local landscape, ensuring rainfall naturally flows away from the site rather than pooling around it. This elevation helps maintain dry conditions and prevents water seepage that could compromise your stored goods.
Your soil type should ideally be clay or conglomerate, as these materials provide the stability needed for nearly vertical pit walls without risk of collapse. To maintain readability and clarity, it's best to avoid multiple storage pits in close proximity.
These soil types also make it easier to form a water-shedding mound over the completed pit, which is essential for long-term storage success.
While it's convenient to locate your pit near grain production or feeding areas, don't let this compromise the site's drainage qualities.
You'll need year-round vehicle access, so choose a location that stays clear and well-drained in all seasons.
Keep adequate distance between multiple pits to prevent water from empty pits affecting stored grain in nearby ones.
Testing Ground and Soil Conditions
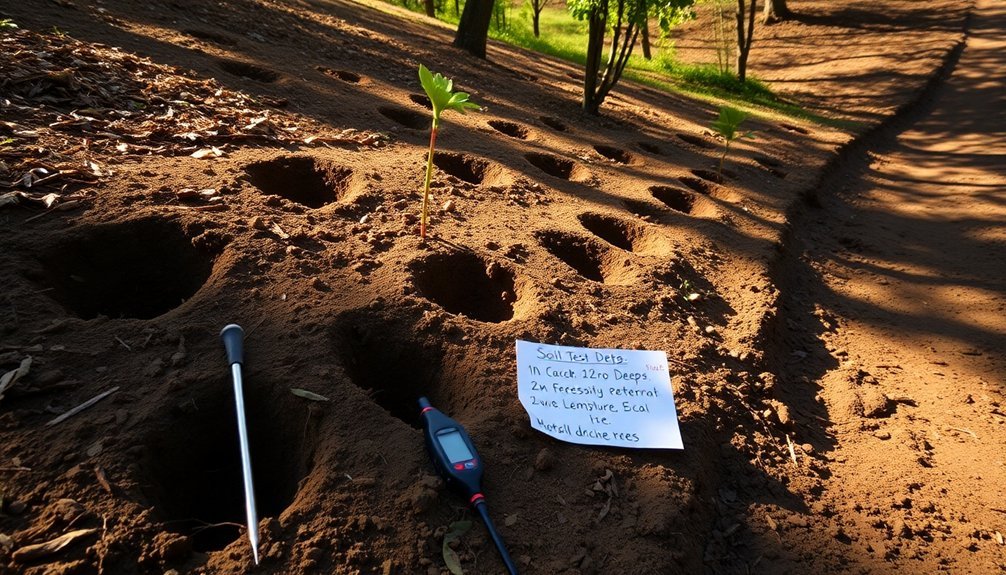
You'll need to test your soil's drainage by digging a small hole, filling it with water, and observing how quickly it drains away.
Check your site's water table depth by monitoring the test hole over several days, especially after rainfall, to verify it remains above the minimum depth required for pit storage.
Perform a clay content analysis by rolling a moistened soil sample into a ball – if it holds its shape and feels sticky, you've got suitable clay-rich soil for pit construction.
Heavy clay soil is ideal for underground storage pits as it provides natural structural stability and moisture resistance.
Soil Drainage Assessment
Proper soil drainage assessment typically begins with a simple yet effective hole test to evaluate how well water moves through your ground. Dig a 12-inch diameter hole that's 12 inches deep, then fill it with water to saturate the surrounding soil. Once it drains completely, refill it and measure how quickly the water level drops over time. Regular hourly measurements taken will give you the most accurate assessment of your soil's drainage capabilities.
While you're digging, evaluate your soil's texture. Take a handful of moist soil and feel its consistency – if it's gritty, you've got sandy soil; if it's smooth but not sticky, it's silty; and if it's sticky and moldable, you're dealing with clay.
| Drainage Rate | Soil Condition | What It Means for Your Pit |
|---|---|---|
| 1-3 inches/hr | Good | Ideal for pit storage, proceed with confidence |
| 0.5-1 inch/hr | Moderate | Workable, but add drainage amendments |
| <0.5 inch/hr | Poor | Consider raised design or different location |
If your drainage test reveals poor results, you'll need to implement solutions before building your pit. Add organic matter to improve permeability, install French drains if necessary, or consider raising your storage system above ground level.
Water Table Depth Check
Once you've confirmed suitable soil drainage, checking the water table depth becomes your next priority.
You'll need to determine if groundwater levels are deep enough to prevent flooding your food storage pit during wet seasons. The most practical method for homeowners is to dig a test hole and monitor it over time.
Create a test hole that's at least 2-3 feet deeper than your intended storage pit depth. Install a simple observation well using a PVC pipe with small holes drilled along its length. Cover the pipe with filter fabric to prevent soil from entering, then place it in your test hole and backfill around it with gravel.
You can measure the water level using either a marked steel tape covered in chalk or by inserting a lightweight stick into the pipe.
Monitor your test well for several weeks, especially after rainfall. If you find water levels consistently remaining below your intended pit depth by at least two feet, you've found a suitable location.
For accuracy, take measurements at different times of day and record your findings. If you're in an area with seasonal fluctuations, extend your monitoring through wet seasons for reliable results.
Clay Content Analysis
Testing your soil's clay content is a crucial step in determining the suitability of your earth pit location. You'll need to analyze the soil's composition to guarantee it can maintain proper moisture levels and structural stability for long-term food storage.
To test your soil's clay content, you'll want to use the hydrometer method, which requires removing organic matter with hydrogen peroxide first. You'll then need to disperse your soil sample using sodium hexametaphosphate and measure the sedimentation rates at different time intervals.
If you don't have access to laboratory equipment, you can estimate clay content by measuring the soil's hygroscopic water content at 50% relative humidity.
Keep in mind that your soil's clay content will directly impact its water-holding capacity and drainage characteristics. Higher clay content means better moisture retention, but you'll need to balance this with proper drainage to prevent waterlogging.
If your test results show low clay content, you can improve the soil's moisture-retention properties by adding specific backfill materials. For areas with varying clay content, consider incorporating conductive materials like coal and salt to maintain consistent moisture levels around your earth pit.
Planning Your Pit Design

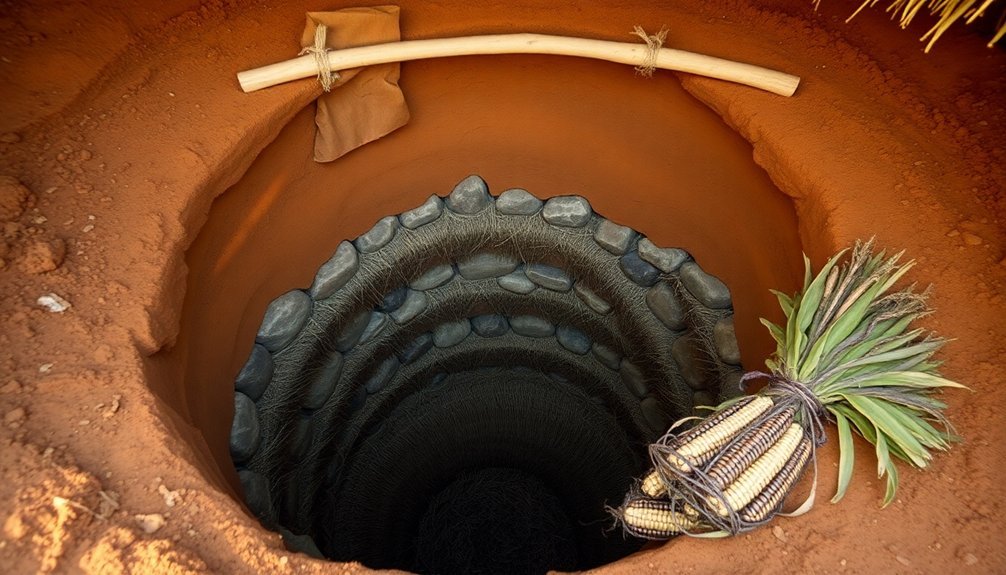
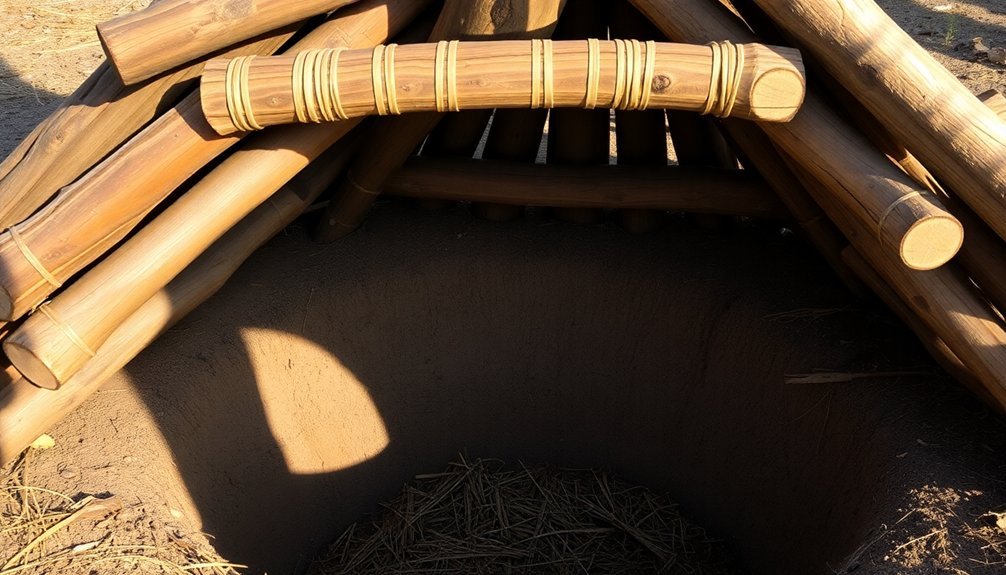
Before breaking ground on your earth pit storage system, careful planning of the design will determine its long-term success. You'll need to dig approximately 4 feet deep, ensuring you're below the frost line. Shape your pit with either a bell-shaped or cylindrical structure, making sure to flare the sides to prevent cave-ins.
Your design should include a well box with a central duct system for regulating temperature and humidity. Plan for an access hatch that sits several feet above ground level, and incorporate a rope and sack system that'll let you retrieve stored items without disturbing others.
Don't forget to mark your pit's location with stakes – you won't want to lose it under winter snow. Include drainage features in your design, such as a surrounding trench to prevent waterlogged soil from freezing.
You'll want to line the bottom and sides with straw or dried leaves for insulation. Plan for air circulation by incorporating racks or straw tunnels throughout the structure. Remember to leave space for monitoring systems that'll help you maintain ideal storage conditions year-round.
Gathering Essential Materials
Four essential material categories form the foundation of a successful earth pit storage system: clay mixtures, natural sealants, organic materials, and structural supports. You'll need to gather these materials locally, focusing on proven traditional components that guarantee your pit's durability and effectiveness.
Start by collecting clay from termite mounds, as it offers superior plasticity when mixed with rice straw. For sealing, you'll require liquid clay, cow dung, and stiff clay or wooden bungs. Don't forget structural elements like timber and gravel for proper support and drainage.
| Material Type | Primary Uses | Key Components |
|---|---|---|
| Clay Mixtures | Wall Construction | Termite Clay + Rice Straw + Néré Juice |
| Natural Sealants | Gap Filling | Liquid Clay + Cow Dung + Adobe |
| Organic Materials | Reinforcement | Thatched Grass + Bark + Pumice |
| Support Materials | Structure | Timber + Gravel + Wooden Ducts |
When gathering materials, verify you test the clay's composition, as it varies by location. You'll need to collect enough thatched grass for proper roofing protection and adequate timber for internal support structures. Remember to source gravel for drainage trenches and pumice for soil mixing to achieve ideal moisture control.
Digging the Storage Pit
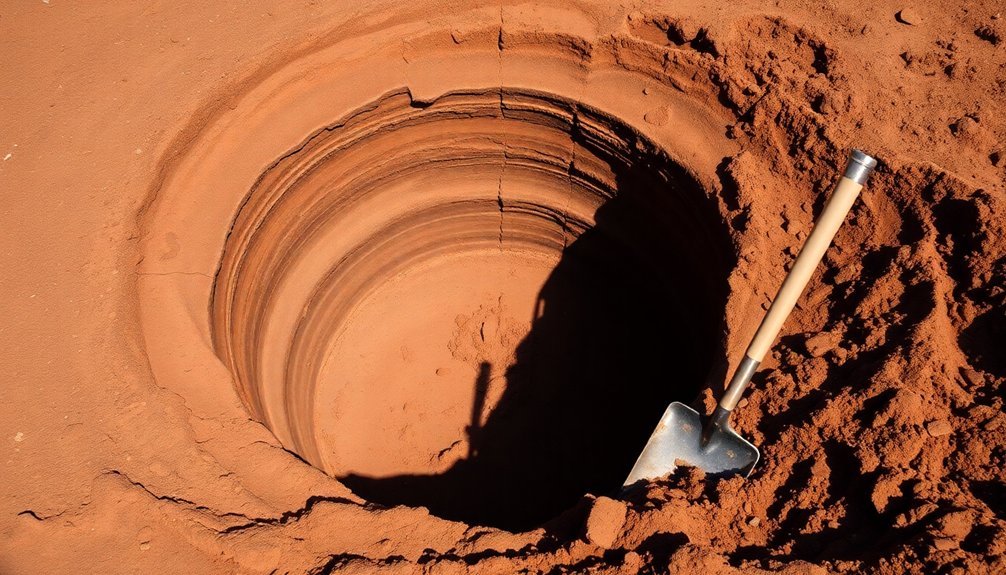
You'll need to start by selecting a well-drained, shady spot on elevated ground to prevent water accumulation and guarantee ideal storage conditions.
Using a sturdy shovel and measuring tools, dig your pit 1-2 feet deep with a width that accommodates your expected vegetable yield.
As you excavate, keep the removed soil nearby for later covering, and guarantee the pit walls remain stable and even throughout the digging process.
Selecting the Perfect Location
When selecting a location for your earth storage pit, choosing the highest point in the local landscape is essential for success. This elevation guarantees that both surface and underground water will naturally flow away from your pit rather than seeping into it.
You'll want to find an area with clay or conglomerate soil, as these soil types allow you to dig nearly vertical walls that won't collapse. Look for a well-drained site that's easily accessible by vehicle throughout the year.
While it's convenient to position your pit near grain production or feeding areas, don't compromise on finding a "high and dry" location. You'll need to dig shallow drainage ditches around the pit's perimeter to direct surface water away from the storage area.
Consider the surrounding environment carefully. Check for signs of burrowing animals and ascertain you're not in an area prone to flooding or high water tables.
If you're using storage containers, plan to place them slightly elevated on bricks or stones to improve drainage. The ideal location should also allow for some ventilation while maintaining the naturally cool, stable temperatures that make underground storage so effective.
Proper Pit Dimensions
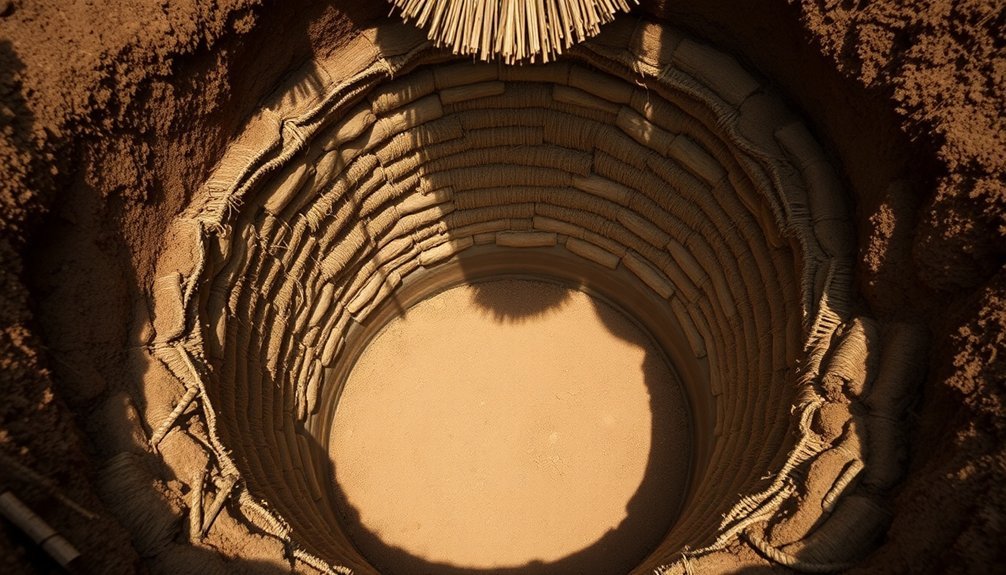
Once you've secured your ideal location, understanding the correct dimensions for your storage pit becomes the next key step. The most efficient design is typically bell-shaped or cylindrical, with a narrow neck opening that widens into a larger storage chamber below.
You'll want to dig your pit between 1-5 meters deep, though you can go deeper for larger storage needs up to 15 meters. For the diameter, aim for 2-4 meters at the widest point of the storage chamber, while keeping the entrance narrow to minimize air and moisture infiltration.
If you're planning for family use, a smaller capacity of a few hundred kilograms might suffice, but you can scale up to 200 tonnes for community storage. The bottom should be flat to maximize storage space, particularly in bell-shaped designs.
Consider adding internal compartmentalization with vertical walls and a central support column if you're building a larger pit. Remember, these dimensions aren't just arbitrary numbers – they're carefully calculated to balance accessibility, storage capacity, and preservation effectiveness.
You'll need enough space to properly layer your stored items while maintaining the structural integrity of the pit.
Tools and Excavation Methods
Successful pit excavation requires both the right tools and proper digging techniques. You'll need basic tools like shovels and pickaxes, but traditional implements such as the garden fork can be especially effective during cool morning hours when the soil is more manageable.
If you're working with harder ground, a hoto (wooden spade) or hengahenga (breaking hoe) can help loosen the soil before deeper excavation begins.
Choose your excavation method based on your terrain:
- For sloping sites, dig horizontally into the bank, creating a bell-shaped cavity that widens as you go deeper.
- For level ground, dig vertically and form the classic bell shape, which naturally deters pests and adds structural stability.
- If bedrock is present, cut directly into it for maximum durability and security.
Work during cool, dry conditions to prevent soil collapse and make digging easier.
As you excavate, prepare the interior surfaces by plastering them with clay to deter burrowing animals. You'll also want to incorporate drainage features like gravel-filled trenches around the pit's perimeter to prevent water accumulation.
Remember to sterilize the completed pit with fire before use, especially if you're planning to store root crops.
Preparing Walls and Floor
Preparing your earth pit's walls and floor requires careful attention to both structural integrity and moisture control. You'll need to start by laying concrete blocks at the corners, using a precise mortar mix of 1 part cement, 1 part lime, and 4 parts sand. Stack your walls to reach 6½ to 8 feet in height, guaranteeing they're perfectly aligned and level throughout construction.
| Component | Material | Specifications |
|---|---|---|
| Walls | Concrete Blocks | 8×16 inches |
| Mortar | Cement/Lime/Sand | 1:1:4 ratio |
| Floor | Gravel/Cement | Raised slope |
| Insulation | Rigid Foam | 2-inch thick |
For proper moisture control, you'll want to position the floor slightly higher than the outside soil level. Apply a layer of gravel for drainage and easier maintenance. Don't forget to leave a standard door opening during wall construction. Install rigid 2-inch urethane or Styrofoam sheets on exterior surfaces for insulation. When building storage shelves, maintain an essential 2-inch gap between the shelf backs and walls to guarantee proper air circulation. Secure all insulation materials with construction cement for long-lasting performance.
Installing Drainage Systems
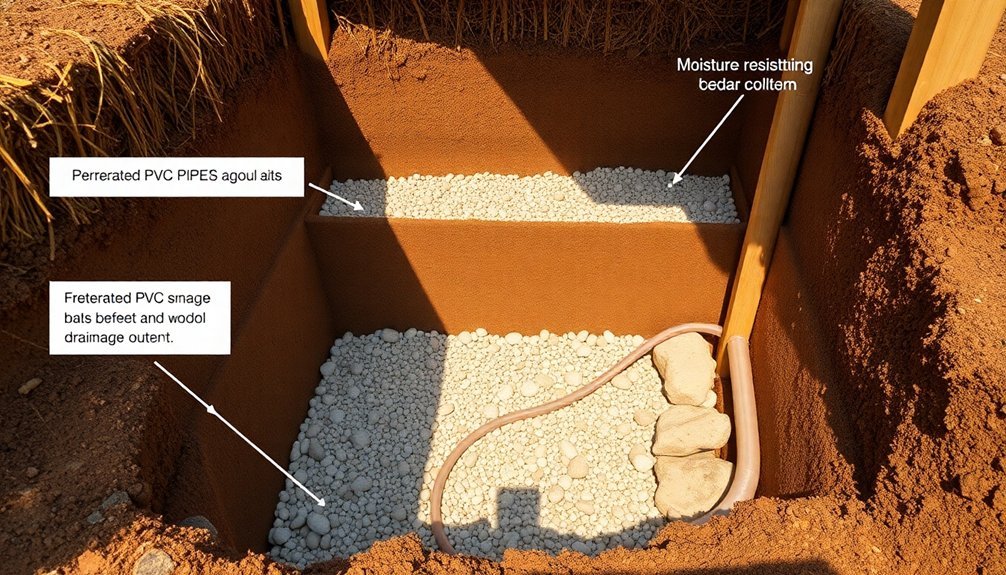
Start by laying a 4-inch gravel base across your pit's floor, ensuring the stones are tightly packed to create a stable foundation for drainage.
You'll need to dig a 6-inch deep perimeter trench around the pit's edge, filling it with coarse gravel and connecting it to the base layer to direct water away from stored items.
To maximize water flow, create a gentle 2-degree slope from the pit's center to the perimeter trench, which will help prevent water pooling and maintain a dry storage environment.
Gravel Base Layer Design
A well-engineered gravel base layer forms the backbone of any earth pit storage system's drainage capabilities.
You'll need to excavate your pit deep enough to accommodate a 4-6 inch layer of gravel while guaranteeing the stored food remains below ground level. Before adding the gravel, lay down a geotextile fabric to create a barrier between the soil and stone, preventing soil migration while allowing water to pass through.
- Select 3/4 inch clean stone or gravel as your base material, spreading it evenly across the pit's bottom to create a uniform drainage surface.
- Use a hand tamper or power plate compactor to firmly pack the gravel, creating a stable foundation that won't settle or shift under load.
- Verify the gravel layer maintains consistent depth throughout, checking with a level to prevent low spots where water could collect.
You'll want to integrate this gravel base with your drainage channels or perforated pipes if you're using them.
The gravel layer should slope slightly toward these drainage features, helping water move away from your stored food efficiently.
Perimeter Trench Layout
Building upon your gravel base foundation, proper perimeter drainage becomes the next key element of your earth pit storage system.
You'll need to dig a shallow trench around the entire pit perimeter at ground level, typically a few inches deep. Make sure you maintain a slight upward slope away from the pit to encourage water runoff.
Fill your perimeter trench with gravel to create an effective drainage system. The gravel layer should be substantial enough to handle expected rainfall and surface water while preventing soil erosion.
You'll want to select gravel that won't compact over time, ensuring consistent water flow throughout the seasons.
Position your trench carefully to integrate with the pit's overall design without compromising its structural integrity. Consider your soil type when determining the exact placement, as different soils have varying drainage characteristics.
Mark the trench location clearly, especially if you live in an area that experiences snowfall.
Remember to keep the trench accessible for regular maintenance. You'll need to check it periodically for debris buildup and clear any sediment that could block water flow.
Regular inspection and cleaning will maintain the drainage system's effectiveness and protect your stored produce.
Slope For Water Flow
When planning your earth pit storage system, proper water drainage relies heavily on strategic slope installation. You'll need to select a location that's naturally elevated to encourage water runoff and prevent flooding. The ideal site should have sandy soil and a gentle gradient that directs water away from your storage pit.
To guarantee effective drainage, you'll want to implement these critical slope measurements:
- Create a drainage trench around the pit's perimeter, incorporating a 1-inch slope for every 8 feet of length to facilitate proper water flow.
- Install perforated drainpipes on a 3-inch gravel bed, maintaining the same slope ratio to channel water away from your storage area.
- Grade the surrounding ground surface to direct surface runoff away from the pit's opening, ensuring at least a 2% slope from the pit's edge.
For enhanced moisture control, you'll need to layer the pit's bottom and sides with straw or dried leaves. This natural barrier helps manage water seepage while supporting proper ventilation.
Remember to compact the surrounding soil firmly but not excessively during backfilling to maintain the established slope and prevent future settling issues.
Adding Protective Linings
Protective linings play an essential role in maintaining the effectiveness of earth pit storage systems. You'll need to choose between traditional or modern synthetic materials to create an impervious barrier that prevents moisture infiltration and maintains proper atmospheric conditions within your pit.
For a traditional approach, you can apply clay mud reinforced with fiber and dung to the pit walls. This mixture, when properly applied, creates a relatively impermeable surface that helps control moisture and gas losses.
You'll want to plaster the walls thoroughly to prevent cracks and seal the top with a mixture of cow dung and mud to keep out water and pests.
If you're opting for modern materials, thick polyethylene sheets offer superior protection. You'll need to weld these sheets together and guarantee they're tightly fitted against the pit walls, leaving no gaps or openings.
While more expensive, polyethylene liners provide better control over oxygen levels and CO2 accumulation, creating an environment that's hostile to pests and favorable for long-term storage.
Whichever material you choose, you'll need to inspect your lining regularly for damage and make prompt repairs to maintain its protective properties.
Building the Pit Cover
After securing your pit's protective lining, the next major step focuses on constructing an effective cover. You'll need to build a sturdy cover that prevents water intrusion while maintaining stable internal conditions.
For traditional designs, you can use timber as your primary material, sealed with mud plaster, or opt for a stone cover sealed with mud.
For ideal protection and accessibility, consider installing a well box that supports an access hatch several feet above ground level. You'll want to confirm your cover design accounts for your local climate conditions. In rainy regions, focus on waterproofing, while in dry areas, prioritize moisture control and ventilation.
Here are three essential steps for building your pit cover:
- Create a sturdy frame using timber that extends beyond the pit edges with a generous overhang.
- Install a central duct system in the cover design to regulate temperature and humidity.
- Seal all joints with mud and heap earth or sand around the edges to prevent air infiltration.
Remember to inspect your cover regularly for cracks or gaps, and maintain its structural integrity through periodic maintenance. This will confirm your storage pit remains secure and functional throughout its use.
Organizing Storage Space
Proper organization of your earth pit's storage space serves as the foundation for successful food preservation. Start by installing a vertical wooden duct in the center, which will serve as your main organizational axis.
Around this central structure, create distinct compartments for different types of produce using timber supports and frames. Implement a rope and sack system that allows you to hang produce at different heights.
You'll want to layer your food items strategically, placing root vegetables that need cooler conditions at the bottom. Use natural materials like sand, sawdust, and leaves between layers for insulation.
Install a shallow, gravel-filled drainage trench around the pit's perimeter to prevent water accumulation. Separate your storage areas based on humidity requirements.
Keep high-humidity produce like cabbages away from low-humidity items such as onions and garlic. You'll need clear access paths to reach your stored items without disturbing others.
Don't forget to include monitoring tools like thermometers and hygrometers to track storage conditions. Add cloth sacks filled with desiccant materials to control moisture levels, and remember to cover everything with a weighted-down tarp to keep out unwanted visitors.
Maintaining Proper Temperature Control
Temperature control forms the backbone of successful earth pit storage, relying primarily on the ground's natural ability to maintain temperatures between 50-55°F below the frost line.
You'll need to work with this natural insulation while implementing additional measures to maintain ideal conditions throughout the seasons.
To effectively manage your pit's temperature, consider these essential control methods:
- Install a vertical wooden duct system that allows you to introduce cold air to the bottom of the pit, helping you adjust temperatures as needed while maintaining vital air exchange.
- Layer your storage materials strategically, using sacks filled with straw, sawdust, or leaves between produce layers, and top it all with a weighted-down tarp for additional insulation.
- Monitor and adjust conditions regularly through your ventilation system, using thermometers to track temperature fluctuations and responding accordingly.
In regions with extreme temperatures, you'll want to add extra protection against freezing by incorporating additional insulation layers.
Keep your pit's access point above ground level to guarantee you can reach your stored items even after rain or snow, and maintain proper drainage using gravel flooring to prevent excess moisture buildup.
Monitoring Food Quality
Successfully preserving food in an earth pit requires diligent monitoring of your stored items through regular quality checks and systematic inspections.
You'll need to conduct sampling at three essential points: when you first store the food, halfway through the storage period, and approximately one month before you plan to empty the pit.
Focus your inspections on areas where contamination commonly occurs, especially around entry points, doors, and the upper sections of your storage pit.
You must check moisture content during each inspection, as it's vital for preventing mold growth.
Don't forget to look for condensation on surfaces and address any moisture issues immediately through dehydration or aeration techniques.
Keep your storage area pest-free by implementing rodent traps and regularly inspecting for insect activity.
You'll want to pay special attention to spout lines where broken food particles tend to accumulate, as these areas can restrict proper air flow.
Make sure you're clearly labeling all stored items and organizing them systematically for easy access.
Follow HACCP principles to identify potential hazards, and always check the structural integrity of your pit to prevent any compromise in storage conditions.
Frequently Asked Questions
How Long Does Each Type of Vegetable Typically Last in Pit Storage?
You'll find carrots last longest at 8 months, potatoes and winter squash 6 months, beets and cabbage 5 months, parsnips and onions 4 months, kohlrabi 2 months, and turnips/radishes several months in pit storage.
Can Multiple Families Share One Storage Pit System Effectively?
You can effectively share a storage pit with multiple families by dividing the space into marked sections, establishing clear usage schedules, and sharing maintenance duties. It'll work best when everyone communicates and coordinates well.
What Traditional Pest Control Methods Work Best for Earth Pit Storage?
You'll find diatomaceous earth works best to control insects naturally. Add dried neem leaves, wood ash, and aromatic herbs like mint around your pit's edges. These traditional methods effectively repel and eliminate storage pests.
How Do Seasonal Changes Affect the Storage Capacity and Maintenance Needs?
You'll need to adapt your storage as seasons change. Winter requires extra insulation and snow management, while summer demands better ventilation. Check temperature fluctuations regularly and adjust stored produce amounts based on conditions.
Which Vegetables Should Never Be Stored Together in the Same Pit?
You shouldn't store kale, rutabagas, or cabbage with other vegetables due to their strong odors. Keep apples away from cabbage, and don't mix endive with cabbage. Separate vegetables with different humidity needs.
In Summary
Building your own earth pit food storage system isn't a small undertaking, but you'll find it's worth the effort. With proper planning, construction, and maintenance, you'll have a reliable way to store food without electricity. Remember to check your pit regularly for moisture issues and temperature fluctuations. If you've followed these steps carefully, you'll enjoy fresh, well-preserved food for months to come.


Leave a Reply