
To successfully air-dry fish at home, start by selecting lean varieties like cod or flounder and cutting them into uniform ¼-inch strips. Clean the fish thoroughly, removing scales, gills, and intestines, then soak in a salt marinade for 20-30 minutes. Set up your drying area in a shaded spot with good airflow, using elevated mesh racks positioned at least one meter above ground. Protect your fish with mosquito netting or cheesecloth, and space pieces apart for even drying. Turn regularly and monitor for proper dryness by checking for a leathery texture. Store in airtight containers once dried. These fundamental steps are just the beginning of mastering this traditional preservation method.
Select The Right Fish
The success of air-dried fish starts with choosing the right type of fish. You'll want to focus on lean fish varieties, as they're better suited for the drying process and won't spoil as quickly as fatty fish. Excellent choices include cod, flounder, grouper, haddock, sea bass, and snapper. These lean options can maintain their quality longer during the drying process. Internal organs and gills must be thoroughly removed before beginning the drying process.
When selecting your fish, freshness is vital for achieving the best results. Look for fish with clear eyes, firm flesh, and no strong fishy odor.
You'll need to take into account the size of your fish as well. For small to medium-sized fish, you can butterfly them down to the tail and spread them open for even drying. If you're working with larger fish, plan to fillet or debone them.
Remember to remove the head if your fish is longer than 8 inches or weighs more than half an ounce.
Once you've chosen your fish, cut it into uniform strips about ¼ to ⅜-inch thick. This consistency in thickness guarantees even drying throughout the pieces and helps achieve the ideal 25-30% moisture content in the final product.
Clean And Prepare Fish
Proper cleaning and preparation of your fish sets the foundation for successful air-drying. Start by removing the intestines, scales, and gills under cold running water. Use a fish scaler for efficient scaling, and pat the fish dry with paper towels. Don't forget to remove all bloodlines, as they'll affect the final flavor and texture. For optimal results, choose fresh fish varieties like sardines, mackerel, or sea bream.
Next, make an incision from the anus to the gills to gut the fish. Remove the innards and gills carefully to preserve the flesh. You'll need to decide whether to fillet the fish or butterfly it by cutting down to the tail. For larger fish, remove the head, but you can keep it for smaller ones. Save the heads and bones for making soup stock.
Make consistent incisions through thick portions of the flesh to guarantee uniform drying. If you're planning to hang-dry, cut a hole in the tail end for threading twine.
Finally, prepare your salt treatment using coarse-grain salt like pickling or sea salt – avoid iodized table salt as it can discolor the fish. Create a saltwater marinade using 1 to ½ teaspoon of salt per pound of fish, and soak for 20-30 minutes before letting it drip dry completely.
Create Proper Ventilation Setup
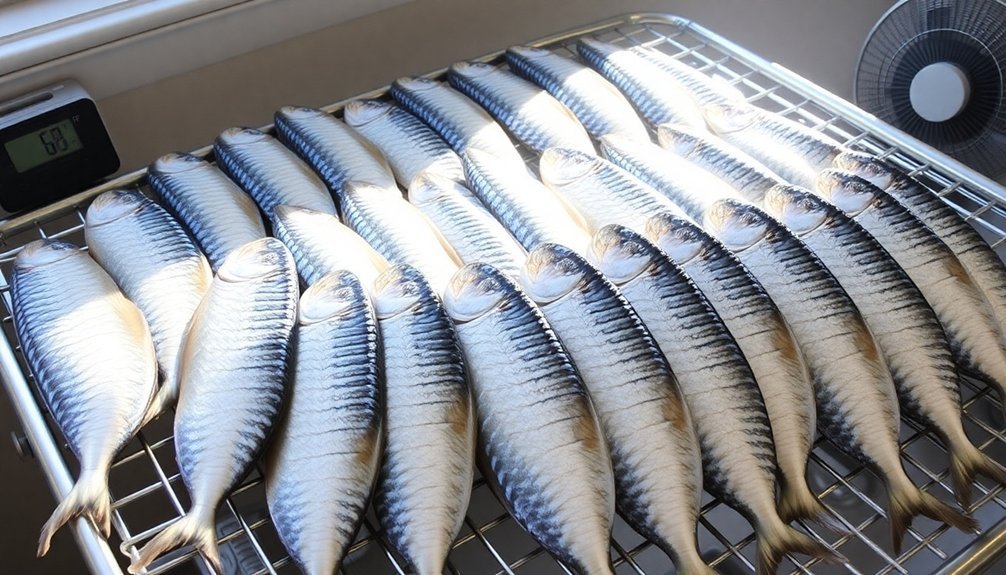
Setting up effective ventilation is essential for successfully air-drying fish at home. Choose a well-ventilated area that's shaded but receives indirect sunlight. You'll need to guarantee constant airflow to prevent your fish from rotting or attracting maggots. A proper forced ventilation system will ensure uniform drying results throughout your fish.
Position your drying baskets or trays to maximize air circulation around the fish. If you're using a dehydrator or oven, maintain temperatures between 130-145°F and crack the door open to allow moisture to escape. For natural drying, use fans to create consistent air movement, and consider using bamboo strainers for their anti-bacterial properties.
Control humidity levels in your drying space to prevent moisture accumulation. If you're near the ocean or in a humid climate, you might need a dehumidifier.
Install screens or covers to protect your fish from flies and other pests while maintaining airflow. If you're using a smokehouse, opt for materials like spruce-bark that provide gentle air circulation while keeping the area cool.
Monitor your setup regularly to guarantee conditions remain ideal. Your ventilation system should remove moisture effectively while maintaining a cool, dry environment that prevents bacterial growth and spoilage.
Position Fish For Maximum Airflow
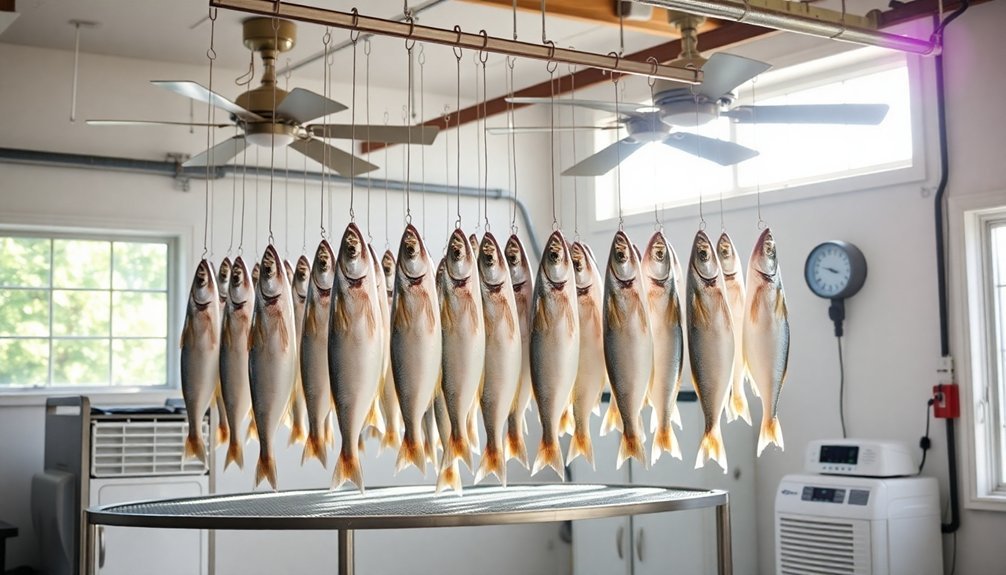
Positioning your fish correctly stands as the cornerstone of successful air-drying. You'll need to elevate your fish at least one meter above ground level using slatted or mesh racks, which allows air to circulate both above and below the fish. This elevation greatly improves drying efficiency and reduces spoilage risks.
To maximize the drying process, you'll want to cut your fish properly. Remove the flesh from the backbone and ribs, then score it to create additional folds. You can open the fish from either the back or belly side – back-side opening maintains shape better but requires splitting the head, while belly-side opening is easier but may affect the fish's form.
Don't let your fish pieces touch each other during drying. Space them apart on your drying surface to prevent moisture from getting trapped between pieces. You can use drying baskets or trays with individual slots to maintain consistent spacing.
Remember to turn your fish periodically for even drying. Place them in a shaded area on sunny days with good ventilation, and you'll achieve the most consistent results. The combination of proper spacing and regular turning guarantees uniform drying throughout the process.
Protect From Insects
You'll find specialized netting made from HDPE and blue nylon mesh provides effective protection against insects while maintaining essential airflow during the fish-drying process.
When selecting a screening method, opt for triangular-weave mosquito netting that allows 85% or more airflow, preventing spoilage while keeping bugs and birds away from your drying fish.
Consider combining your netting setup with natural deterrents like bamboo strainers, which offer anti-bacterial benefits and help achieve even drying results.
Screening Methods That Work
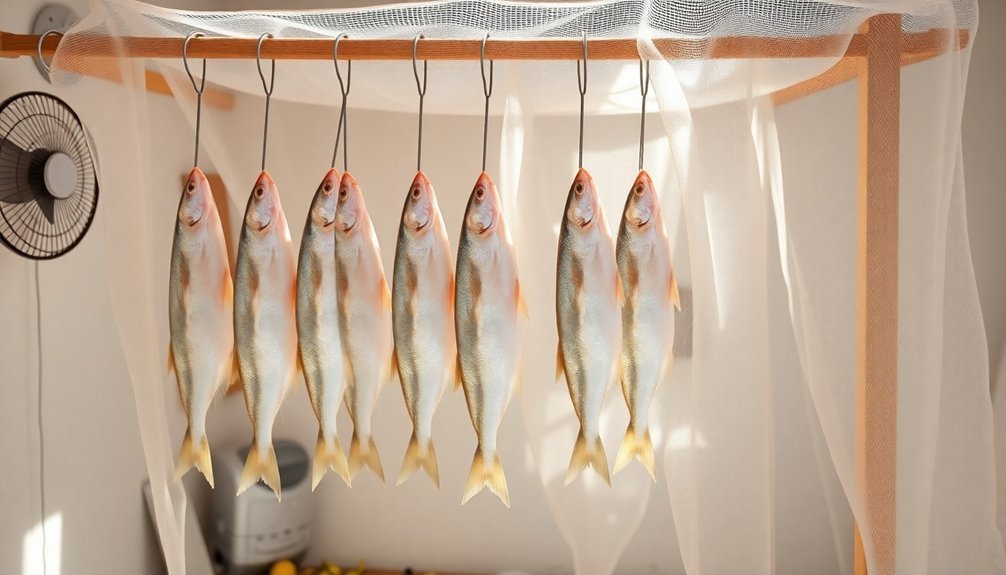
Effective screening methods are essential for protecting your drying fish from pesky insects and other unwanted visitors. You'll need to create physical barriers using breathable materials like cheesecloth while ensuring proper air circulation to prevent moisture buildup.
| Barrier Type | Benefits | Best Usage |
|---|---|---|
| Bamboo Strainer | Anti-bacterial, natural repellent | Indoor drying |
| Mesh Racks | Maximum air flow, complete coverage | Outdoor setup |
| Cheesecloth | Lightweight, breathable protection | All conditions |
Position your drying setup in a well-ventilated area that's inaccessible to birds and animals. You'll want to avoid direct sunlight – instead, choose a shaded spot that still gets good airflow. This placement helps prevent overheating while reducing insect attraction.
Don't forget to implement additional protective measures like hanging your fish with twine to maximize surface exposure. Use screens around the entire drying area and cover the fish at night or during rain. You should also regularly inspect your fish for signs of insect activity and adjust their position throughout the day. Keep the area clean and free of debris that might attract unwanted pests, and monitor humidity levels to maintain ideal drying conditions.
Natural Pest Control Techniques
Protecting your drying fish from insects doesn't require harsh chemicals when natural alternatives work just as effectively. Turmeric offers exceptional protection, with a 3% extract or 1.5% powder solution effectively repelling insects while maintaining your fish's flavor and texture.
If you don't have turmeric, neem extract at 5% concentration or 1.5% powder serves as a viable alternative.
Create protective barriers around your drying area using natural deterrents. Mix garlic with water and spray it around your drying space, or sprinkle cayenne pepper, cinnamon, or talcum powder to keep crawling insects at bay.
You'll also want to plant mint varieties nearby, as they naturally repel common pests like ants and aphids.
Don't forget to implement physical controls alongside these natural repellents. Regularly vacuum the area to remove food particles that might attract pests, and seal any cracks or crevices where insects could enter.
Keep your drying environment clean by using a spider brush to remove webs and egg sacs, focusing particularly on corners and overhangs. Remember to check door sweeps and vents regularly to verify they're properly sealed and functioning.
Monitor Weather Conditions
Successful air-drying of fish depends heavily on monitoring and responding to weather conditions.
You'll need to focus on four key weather elements: temperature, humidity, wind, and sunlight.
Keep temperatures below 10°C/50°F for ideal natural drying. Higher temperatures can speed up the process but risk spoilage if not carefully managed.
Watch the humidity levels closely – they should stay below 75% to prevent moisture absorption that can lead to spoilage. When humidity rises, especially during rain or at night, you'll need to move your fish indoors.
Wind and air circulation are vital factors. Look for consistent airflow and position your drying racks to maximize exposure to natural breezes.
Good air movement not only speeds up drying but also helps maintain sanitary conditions. If you're using a controlled environment, aim for air velocity around 130 linear m/min.
While sunlight can aid the drying process, you'll want to be strategic about exposure.
Direct sun during peak hours can cause case-hardening, where the surface dries too quickly.
Consider using mesh racks or placing fish in shaded areas with good ventilation to prevent overheating while maintaining steady drying conditions.
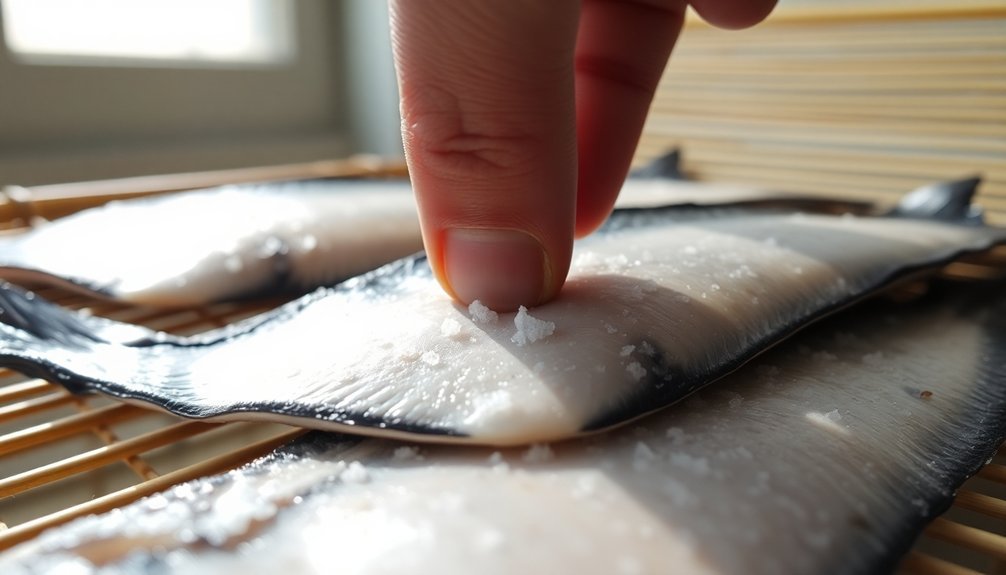
Check For Even Drying
Regular monitoring of your drying fish guarantees consistent results and prevents spoilage.
You'll need to check the fish's surface regularly by touching it – if it sticks to your finger, it needs more drying time. Test the fish's consistency by gently bending it; you're looking for a firm but pliable texture that doesn't break apart.
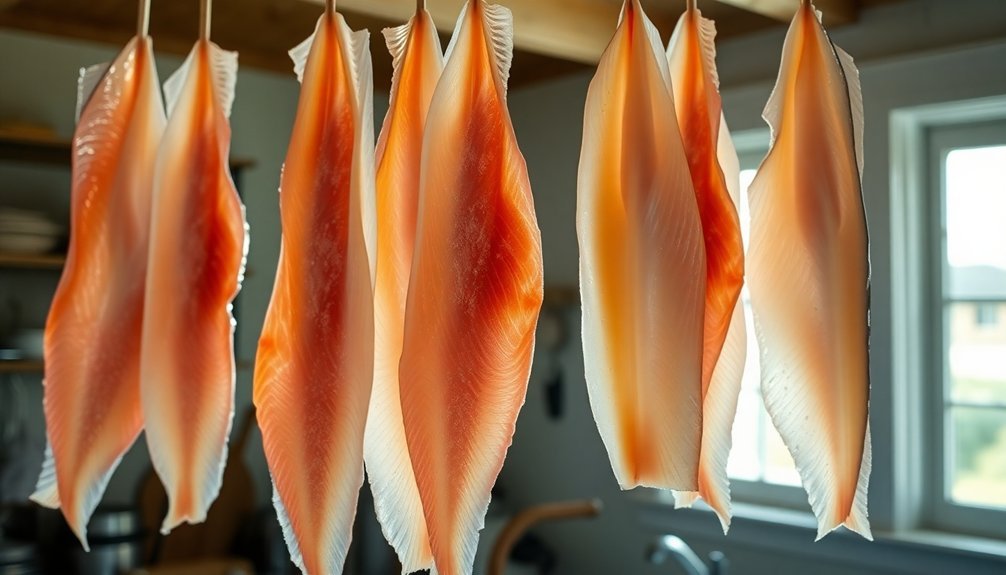
Pay special attention to the thickest parts of the fish, as these areas take longer to dry completely. When checking for dryness, confirm the fish has developed either a leathery or brittle texture, depending on your desired outcome.
Don't let the fish over-dry, as this can cause it to crumble and become unusable.
To achieve even drying, spread the fish out as wide as possible on your drying surface. If you're working with thicker cuts, score the flesh to create folds that expose more surface area to air.
Use wire mesh racks to promote consistent air circulation, and remember to turn the fish regularly. You'll want to position each piece with enough space between them to confirm proper airflow and uniform drying throughout the process.
Prevent Moisture Absorption
Moisture control plays an essential role in preserving your air-dried fish. To prevent unwanted moisture absorption, you'll need to manage both environmental conditions and storage methods carefully. Keep the relative humidity low and guarantee warm air circulation around your fish by positioning drying racks strategically for maximum airflow.
Don't expose your fish to direct sunlight, as this can cause uneven drying. Instead, place them in a shaded area on sunny days. When night falls, either remove the fish from the racks or cover them with plastic to prevent moisture absorption during periods of higher humidity. You can also use press-piling by stacking fish with weights to encourage moisture movement.
Store your dried fish in airtight, moisture-resistant containers placed in cool, dry locations. If you're using drying baskets or bamboo strainers, ensure they're clean and well-ventilated.
Consider treating your fish with a 3-10% salt solution before drying, as this helps inhibit bacterial growth and controls moisture retention. For additional protection, you can dip the fish in a 5% calcium propionate solution to prevent mold growth during storage.
Test For Dryness
Testing your fish for proper dryness calls for multiple sensory checks to confirm it's ready for storage. Using your senses, you'll need to assess the texture, hardness, and overall condition of the fish before determining if it's fully dried.
| Test Type | What to Check For |
|---|---|
| Physical | Fish should break easily at thickest part and feel leathery or brittle |
| Sound | Listen for a crisp sound when bending the dried fish |
| Touch/Sight | Surface should be uniformly dry with no sticky or moist patches |
When examining your dried fish, you'll want to check that it's hardened to a paper-like consistency and breaks off easily in the thickest areas. The texture should be either leathery or brittle, depending on your fish type, but never juicy or flexible. There shouldn't be any strong fishy or sour odors, which could indicate spoilage.
For the most reliable results, test your fish after the recommended drying period – typically several days for air drying or up to 10 hours in a dehydrator at 63°C (145°F). Remember that drying times can vary based on environmental conditions, so you'll need to check periodically until reaching the desired dryness level.
Store Dried Fish Properly
After completing the drying process, proper storage becomes essential for maintaining your fish's quality and extending its shelf life. Store your dried fish in airtight containers, glass jars, or vacuum-sealed bags to prevent moisture and air infiltration. If you're using jars, make certain they're clean and completely dry before adding the fish.
For peak preservation, store your dried fish in the refrigerator or freezer. If that's not possible, keep it in a cool, dry, and dark place like a cellar or closet. You'll want to avoid room temperature storage for more than a week.
When packaging, wrap the fish in parchment paper or newspaper before placing it in your chosen container. Add desiccants like silica gel or activated charcoal to control moisture.
Monitor your stored fish regularly for signs of spoilage, such as mold or rancid odors. Label containers with storage dates and use the fish within a reasonable timeframe. If you're freezing portions, separate them into smaller amounts for easier use.
Always handle the fish with dry hands to prevent introducing moisture. You can periodically microwave the dried fish to maintain dryness and disinfect it.
Frequently Asked Questions
Can I Rehydrate Air-Dried Fish, and How Long Does It Take?
Yes, you can rehydrate air-dried fish by soaking it in water. It'll take several hours, depending on the fish's thickness and drying method. Cold air-dried fish rehydrates faster than hot air-dried fish.
What Causes White Mold on Drying Fish and Is It Dangerous?
White mold on your drying fish is caused by poor drying conditions, high moisture, and inadequate salt. It's dangerous as molds can produce toxic mycotoxins. Don't eat moldy fish – it's not safe for consumption.
How Do Different Seasonal Temperatures Affect the Fish-Drying Process?
You'll find spring and fall best for drying fish at temperatures below 50°F. Summer's heat speeds drying but risks spoilage, while winter's cold slows the process and may freeze your fish.
Will Air-Dried Fish Maintain Its Nutritional Value Compared to Fresh Fish?
You'll notice some nutrient loss in air-dried fish compared to fresh fish. While protein becomes concentrated, you'll see decreases in vitamins A, E, and K, plus some minerals, though it's still nutritionally valuable.
Can I Air-Dry Previously Frozen Fish Successfully?
You can air-dry frozen fish, but you'll get better results using a dehydrator or smoker. The high moisture content and texture issues of frozen fish make controlled drying methods more reliable than traditional air-drying.
In Summary
You'll find air-drying fish at home isn't as challenging as it may seem. By following proper fish selection, cleaning, and drying techniques, you're ensuring a safe and successful preservation process. Remember to maintain good airflow, protect from pests, and check regularly for even drying. With practice, you'll master this traditional preservation method and enjoy your own homemade dried fish whenever you want.


Leave a Reply