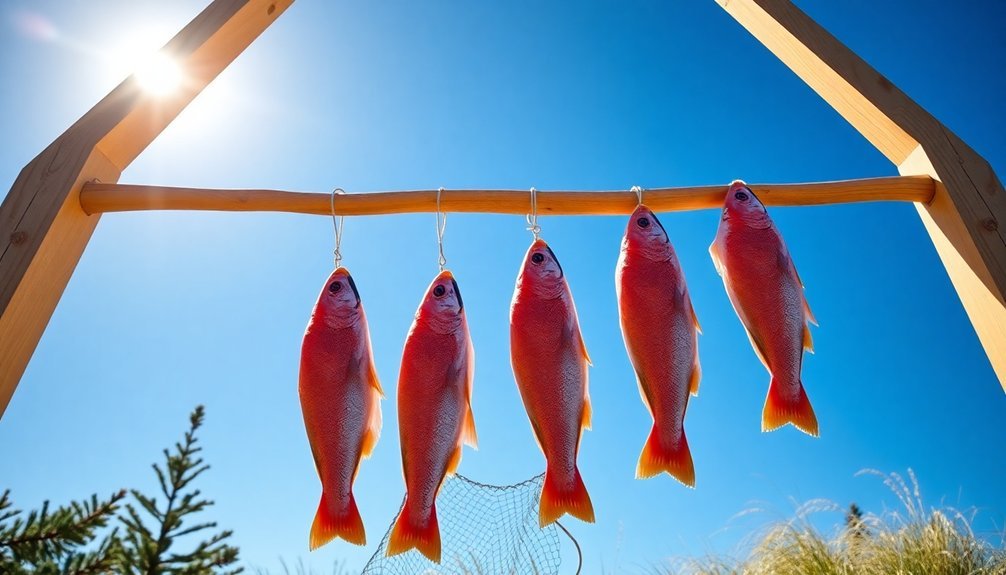
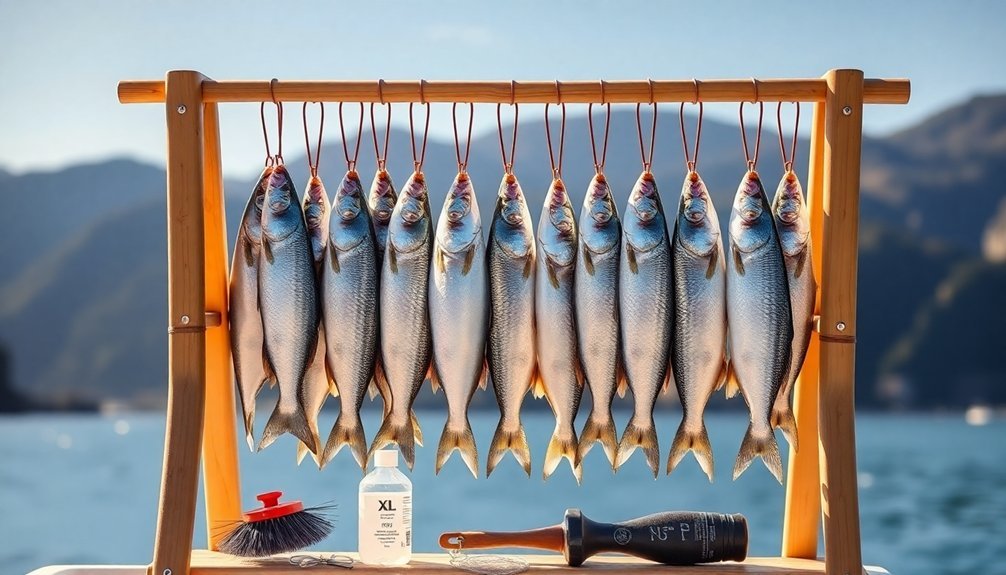
To build your outdoor fish drying rack system, you'll need sturdy bamboo or timber posts (160cm), metal elbows, chicken wire, and basic construction tools. Start by creating a level base frame with four equal-length logs at 90-degree angles. Install support posts 1 meter apart, burying them 60cm deep for stability. Add crossbeams and attach weather-resistant mesh material for ideal airflow. Position your rack in a sunny spot with good air circulation, at least 1 meter off the ground. Include a slight slope for drainage and protect with waterproof covers during bad weather. The detailed steps below will transform your fish-drying game.
Essential Materials and Tools
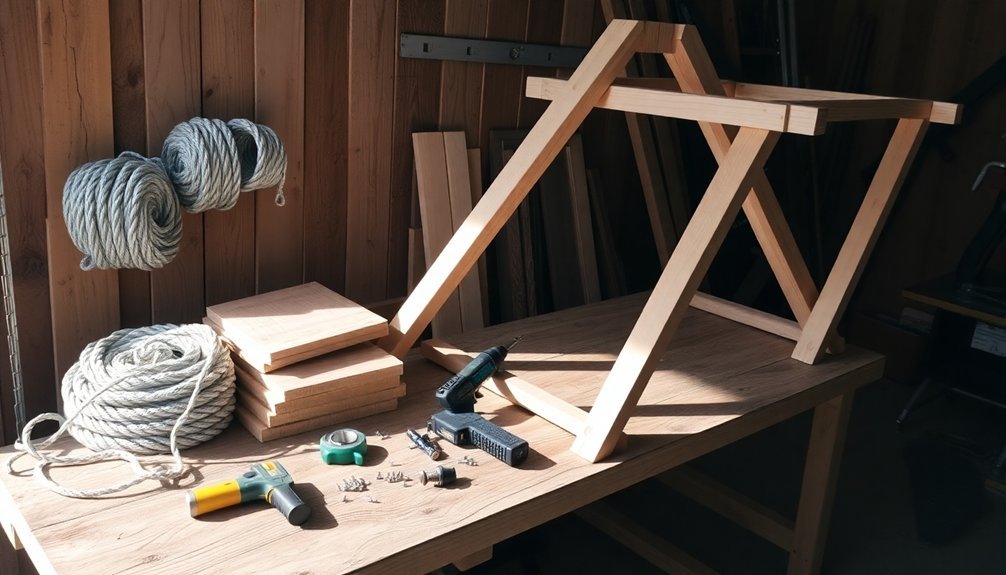
Building a reliable outdoor fish drying rack starts with gathering the right materials and tools. You'll need sturdy bamboo or tree branches for the main frame, along with timber posts (approximately 160 cm in length) to serve as the foundation. Consider using four-inch metal elbows at the joints for enhanced durability.
For the supporting structure, collect lighter wood pieces or bamboo for crossbeams, and secure chicken wire, mosquito netting, or old fishing nets to hold the fish.
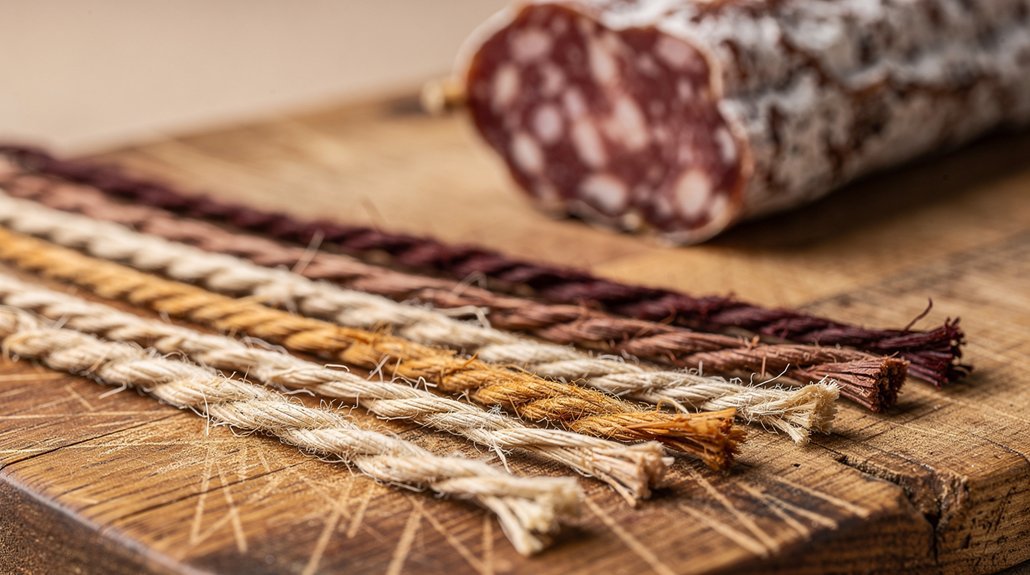
For construction, you'll require basic tools including a saw for cutting materials, a hammer to secure posts, and wire or twine for attachments. Don't forget measuring tape to guarantee proper spacing and height. You should also gather nails or screws if you're building a more permanent structure.
To protect your drying fish, you'll want to have waterproof materials on hand. Get a plastic sheet or tarp to shield the rack from rain, and protective netting to keep insects and small animals away.
Consider adding hooks or clips for secure fish hanging, and have some weighted materials ready to stabilize the rack in windy conditions. If you're using spruce poles, their rough surface will help prevent fish from sliding off.
Building the Base Frame
With your materials gathered, it's time to create the foundation of your fish drying rack. Start by selecting four logs of equal length that'll form your base frame's diagonals. You'll want to arrange these logs so they intersect at a center point, with opposite logs forming straight lines.
| Step | Action | Purpose |
|---|---|---|
| 1 | Level ground | Prevents tipping and guarantees stability |
| 2 | Position logs | Creates rectangular foundation |
| 3 | Check angles | Confirms 90-degree corners |
| 4 | Secure center | Maintains structural integrity |
| 5 | Anchor base | Protects against wind |
Make sure you're building on level ground and anchor the frame securely. The base frame must form a perfect rectangle – this isn't just about appearance, it's critical for structural stability. If you're using spruce poles, you'll find they're naturally rough enough to hold your fish securely. Remember, you're not just building a simple frame; you're creating a structure that'll need to withstand weather conditions while protecting your fish from rain, wind, and hungry wildlife. Don't skip measuring your diagonals – they should be equal in length to confirm you've achieved the proper rectangular shape. For visual inspiration and guidance, you can explore high-quality visuals of similar outdoor structures.
Assembling Support Structures
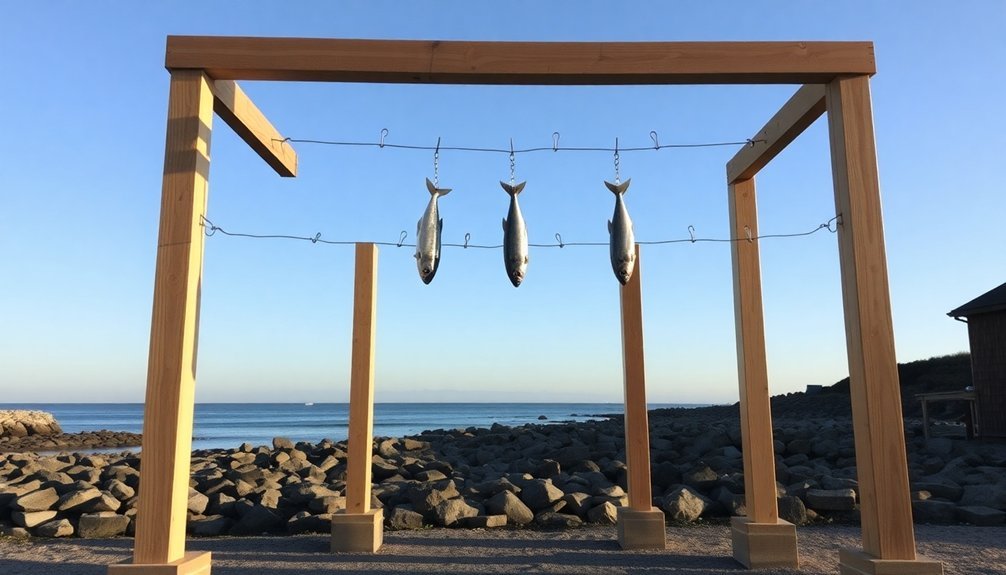
You'll need to space your frame posts at consistent 160 cm intervals and secure them at least 60 cm deep in the ground to guarantee proper stability.
The anchor points must be reinforced with concrete or compacted soil, while the posts should be perfectly vertical and level with each other.
Using stainless steel mesh wire for the drying surfaces ensures long-lasting durability and proper air circulation.
For maximum strength, install metal brackets at major connection points and add diagonal bracing between posts to prevent any wobbling or shifting of the structure.
Frame Spacing and Stability
Proper frame spacing and stability form the cornerstone of a successful fish drying rack system.
You'll need to maintain a 1-meter distance between drying rack lines to guarantee ideal air circulation around your fish. When setting up the frame, space your lighter wooden pieces or bamboo supports 1 meter apart to match your rack's width.
For maximum stability, you'll want to bury your main support poles about 60 cm into the ground. Install a combination of wooden or metallic supports, and use wider planks at the frame level for added strength.
Don't forget to secure your mesh or netting firmly to the frame using small nails or staples, and add a batten at the frame's lower bottom to keep the mesh taut.
Remember to slope your racks to help water drain from the fish's gill area and promote even drying. You'll need to adjust the spacing based on your fish size and type to prevent overcrowding.
For double-slope configurations, use a 1.5-meter pole in the center or on one side, and guarantee your frame stands at least 1 meter high to facilitate proper air movement.
Anchor Points and Posts
Building upon the frame's spacing requirements, the anchor points and posts serve as the backbone of your outdoor fish drying system.
You'll need to embed these anchor points at least 60 cm into the ground, preferably with concrete footings, to prevent any toppling. For maximum stability, space your anchor points strategically to support both the rack structure and the weight of your fish.
Select your posts based on durability and local conditions. You've got two main options: high-tensile galvanized steel tubing or treated hardwood boards.
Both materials need to withstand the elements, with metal posts requiring rust-resistant treatments and wooden posts needing protection against heat, fungi, and insects.
When installing your posts, guarantee they're in an exposed area with good air circulation. Here are critical considerations for proper installation:
- Bury posts 1-1.5 meters deep, leaving adequate height above ground
- Install in single or double slope configuration based on your drying needs
- Add eyelets and wire for securing lines or nets
- Incorporate cross-supports using lighter wood or bamboo between poles
Don't forget to add protective elements like chicken wire or mosquito netting to safeguard your fish from pests and weather.
Installing Drying Surfaces
Select your drying mesh material based on local availability, choosing between chicken wire, mosquito netting, old fishing nets, or natural alternatives like coconut matting.
You'll need to securely attach your chosen mesh to the wooden frame using small nails, ensuring it's pulled taut to prevent sagging when loaded with fish.
When assembling the support frame, space the posts about 1 meter apart and nail the wooden pieces together firmly to create a sturdy base that can withstand the weight of both the mesh and fish.
Mesh Material Selection
For effective fish drying, choosing the right mesh material stands as a critical decision in your rack system's construction. You'll want to select a material that's both durable and functional, with stainless steel or metal mesh being the most reliable options.
These materials resist heat, fungi, and insects while withstanding outdoor conditions and UV exposure.
When selecting your mesh, consider these essential characteristics:
- Mesh size options that match your drying needs, from small to large openings
- UV-resistant properties to guarantee long-term durability
- Easy-to-clean surfaces that maintain hygiene standards
- Weather-resistant qualities to protect against rain and harsh elements
You'll need to attach your chosen mesh securely to the frame using nails or staples, making sure it's pulled taut to prevent sagging.
Don't forget to use clamps at the corners and bend any sharp edges for safety. The mesh should extend firmly from the bottom of the frame upward.
This configuration not only protects your fish from ground contaminants but also guarantees proper air circulation, leading to quicker drying times and better-quality dried fish products.
Support Frame Assembly
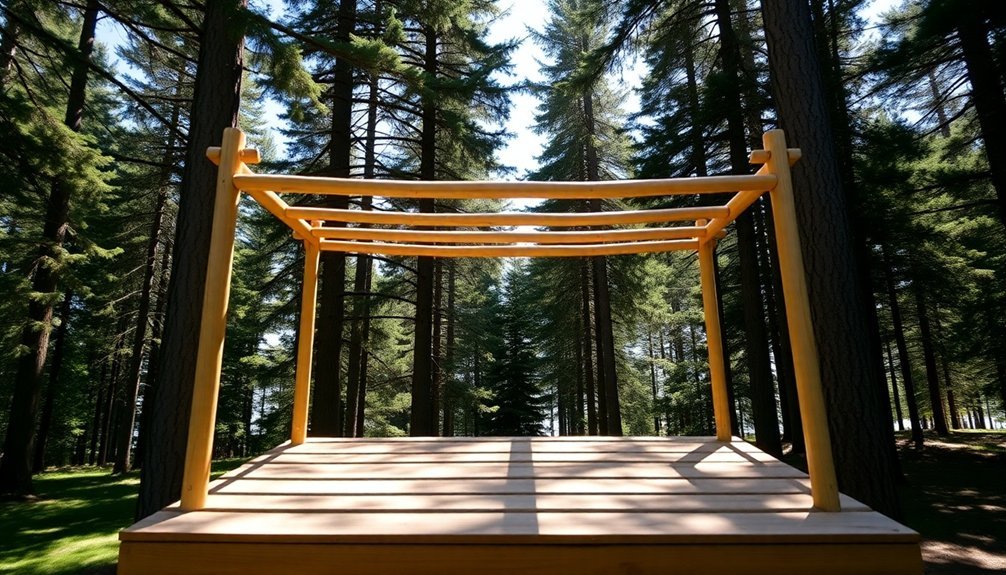
The successful assembly of your drying rack's support frame starts with proper installation of the main timber poles. Cut your timber posts to 160 cm for the base structure, then bury them approximately 60 cm into the ground to guarantee stability. Space the poles about 1 meter apart to accommodate your desired rack width.
Once you've secured the main poles, attach lighter wooden pieces or bamboo between them to create a sturdy grid-like structure. Use screws or nails to fasten all components securely, paying special attention to the joints as they'll need to withstand various weather conditions.
You'll want to take into account implementing a slight slope in your design to enhance air circulation.
Install your chosen mesh material (chicken wire, mosquito nets, or old fishing nets) across the frame, pulling it taut to guarantee even spacing for maximum airflow. Secure the mesh using wire or strong string at regular intervals.
Position your completed frame in an area with good air circulation, ensuring it's raised enough to allow air movement from all directions. Keep the surrounding area clear of debris and think about adding a protective tarpaulin for weather coverage when needed.
Selecting the Perfect Location
Finding an ideal location for your outdoor fish drying rack requires careful evaluation of multiple critical factors.
You'll want to focus on maximizing sun exposure and air circulation while guaranteeing protection from potential hazards. The location you choose will greatly impact the quality and efficiency of your fish drying process.
Select a spot that's elevated at least 1 meter above ground level to prevent water accumulation and contamination.
You'll also need to verify it's easily accessible for loading, unloading, and regular maintenance. The area should be free from obstacles and positioned away from trees or structures that could cast unwanted shade.
- Position your rack where there's consistent airflow and relatively low humidity to speed up the drying process
- Choose a location that's protected from animals and can be easily fitted with protective mesh or netting
- Confirm the spot allows for proper drainage and keeps the fish away from ground moisture
- Select an area that's convenient to access but secure enough to prevent theft from wildlife or unauthorized visitors
Remember to take into account the proximity to your storage facilities and transportation routes when finalizing your location choice.
This will make the entire process more efficient and manageable.
Weather Protection Strategies
Successful fish drying depends heavily on implementing robust weather protection strategies for your outdoor rack system. You'll need to shield your fish from rain, sun, wind, and various pests to guarantee ideal drying conditions.
Start by covering your rack with waterproof materials like tarps or plastic sheets, but make sure they don't trap moisture underneath. Position the rack with a sloping top to facilitate water runoff and keep it elevated from damp ground.
For pest control, wrap the structure in mesh or chicken wire to prevent insects from reaching your fish, and maintain a clean area underneath to discourage pest activity.
While you'll want good airflow for drying, you shouldn't expose your fish to harsh direct sunlight. Position your rack in a location that receives moderate sunlight and steady wind currents. You'll find that elevated racks benefit from stronger air movement, which speeds up the drying process.
To protect against scavenging animals, secure your fish firmly to rough-surfaced poles that prevent sliding. Cover the entire structure with sturdy netting or tarps, and test the rack's stability to make sure it can withstand animal interference.
Remember to balance your fish carefully to prevent them from falling off.
Maintenance and Cleaning Tips
Maintaining a clean fish drying rack guarantees both food safety and longevity of your equipment. You'll need to establish a regular cleaning routine after each use, using warm water and mild detergent to prevent residue buildup.
Pay special attention to corners and hidden areas with a scrub brush or toothbrush, ensuring thorough cleaning of all surfaces. For stubborn stains and deep cleaning, you'll want to soak your rack in warm, soapy water before scrubbing.
Don't forget to apply vinegar or baking soda solutions for particularly tough residues. Always rinse thoroughly and allow complete air drying to prevent bacterial growth.
To extend your rack's lifespan, implement these preventive measures:
- Use rack liners or silicone-coated surfaces to minimize direct water contact
- Regularly inspect for wear and tear, especially loose screws or rust spots
- Apply rust-resistant coatings to metal components
- Address any structural issues immediately to prevent further damage
For specialized cleaning needs, you might need to use rust removers or targeted cleaners. If you notice mold or mildew, apply a vinegar-water solution and let it sit before gentle scrubbing.
Always follow manufacturer recommendations when using specialized cleaning products.
Safety and Quality Control
Safety and quality control in outdoor fish drying relies heavily on protecting your catch from up above and down below.
You'll need to install fine mesh netting around your rack to create a protective barrier against mosquitoes and other insects while maintaining proper air circulation. Be certain the mesh size is small enough to prevent pest penetration but doesn't restrict airflow.
To protect your fish from larger threats, you'll want to build your rack at a height that prevents ground animals from reaching it. Use spruce poles for the fish-hanging surface, as their rough texture prevents slipping.
Install protective covers like tarpaulins or plastic sheets that you can pull over the rack during rain or when birds are active.
Position your rack in an area with low humidity and strong air circulation to guarantee proper drying conditions.
You'll need to use high-quality, food-safe materials like PE galvanized components or hardwood that's resistant to heat, fungi, and insects.
Construct a sturdy base by nailing wooden boards together, and reinforce it with mesh underneath for additional support.
Remember that all materials should be waterproof, sun-proof, and non-toxic to maintain food safety standards.
Frequently Asked Questions
How Many Fish Can Be Dried Simultaneously on a Standard-Sized Rack?
You'll be able to dry about 264 kg of fish at once on a standard rack. With 22 trays holding 12 kg each, you've got plenty of space to efficiently dry your catch simultaneously.
What Alternative Materials Can Replace Chicken Wire if It's Unavailable?
You can replace chicken wire with mosquito netting, nylon screens, PE mesh nets, or even recycled fishing nets. For natural options, try woven bamboo strips or coconut matting. Metal alternatives include galvanized wire mesh.
How Long Will a Properly Maintained Wooden Drying Rack Typically Last?
If you've properly maintained your wooden drying rack with regular tar treatments and protective covers, it'll typically last 3-5 years. You can extend its lifespan even further with thorough maintenance and off-season storage.
Can Fish Be Dried in Cold Winter Conditions Using These Racks?
You'll face challenges drying fish in winter as cold, damp conditions slow the process and promote mold growth. It's possible but you'll need to guarantee lower humidity, maintain proper airflow, and possibly use thinner cuts.
Does the Type of Wood Used Affect the Taste of Dried Fish?
Yes, your choice of wood definitely affects the fish's taste. You'll notice firewood creates a more preferred flavor profile than sawdust, as different woods release unique volatile compounds during smoking that impact the final taste.
In Summary
Now that you've built your outdoor fish drying rack, you'll have a reliable system for preserving your catch. Remember to monitor weather conditions, keep the surfaces clean, and inspect your rack regularly for any needed repairs. With proper maintenance and careful attention to food safety, you'll be able to enjoy your own dried fish for months to come. Your new drying rack is an investment that'll enhance your self-sufficiency skills.
Leave a Reply