Choose large, fired clay pots without cracks and treat them with latex paint and oil-based sealants for ideal grain storage. You'll need to dry your grains to 14% moisture content and maintain temperatures around 18°C. Seal your pots using grease or silicon for airtight protection, and test effectiveness by checking for bubbles underwater. Add natural pest deterrents like garlic cloves or ground hot peppers, and position your storage in a well-ventilated, shaded area. Keep containers elevated with proper spacing for air circulation, and use wood ash at the bottom for moisture control. These time-tested methods are just the beginning of your journey toward mastering traditional grain preservation.
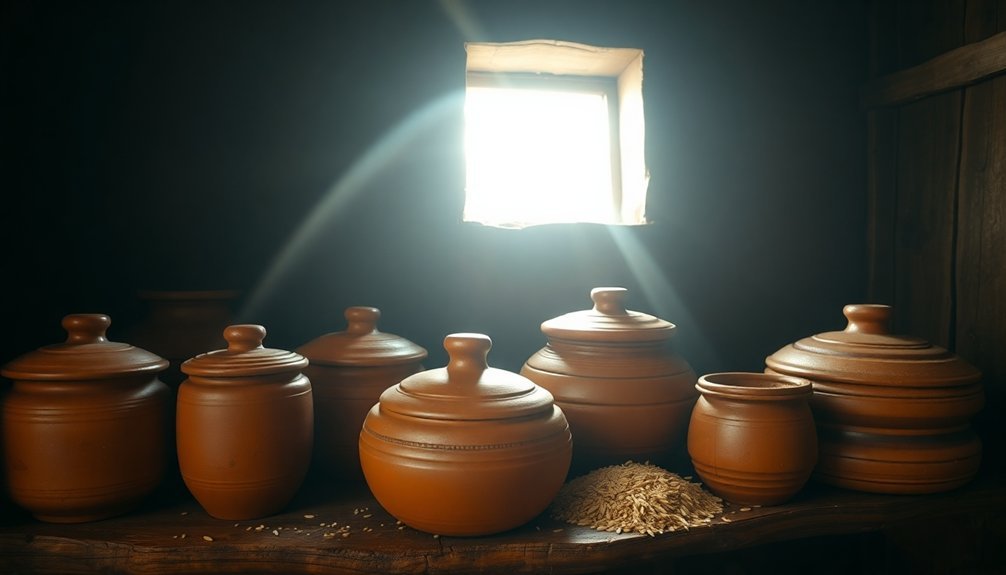
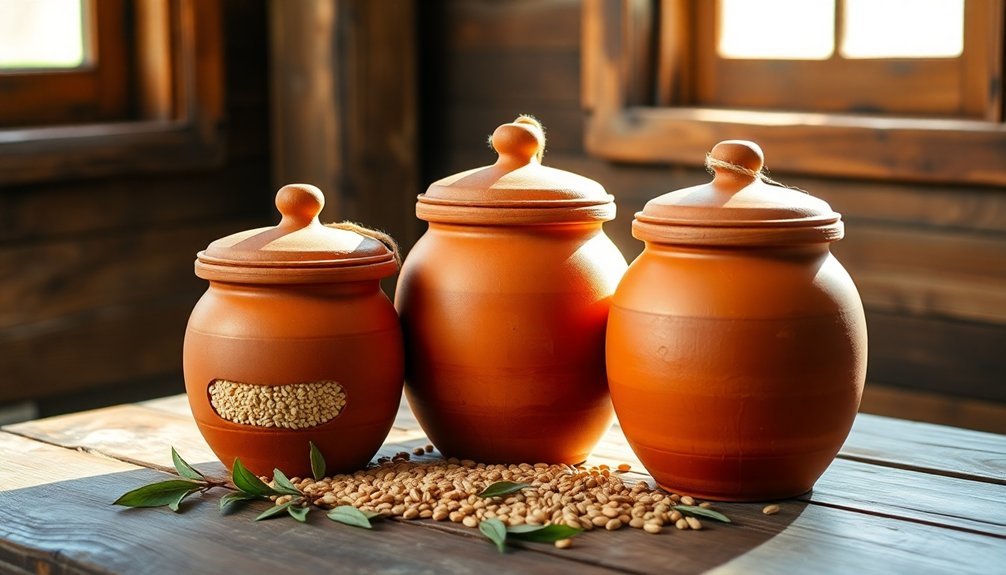
Selecting Perfect Clay Storage Pots

Anyone looking to preserve grains using traditional methods will need to start with the right clay storage container. When selecting your clay pots, choose large, fired vessels that don't have any cracks or damage.
You'll want pots that come with well-fitting lids to keep out moisture and unwanted pests. Place the pots in a cool shaded location to prevent grain spoilage.
If you're dealing with porous clay pots, don't skip the vital step of applying a moisture barrier. You can use latex paint on both the inside and outside surfaces to create an effective seal.
The pots should be sturdy enough to withstand the pressure from your stored grains while maintaining their structural integrity over time.
For areas with high humidity, you'll need to pay special attention to the pot's sealing capabilities. Look for containers that can be sealed airtight using grease or silicon, especially if they've screw-top or press-fitted lids.
If traditional clay pots aren't available, you can consider alternatives like mud plastered baskets or mud walled silos, but make sure they offer the same level of protection against moisture and pests as their clay counterparts.
Proper Grain Drying Techniques
Drying your grain properly before storage is essential for long-term preservation in clay pots. You'll need to reduce moisture content below 15% to prevent mold growth and spoilage during storage. The ideal storage temperature should be maintained at around 18°C for optimal preservation.
You can choose from three main drying methods. Natural air drying is the most energy-efficient option, where you'll add grain in 4-5 foot layers and use fans to force unheated air through the grain mass. While it's slower, it helps maintain grain quality.
High-temperature drying offers the fastest results, using heated air up to 220°F, but you'll need to monitor carefully to avoid cracking or damaging the grain.
For the best results, consider using the combination drying method. Start with high-temperature drying to quickly reduce moisture, then switch to low-temperature air for final drying. If you're using this approach, let your grain temper without airflow for 4-6 hours before completing the drying process. This method helps preserve grain quality while ensuring proper moisture reduction.
Remember to check grain temperature throughout the drying process. Keep it below 60°F during storage to minimize insect activity and prevent mold growth in your clay pots.
Container Sealing Methods
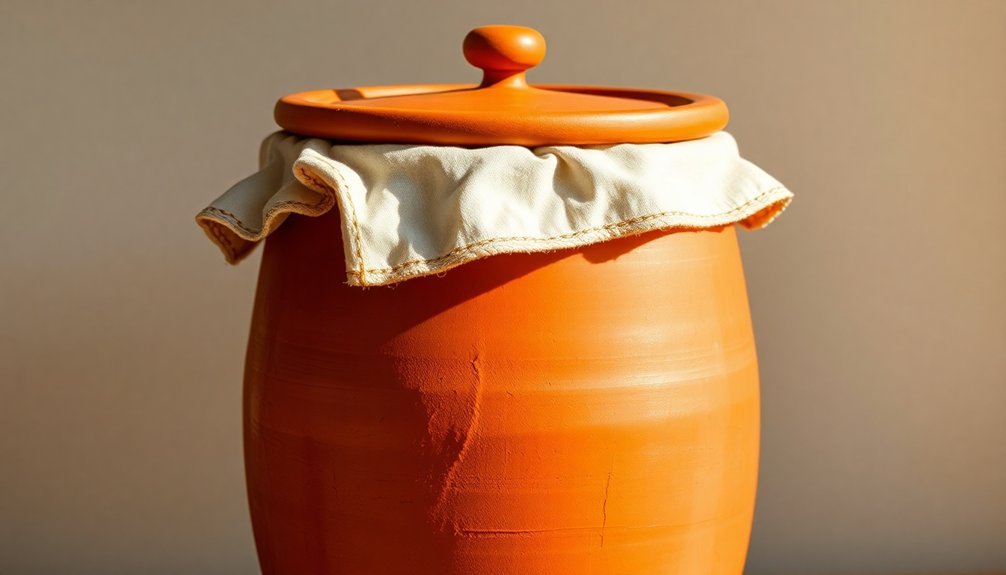
You'll need to master several air-tight closure techniques to properly seal your clay pots, including using grease or silicon for screw-top containers and latex paint for porous surfaces.
Natural materials from your local area can serve as effective sealants when commercial options aren't available, so try using traditional options like clay-ash mixtures or locally-sourced waxes.
To verify your seal's effectiveness, check for any air leaks by gently pressing on the container's lid while it's submerged in water, looking for escaping bubbles that would indicate a compromised seal.
Since clay pots are designed for keeping food fresh through evaporative cooling, proper sealing becomes especially crucial for grain storage to prevent unwanted moisture from entering.
Air-Tight Closure Techniques
Throughout the storage of grains in clay pots, achieving an airtight seal stands as the most critical factor for long-term preservation.
You'll need to prepare your clay pot properly by preheating it and applying a thorough sealing treatment. Start by thoroughly cleaning the pot to remove any residues, then apply multiple coats of latex paint both inside and outside to create an impermeable barrier.
To guarantee your clay pot maintains an effective hermetic seal, follow these essential steps:
- Apply commercial oil or wax-based sealants after preheating the pot, allowing the sealant to penetrate deeply into the porous surface.
- Fill the container completely with grains to minimize dead air space, which helps achieve faster oxygen depletion.
- Use pressure-sensitive adhesive liners around the pot's rim, creating a tamper-evident seal when the lid is secured.
- Test the seal's effectiveness by measuring water loss over a 24-hour period.
Store your sealed clay pot in a shaded area to maintain the seal's integrity.
You'll want to keep the container closed until you actually need to access the grains, as each opening breaks the hermetic seal and affects preservation quality.
Natural Sealant Materials
Natural sealants serve as essential alternatives to commercial products when waterproofing clay grain storage containers. For best results, you'll find Tung oil is the most durable choice, requiring 2-3 coats and providing a breathable yet protective seal.
While it will darken your terra-cotta permanently, it doesn't need thinning with solvents.
If you're looking for a milder option, hemp oil offers good breathability and won't darken the clay as much as Tung oil. Walnut oil provides another alternative, and you can mix it with natural wax for a slight sheen.
For indoor storage containers, shellac creates a highly water-resistant seal, though it's not suitable for outdoor use.
Traditional methods include milk sealing, which requires repeated soaking and rubbing to effectively seal the pores.
Fat sealing, historically used by farmers, involves heating oils and fats to seal the container. You can also consider linseed oil paint, which acts as both a sealant and colorant, though it's less durable than Tung oil.
For unglazed earthenware, natural oils and fats can make the pottery water-resistant, though not completely waterproof.
Testing Seal Effectiveness
Testing the effectiveness of clay pot seals requires systematic evaluation through both traditional and modern methods. You'll need to assess different sealing techniques to guarantee your grains stay protected from moisture and environmental factors.
Whether you're using epoxy resin, traditional sealants, or commercial products, it's vital to measure their performance systematically.
To effectively test your sealed clay pots, follow these essential steps:
- Clean and prepare your pots thoroughly, making sure they're free from dust and completely dry before applying any sealant.
- Mark each pot to identify the specific sealing method used, whether it's beeswax, epoxy resin, or commercial sealants.
- Measure initial water volume and pot weight, then track water loss over a 13.5-hour period.
- Document the performance of each sealant under various environmental conditions.
You can enhance your testing by applying multiple coats and comparing their effectiveness.
Commercial products like acrylic water-based varnish often provide quick-drying solutions, while traditional methods such as linseed oil might require more time but offer authentic results.
Remember to evaluate both the functional and aesthetic impact of your chosen sealant when making your final selection.
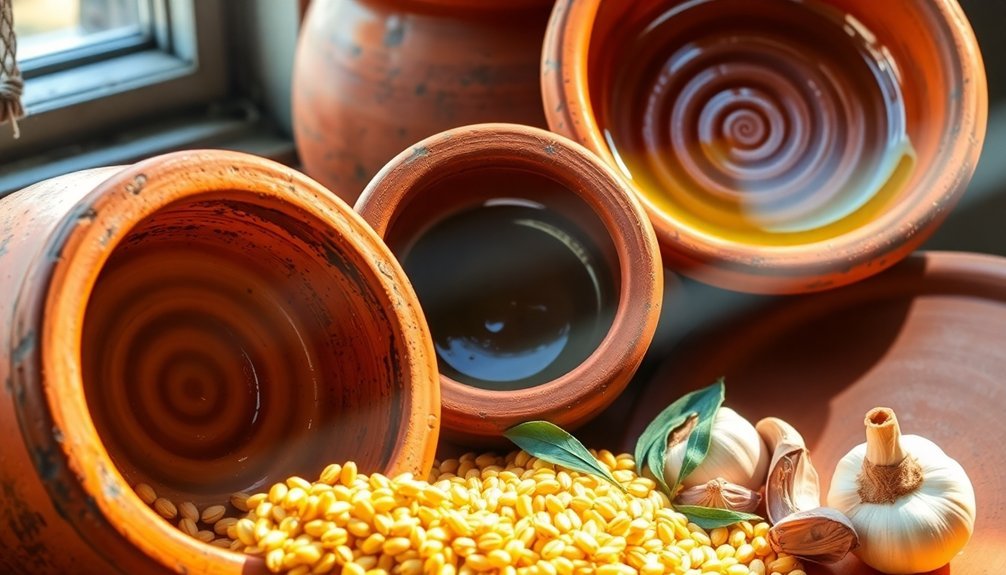
Natural Pest Prevention
Ancient farming wisdom has given us powerful plant-based solutions for protecting stored grains from pests. You'll find that mixing turmeric powder with your grains creates a natural barrier that lasts 6-8 months, while adding neem leaves or powder provides excellent pest-repelling properties.
For enhanced protection, you can layer garlic cloves throughout your stored seeds or mix ground hot peppers with them in your clay pot.
To strengthen your pest prevention strategy, you'll want to incorporate natural powders and substances. Mix wood ash with your grains to create an environment pests can't tolerate, or coat the grains with mustard oil for an effective protective barrier.
When storing pulses, use 30 grams of ginger rhizome powder per kilogram for ideal protection.
You can also combine multiple methods for maximum effectiveness. Try mixing dried neem leaves with your seeds, then storing them in clay pots sealed with thick mud.
Add layers of sand between your grain layers for extra protection. If you're storing maize, mix in tulsi leaves and seeds to keep pests away.
For wheat storage, use 1 kg of activated kaolin per 100 kg of seed to prevent bug infestation.
Temperature Control Strategies
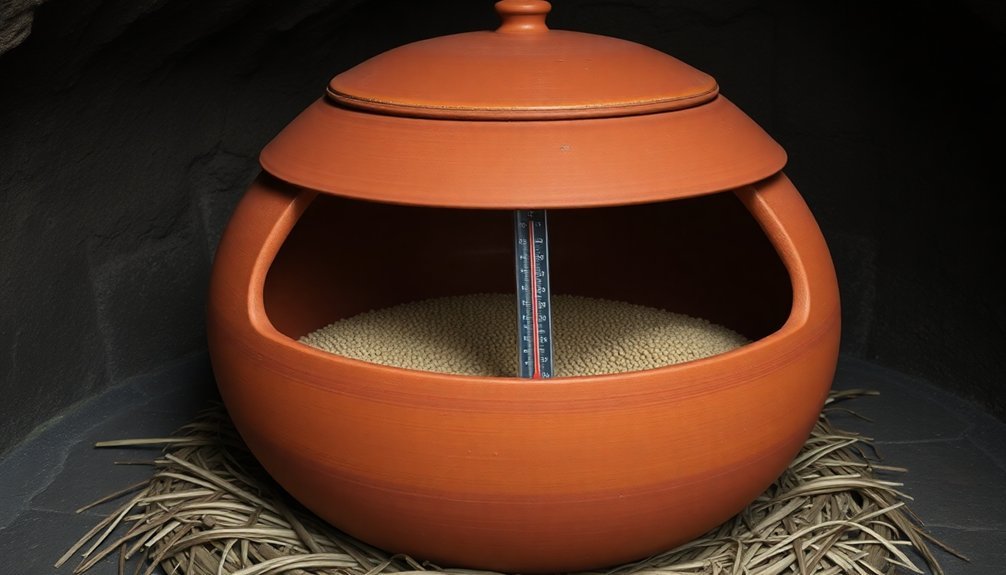
You'll find that clay pot storage offers an effective natural cooling solution for your grains, as the evaporative cooling process can lower internal temperatures by up to 10°C below ambient conditions.
To maximize this cooling effect, place your clay pots in shaded, well-ventilated areas during warmer seasons, allowing the natural evaporation process to work efficiently.
When seasons change, you can adapt your storage strategy by relocating the pots to maintain ideal temperatures, taking advantage of naturally cooler spaces like cellars or underground storage areas.
Natural Cooling Techniques
Maintaining proper temperature levels in clay pot grain storage depends heavily on natural cooling techniques to protect your harvest.
You'll need to keep the grain temperature below 15°C to minimize insect activity and mold growth, with temperatures below 5°C being ideal for preventing losses from various pests and microorganisms.
To effectively cool your stored grains, follow these essential steps:
- Cool your grain gradually in stages until you reach the desired storage temperature.
- Run aeration fans only when outdoor temperatures are 10-15 degrees F lower than your grain temperature.
- Monitor the temperature in the headspace area to track the cooling front's progress.
- Block off aeration fans after each cooling cycle to prevent unwanted air circulation.
You'll find that proper airflow management is vital, so make sure air moves from bottom to top through your grain storage.
The cooling process can double your storage time for every 10-degree reduction in temperature.
Seasonal Storage Placement
Throughout the year, successful grain storage in clay pots requires strategic placement and temperature control adjustments for each season. You'll need to maintain different temperature ranges depending on whether you're storing grain during winter or summer months.
During winter storage, you should cool your grain to 30-35°F for ideal preservation, but don't let it drop below 20°F if moisture content is high. Position your clay pots in areas where you can gradually reduce grain temperatures to at least 50°F when first storing.
You'll want to monitor temperatures regularly to maintain stable conditions.
For summer storage, place your pots in the coolest possible location to prevent insect problems and mold growth. You should aim to keep grain temperatures below 70°F, but temperatures under 60°F are even better for reducing insect activity.
Remember that every 10-degree increase in temperature will cut your allowable storage time in half.
In both seasons, you'll need to check your storage area's temperature regularly. Consider using thermostatic controllers to help maintain proper conditions, and always guarantee proper air circulation around your clay pots to prevent moisture buildup and temperature fluctuations.
Moisture Management Systems
A well-designed moisture management system serves as the cornerstone of effective grain storage in clay pots. You'll find that clay pots naturally regulate humidity levels due to their porous nature, but you'll need to implement additional measures to maintain ideal moisture control.
Start by placing a thin layer of cooled wood ash at the bottom of your clay pot – it's an effective moisture absorber and helps keep insects at bay. You'll need to verify your grain has uniform moisture content before storage to prevent condensation issues and moisture migration.
For an all-encompassing moisture management approach, follow these essential steps:
- Monitor your storage area's relative humidity and adjust ventilation timing accordingly.
- Operate fans during periods of lower ambient humidity to minimize moisture intake.
- Maintain continuous ventilation in the early storage stages, unless temperatures are too high.
- Use humidity controllers connected to your fan systems for automated moisture regulation.
Remember to adapt your moisture control strategy based on your local climate conditions. In humid areas, you'll need more aggressive moisture management, while in drier climates, you might focus more on moisture retention properties of your clay pots.
Clay Pot Treatment Process
You'll find that the clay pot treatment process involves multiple critical stages, starting with initial oil-based applications that protect both interior and exterior surfaces.
Your next step should focus on thorough curing, which requires carefully controlled temperature exposure through sun-drying or oven-baking at 400°F for best results.
Following these paint and curing techniques precisely will guarantee your clay pot develops the proper seasoning needed for effective grain preservation.
Paint Application Techniques
Successful paint application begins with proper preparation of your clay pots. Start by cleaning them thoroughly with a damp cloth and soaking in warm water to remove any stickers.
Once they're completely dry, apply a spray primer in a well-ventilated area to guarantee better paint adhesion, including the inner rim for outdoor pots.
For the best results when painting your grain storage pots, you'll want to follow these essential steps:
- Choose your paint type wisely – chalk paint requires only 2 coats, while acrylic needs 3-4 coats for full coverage.
- Thin acrylic paint with water for smoother application and more even coating.
- Use foam brushes for streak-free coverage, or spray paint with side-to-side motions.
- Apply paint in thin, even layers, allowing each coat to dry completely.
After the base coat dries, you can add designs using painter's tape for clean lines or create an antique effect with gold paint patches.
For added protection, seal your finished work with clear water-based acrylic spray or Outdoor Mod Podge. If you've used chalk paint, apply a wax sealant to maintain its unique texture.
Let the pot cure fully before using it for grain storage.
Pot Curing Steps
Beyond paint application, proper pot curing stands as the foundation for long-lasting grain storage.
You'll need to begin with thorough cleaning, using warm soapy water followed by an overnight soak in clean water. After scrubbing and rinsing without soap, let your pot air-dry for two hours.
Next, you'll treat the pot with garlic and vinegar. Rub garlic cloves over all surfaces, then fill the pot with water and white vinegar. Boil until three-quarters of the liquid evaporates. This treatment helps prevent damage to your pot during use.
The olive oil seasoning process is essential. You'll need to coat the pot inside and out twice, allowing an hour between applications. Then cure it in the oven at 300°F for an hour, followed by 400°F for another hour. Always use a heat diffuser to protect your pot from direct flame.
For final storage preparation, you'll want to verify the pot is completely dry. Store it in a cool place with the lid slightly open for airflow.
Before using it for grain storage, rinse with cold water and air-dry for 15 minutes to prepare the surface.
Storage Location Planning
Careful placement of your clay pot storage facility can mean the difference between easy accessibility and constant logistical headaches.
You'll need to take into account both environmental factors and practical access requirements when selecting your storage location.
Choose a well-drained site that's elevated at least 12 inches above the surrounding terrain to prevent water damage to your clay pots and stored grains.
If you're planning multiple storage units, maintain 2-3 feet of space between them for proper air circulation and easy access during maintenance.
For ideal storage conditions and minimal complications, follow these essential location guidelines:
- Position your storage area at least 200 feet from residential buildings to prevent issues with dust and debris.
- Verify the site has proper drainage with groundwater at least 10 feet below the surface.
- Select a location that's easily accessible during all weather conditions, with proper driveway drainage.
- Take into account prevailing wind directions to minimize the impact of dust on nearby structures.
Remember to plan for future expansion and treat the surrounding area to prevent weed growth, which can attract unwanted pests to your grain storage facility.
Long-Term Preservation Solutions
Throughout the life of your clay pot storage system, effective long-term preservation depends on proper container preparation and maintenance protocols.
You'll need to start by sealing your clay pots thoroughly with latex paint on both interior and exterior surfaces, ensuring they're completely dry before use. Don't forget to apply grease or silicon to all closures for an airtight seal.
For ideal preservation, you'll want to fill your containers completely with clean, properly dried grains (14% moisture) or seeds (12% moisture). Using oxygen absorbers can help maintain low oxygen levels inside your sealed pots.
It's essential to check your containers regularly for any signs of moisture infiltration or pest activity.
To maximize your storage system's effectiveness, you'll need to keep your pots in a cool, shaded area with consistent temperature and good ventilation.
Consider using additional protective measures like Mylar bags inside your clay pots for extra protection. Remember to rotate your grain stock using the FIFO method, and maintain cleanliness of both containers and storage area.
If you notice any containers with cracks or damage, replace them immediately to maintain the integrity of your storage system.
Air Circulation Management
Inside your clay pot storage system, proper air circulation plays an essential role in preserving grain quality. You'll need to guarantee adequate airflow to maintain consistent temperature and moisture levels throughout your stored grain.
When managing air circulation in clay pots, focus on downward airflow patterns to prevent moisture from accumulating at the top of your grain mass.
To effectively manage air circulation in your clay pot storage:
- Monitor the airflow rate carefully – you'll want approximately 1/10 to 1/20 CFM per bushel for ideal preservation, similar to upright storage systems.
- Keep the top of your clay pot slightly open to allow trapped heat to escape, especially during temperature fluctuations.
- Check for temperature uniformity regularly, as proper air circulation helps maintain consistent temperatures throughout your stored grain.
- Pay attention to humidity levels, as air circulation helps maintain the equilibrium moisture content between your grain and the surrounding air.
Remember that while clay pots naturally regulate temperature and moisture, you'll still need to manage air circulation to prevent moisture migration and reduce the risk of mold development.
Proper airflow helps cool your grain mass and discourages insect activity, ultimately extending your grain's storage life.
Frequently Asked Questions
How Many Times Can Clay Pots Be Reused for Grain Storage?
You can reuse clay pots multiple times for grain storage if you're maintaining them properly. With regular cleaning, drying, and careful handling, they'll last for years, especially when they're buried in temperature-controlled conditions.
Can Traditional Herbs Be Mixed With Grains During Clay Pot Storage?
Yes, you can mix traditional herbs like Neem, Bay Leaf, and Butea monosperma with your grains in clay pots. They'll act as natural preservatives and pest repellents while maintaining your grain's quality during storage.
What Indigenous Materials Can Substitute Latex Paint for Sealing Pots?
You can use traditional bear grease, cornmeal paste, or beeswax mixtures to seal your pots naturally. They're effective alternatives to latex paint, and you'll need to apply multiple coats for the best results.
Does Storing Different Grain Types Together Affect Their Preservation Quality?
Yes, you shouldn't mix different grain types during storage. They'll affect each other's moisture levels and can spread pests between them. Storing grains separately helps maintain their quality and prevents cross-contamination issues.
How Do Seasonal Changes Impact the Effectiveness of Clay Pot Storage?
You'll need to adjust your storage methods as seasons change. Temperature swings can damage your clay pots, while humidity affects their cooling efficiency. It's best to move pots indoors during freezing weather.
In Summary
You've learned the essential methods for successfully storing grains in clay pots. By properly selecting, treating, and sealing your containers while maintaining ideal temperature and airflow, you'll protect your harvest from pests and spoilage. Remember to check your stored grains regularly and rotate stock as needed. With these time-tested techniques, you'll preserve your grains effectively for months to come.
Leave a Reply