
Salt boxes last for generations due to their thoughtful construction and proper maintenance. You'll find traditional salt boxes built with moisture-resistant hardwoods like Black Walnut or Quartersawn White Oak, carefully joined using mortise and tenon techniques that minimize metal nails. They're designed with off-center lids and strategic ventilation to prevent moisture buildup, while professional kiln-drying and proper finishing with mineral oil and shellac protect the wood. To maximize longevity, you'll want to mount your salt box on a wall away from damp areas and maintain regular cleaning. Understanding these time-tested principles reveals why these essential kitchen tools have endured through centuries.
Historical Roots of Salt Storage
Throughout ancient history, salt played a pivotal role in human civilization, particularly in northern Europe where it was essential for food preservation. You'll find evidence of this importance dating back to the Neolithic era in England, where salt pans in Yorkshire from 3766-3647 BCE show just how long humans have been managing this vital resource.
When the Romans arrived in Britain, they introduced iron pans for boiling brine to produce salt, revolutionizing local production methods. You'll be interested to know that salt was so valuable that Roman soldiers received special salt rations called "salarium argentum," which is where we get the word "salary" today.
The need to store salt properly led to innovative solutions across different cultures. You'd have found salt being stored in controlled environments to maintain its effectiveness, as moisture was its greatest enemy. The early storage solutions required maintaining temperatures between 60 and 70 degrees to preserve the salt's quality.
The impact of proper salt storage extended far beyond the kitchen – it influenced commerce, military strategies, and even state policies. Without effective storage methods, you wouldn't have been able to preserve food year-round, especially during harsh winter months when fresh food was scarce.
Common Construction Materials
You'll find traditional saltbox construction relies heavily on wood frame components like 2×4 walls and 2×6 floor joists.
When choosing roofing materials, you've got options ranging from classic wood shakes to modern asphalt shingles with 25-year warranties.
To boost weather resistance, you can upgrade to metal roofing or composite materials that maintain the classic saltbox look while offering superior durability.
Professional installation by skilled contractors is crucial for ensuring proper structural integrity and long-term performance.
Traditional Wood Frame Components
Traditional saltbox houses relied on robust wood framing components that formed their distinctive structural skeleton.
You'll find that the main framework used substantial 6×6 lumber for posts and principal rafters, while 4×6 lumber served as common rafters and braces. The structure's backbone included hefty 6×10 timbers for girts, ridges, and top plates, creating a solid foundation for the iconic design.
If you're examining these historic structures, you'll notice they're assembled in progressive bents that conform to the signature saltbox roofline. The asymmetrical design creates a unique challenge during construction, requiring specialized framing expertise.
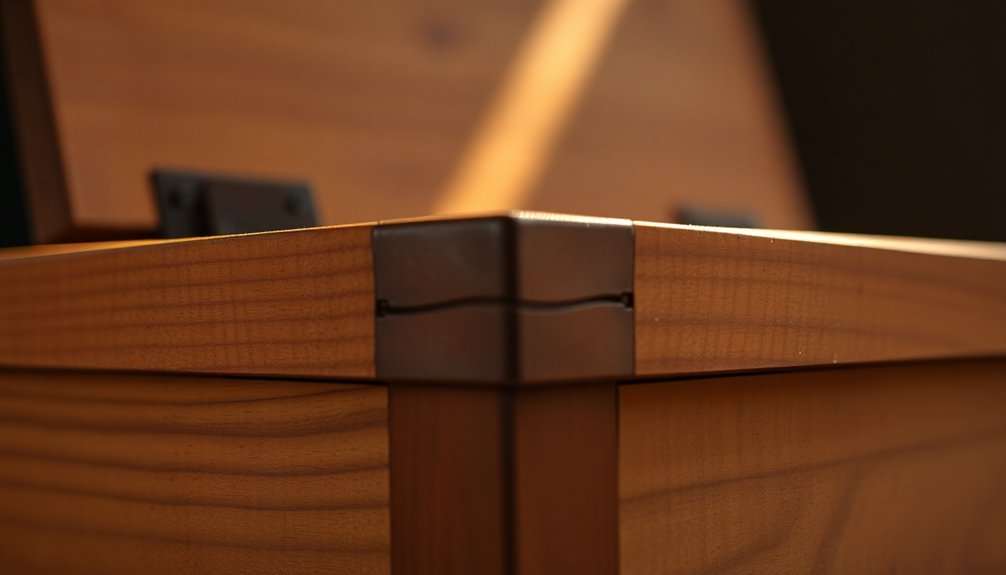
The timber frame construction technique connects these components using mortise and tenon joints, wooden pegs, and braces, with minimal use of metal nails due to their historical expense. Cathedral ceilings and open spaces were made possible through this intelligent design approach.
When selecting lumber for these components, you'll want to prioritize straight, defect-free pieces without cracks, knots, or decay.
Cedar and other weather-resistant woods are your best choices for longevity. Today's builders often supplement traditional joinery methods with galvanized screws and corner brackets, though many still honor the time-tested mortise and tenon joints that have helped these structures endure for generations.
Modern Shingle Selection Options
Modern shingle selection builds upon the time-tested principles of saltbox construction while offering enhanced durability and protection.
Today's shingles feature a robust fiberglass mat foundation that's engineered with specific glass fibers and resins, providing exceptional structural integrity for your saltbox roof.
You'll find that the asphalt coating is far superior to standard road asphalt, having been oxidized and mixed with mineral powder to enhance its weather-resistant properties.
This specialized coating doesn't just waterproof your roof; it creates a formidable barrier against UV rays and harsh weather conditions that could otherwise compromise your saltbox's integrity.
The ceramic granules you'll select aren't just for aesthetics.
While they do offer various color options to complement your saltbox's design, they're primarily engineered to provide an additional protective layer against environmental factors and UV radiation.
When it's time to install your modern shingles, you'll appreciate their user-friendly design features.
They include helpful alignment guidelines and interlocking systems that guarantee proper installation from the eaves to the peak.
You can choose from various designs, including premium options that enhance both durability and visual appeal while maintaining your saltbox's traditional character.
Weather-Resistant Material Upgrades
Sturdy materials form the backbone of weather-resistant upgrades for saltbox construction, building upon centuries-old techniques while incorporating contemporary advances.
You'll find that traditional timber framing remains essential, but you can now enhance it with modern wood treatments and preservatives that weren't available to colonial builders.
When you're selecting roofing materials, you'll benefit from combining historical wisdom with current technology.
While wood shakes and shingles are still excellent choices, you can opt for modern versions treated with weather-resistant compounds.
These materials maintain the classic aesthetic while offering superior protection against rain and snow.
You can improve upon the original construction techniques by incorporating today's moisture barriers and insulation systems.
The saltbox's signature sloped roof design works even better when you add contemporary drainage solutions and upgraded gutter systems.
You'll still want to maintain the fundamental timber frame structure, but you can reinforce critical joints with modern fasteners where appropriate.
The key is to preserve the proven structural elements that have kept these houses standing for generations while strategically upgrading materials to enhance their weather resistance and durability.
Air Flow Design Elements
In your saltbox home, you'll find that natural ventilation follows a specific upward pattern, starting from the soffit vents and moving through continuous air gaps to the ridge vents.
You can optimize this airflow by ensuring proper installation of vent baffles in each rafter bay, maintaining an unobstructed path from eave to peak.
The distinctive asymmetrical roof shape of your saltbox actually helps distribute wind pressure more effectively across the ridge vents, enhancing the overall ventilation performance.
Natural Ventilation Patterns
Throughout history, natural ventilation patterns have played an essential role in saltbox design, relying primarily on temperature differences and strategic opening placement.
You'll find that these homes utilize both mixing and displacement ventilation principles to maintain comfortable indoor conditions.
When warm air rises in your saltbox home, it creates a natural buoyancy effect that drives air circulation. The strategic placement of high and low-level openings helps control this airflow.
You'll notice that cool air enters through lower openings, while warmer air exits through higher ones, creating an efficient displacement ventilation system that removes pollutants and excess heat.
The mixing ventilation in your saltbox occurs when incoming air thoroughly blends with interior air, creating uniform temperatures throughout the space.
This process works particularly well with the home's high-level inlets, where cool air descends in turbulent plumes, effectively mixing with the room's air.
The simple two-plane design of your saltbox roof, combined with these ventilation patterns, creates a remarkably efficient system.
You'll benefit from stable temperature stratification and consistent air exchange with the outdoor environment, factors that contribute considerably to the longevity of these historic structures.
Ridge Wind Distribution
The distinctive aerodynamic shape of your saltbox roof sets up an exceptional wind distribution system along its ridge. You'll notice how the asymmetrical design, with its long rear slope and shorter front roofline, allows wind to flow smoothly over the structure while reducing potentially damaging uplift forces. The roof's unique configuration helps distribute wind pressure evenly across its surface.
When strong winds hit your saltbox roof, they'll encounter minimal resistance thanks to the sloping sides and central ridge. This design prevents significant turbulence or eddies from forming, which could otherwise stress the structure. You'll find that the roof's shape naturally channels wind forces away from your home, reducing the risk of structural damage during storms.
Your saltbox roof's design isn't just about wind protection – it's also highly effective at managing snow and rain. The steep slopes guarantee that precipitation slides off easily, preventing harmful accumulation.
You'll appreciate how the simple two-plane design, often constructed with wood shakes or shingles, minimizes potential leak spots and makes maintenance straightforward. This combination of features contributes to the roof's long-term structural integrity and durability.
Traditional Sealing Methods
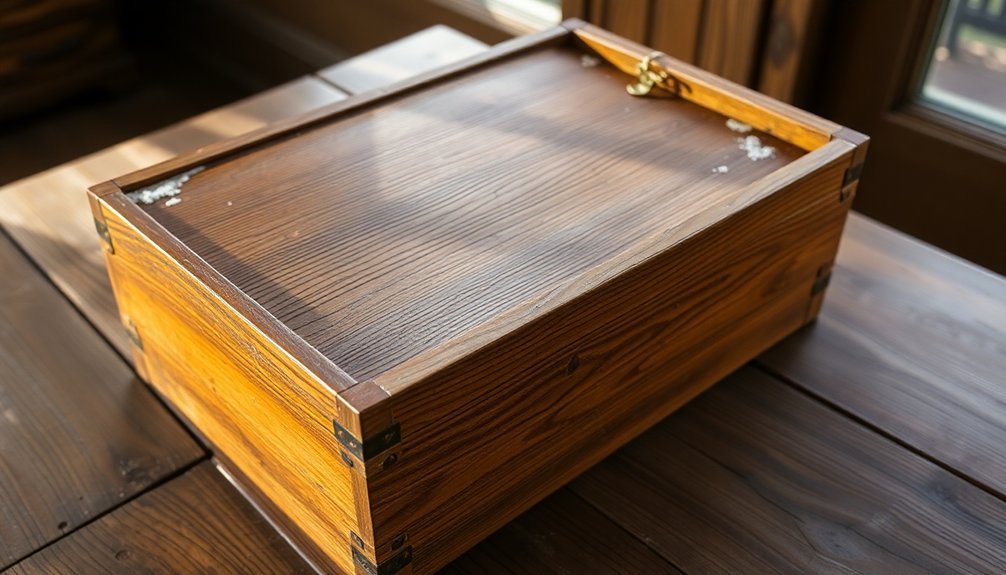
Many traditional sealing methods for salt boxes focus on protecting both the wood and its contents through careful interior treatment.
You'll need to apply food-safe finishes like shellac, food-grade oil, or polyurethane to seal the interior surfaces, preventing wood distortion and ensuring your seasonings remain safe to use.
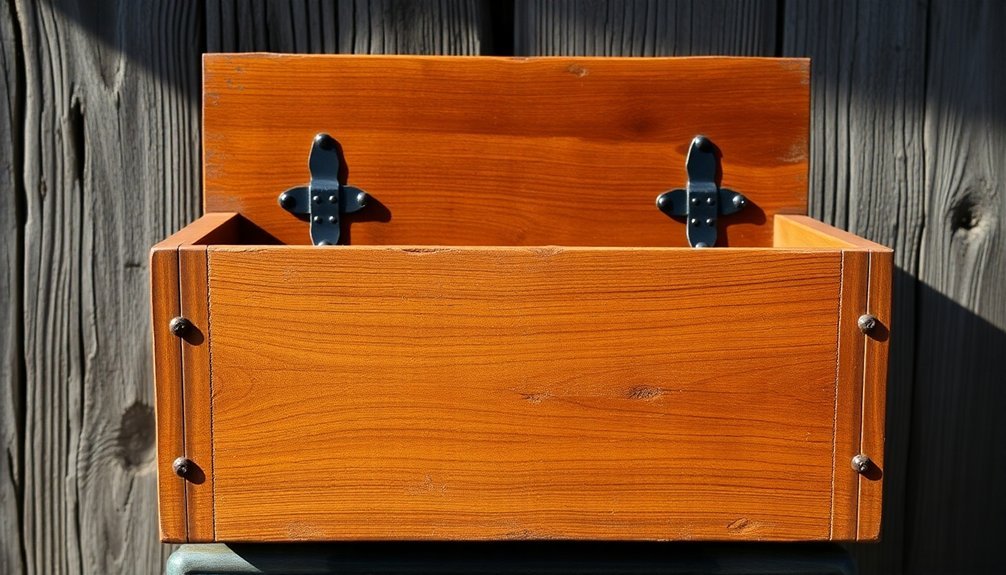
When you're assembling the box, pay special attention to the hinge and lid alignment.
You'll want to drill precise holes for 1/16-inch brass rod hinges, allowing the lid to open smoothly without catching.
Test the hinge action frequently and make adjustments by rounding over the lid's back edge if needed.
For the construction's integrity, you'll find stopped dadoes essential for securing the back panel.
They'll prevent movement during use, while a shouldered back covers the joint and maintains squareness.
You should use layout lines on the fence and box sides to guide your routing process.
During assembly, you'll need to maintain square carefully, as the small bearing surface can easily lead to misalignment.
Use tape at the miters and small clamps at the dado joints for a secure glue-up that'll last generations.
Wood Selection and Treatment
Selecting ideal wood for your salt box requires careful consideration of both aesthetics and practicality.
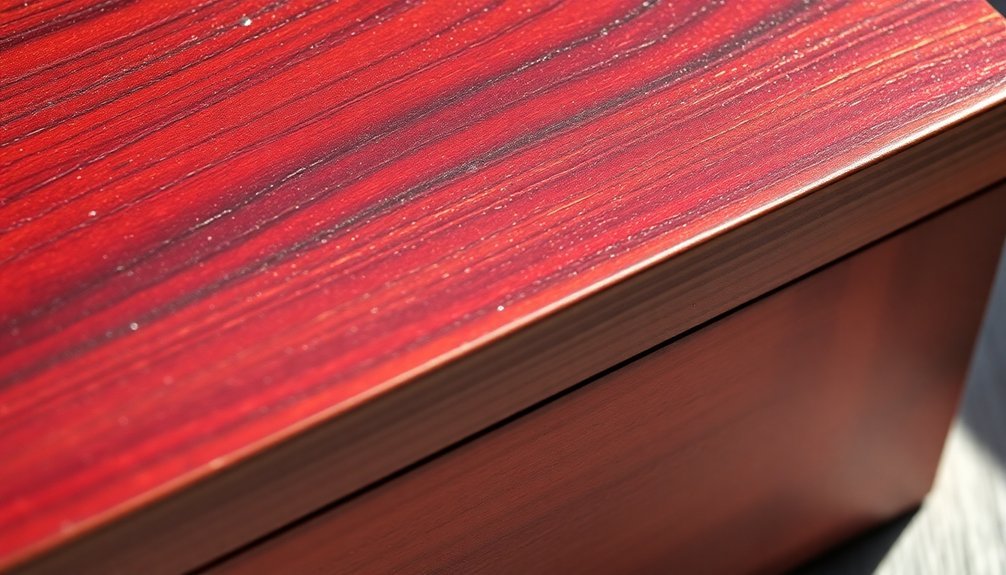
You'll want to choose hardwoods like American Black Walnut, English Walnut, or Quartersawn White Oak for their exceptional durability and resistance to warping. These woods won't impart unwanted flavors to your salt and can withstand years of daily use.
When preparing your chosen wood, it's vital to ascertain it's professionally kiln-dried to maintain the proper moisture content.
You'll need to use specific tools for shaping and finishing, including bowl gouges for rough cuts and scrapers for smooth interior surfaces.
For long-lasting protection, here are three essential finishing steps:
- Apply food-safe mineral oil and beeswax to protect the wood while enhancing its natural beauty.
- Consider using shellac as an additional protective barrier for both interior and exterior surfaces.
- Buff the wood using progressive stages of Tripoli, White Diamond, and Carnauba wax wheels for a professional finish.
Remember to avoid scented woods, those that oxidize like Purple Heart, or oily varieties such as Cocobolo and Teak, as these can compromise your salt's quality over time.
Moisture Control Techniques
Now that you've properly prepared your wood, maintaining proper moisture control in your salt box becomes your next priority.
You'll want to implement a saturated salt solution system, which provides superior humidity control compared to alternatives like silica gel. This system can maintain stable relative humidity (RH) levels 24 times more effectively than silica gel in the 40%-60% range.
To set up your moisture control system, place a saturated salt solution in a tub within your salt box. Cover the tub with Goretex or Tyvek to allow proper air exchange while controlling moisture movement.
For ideal results, choose magnesium nitrate as your salt, which maintains 54% RH at 70°F and offers excellent stability. You'll only need to service this system about once a year.
Make sure your salt box is tightly sealed to maximize the effectiveness of your humidity control. The salt solution will automatically supply water vapor when humidity is low and absorb excess moisture when it's high.
Consider adding air pollutant scavengers to protect against potential salt degradation and guarantee your salt box's longevity.
Proper Box Placement

The kitchen hearth demands careful consideration when placing your salt box. You'll want to position it near a heat source, like your stove or fireplace, to keep the salt dry and prevent moisture absorption. This placement is especially vital during damp, cool weather when salt is most likely to clump.
For ideal preservation, you'll need to focus on three key placement factors:
- Air circulation – Mount your salt box on the wall in an airy spot to prevent moisture buildup and maintain salt quality.
- Stability – Guarantee the box hangs flat against the wall with no offset, using vertical grain orientation in the back panel for stronger hanging support.
- Accessibility – Position the box within easy reach of your cooking area without interfering with other kitchen activities.
You'll find that proper placement serves multiple purposes: it keeps your salt dry through heat exposure and air flow, prevents damage from accidental knocks or spills, and makes the salt readily available when you need it.
A well-placed salt box not only preserves your salt but also enhances your cooking efficiency by keeping this essential ingredient close at hand.
Long-Term Maintenance Practices
For lasting salt box performance, you'll need to establish regular maintenance routines that protect both your salt and the box itself.
Start by ensuring proper air circulation around your salt box, keeping the lid uncovered to prevent moisture buildup that could compromise your salt's quality. You'll want to check regularly for any signs of dampness or condensation, as these can affect the salt's effectiveness in meat preservation.
Clean your salt box thoroughly between uses, removing any residual moisture or old salt particles that might contain impurities. When refilling, use only pure salt without anti-caking agents or added minerals, as these additives can accumulate over time and affect your curing results.
Don't forget to inspect the box's corners and joints periodically for any signs of wear or separation.
If you notice your salt becoming clumped or discolored, it's time to empty the box completely, dry it thoroughly, and start fresh.
You'll also want to rotate your salt supply regularly, ensuring the oldest salt gets used first.
Keep your box in a cool, dark place, away from direct sunlight and heat sources that could cause warping or deterioration.
Weatherproofing Ancient Salt Boxes
Building upon these maintenance practices, ancient salt boxes incorporated sophisticated weatherproofing techniques that protected their precious contents.
You'll find that craftsmen carefully selected moisture-resistant woods and applied protective finishes like paint or veneer to create an additional barrier against dampness. These boxes weren't just decorative; they were engineered to combat the primary enemy of salt storage: humidity.
The strategic placement of salt boxes played a vital role in their weatherproofing success. You'll notice they were typically:
- Mounted on walls to prevent contact with damp floors
- Positioned near heat sources like stoves to maintain dryness
- Stored in well-ventilated areas to prevent moisture buildup
The construction methods themselves served as weatherproofing elements. When you examine ancient salt boxes, you'll see how mortise and tenon joints created tight seals, while off-center lids prevented moisture from seeping in during use.
The lids were precisely hinged to maintain consistent coverage, and the overall design prioritized functionality over aesthetics. Even decorative elements were carefully planned to avoid compromising the box's weather-resistant properties, ensuring these essential kitchen tools could withstand generations of use.
Frequently Asked Questions
Can Saltbox Designs Be Adapted for Modern Eco-Friendly or Solar Installations?
Yes, you'll find saltbox roofs are perfect for modern eco-friendly updates. Their steep slopes easily accommodate solar panels, while the design naturally promotes energy efficiency through ideal insulation and space utilization.
How Do Insurance Companies Typically View Homes With Saltbox Roof Designs?
You'll generally find that insurance companies favor saltbox roofs due to their weather-resistant design. Their efficient water shedding and wind resistance typically result in lower premiums and fewer claims than other roof styles.
What Are the Typical Costs Compared to Conventional Roof Designs?
You'll spend $10,500-$36,000 for a saltbox roof, which is pricier than standard gable roofs ($7,000-$20,000) but comparable to hip roofs ($24,000-$36,000). Material choices and local labor rates affect your final cost.
Are There Specific Regional Building Codes That Affect Saltbox Construction?
You'll need to check local building codes, as requirements vary by region. Historic districts often have strict preservation guidelines, while modern codes may require additional structural support and specific snow-load ratings for saltbox roofs.
How Does the Asymmetrical Design Impact Heating and Cooling Efficiency?
You'll find that the saltbox's sloped roof and strategic room placement around the central chimney maximize heat retention in winter, while the design promotes natural ventilation and cooling airflow during warmer months.
In Summary
You've learned that salt boxes endure through generations thanks to careful material selection, proper ventilation, and time-tested construction methods. By choosing the right wood, treating it appropriately, and maintaining good airflow, you'll keep your salt dry and usable. When you combine these elements with strategic placement and regular maintenance, you're preserving a practical tradition that's served households for centuries.


Leave a Reply