
Traditional food drying frameworks came in several forms you'd recognize from history. You'd find still houses with controlled environments, outdoor racks positioned for maximum sunlight, and suspension systems using hooks and loops for meat. Early cultures used underground spaces like cellars and caves, while dedicated structures featured black-painted trays and solar collectors to boost drying power. Herb drying relied on upside-down bundling or flat mesh screens, while corn cribs utilized slatted walls for air circulation. The evolution of these frameworks reveals fascinating innovations in food preservation that shaped how we store food today.
Ancient Drying Structures

Throughout history, countless civilizations developed sophisticated drying structures to preserve their food supplies. You'll find that some of the earliest examples date back to 12,000 B.C. in Middle Eastern and Oriental cultures, where people dried their foods in the hot sun. As civilizations advanced, they created more controlled environments for food preservation.
During the Middle Ages, you'd see purpose-built structures called Still Houses, which were specifically designed to dry fruits, vegetables, and herbs in regions where sunlight wasn't sufficient. These buildings used fire not only for drying but also for smoking foods, providing a reliable preservation method regardless of weather conditions. The advent of icehouses in America revolutionized cold storage capabilities for preserved foods.
When you examine historical farm complexes, you'll notice specialized structures like corn cribs, which were engineered to maximize air circulation for drying corn. These facilities were essential for maintaining livestock feed throughout the year.
The Romans, who were particularly fond of dried fruits, even developed methods that combined drying with honey preparation. Trade routes with India and the Orient further influenced these preservation techniques, introducing new methods like the use of sugar cane for preservation.
Natural Element Drying Systems
When you're utilizing natural elements for food drying, success depends on four key environmental factors: sunlight, air circulation, temperature, and humidity.
You'll find that direct sunlight provides the most traditional drying method, while proper air circulation at around 30% humidity guarantees ideal moisture removal. The best results come from high temperatures with minimal day-to-night fluctuations. Prior to modern biomass systems, these traditional methods were essential, as they provided sustainable energy solutions for food preservation.
To effectively harness these natural elements, you'll need to take into account specific infrastructure and positioning. Here's what you should focus on:
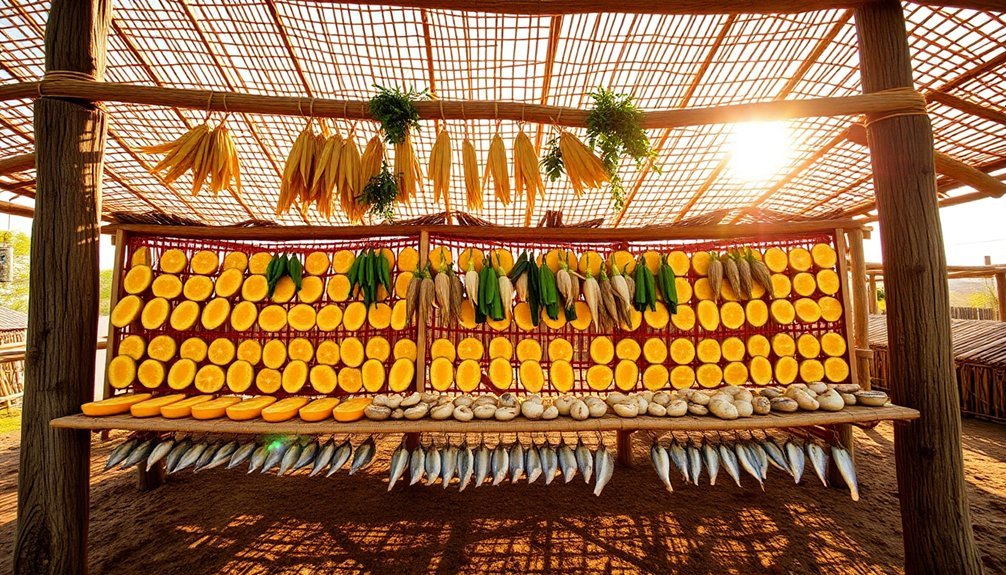
- Position your drying racks in areas with consistent airflow, using clotheslines for items like corn or ristras for chile peppers.
- Set up protective shelters that shield food from rain while maintaining ventilation.
- Install hooks, loops, or clips rather than rope or wire to guarantee even drying and proper air circulation.
- Arrange your drying setup to take advantage of warm, dry air while protecting against strong winds.
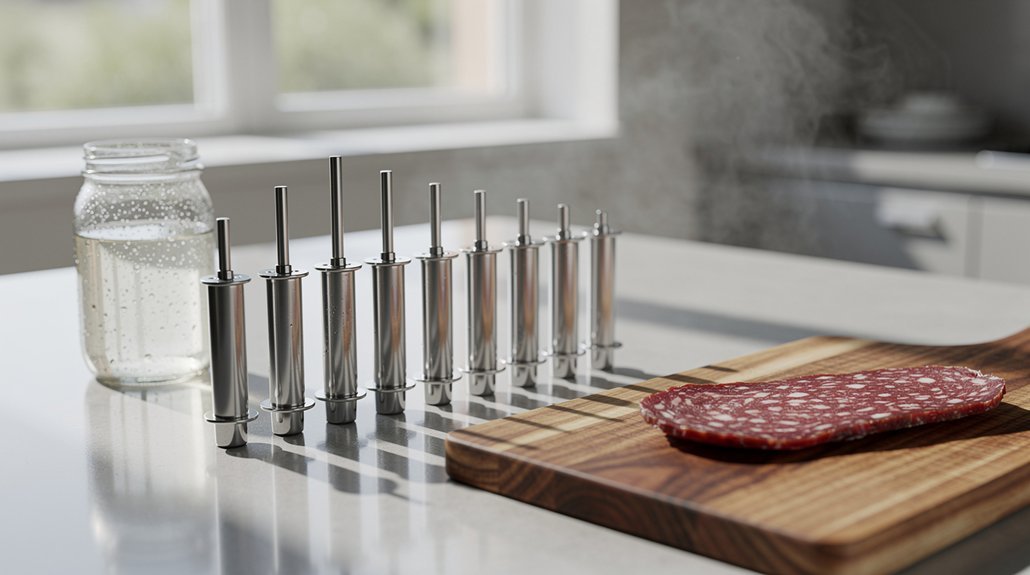
Before drying, you'll want to prepare your food properly through techniques like blanching vegetables, using preservative solutions, or soaking meat in salt brines.
Remember to cut items into uniform shapes to guarantee they dry simultaneously and thoroughly.
Building Traditional Still Houses

Natural drying methods work well in favorable weather, but regions with limited sunlight or unpredictable conditions need more reliable solutions. Still houses emerged as an effective alternative, providing controlled environments for drying fruits, vegetables, and herbs regardless of external conditions.
When you're building a traditional still house, you'll need to focus on three key elements: construction, heating, and ventilation. The structure should be made from locally available materials and designed to capture and retain heat while allowing proper air circulation. This indoor method is far more reliable than sun drying, which requires temperatures above 85°F.
You'll want to incorporate a fire-based heating system that you can control to maintain consistent temperatures throughout the drying process.
Once your still house is operational, you'll place food items inside and monitor them regularly to prevent over-drying or spoilage. The drying process can take several days, during which you'll need to maintain the fire at appropriate temperatures and check the food's progress.
When the items are properly dried, you'll transfer them to airtight containers for long-term storage. This controlled approach guarantees you can preserve food effectively, even in regions where natural drying methods aren't reliable.
Meat Suspension Methods
You'll find that traditional meat suspension relies heavily on hooks and loops crafted from natural materials like wood or metal, which need to be positioned strategically for ideal drying.
To maximize air circulation, you'll want to space your meat pieces evenly and install support systems that prevent meat surfaces from touching each other.
Your air flow support system should include crossbeams and vertical posts that create multiple hanging levels while ensuring proper ventilation throughout the drying space.
Traditional Hooks and Loops
Two primary methods have traditionally been used for suspending meat during the drying process: hooks and loops. Each method serves a specific purpose in ensuring proper air circulation and preventing meat pieces from touching during the drying process.
Traditional hooks are crafted from galvanized wire that's 1 to 1.5mm in diameter and 15cm long. You'll find these formed into S-shapes by twisting both ends around a circular stick. The wire's corrosion-resistant properties make it ideal for long-term use, while its thickness provides the stability needed at the meat's thicker end.
For the loop method, you'll use thin string or strong thread cut to 30cm lengths with knotted ends. You'll create a double loop that's pulled tight against the meat to prevent slipping.
Here's what makes both methods effective:
- They allow free air circulation around the entire piece of meat.
- They prevent meat pieces from touching each other, reducing spoilage risk.
- They can be supported by wooden or metal sticks for proper weight distribution.
- They're adaptable to different meat strip shapes and sizes, with loops being more versatile than hooks.
Air Flow Support Systems
Successful meat drying depends heavily on proper air flow support systems that maximize circulation around each piece. You'll need sturdy horizontal supports, typically wooden or metal sticks about 2 meters long and 2 centimeters in diameter, to properly suspend your meat strips.
These supports are far better than flexible materials like ropes or wires, as they'll provide the stability needed for heavy loads of drying meat.
When you're setting up your drying framework, you'll want to space your meat strips so they don't touch each other. Each support stick can hold 25-30 pieces of meat, but you'll need to arrange them carefully to maintain proper airflow.
Hang each strip from its thicker end, ensuring there's enough space between pieces for warm, dry air (ideally around 30% humidity) to circulate freely.
Your setup should account for continuous evaporation, which is most intense during the first day. Position your framework where natural air circulation and consistent temperatures can help maintain steady drying conditions.
Fruit Drying Frameworks
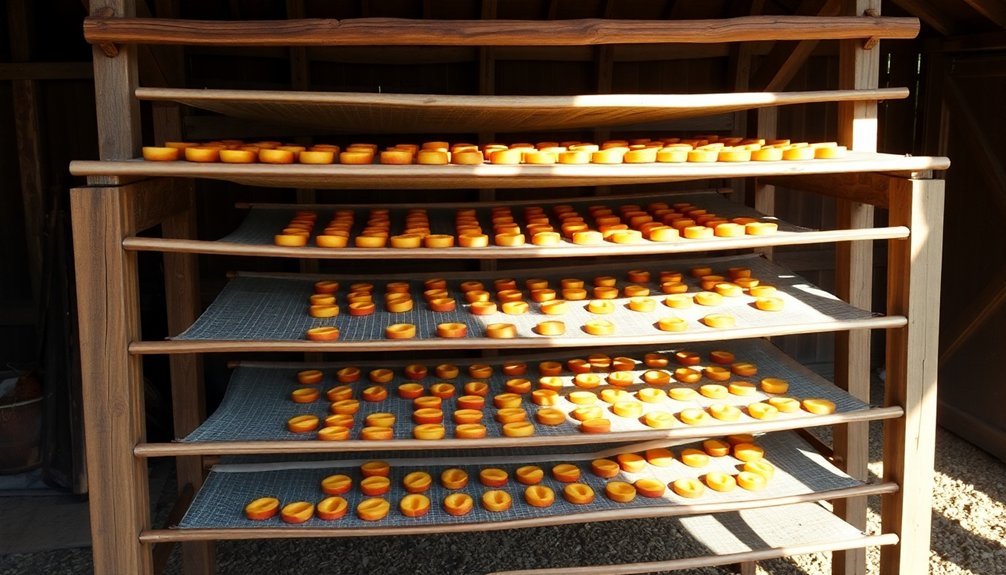
Throughout history, fruit drying frameworks have evolved from basic sun-drying methods to sophisticated dehydration technologies. Traditional frameworks relied heavily on natural elements, using black-painted trays, solar collectors, and mirrors to maximize the sun's thermal power.
While these methods were cost-effective, they often left fruits vulnerable to contamination from insects and microorganisms.
To guarantee successful fruit drying in traditional frameworks, you'll need to follow these essential steps:
- Select firm, ripe fruits and clean them thoroughly to remove surface contaminants.
- Cut fruits into uniform, thin slices and treat them with anti-darkening solutions like lemon juice or ascorbic acid.
- Arrange the slices in single layers on drying trays, ensuring proper spacing for airflow.
- Monitor the drying process regularly and rotate trays for even dehydration.
Traditional frameworks required careful attention to storage conditions. You'll need to condition your dried fruits for 4-10 days before storing them in moisture-proof containers.
While modern techniques like freeze-drying and spray drying offer more control and efficiency, traditional frameworks continue to be relevant in many parts of the world, especially in regions with abundant sunlight and limited access to modern technology.
Air Flow Design Principles
Building on traditional fruit drying methods, proper air flow design stands at the heart of effective food dehydration. You'll need to guarantee continuous air circulation to remove moisture while preventing the growth of microorganisms. The key is striking a balance – your airflow should be strong enough to carry away water vapor but not so powerful that it displaces the food from your drying racks.
When you're setting up your drying system, you'll want to focus on tray design and spacing. Using materials like cheesecloth or synthetic netting over racks works well for small batches, while wooden or heat-resistant plastic trays with perforated bottoms are better for larger quantities.
You'll need to space your trays properly, using wooden blocks between layers to maintain consistent air circulation.
Temperature control works hand in hand with airflow. You're aiming for heat that draws out moisture without cooking the food, typically between 55-75°C for vegetables. If you're using an oven, keep your trays 1 1/2 inches smaller than the oven dimensions to guarantee proper air movement.
Modern dehydrators can enhance this process with built-in vertical or horizontal airflow designs, offering more controlled drying conditions.
Early Storage Solutions
Ancient civilizations mastered food preservation through diverse storage solutions that worked alongside their drying techniques.
They'd develop sophisticated systems using natural formations and purpose-built structures to maintain their dried goods. The combination of proper storage with effective drying methods helped communities survive through harsh seasons and periods of scarcity.
You'll find these fundamental storage solutions were remarkably effective:
- Underground Spaces: Cellars and caves provided naturally cool environments that helped extend food storage times, protecting dried goods from temperature fluctuations.
- Purpose-Built Structures: Still houses offered controlled environments for drying and storing foods, especially in regions with limited sunlight.
- Ice Storage: Icehouses were constructed to maintain lower temperatures, helping preserve both fresh and dried foods before mechanical refrigeration.
- Natural Water Sources: Cool streams were utilized as primitive refrigeration systems.
These storage methods weren't just practical – they were essential survival tools.
Communities would often combine different storage approaches, using cellars for long-term storage while keeping frequently accessed items in still houses or other above-ground structures.
You'll notice many of these principles still influence modern food storage practices.
Traditional Herb Drying Racks
Traditional herb drying racks stand as one of the most enduring food preservation tools, evolving from early storage methods into specialized systems.
You'll find two primary approaches: bundling herbs in groups of 8-10 stems hung upside down, and laying them flat on screens for ideal air exposure.
The racks themselves typically feature either hanging frameworks or mesh screen designs. You can mount hanging racks from walls or ceilings, ensuring they're sturdy enough to support your herbs' weight.
Mesh screens offer versatility, as you'll be able to use them both indoors and outdoors, though they're not as durable as other options.
When you're designing or choosing a drying rack, you'll want to prioritize space efficiency and air circulation.
Vertical hanging systems help you maximize space, while stackable trays let you dry larger quantities in compact areas.
If you're interested in building your own rack, you can repurpose materials like old window screens, chicken wire, or even embroidery hoops with cheesecloth.
You'll find that medical-grade stainless steel works best for preventing microorganism growth, but simple materials like salvaged wood and cotton string can create effective drying systems too.
Safety Features in Drying Structures

Effective safety features in food drying structures rely on four vital elements: temperature control, air circulation, humidity management, and protective measures. You'll find these elements carefully integrated into traditional drying frameworks to guarantee food safety and prevent spoilage.
Temperature control's sweet spot is 140°F, which prevents cooking while guaranteeing proper dehydration. For meat and poultry, you'll need to preheat to 160-165°F to kill harmful bacteria. Proper air circulation is essential, achieved through strategic placement of screens and racks that allow air to flow freely around the food.
- You'll want to use food-safe materials like stainless steel or Teflon-coated fiberglass for your drying racks, avoiding galvanized metal, copper, or aluminum.
- Double screens or cheesecloth provide important protection against birds and insects.
- Position your drying structure in a well-ventilated area with relative humidity below 20%.
- Maintain constant airflow using fans or natural ventilation to prevent moisture from becoming trapped.
Remember to regularly check your dried foods for moisture and re-dry if necessary. Proper cooling and packaging after drying will prevent moisture re-entry and guarantee your preserved foods remain safe for consumption.
Frequently Asked Questions
How Did Ancient Cultures Determine if Food Was Adequately Dried?
You'd check food's dryness through visual inspection, weight, flexibility, and smell. You'll know it's ready when it's lightweight, bendable without breaking, and has no signs of moisture or spoilage.
What Materials Were Used to Construct Drying Racks Before Metal Tools?
You'd find ancient drying racks made from wood slats, bamboo, and plant fibers. They'd use leather strips and rawhide for binding, while creating frames with branches and woven baskets for smaller items.
How Did Communities Share Drying Facilities in Ancient Settlements?
You'll find ancient communities shared drying areas by establishing communal sun-drying spaces and still houses. They'd coordinate usage times, pool resources, and pass down preservation knowledge through generations while working together.
What Role Did Children Play in Traditional Food Drying Practices?
You'll find children actively participated in workshops, helped prepare foods for drying, and learned cultural significance. They'd assist with washing, trimming, and monitoring while gaining knowledge of traditional preservation methods and cultural heritage.
How Were Dried Foods Tested for Safety Before Modern Scientific Methods?
You'd test dried foods through visual inspection for mold, checking texture for proper dryness, smelling for off odors, and taste-testing samples. Traditional knowledge passed down through generations guided these safety assessments.
In Summary
You've seen how traditional food drying frameworks evolved from simple sun-exposed platforms to complex, purpose-built structures. Whether you're looking at Native American drying racks, European stillhouses, or Asian suspended systems, you'll notice they all share core principles: elevated designs, proper airflow, and protection from pests. These time-tested methods continue to influence modern food preservation techniques, proving that ancient wisdom still holds value today.
Leave a Reply