Choose grape varieties with high sugar content and thick skins like Muscat of Alexandria or Thompson Seedless for ideal results. You'll want to harvest when grapes reach at least 19° Brix, typically around September 1st. Pre-treat your grapes with potassium carbonate or olive oil to enhance drying efficiency. Set up your drying area with proper spacing and airflow, positioning racks for maximum sunlight exposure. Monitor weather forecasts carefully, avoiding rainy periods. Protect your grapes with shade cloth and windbreaks during the process. Test regularly for 12-13% moisture content. Keep these fundamentals in mind, and you'll discover the ancient art of transforming grapes into concentrated bursts of flavor.
Selecting the Perfect Grape Varieties
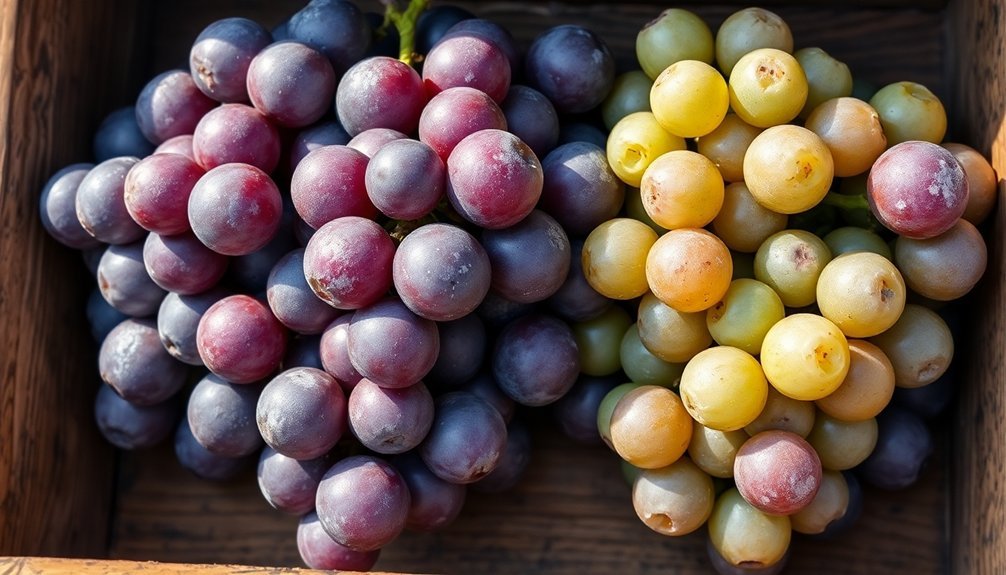
When it comes to sun-dried grapes, selecting the right variety can make or break your success. You'll want to focus on varieties that have high sugar content and thick skins, which are vital characteristics for ideal drying. Muscat of Alexandria and Thompson Seedless are top choices that consistently deliver excellent results.
Summer Muscat should be at the top of your list if you're looking for intense flavor. It's specifically bred for dry-on-the-vine raisin production and offers that distinctive muscat taste that many consumers prefer. For optimal growth, vines typically need 250 to 350 gallons of water annually to maintain proper hydration levels.
For additional options, consider Flame and Delight varieties, which handle high summer heat exceptionally well and produce quality dried grapes.
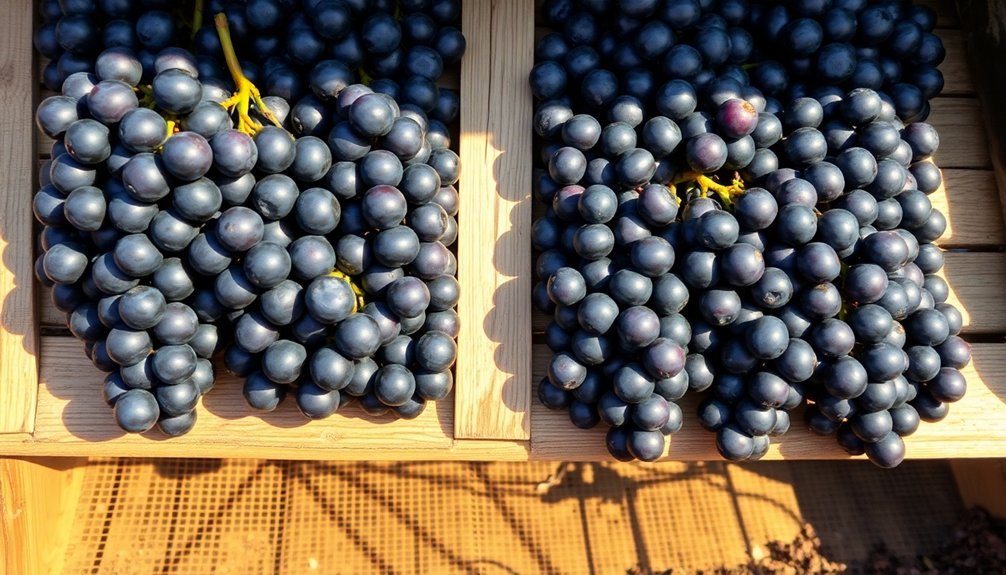
If you're in a particularly hot and dry climate with minimal rainfall (around 10 inches per year), you'll find success with traditional European Vitis vinifera varieties. Black Monukka and Ribier are excellent choices for these conditions, as they thrive in intense summer heat and can be used for both fresh consumption and drying.
Remember that proper drainage is vital, so make sure your soil is sandy or gravelly for best results.
Harvest Timing and Methods
After selecting your ideal grape varieties, proper harvest timing becomes your next key focus for successful sun-dried grapes. You'll want to guarantee your grapes reach at least 19 °Brix for minimum grade standards, typically targeting a September 1 harvest start in the San Joaquin Valley. Don't wait beyond September 15, as you'll risk poor drying conditions and potential rainfall. This traditional drying method dates back to ancient Egyptian times, when grapes were first purposefully dried around 2000 BC.
Your row orientation greatly impacts drying time. East-west rows dry faster with 12 hours of direct sunlight, while north-south rows need 7-10 extra days due to limited sun exposure.
| Aspect | Best Practice | Time Investment |
|---|---|---|
| Sampling | Random berry collection from sunny/shady sides | 1-2 hours/block |
| Harvest Window | Early September start | 2 weeks maximum |
| Labor Tasks | Terracing, picking, turning | 28 hours/ton |
| Row Coverage | Night protection essential | Daily task |
To guarantee accurate maturity assessment, walk the full length of several rows while sampling, avoiding end-row vines. You'll need to take at least 20 random cluster samples for precise readings. Remember to factor in your vineyard's specific conditions, including soil variations and vine vigor, when determining your harvest timing.
Essential Pre-Drying Preparations
You'll want to start with grape varieties known for their high sugar content and thin skins, as these characteristics lead to better drying results.
Before drying your grapes, treat them with a potassium carbonate solution or olive oil mixture to break down the waxy coating and speed up the drying process.
Check your local weather forecast to guarantee you'll have several consecutive days of hot, dry conditions with light winds, which are essential for successful sun-drying.
Ensure proper trellis systems and row spacing in your vineyard to maintain quality grape production and facilitate efficient harvesting.
Select Best Grape Varieties
Selecting the right grape varieties stands as the cornerstone of successful sun-drying. If you're looking for proven performers, you'll want to focus on Sultana and Thompson Seedless grapes. These varieties excel in sun-drying thanks to their high sugar content and ideal skin characteristics, consistently producing high-quality raisins with minimal unwanted flavors.
For more variety options, consider Muscat and Fiesta Seedless grapes. They'll give you excellent sugar content and flesh characteristics, with Muscat offering a distinctively strong flavor profile.
If you're planning to use the dry-on-vine method, you'll find Selma Pete grapes particularly valuable due to their early ripening nature and suitability for mechanical harvesting.
You'll need to verify your chosen variety matches your local climate. Your growing region should have hot, rainless summers and low spring frost risk.
You'll want to confirm that your area provides more than 1,926 Biologically Effective Degree Days during the growing season. If you're in a region like California, you're ideally positioned for successful raisin production, as the climate offers ideal drying conditions with minimal rainfall during the critical drying period.
Pre-Treatment Solutions Matter
Once you've chosen your grape varieties, proper pre-treatment becomes the next key step in creating quality sun-dried grapes.
You'll need to break down the waxy layer on your grapes' surface to speed up the drying process. The most common method is dipping grapes in sodium hydroxide or potassium carbonate solutions, which create tiny cracks in the skin and improve water removal.
You can apply these solutions by either dipping or spraying your grapes. Using an alkaline oil-in-water emulsion will help maintain higher sugar concentrations while preventing excessive darkening.
If you're concerned about chemical treatments, you've got several alternatives. Consider using abrasive methods, pulsed electric fields, or ultrasound treatments – they can reduce drying time by up to 20%.
Don't forget to protect your grapes from direct sunlight during the drying process by using curtains.
If you're aiming for lighter-colored raisins, sulfur compounds can help prevent browning.
Whatever method you choose, you'll cut your drying time considerably – from 3-5 weeks down to 7-14 days.
Remember that your choice of pre-treatment will affect your final product's color, moisture content, and overall quality.
Monitor Weather Before Starting
Weather monitoring stands as a critical first step before beginning any sun-drying operation. You'll want to check temperature forecasts, humidity levels, and potential rainfall for at least the next 7-10 days. Remember that temperatures drop approximately 1°F every 4 days from mid-August to mid-October, so earlier drying typically yields better results.
Look for periods with hot, rainless conditions and low humidity, as these provide ideal drying conditions. Your grapes can reach temperatures up to 136°F on tray tops and 122°F at tray bottoms, which is perfect for efficient drying.
If you're using a DOV system, pay special attention to sun exposure patterns and position your trays with a south-north orientation to maximize sunlight.
Don't start drying if rain is forecasted, as moisture can greatly slow the process and darken your fruit. If you're in a high-humidity area, consider using drying sheds with side curtains or alternative methods like dehydrators.
Keep old sheer curtains or burlap handy to protect your grapes if weather conditions suddenly change. You'll also need to monitor hourly temperatures throughout the drying process to make necessary adjustments to tray positions or covering.
Setting Up Drying Locations
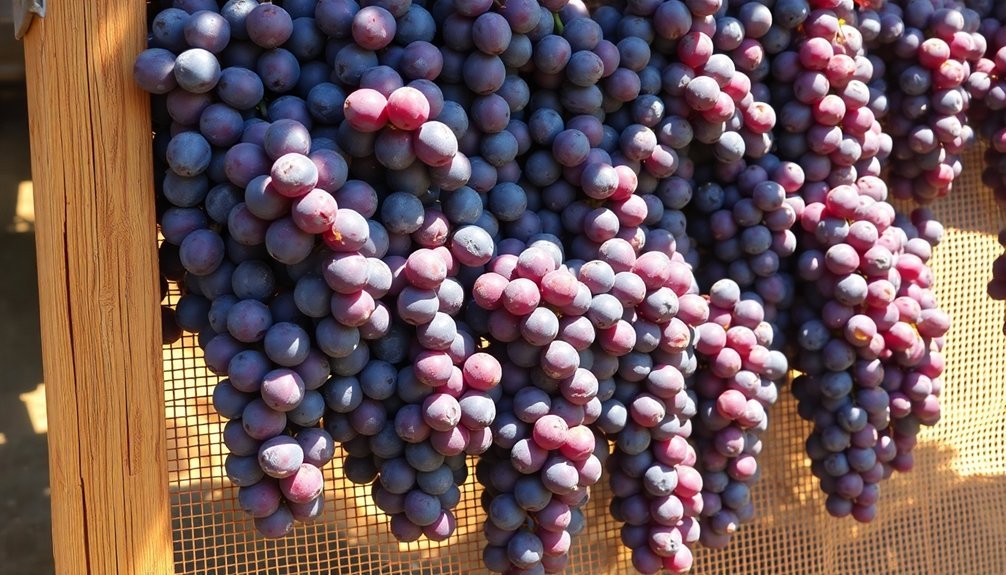
To guarantee successful grape drying, proper setup of your drying location plays an essential role in the final product's quality. Position your drying area in a sunny spot that maintains temperatures above 30°C (86°F), ensuring consistent airflow from west to east.
Set up your drying racks or trays in north-south oriented rows, spacing them 60-150 cm apart. If you're using a drying shed, install 6-12 vertical shelves with 23-45 cm spacing between them. Cover the shelves with polyethylene films, mesh, or jute hessian for ideal results.
Arrange your grapes in single layers on flat surfaces lined with parchment paper, maintaining a density of about 20 kg/m². If you're using wire racks, you'll benefit from better air circulation beneath the fruit. Don't let the grapes touch each other as this can lead to uneven drying.
Protect your drying grapes by covering them with tea towels or fine mesh netting to keep insects and debris away. Install curtains or burlap on sun-facing sides to prevent direct sunlight exposure.
Remember to position your setup on elevated ground, away from obstacles that might block airflow.
Weather and Temperature Monitoring
Maintaining successful grape drying requires close attention to weather conditions and temperature patterns. You'll need hot, dry days with temperatures of at least 85ºF and humidity levels below 60 percent for ideal results.
Keep in mind that direct sunlight can boost temperatures by 30-40 degrees above ambient levels, which helps speed up the drying process.
You'll want to monitor weather forecasts continuously and be ready to protect your drying grapes from adverse conditions. Rain can reverse the drying process, while high humidity and cool temperatures increase the risk of mold.
It's crucial to cover or move your grapes under shelter during nighttime hours to prevent condensation from slowing the process.
When selecting your drying location, consider using both passive and active protection methods. You can implement wind machines or over-vine irrigation systems to combat frost damage.
If weather conditions become unfavorable, be prepared to switch to alternative drying methods like using an oven or food dehydrator.
Regular assessment of your grapevines' health will help you adjust your techniques based on weather-related challenges and guarantee successful drying outcomes.
Protecting Your Drying Grapes
Your drying grapes need strategic shade management to prevent damage from intense sunlight, which you can achieve using side curtains, burlap covers, or gauzy materials.
Position your drying racks in areas that offer natural protection from strong winds while maintaining adequate airflow to prevent moisture buildup.
When setting up your shade structures, make certain they're secured firmly to withstand unexpected gusts while still allowing you to adjust them as the sun's position changes throughout the day.
Shade Management Essentials
Proper shade management stands as an essential factor in successfully drying grapes for raisins. When you're drying grapes, you'll need to carefully control sunlight exposure to prevent sunburn while ensuring ideal ripening conditions.
Using shade cloth helps you maintain temperatures between 30-42°C and humidity levels of 6-20%, which are perfect for the drying process. You'll want to position your shade cloth to create a balanced environment that protects against harmful UV radiation while still allowing enough light for proper sugar development.
This protection doesn't just shield your grapes from sunburn – it also helps preserve better color in your final raisins by avoiding direct sun exposure.
Your shade management strategy should focus on creating a controlled microclimate. By regulating temperature and humidity, you're also preventing fungal diseases and reducing water evaporation from the soil.
Position your shade cloth to promote good air circulation, which helps maintain the right humidity levels and reduces disease risks. If you're in a particularly hot climate, you'll find that proper shade management becomes even more vital during heatwaves, as it helps prevent excessive heat stress on your drying grapes.
Position Against Wind Damage
While shade protection keeps your grapes safe from above, wind presents another challenge that needs strategic defense. You'll need to position your drying grapes strategically to prevent damage from strong gusts that can knock fruit off drying racks or contaminate them with debris.
| Wind Protection Strategy | Implementation Tips |
|---|---|
| Barrier Placement | Set up temporary fabric barriers or fencing on the windward side of drying areas |
| Height Management | Keep drying racks lower to the ground where wind speeds are typically reduced |
| Row Orientation | Align drying racks parallel to prevailing winds to minimize resistance |
| Natural Shields | Use existing structures or vegetation as windbreaks when possible |
| Distance Control | Position racks at least 10 feet from windbreaks to prevent debris accumulation |
When setting up your drying area, you'll want to incorporate both permanent and temporary wind protection measures. If you're using outdoor racks, position them where existing buildings or vegetation can serve as natural windbreaks. Don't forget to monitor weather forecasts during the drying period – you may need to quickly cover or move your grapes indoors if strong winds are predicted. Keep your drying racks oriented parallel to typical wind patterns, as this reduces the surface area exposed to direct gusts.
Testing for Optimal Moisture Levels
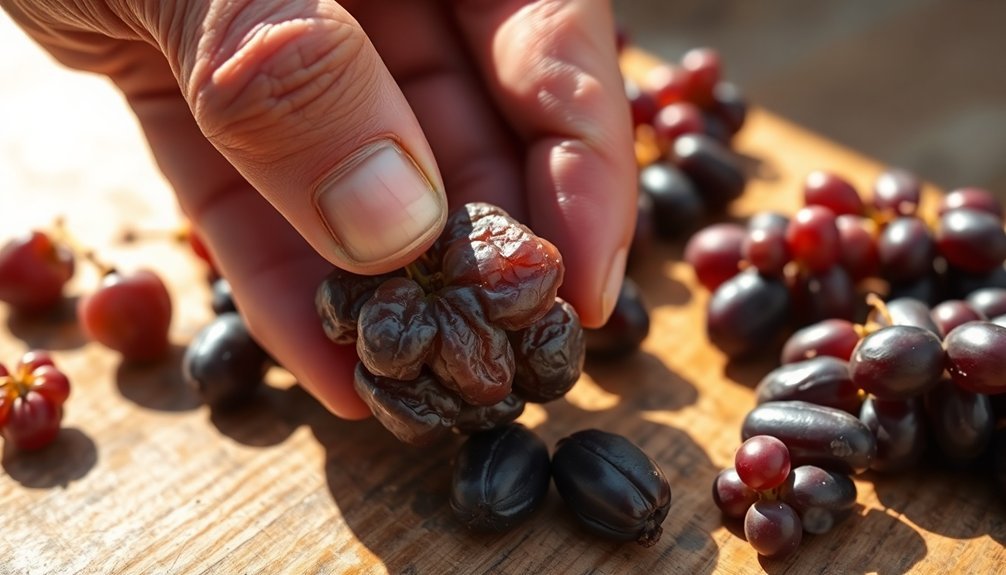
Testing sun-dried grapes for moisture content requires precise methods to confirm ideal quality and storage life. To achieve the best 12-13% moisture content, you'll need to use either traditional oven-drying methods or modern moisture analyzers. While conventional ovens can take up to 18 hours, advanced moisture analyzers can deliver accurate results in just 3-45 minutes.
When testing your sun-dried grapes, you'll need to crush them first to allow internal moisture to evaporate effectively. Set your moisture analyzer to 115°C, distribute the crushed raisins evenly on the sample pan, and start the analysis immediately to prevent ambient conditions from affecting the results. The analyzer will display the moisture percentage, temperature, and weight changes throughout the process.
- Confirm proper sample preparation by crushing the raisins thoroughly and testing them immediately
- Monitor the water activity (Aw) level – it should remain below 0.6 for proper preservation
- Record the moisture analyzer's readings for temperature, weight changes, and final moisture content
For consistent quality, check your samples regularly during the drying process.
Environmental factors like temperature, humidity, and air movement can greatly impact your results, so maintain controlled conditions whenever possible.
Frequently Asked Questions
How Long Can Sun-Dried Grapes Be Stored Before Quality Deteriorates?
You can store sun-dried grapes for 6 months in your pantry, up to 1 year in your refrigerator, or up to 2 years in your freezer. They'll last longest when you keep them sealed airtight.
Can Pesticide-Treated Grapes Be Safely Dried for Consumption?
Yes, you can safely dry pesticide-treated grapes. The drying process markedly reduces pesticide residues by 64-92%, whether you use sun or oven drying. Both methods bring residues well below safe consumption limits.
What Causes White Crystallization on Dried Grapes During Storage?
You'll notice white crystals form on your raisins when sugar concentrates due to moisture loss during storage. High temperatures and low humidity speed up this process as water evaporates, forcing sugars to crystallize.
Are Plastic Drying Trays Safe to Use Instead of Paper?
Yes, you'll find food-grade plastic trays are perfectly safe and superior to paper. They're durable, won't contaminate grapes, and allow better air circulation. Just guarantee you're using food-safe materials without harmful chemicals.
How Do You Prevent Insects From Infesting Grapes During Drying?
You can prevent insect infestations by using malathion-treated trays, covering grapes with organza bags, maintaining proper sanitation, and implementing regular monitoring. Don't forget to steam sanitize your equipment before use.
In Summary
You'll find that sun-dried grapes require patience and attention to detail, but the results are worth the effort. By following these seven timeless tips, you're well-equipped to create perfect raisins from your grape harvest. Remember to monitor weather conditions closely and test moisture levels regularly. Whether you're drying grapes for snacking or cooking, these guidelines will help guarantee your success year after year.


Leave a Reply