To preserve maximum flavor in dried herbs, you'll want to master seven essential methods. Start by air-drying bundles in a well-ventilated space, or use a dehydrator set between 95-115°F for quick results. Try low-temperature oven drying below 200°F with the door slightly open, or opt for quick microwave drying in 30-second bursts. Store your dried herbs in airtight glass containers away from light and heat, and remember to crush them just before use to release essential oils. Label everything with dates and rotate your stock regularly. Follow these techniques, and you'll reveal the full potential of your herb collection.
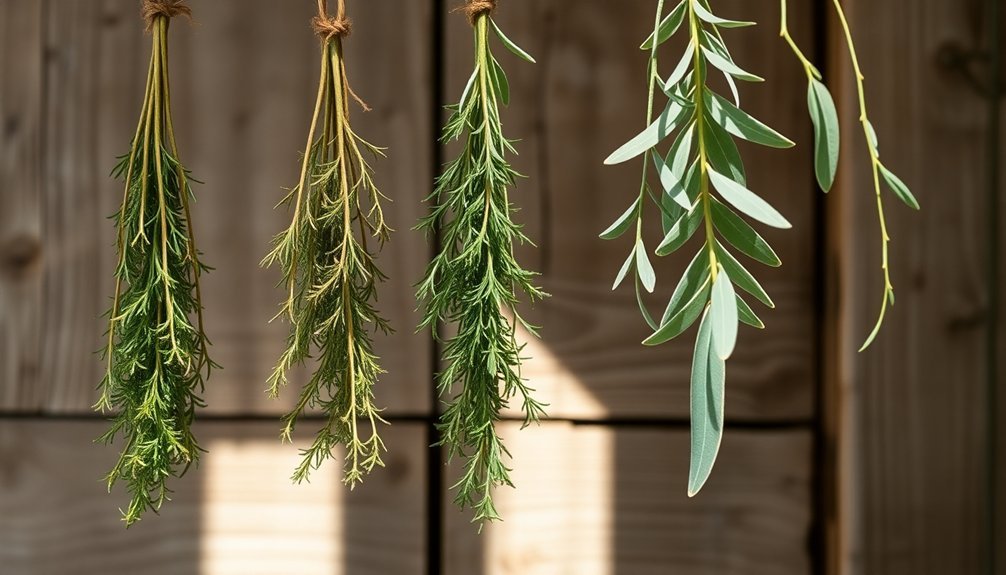
Proper Air-Drying Techniques
Setting up for a successful herb-drying project starts with proper harvesting and preparation techniques.
You'll want to harvest your herbs in the early morning after the dew has dried, as this timing helps preserve their essential oils. Cut the stems just above a leaf node, which encourages future growth, and remove any damaged or yellowed leaves. A salad spinner can help remove excess moisture efficiently.
After gently rinsing your herbs, let them dry on paper towels for a few hours.
Create small bundles about ½ to 1 inch in diameter, securing them with twine or rubber bands. You'll find rubber bands particularly useful as they'll adjust to the stems' shrinkage during drying. Tie the bundles approximately ½ inch from the shortest stem's end, ensuring they're not too tight to restrict airflow.
Select a well-ventilated, dimly lit area for hanging your herbs upside down. You can use your basement, attic, or a dark cupboard.
For delicate herbs with soft petals or leaves, cover the bundles with paper bags that have holes punched in them. In humid environments, you'll need to check your herbs daily to prevent mold formation.
The drying process typically takes 2-4 weeks, and you'll know they're ready when the leaves become brittle and crumble easily.
Low-Temperature Oven Method
While air-drying offers a traditional approach, the low-temperature oven method provides a faster alternative for drying herbs when time is limited.
You'll want to start with fresh, clean herbs that are completely dry to the touch. Remove any damaged leaves and select sprigs with uniform-sized leaves to guarantee even drying. Using herbs like oregano and thyme can yield excellent results within 40 minutes total drying time.
Preheat your oven to its lowest setting, typically between 150-200°F. Spread the herb leaves in a single layer on a parchment-lined baking sheet, making sure they don't overlap.
Place the sheet on the middle rack and keep the oven door slightly ajar to let moisture escape.
You'll need to monitor the process closely, as drying times can vary from 30 minutes to 2 hours. If your oven maintains very low temperatures around 170°F, you can leave it on throughout the process.
For higher temperatures, turn off the oven after preheating and let the herbs dry as it cools. Rotate the baking sheet every 30 minutes for even results. Your herbs are ready when they crumble easily between your fingers with no damp spots.
For long-lasting results, let the herbs cool completely before storing them in airtight containers in a cool, dark place.
Quick Microwave Drying
You'll find microwave drying to be one of the fastest ways to preserve fresh herbs, requiring just basic supplies like paper towels and a microwave-safe plate.
Properly preparing your herbs by cleaning them and removing damaged leaves guarantees the best results for quick drying. The entire process takes about two minutes total when done correctly.
To prevent burning, you'll need to monitor the process closely and microwave in short bursts, adjusting the power level based on your microwave's strength.
Simple Speedy Herb Prep
Microwave drying offers a quick and reliable method for preserving fresh herbs when you're short on time.
Before you begin, you'll need to properly prepare your herbs by removing the leaves from their stems and discarding any wilted or discolored portions. Wash the leaves thoroughly in cool water and pat them completely dry with paper towels.
To set up your microwave station, place a single layer of clean herb leaves on a paper towel-lined microwave-safe plate. Cover the leaves with another folded paper towel, making sure it doesn't hang over the plate's edges.
You'll want to microwave your herbs in 30-second intervals, checking them after each session to verify even drying. If you have a powerful microwave over 1000 watts, reduce the power to 50% to prevent burning. The entire process typically takes 2-3 minutes.
Once your herbs are dried, let them cool completely before transferring them to airtight containers. Label and date each container, and store them in a cool, dry place.
You'll find your dried herbs maintain their best flavor when used within a month of processing.
Prevent Burning While Drying
Success in microwave-drying herbs hinges on preventing burnt, bitter results. You'll need to adjust your microwave's power level based on its wattage – if you're working with a high-powered unit (over 1000 watts), reduce the power to 50%. For delicate herbs, drop the power even lower to 20-30%, while heartier varieties can handle full power.
Layer your herbs carefully to guarantee even drying. Place clean, stemless leaves in a single layer on microwave-safe paper towels, making sure they don't overlap. Cover them with another paper towel to absorb excess moisture during the drying process.
Work in 30-second intervals, checking your herbs between each burst. They're ready when they've shrunk slightly and crumble easily when bent. If they're still flexible, continue microwaving in short bursts while monitoring closely – paper towels can ignite if there aren't enough herbs present.
Once dried, let your herbs cool completely before transferring them to small, airtight containers. Label and date each container, and plan to use your dried herbs within a month for best flavor and aroma.
Store them at room temperature to maintain their quality.
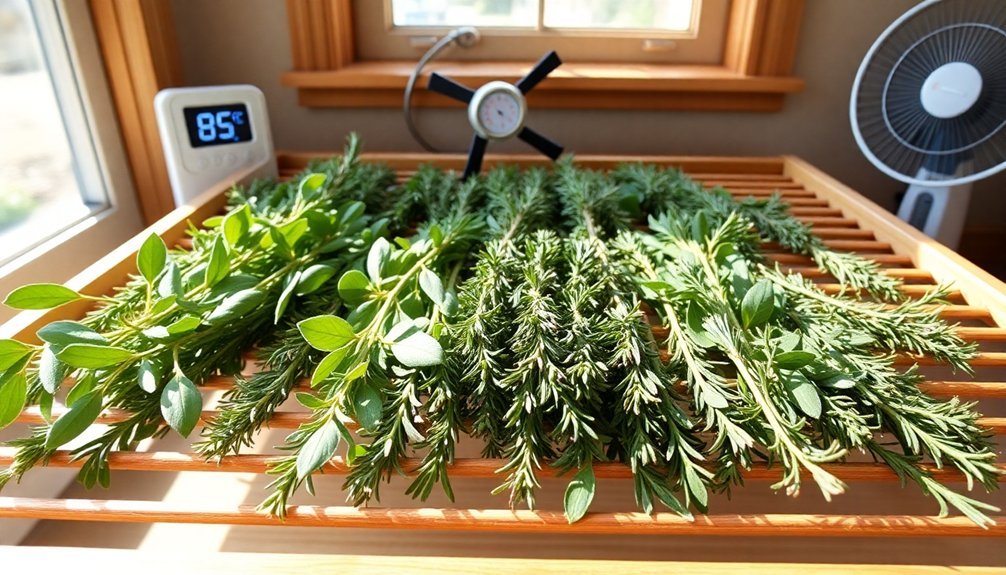
Dehydrator Settings for Herbs
Precise temperature control stands at the heart of successfully drying herbs in a dehydrator. You'll want to set your dehydrator between 95°F and 115°F for best results, though you might need to increase it to 125°F if you live in a high-humidity area.
Lower temperatures will help preserve your herbs' color, aroma, and medicinal properties, so don't be tempted to rush the process with higher heat.
Before placing herbs in your dehydrator, rinse them under cool water and gently blot them dry. Arrange them in a single layer on your trays, keeping small leaves on their stems while removing larger leaves from thick stems.
For tiny herbs, you'll find silicone mats helpful in preventing them from falling through the trays.
Organize your trays strategically by placing harder-to-dry herbs on the bottom levels and faster-drying ones on top. This arrangement makes it easier to remove herbs as they finish drying.
You'll know your herbs are ready when they crumble easily and their stems snap when bent. Most herbs will take between 1 and 4 hours to dry completely, so check them periodically for ideal results.
Herb Storage Solutions
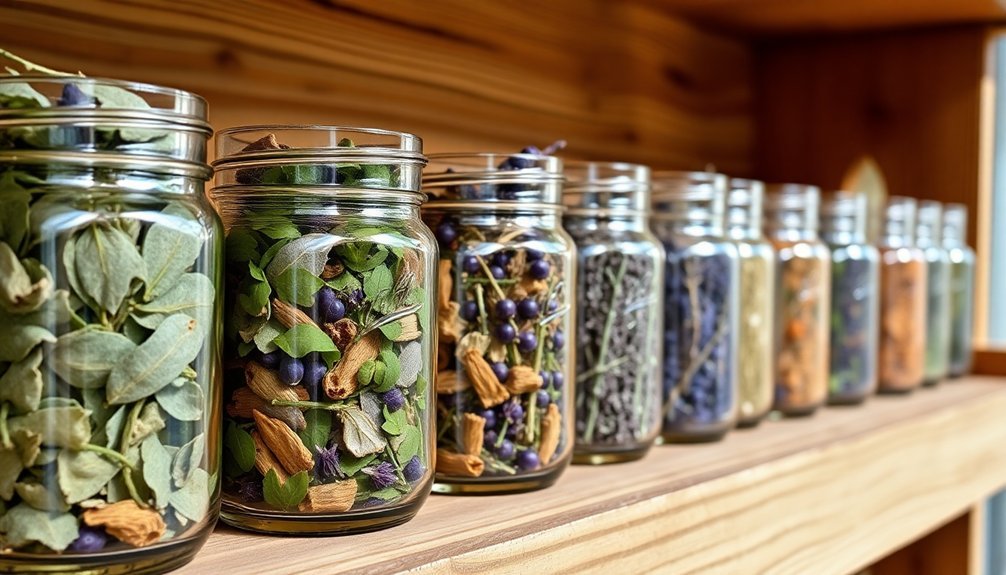
To keep your dried herbs packed with flavor, start by storing them in pristine airtight containers that'll protect against moisture and air exposure.
You'll want to place these containers in a cool, dark spot away from direct sunlight and heat sources, as both light and warmth can quickly degrade your herbs' essential oils.
Set up a rotation system by labeling your containers with dates and using older herbs first, ensuring you're always cooking with the freshest dried herbs possible.
Airtight Container Best Practices
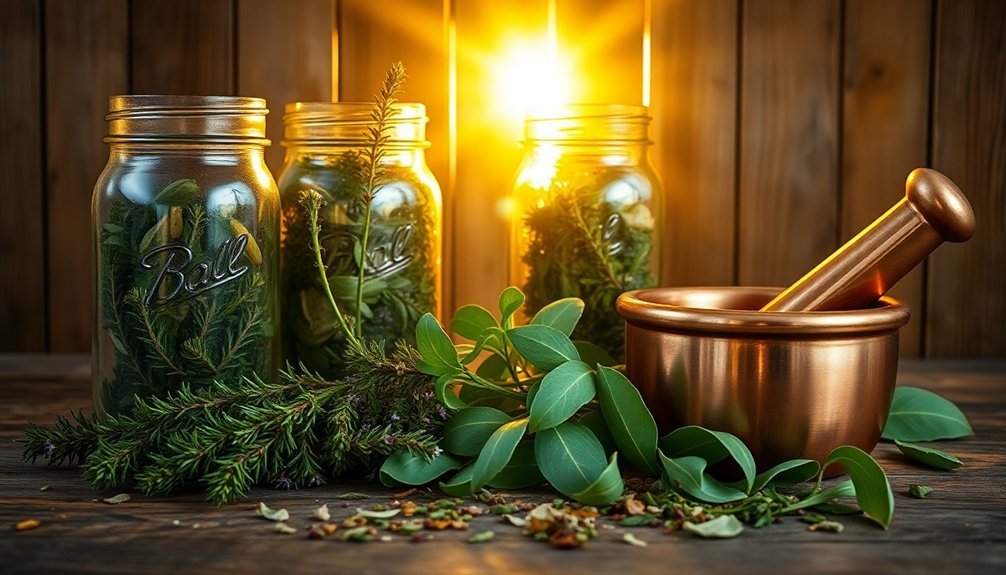
Preserving the vibrant flavors of dried herbs hinges on proper container selection and storage methods. You'll want to choose airtight containers that protect against moisture, light, and air exposure. Glass containers, particularly mason jars and infinity jars, offer superior protection while preventing unwanted chemical interactions.
| Container Type | Key Benefits | Best Uses |
|---|---|---|
| Mason Jars | Airtight seal, versatile | Large batch storage |
| Glass Jars | Non-reactive, clear visibility | Daily use herbs |
| Doob Tubes | Portable, water-resistant | Travel portions |
| Infinity Glass | Light blocking, airtight | Long-term storage |
| Vacuum-Sealed | Maximum freshness | Bulk preservation |
Keep your herbs in a cool, dark place like a pantry or spice cabinet. Don't store them near heat sources or in direct sunlight. You'll need to check your containers regularly for moisture buildup and guarantee the seals remain tight. When handling your herbs, minimize exposure to air by quickly opening and closing containers. For maximum longevity, consider freezer storage in airtight containers, but be sure to protect against freezer burn. Label each container with contents and dates to track freshness and maintain proper rotation.
Temperature and Light Control
Maintaining proper temperature and light control dramatically affects the longevity and quality of your dried herbs. Store your herbs in a cool environment around 20°C (68°F), away from heat sources like stoves and microwaves.
While refrigeration can maintain freshness, it's best avoided due to condensation issues and high moisture levels.
For ideal drying, set your dehydrator between 95-115°F (35-43°C), increasing to 125°F in humid conditions. Guarantee good air circulation between trays and follow your dehydrator's specific guidelines.
Keep the storage environment's relative humidity between 40-60% to prevent moisture absorption and mold growth.
Protect your herbs from direct sunlight, which breaks down essential oils and reduces potency. Choose dark or opaque containers made of ceramic, aluminum, or stainless steel.
If you're using glass jars, opt for dark brown ones or store clear containers in a dark cupboard. When measuring herbs, use dry utensils and minimize container opening time to reduce light exposure.
With consistent temperature and proper light protection, your dried herbs can maintain their flavor for up to a year.
Rotation for Maximum Freshness
A smart rotation system serves as the backbone of effective herb storage. When you're storing dried herbs, it's essential to implement a "first in, first out" approach, ensuring you'll use older herbs before they lose their potency.
Start by labeling each container with both the herb type and storage date, making it easy to track their shelf life.
You'll want to divide your herbs into two storage categories: bulk storage and daily use. Keep your larger quantities in airtight containers in a dedicated storage area, while maintaining smaller portions in everyday containers for regular cooking. This two-tier system helps preserve the freshness of your bulk supply while making daily access convenient.
Don't forget to inspect your stored herbs regularly for any signs of degradation. Most dried herbs maintain their quality for 1-3 years, but you'll need to replace them once they've lost their vibrant color or distinctive aroma.
When transferring herbs between containers, always use dry utensils to prevent moisture contamination. By maintaining this systematic rotation approach and proper handling techniques, you'll maximize the flavor and longevity of your dried herbs while minimizing waste.
Releasing Maximum Herb Flavors
To access the full potential of dried herbs, you'll need to master several key techniques for releasing their essential oils and flavors. Start by crushing or rubbing the herbs between your palms, which breaks down their cell walls and awakens dormant flavors.
For woody herbs like rosemary, use a mortar and pestle to grind them into smaller pieces, maximizing their flavor impact.
Timing plays a vital role in flavor release. Add your dried herbs at least 20 minutes before finishing cooking, especially in liquid-based dishes like soups and stews. This gives them enough time to properly rehydrate and infuse their flavors throughout the dish.
You'll get better results by using oil or butter to help distribute the herbs' essential oils, rather than soaking them in hot water, which can wash away their volatile compounds.
For the most complex flavor profiles, combine both fresh and dried herbs in your cooking. You can also incorporate dried herbs into rubs or compound butters to guarantee even distribution.
Before using any dried herbs, give them a quick smell test – if they've lost their aroma, you'll need to use more or replace them entirely.
Temperature Control During Drying
While mastering flavor release techniques sets a strong foundation, proper temperature control during the drying process will determine your herbs' ultimate quality. You'll need to maintain temperatures below 100°F to preserve the essential oils and flavors that make your dried herbs worth the effort.
| Method | Temperature Range | Drying Time |
|---|---|---|
| Dehydrator | 95°F – 115°F | 1-4 hours |
| Oven Drying | Below 100°F | 2-4 hours |
| Air Drying | Room temp | 2 weeks |
| Humid Climate | Up to 125°F | 2-6 hours |
| Indoor Shade | 65°F – 75°F | 1-2 weeks |
For dehydrator use, arrange herbs in a single layer and set your thermostat between 95°F and 115°F. If you're using your oven, keep it at its lowest setting and prop the door open slightly to prevent moisture buildup. You'll want to check frequently to avoid overcooking.
Air drying offers the gentlest approach but requires patience. Place your herbs in a well-ventilated, dimly lit area away from direct sunlight. Bundle them loosely to guarantee proper airflow, and you'll have perfectly dried herbs in about two weeks. Remember, higher temperatures might speed up the process, but they'll sacrifice the quality you're working to preserve.
Frequently Asked Questions
Can I Dry Different Types of Herbs Together at the Same Time?
Yes, you can dry different herbs together since flavors don't transfer during drying. Just monitor them closely, as some herbs dry faster than others, and be sure to label them afterward to avoid confusion.
How Do I Know if Mold Has Started Growing on Drying Herbs?
You'll spot mold through visual signs like powdery growth or dark spots, unusual musty smells, and changes in texture. If your herbs feel soft instead of crisp, or have a peppery odor, they're likely moldy.
Which Herbs Retain the Most Flavor After Drying?
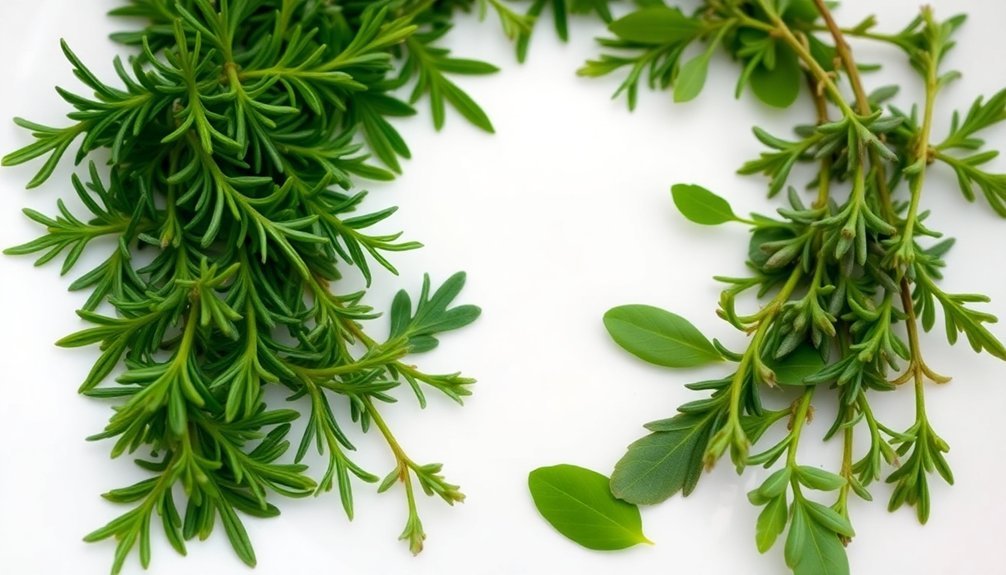
You'll get the best flavor retention from resinous herbs like oregano, thyme, sage, and rosemary. Their high volatile oil content helps them maintain strong flavors even after drying, unlike delicate herbs.
Should I Wash Herbs Before Drying Them?
You'll want to assess your herbs' condition first. If they're from your organic garden and clean, skip washing. If they're store-bought or dirty, wash them gently but guarantee they're completely dry before processing.
Can Dried Herbs Be Used in Place of Fresh in Any Recipe?
While you can substitute dried herbs for fresh ones, they're not ideal for all recipes. They work best in cooked dishes but aren't great for garnishes, salads, or recipes where fresh herbs' brightness is essential.
In Summary
You'll get the most flavorful dried herbs by carefully controlling temperature and using proper storage methods. Whether you're air-drying, using a dehydrator, or opting for quick microwave techniques, remember that low and slow is the key. Store your dried herbs in airtight containers away from light and heat, and crush them just before use to release their maximum flavors. You'll enjoy garden-fresh taste year-round.


Leave a Reply