Traditional fish smoking doesn't require curing, but you'll need proper equipment and technique for success. Start with a quality food smoker that has reliable temperature controls and a meat thermometer. Clean your fish thoroughly, removing all organs and bloodline, then pat it dry. For hot smoking, maintain temperatures between 150-170°F until the fish reaches an internal temperature of 160°F, typically taking 6-8 hours. You'll want to monitor the process carefully to avoid the bacterial danger zone of 100-130°F. The smoking process creates a protective coating while enhancing flavor, but there's much more to mastering this ancient preservation method.
Understanding Smokeless Salt Preservation
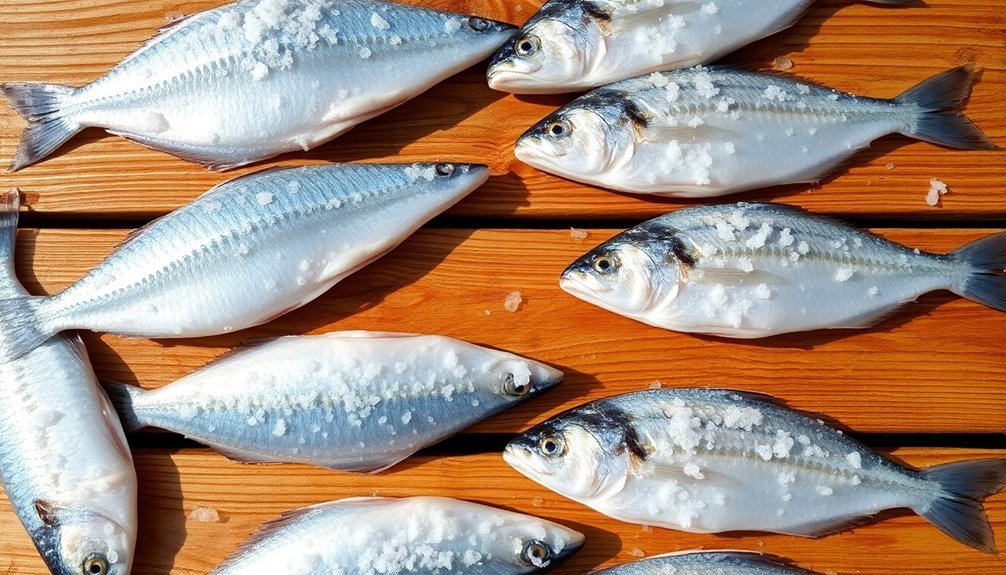
Salt preservation stands as one of humanity's oldest and most reliable methods for keeping fish fresh. When you're looking to preserve fish without smoking, understanding how salt works is essential to your success. The process relies on salt's ability to draw moisture from fish tissue, creating an environment where harmful bacteria can't thrive.
You'll find that salt does more than just preserve – it transforms your fish's texture and enhances its flavor by penetrating the flesh and altering protein structures. Whether you're working with fatty fish or lean varieties like salmon and herring, you'll need to take into account their unique characteristics when applying salt. Using a combination of coarse and fine salt can help achieve optimal results by preventing salt burn while maintaining effective preservation.
You've got two main approaches to choose from: dry salting or brining. A typical brine solution uses 8-12% salt concentration (about one-and-a-half cups of salt per gallon of water), while dry salting involves coating fillets with a salt mixture and layering them in a container.
For best results, you'll want to use high-quality, food-grade salt that's low in minerals like calcium and magnesium. Remember that uniform salt distribution is key – factors like fish size and species will affect how long you'll need to cure your catch.
Benefits of Direct Smoke Methods
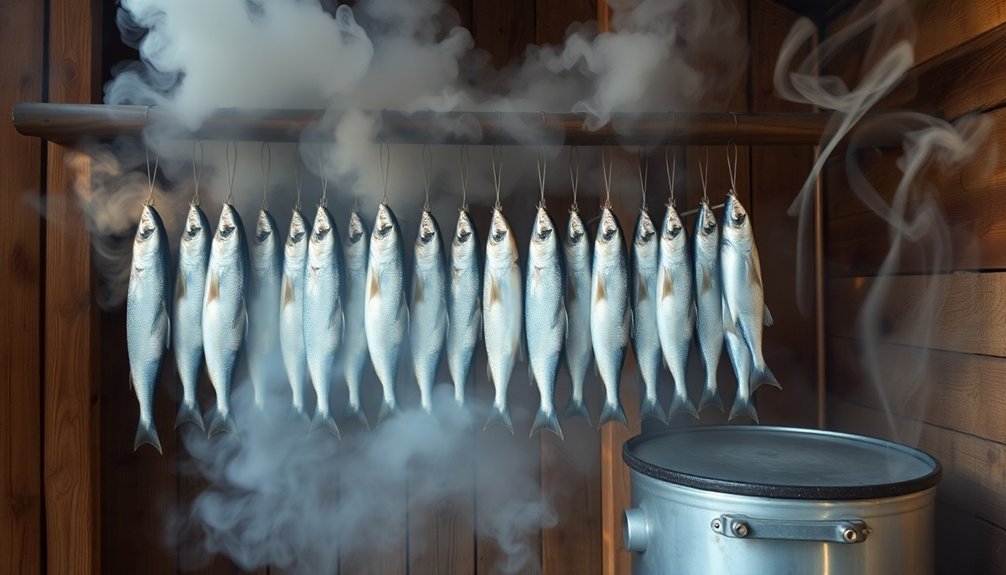
While salt preservation offers reliable results, direct smoke methods bring an impressive array of benefits to your fish preservation toolkit. When you smoke fish, you're not just preserving it – you're creating a protective acidic coating that prevents oxidation and inhibits bacterial growth. Traditional smokehouses were vital for preserving entire communities' fish supplies.
The smoke's phenolic compounds work to inactivate harmful bacteria while simultaneously infusing your fish with distinct flavors and appetizing colors.
You'll find that smoking effectively dehydrates your fish, making it inhospitable for bacteria while extending its shelf life. If you choose hot smoking (175-200°F), you'll eliminate dangerous Clostridium botulinum spores and other pathogens, resulting in a product that's about 70-75% of its original weight.
Cold smoking (below 90°F) preserves the texture better, allowing you to slice the fish thinly, but you'll need professional expertise due to safety concerns at lower temperatures.
Both methods require careful control of humidity and airflow for proper moisture removal.
Whether you opt for traditional wood smoke or liquid smoke alternatives, you're getting multiple preservation benefits: moisture reduction, bacterial inhibition, and antioxidant protection – all while developing complex, smoky flavors in your fish.
Choosing Your Smoking Wood
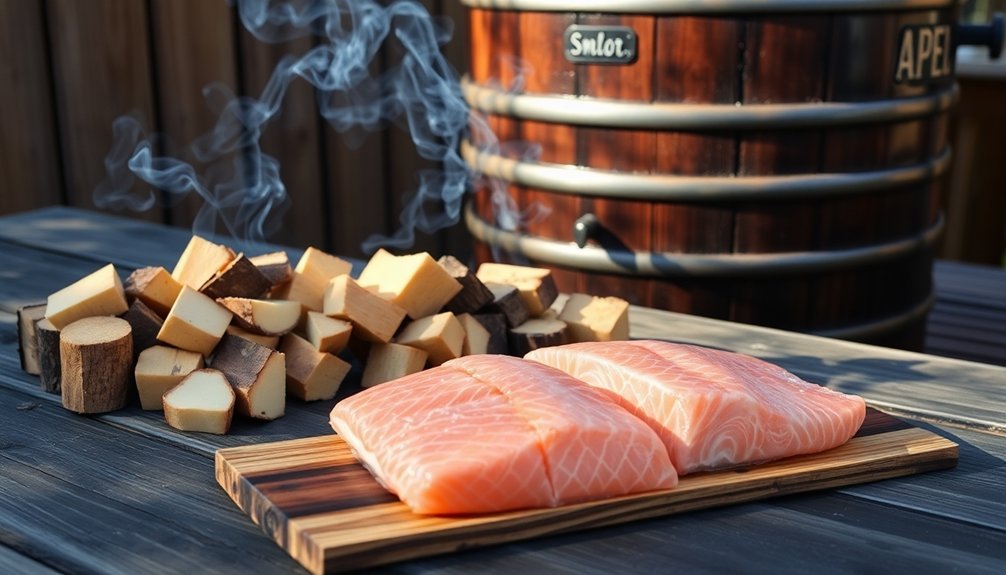
Wood selection makes or breaks your smoked fish experience. You'll need to match the wood type to your fish species and desired flavor intensity.
For orange fish like salmon and trout, stick with milder woods such as alder or apple, which won't overpower their delicate flavors. These woods burn slowly and evenly, producing a light smoke that enhances rather than masks the fish's natural taste. Cedar planks are especially effective as they contain low resin content, ensuring a clean burn without harsh aftertaste.
If you're smoking grey or blue fish like tuna or yellowtail, you can opt for stronger woods like hickory or mesquite. However, use these sparingly to avoid overwhelming the fish.
For consistently good results, choose hardwoods over softwoods – never use fir, spruce, or pine, as they'll leave an unpleasant taste.
While cedar is popular in some circles, it's controversial and not recommended for all smoking methods. Instead, consider reliable options like maple, which offers a mild, versatile smoke suitable for most fish.
Remember to maintain proper temperature above 140°F and guarantee good airflow while smoking. Your choice of wood directly impacts food safety and flavor, so select carefully based on your specific fish and smoking method.
Essential Equipment and Setup
Now that you've selected the right wood, let's focus on getting your smoking station properly equipped.
You'll need a quality food smoker with advanced temperature controls and a reliable meat thermometer to monitor your fish's internal temperature.
Don't forget to set up a clean, sanitary work area with proper cutting boards and knives for fish preparation.
For the brining process, gather a large bowl, plastic wrap, and a refrigerator-safe container.
You'll also need a rack and rimmed baking sheet for drying and resting the fish.
Keep paper towels handy for patting the fish dry after brining and rinsing.
A dedicated water pan in your smoker will help maintain proper humidity and temperature.
Your setup should include some finishing touches: olive oil to prevent sticking, fresh herbs for garnishing, and honey or maple syrup for basting.
Make sure you've got storage containers ready for the finished product.
Remember to maintain clean, sanitized surfaces throughout the process.
It's worth investing in a cooling rack specifically for developing the pellicle, which is essential for proper smoke adherence.
Temperature Control Fundamentals

Mastering temperature control is essential for successful fish smoking, whether you're hot-smoking or cold-smoking your catch.
For hot-smoking, you'll need to maintain ambient temperatures between 150-170°F, ensuring the internal temperature of your fish reaches at least 160°F for 30 minutes. Cold-smoking requires lower temperatures, ranging from 60-80°F.
You'll want to use a standard meat thermometer to check the internal temperature of the largest piece of fish, and a long-stemmed dial thermometer to monitor the smoker's temperature without opening the door.
Set your alarms at 140°F (low) and 160°F (high) to stay within safe ranges. It's vital to avoid the danger zone of 100-130°F where bacteria thrive.
Remember that smoke alone won't preserve your fish – proper heat and salt are essential. You'll need to complete the smoking cycle within 6-8 hours to prevent spoilage.
If your smoker can't reach 200-225°F, you can finish cooking the fish in your kitchen oven. Once smoked, store your fish in the refrigerator to maintain food safety and prevent bacterial growth.
Preparing Fish for Smoking
Before you smoke your fish, you'll need to thoroughly clean and scale it, removing any debris or loose scales that could affect the final product.
Make sure to rinse the cleaned fish under cold water and check for any remaining scales or blood spots that might impact the smoking process.
Once cleaned, you'll want to pat the fish completely dry with paper towels, as excess moisture can prevent proper smoke absorption and pellicle formation.
Clean and Scale First
Proper preparation of your fish is essential for achieving the best smoking results.
Begin by laying newspaper under your cutting board and scaling the fish with a scaler or butter knife, working from tail to head in short, back-and-forth motions. You'll need to do both sides thoroughly, except for mackerel, which doesn't require scaling.
To gut the fish, make a shallow cut along the belly from the tail to the head, being careful not to pierce the innards. Remove all internal organs and discard them.
Next, spread the fish's body open and scrape out the bloodline if present. Cut off all fins and rinse the cavity under running water.
Different fish require specific approaches. For trout, you'll want to remove the bill, tail, fins, and head before gutting.
When cleaning mackerel, pay special attention to washing the skin and removing the bloodline. For all fish types, verify you've removed all slime, blood, and potential bacteria.
Once cleaned, you can fillet or split the fish, maintaining uniform pieces to guarantee even smoking results. Keep the skin on the fillets for better smoking.
Dry Fish Before Smoking
The drying process stands as a vital step between cleaning and smoking your fish. After you've salted or brined your catch, you'll need to rinse it thoroughly with cold water to remove excess salt and debris. Pat the fish dry with a kitchen towel, then place it on drying racks where air can circulate freely.
You'll want to make sure your fish develops a pellicle – a shiny, tacky surface that's essential for proper smoke absorption. For faster drying, use a fan in a cool, shaded area or place the fish in your refrigerator. If you're working with lean fish, consider applying a light coat of grapeseed oil to enhance smoke adhesion.
| Step | Do's | Don'ts |
|---|---|---|
| Rinsing | Use cold water thoroughly | Use warm water |
| Surface Prep | Pat dry with towel | Leave water droplets |
| Environment | Keep cool and ventilated | Dry in warm spaces |
| Time | Allow complete drying | Rush the process |
| Testing | Check for tacky surface | Smoke while wet |
Remember to maintain uniform piece sizes for consistent results, and don't rush this stage – proper drying prevents surface spoilage and guarantees even smoke distribution during the smoking process.
Traditional Smoking Time Guidelines
If you're planning to hot-smoke your fish, you'll need about 2 hours of smoking at 90°F, followed by increased heat to reach an internal temperature of 150-160°F for safety.
Your total smoking duration will vary based on the size and thickness of your fish pieces, with larger cuts requiring longer exposure to reach the target internal temperature.
For best results, you'll want to maintain ambient temperatures between 150-170°F throughout the main cooking phase, using your meat thermometer to monitor progress in the thickest section.
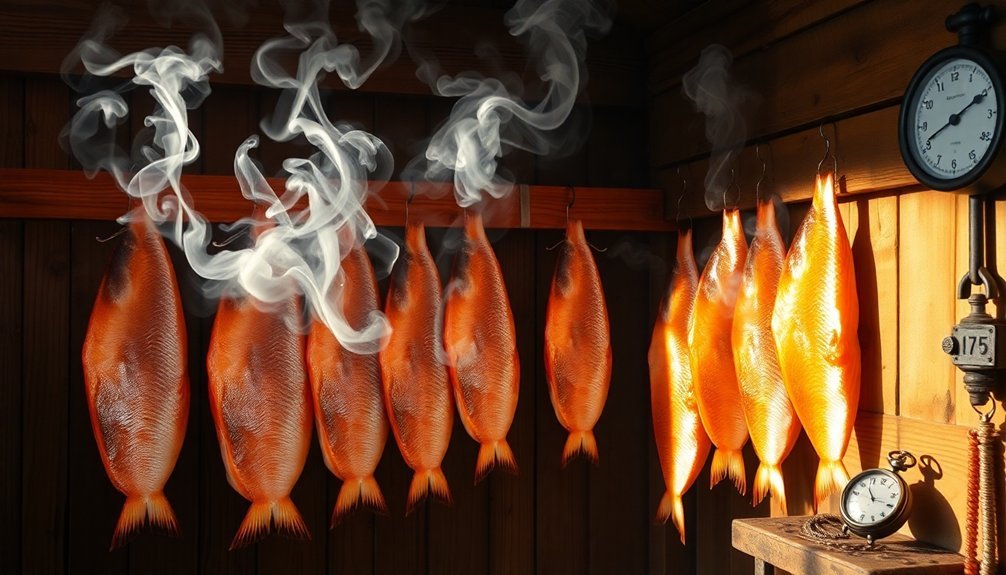
Hot Vs Cold Duration
Understanding smoking duration is essential when deciding between hot and cold smoking methods for your fish. Hot smoking is a relatively quick process, taking 6 to 8 hours to complete, while cold smoking requires considerably more time, ranging from 12 hours to several days.
When you're hot smoking, you'll need to maintain an internal temperature of 160°F for at least 30 minutes to guarantee food safety. Before starting, plan for 30 minutes to 3 hours of drying time to form a pellicle. If your smoker can't reach the required temperature, you can finish the process in your oven at 300°F for 30 minutes.
Cold smoking demands more patience and careful monitoring. You'll need to control humidity levels, starting at 90% and gradually reducing to 70%. The extended duration allows for better smoke absorption while keeping temperatures below 90°F.
Remember that cold-smoked fish requires freezing first to eliminate parasites if you won't be cooking it later.
Your timing will vary based on factors like fish species, equipment setup, and batch size. Both methods require immediate refrigeration after completion, though cold-smoked fish typically offers a longer shelf life than its hot-smoked counterpart.
Temperature Impact on Time
Maintaining precise temperatures during fish smoking directly influences your processing time and final product quality.
When you're cold smoking fish, you'll need to maintain temperatures between 60-80°F (16-27°C) for extended periods of 6-12 hours. These lower temperatures require longer processing times to achieve the desired flavor while keeping the fish in its raw state.
For hot smoking, you'll need to carefully monitor both the smoker's ambient temperature and the fish's internal temperature. You should aim for an internal temperature of 120-135°F (49-57°C) for peak quality, but verify it reaches at least 150°F (66°C) for safety.
Don't exceed 70°C, as this will damage the protein structure and dry out your fish. Your smoking time will vary based on the temperature you maintain.
Using a long-stemmed thermometer, you'll need to check the thickest part of the fish regularly. Remember that cold smoking requires immediate refrigeration after processing due to food safety concerns, while hot smoking effectively cooks the fish.
You'll also need to adjust your timing based on your smoker's ventilation and heat source control to maintain consistent temperatures throughout the process.
Storage and Shelf Life
Proper storage techniques transform your freshly smoked fish from a temporary delicacy into a long-lasting treasure.
You'll need to act quickly after smoking to guarantee the best preservation results, never leaving your fish at room temperature.
For refrigerator storage, keep your smoked fish at or below 37°F (3°C). Wrap it in paper towels or cloth to manage condensation, and place it in an airtight container.
If you've hot-smoked your fish, cool it to 50°F within three hours and to 37°F within 12 hours. You can expect lightly salted and smoked products to last 10-14 days in the fridge.
For longer storage, freezing's your best bet. Wrap your fish tightly in plastic wrap or aluminum foil, or use a vacuum sealer.
You'll get up to six months of storage life in the freezer, though smoked salmon's best used within 2-3 months. Remember, freezing's essential for cold-smoked fish to eliminate parasites.
If you're planning for extended storage, consider pressure canning. Pack your fish vertically in jars with 1-inch headspace, and process them properly to destroy harmful bacteria.
Store your canned fish away from sunlight and check the seals within 24 hours.
Frequently Asked Questions
Can Pregnant Women Safely Eat Traditionally Smoked Fish?
You shouldn't eat traditionally smoked fish while pregnant unless it's thoroughly heated until steaming hot. The risk of Listeria infection is too high, and it can cause serious complications for you and your baby.
How Do Different Fish Species Affect the Color of Smoked Products?
You'll notice different fish species naturally produce varying colors when smoked. Salmon turns golden-orange, haddock becomes pale yellow, and pollack develops a yellow-brown hue. Larger fish often show more intense coloring.
Why Does Smoked Fish Sometimes Develop a White Surface Residue?
You'll notice white residue on smoked fish because heat causes muscle proteins (albumin) to squeeze out and coagulate on the surface. It's completely safe, though you can minimize it by brining beforehand.
Does Smoking Fish Affect Its Omega-3 Fatty Acid Content?
You don't need to worry about losing omega-3s when smoking fish. The smoking process retains most of these essential fatty acids, whether you're using cold or hot smoking methods. They'll stay nutritionally valuable.
Can Traditionally Smoked Fish Be Used in Raw Fish Recipes?
You shouldn't use traditionally smoked fish in raw recipes unless it's hot-smoked. Cold-smoked fish isn't fully cooked and carries foodborne illness risks. Stick to hot-smoked fish for uncooked dishes, following proper storage guidelines.
In Summary
You've learned the core techniques for preserving fish through traditional smoking methods without relying on curing. With proper wood selection, temperature control, and careful preparation, you'll be able to create delicious smoked fish that lasts longer than fresh catches. Remember to store your finished product correctly and monitor for quality. Whether you're preserving the day's catch or preparing for winter, you're now equipped with this time-tested preservation skill.


Leave a Reply