
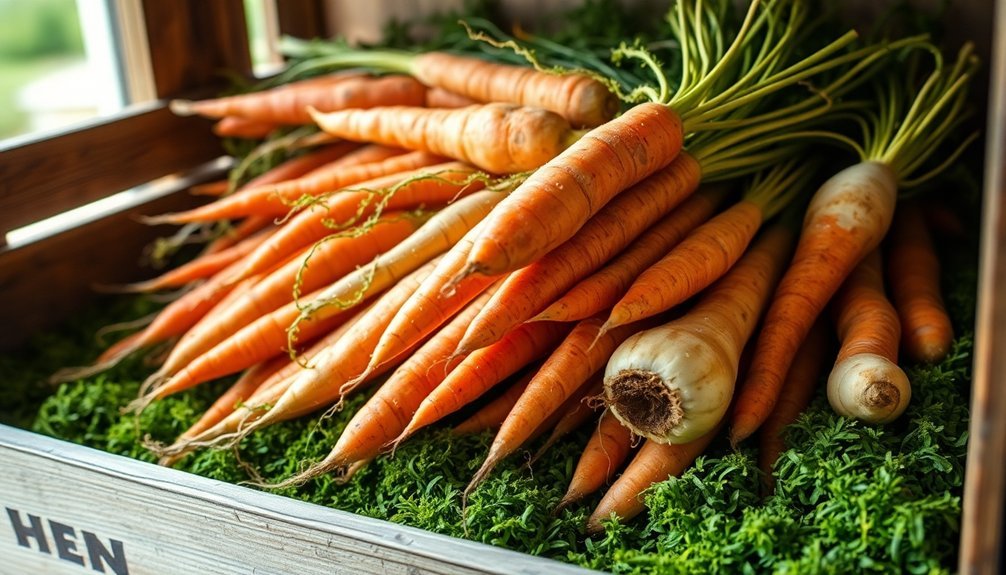
You'll find several time-tested methods to store your root vegetables through winter. Build a traditional root cellar, create a garden clamp with straw and soil layers, or dig an underground storage pit lined with insulation. Try sand storage in bins, stack protective hay bales, or use moss bedding techniques for moisture control. Convert your basement into a temperature-controlled space, set up ventilated storage boxes, or design a natural cold room. You can even combine methods, like using sand storage within a root cellar. These proven techniques will help you master the art of long-term vegetable preservation.
Root Cellar Construction Basics
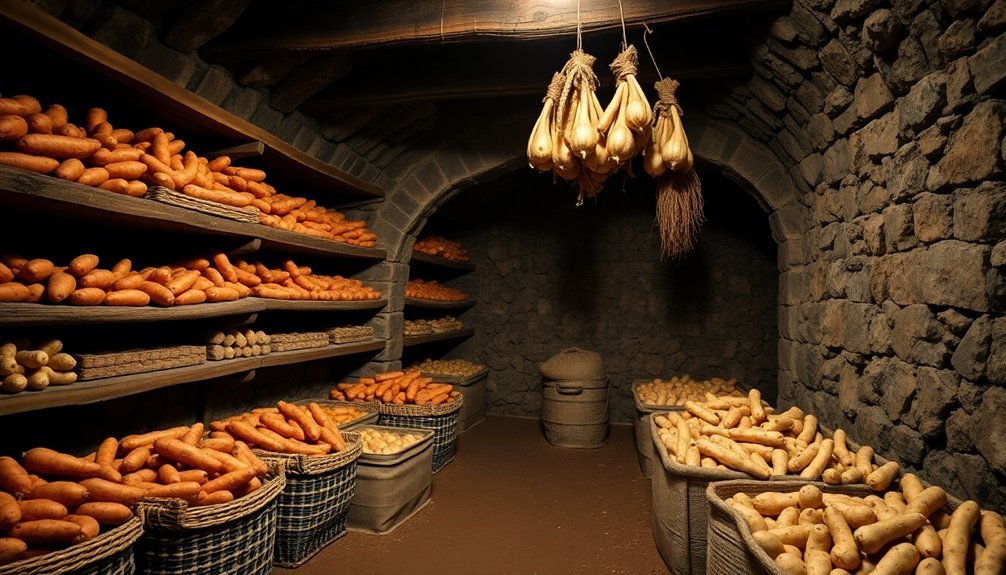
Setting up a root cellar starts with proper site preparation and a solid foundation. You'll need to dig into a hillside or ground, ensuring the footer sits below the frost line. Make the hole just large enough for your planned storage space, plus an extra 2-3 feet around the door area for better cold protection. Don't forget to add gravel around the footer base. A dirt floor configuration will help maintain optimal humidity levels for your stored produce.
For the foundation, you'll pour a concrete footer – 16 inches wide for block walls or 8 inches for poured concrete. Include reinforcing rods for strength, particularly near the door. After letting the footer cure for 3-7 days, construct your walls using concrete blocks or similar moisture-resistant materials. Remember to include openings for vents and a standard door.
The walls and roof need proper insulation using foam plastic or urethane sheets, covered with 2-4 feet of earth. Install your ventilation system with low intake vents and high outlet vents for effective air circulation. You'll want to seal these vents during winter but keep them open in summer.
Finally, backfill around the cellar, adding a perforated drainpipe on a gravel bed to prevent water accumulation.
Clamp Storage In Your Garden
Building your first garden clamp starts with selecting a well-drained area and laying down a thick base layer of straw about 15-20cm deep.
You'll need plenty of clean straw or hay for insulation, along with enough soil to create a protective 15cm outer layer that shields your root vegetables from the elements. A ventilation chimney at the top helps regulate temperature and prevent spoilage.
Creating an effective clamp requires careful attention to the layering process: vegetables go in the middle (largest ones at the bottom), with straw surrounding them and soil as the final covering.
Building Your First Clamp
In your garden, a well-built clamp provides an effective traditional storage solution for root vegetables. Before you begin construction, select a level area with good drainage, and consider digging a protective ditch around your planned storage site. Similar to organizing workshop clamps in utility tubs for mobility, you can create temporary access points in your garden clamp for easy vegetable retrieval.
To build your first clamp successfully, follow these essential steps:
- Lay down a 15-20cm thick straw base in a circular pattern, roughly 1.5m wide, adding a sand layer underneath if your soil's drainage is poor.
- Stack your cleaned, trimmed vegetables in a stable mound no higher than one meter, placing larger items at the bottom.
- Add alternating layers of straw between vegetable layers, maintaining consistent insulation throughout.
- Cover the entire mound with 15-20cm of straw, followed by 15cm of soil, patted down for water runoff.
Don't forget to create a ventilation "chimney" at the top using a protruding straw bundle to release excess heat.
When retrieving vegetables, seal the clamp properly afterward to maintain the storage environment.
For larger harvests, create additional clamps or extend the length while keeping the width at 5ft for maximum efficiency.
Natural Insulation Materials Needed
Three natural materials form the foundation of effective clamp storage: straw, dry leaves, and untreated wood shavings. Each of these materials plays a crucial role in protecting your root vegetables from frost damage and maintaining consistent temperature levels throughout the winter months.
You'll want to gather plenty of straw, which serves as your primary insulator. It's particularly effective at creating air pockets that regulate temperature and prevent frost from reaching your vegetables.
Dry leaves work similarly to straw and can be used either as an alternative or in combination with it. When you're collecting wood shavings, make certain they're untreated to avoid introducing harmful chemicals to your stored vegetables.
Don't forget to add soil as your final protective layer. You'll need enough to create a thick covering that shields your clamp from extreme temperature fluctuations.
As you layer these materials, verify they're completely dry to prevent unwanted moisture buildup. If you're working in an area prone to heavy rainfall, you'll need to pay extra attention to drainage and might want to add more straw at the base of your clamp for improved moisture control.
Underground Storage Pit Methods
You'll find that a properly constructed underground storage pit begins with a hole 1-2 meters deep, lined with insulating materials like straw or leaves.
To maximize protection for your root vegetables, layer them carefully without touching, then cover with successive layers of straw, leaves, and 25-50cm of soil.
Your vegetables will stay fresh longer when you maintain consistent cool temperatures by monitoring the pit regularly and adjusting ventilation as needed.
Simple Pit Design Basics
Building a successful root vegetable storage pit begins with four essential design components: proper site selection, correct dimensions, adequate insulation, and effective ventilation.
For ideal performance, you'll want to choose a well-draining, slightly elevated location that's free from groundwater issues. Mark your chosen spot with stakes so you can easily find it under snow. When digging, create a pit that's 6 to 10 inches deep and 18 to 24 inches wide, with flared sides to prevent cave-ins.
- Prepare the foundation by lining the bottom and sides with straw or dried leaves.
- Layer your vegetables carefully, avoiding bruising or damage.
- Cover with additional straw or leaves, followed by a soil layer.
- Install ventilation tunnels using straw for moisture control.
You'll need to establish proper airflow by creating horizontal straw tunnels at ground level and vertical chimneys that extend upward. Cover these ventilation points with flat rocks or boards to protect from rain while maintaining air circulation.
For added protection, consider using a wooden lid or waterproof tarp over the entire pit. Remember to check your stored vegetables periodically and carefully reseal the pit after harvesting.
Layering For Maximum Protection
Proper layering techniques inside your storage pit can mean the difference between preserved vegetables and spoiled ones. You'll need to create distinct layers using materials like sand, straw, or leaves to protect your harvest. Start by lining the pit's bottom with straw or dead leaves, then add your first layer of vegetables.
| Material | Purpose |
|---|---|
| Sand | Maintains moisture balance |
| Straw/Leaves | Provides insulation and drainage |
| Sphagnum Moss | Prevents shriveling |
Place your vegetables close together but not touching, creating a single layer. Add horizontal straw tunnels for ventilation and moisture control. Cover this layer with damp (not wet) sand or moss, then repeat the process until you've filled the pit. Top everything with thick banana leaves or similar material to lock in moisture.
To protect against pests, consider storing vegetables in cloth or jute sacks before layering. You'll want to check the pit regularly and remove any spoiled items before rot spreads. If conditions become too dry, add small amounts of water occasionally, but be careful not to oversaturate. Remember, success depends on maintaining the right moisture balance while allowing proper ventilation.
Temperature Control Methods
Maintaining precise temperature control in underground storage pits requires careful planning and construction. You'll need to dig below the freeze line, typically two feet deep, to create a stable environment where temperatures remain consistent between 32-40°F for most root vegetables.
Potatoes require special attention – store them initially at 45-60°F for two weeks before moving them to 35-40°F for long-term storage.
To achieve ideal temperature control in your storage pit, follow these essential steps:
- Dig your pit 1-2 meters deep, ensuring it's below the local freeze line.
- Line the bottom and sides with straw or leaves, creating an insulating barrier.
- Add wire mesh protection to prevent rodents from disrupting temperature stability.
- Cover with thick layers of soil or sand to regulate temperature fluctuations.
Monitor your pit regularly, as even small temperature changes can trigger sprouting.
You'll want to maintain darkness, especially for potatoes, to prevent photosynthesis. During extreme weather, add extra insulating materials like hay or straw to protect against temperature swings.
Remember that consistency is key – avoid opening the pit unnecessarily, as this can disrupt the carefully maintained temperature environment.
Sand Storage For Root Crops
When you're looking to preserve root vegetables for several months, sand storage provides an effective and time-tested method. You'll need to maintain specific conditions: temperatures between 32-40°F and humidity levels of 90-95% in an unheated, enclosed space like a basement or garage.
Start by harvesting your vegetables on a dry day, and don't wash them – just brush off excess soil. Remove leafy tops and inspect for damage, selecting only unblemished produce for storage. You'll want to use fine-grade "play" sand and layer it with your vegetables, making certain they don't touch each other.
| Vegetable | Storage Tips |
|---|---|
| Carrots | Store vertically |
| Parsnips | Keep 1" apart |
| Beets | Layer horizontally |
| Turnips | Check weekly |
| Potatoes | Separate from apples |
Check your stored vegetables weekly and remove any showing signs of deterioration. Keep the sand slightly damp but not wet, and guarantee proper air circulation. If you've followed these steps carefully, your root vegetables can stay fresh for two to six months. Remember to store apples separately, as they release ethylene gas that can speed up vegetable spoilage.
Hay Bale Storage Systems
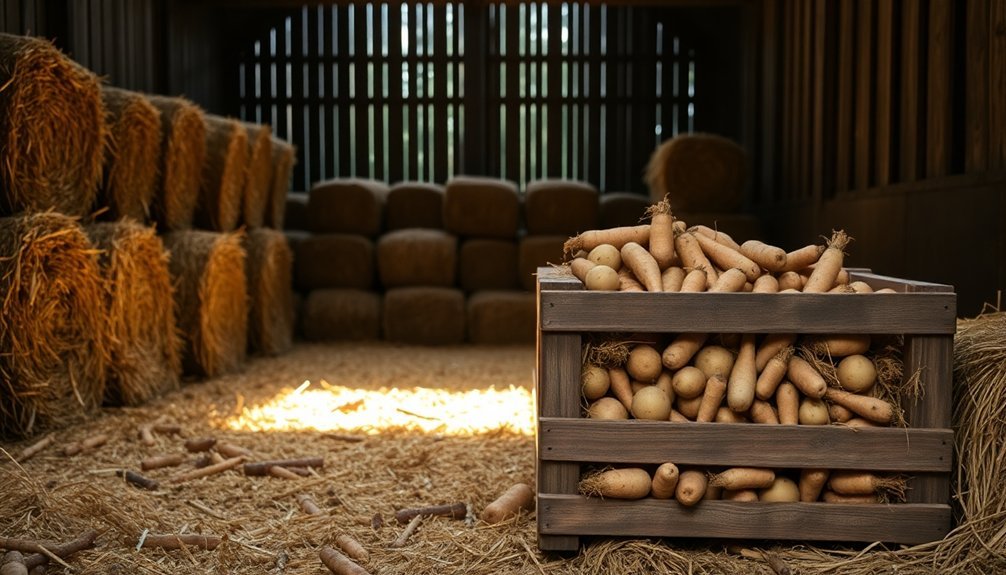
Throughout the winter months, hay bale storage systems offer gardeners a natural and effective way to preserve root vegetables right in the ground. This method creates a protective barrier that shields your crops from harsh winter temperatures while maintaining easy access for harvest.
You'll want to start by arranging your root vegetables in a block layout, which makes coverage more manageable. After the first few frosts signal the start of overwintering, create a protective perimeter using hay bales around your root crop block. Then, apply a thick 5-7 inch layer of straw directly over your vegetables.
- Position 2x4s in an X pattern to anchor your straw covering
- Add floating row cover over the entire structure
- Fill the center with 8-10 inches of shredded leaves
- Check and maintain moisture levels regularly
To keep your system functioning properly, you'll need to monitor the condition of your hay bales and mulch throughout the winter. When it's time to harvest, simply lift the mulch to access your vegetables.
If you notice any gaps in coverage, add more mulch to maintain consistent insulation. This method works particularly well for carrots, turnips, beets, and parsnips.
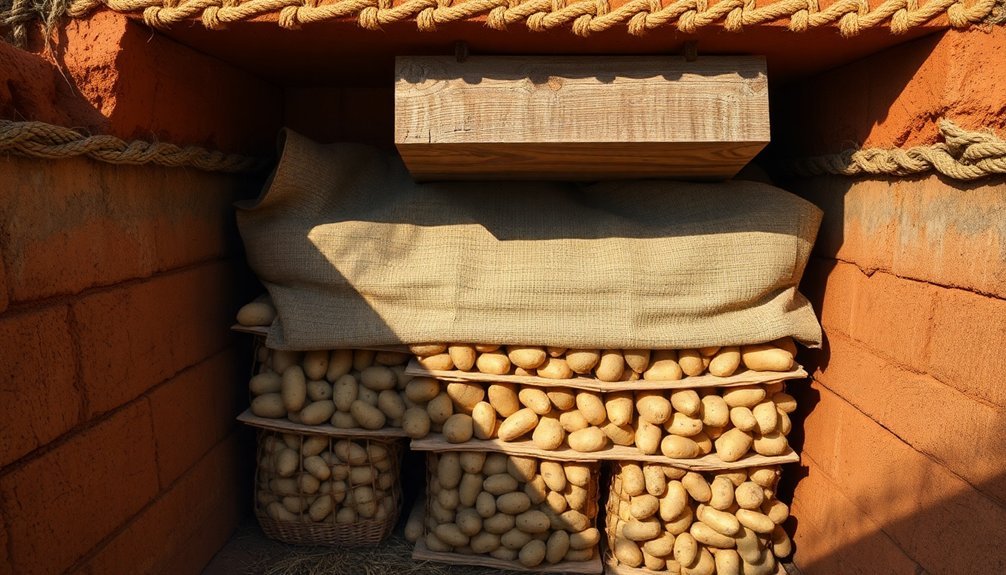
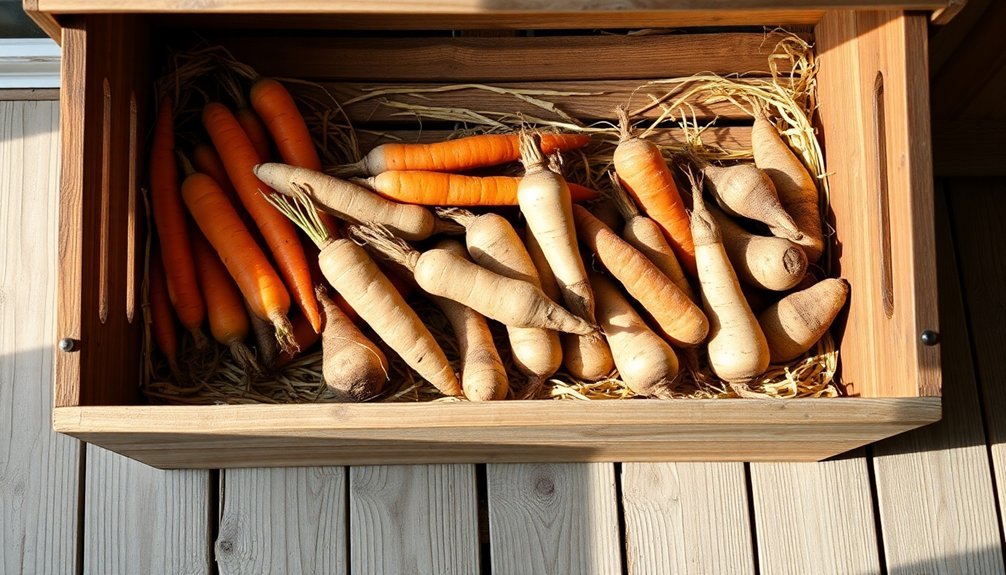
Traditional Wooden Bin Storage
Traditional wooden bin storage stands out as one of the most reliable methods for preserving root vegetables during the cold season. You'll need to start by selecting a sturdy wooden container that provides adequate ventilation and can support multiple layers of vegetables and soil. Don't forget to add a jute liner for extra insulation.
Before storing your root vegetables, you'll want to prepare them properly. Carefully dig them up, trim the greens to about an inch from the top, and avoid any cuts into the vegetable itself. This prevents decay and guarantees longer storage life.
| Storage Step | Key Action | Why It Matters |
|---|---|---|
| Bottom Layer | Add 1-2" soil | Creates drainage base |
| Vegetable Placement | Space apart | Prevents contact rot |
| Layer Building | Alternate soil/veggies | Maintains moisture |
| Top Coverage | Add 3-4" soil | Provides insulation |
| Environment | 32-40°F, dark | Ideal preservation |
You'll need to maintain proper storage conditions by keeping your bins in a cool, dark location with high humidity (85-95%). Check regularly for spoilage and guarantee good air circulation around the containers. With proper setup and monitoring, your root vegetables can stay fresh for months.
Moss Bedding Preservation Technique
The moss bedding preservation technique offers a natural alternative to wooden bin storage, drawing on the remarkable properties of sphagnum moss. You'll want to gather fresh sphagnum moss on the same day you harvest your root vegetables, as its incredible ability to hold up to 26 times its weight in water makes it perfect for maintaining ideal moisture levels.
- Clean your harvested roots by gently brushing off soil and trimming the tops.
- Dry them thoroughly in a well-ventilated area.
- Select only the best specimens for storage.
- Layer the moss and vegetables carefully in your container.
Start by placing a 1-2 inch layer of damp moss at the container's bottom. Arrange your root vegetables in a single layer, making sure they don't touch each other.
Add another moss layer before placing more vegetables. Continue this pattern until you've used all your produce, finishing with a final moss layer on top.
Cover the container with a breathable material and store it in a cool, dark place between 32-38°F.
Don't forget to check your stored vegetables every couple of weeks, removing any that show signs of spoilage to protect the rest of your harvest.
Temperature Controlled Basement Storage
You'll need to maintain strict temperature control in your basement storage area by installing thermostats and monitoring temperature variations at different heights, as warm air naturally rises to the top.
To manage humidity effectively, you can place water-filled containers on the floor or install a small humidifier, while ensuring proper ventilation through strategically placed vents or small fans to prevent stagnant air and mold growth.
Your storage setup should include raised shelving or wire baskets that promote air circulation, allowing you to check produce regularly while maintaining the ideal 32-40°F (0-4°C) temperature range for most root vegetables.
Basement Humidity Control Methods
Maintaining proper humidity control in your basement storage area is critical for preserving root vegetables and preventing moisture-related damage.
You'll want to keep humidity levels between 30% to 50% to create an ideal environment for your stored produce while preventing mold growth and vegetable spoilage.
A dehumidifier is your most powerful tool in this battle against excess moisture. Choose one that's properly sized for your basement space and run it continuously during humid periods.
To create an all-encompassing moisture management system, make sure you've sealed all potential water entry points in your foundation walls, including cracks, gaps around pipes, and window frames.
Here are the key steps to establish effective humidity control:
- Install a high-quality dehumidifier with continuous drainage capability
- Seal all foundation cracks and gaps using appropriate waterproof sealants
- Improve air circulation with strategically placed fans and ventilation systems
- Cover bare concrete floors with moisture-resistant materials like vinyl or marmoleum
Remember to avoid carpeting in your storage area, as it can trap moisture and become a breeding ground for mold.
Instead, opt for water-resistant flooring materials and maintain proper ventilation to allow ethylene gases to escape.
Temperature Monitoring Best Practices
Proper moisture control works hand in hand with precise temperature monitoring for successful root vegetable storage.
You'll need to maintain temperatures between 32° and 40°F to slow down respiration and prevent both freezing and premature sprouting of your vegetables.
To effectively monitor temperatures, you'll want to place thermometers strategically throughout your storage area. Position them in both the coldest and warmest spots, and use models that record minimum and maximum readings.
Check these readings daily, especially during seasonal changes when outside temperatures fluctuate dramatically.
If you notice temperatures dropping below 32°F, you can add a 100-watt light bulb as a gentle heat source.
When temperatures rise above 40°F, you'll need to enhance insulation using materials like straw or hay.
Don't forget to keep your storage area separate from heating ducts and pipes that could cause unwanted temperature spikes.
For the most stable environment, you'll find unheated basement areas ideal, particularly those with earthen floors.
If you're using a basement window well or similar space, make sure it's properly insulated to maintain consistent temperatures throughout your storage period.
Effective Airflow Management Systems
A well-designed airflow system forms the backbone of successful root vegetable storage in your basement. You'll need to create a balanced environment where air circulates freely while maintaining consistent humidity levels. Strategic placement of fans and ventilation pipes helps regulate temperature and prevent stagnant air pockets that can lead to spoilage.
To enhance your airflow management system's effectiveness:
- Install adjustable exhaust pipes or windows near the ceiling to release warm air and draw in cool night air, helping maintain ideal storage conditions.
- Position electric fans strategically to guarantee continuous air movement, especially in corners and between storage containers.
- Use wire mesh baskets or natural fiber containers to store your vegetables, allowing air to flow freely around the produce.
- Create adequate spacing between storage bins and walls to promote proper air circulation.
Make certain you're organizing your vegetables with airflow in mind, keeping similar items together and maintaining proper spacing. If you're using ventilation pipes, they should be closable to control airflow during temperature fluctuations.
Remember to monitor the airflow patterns regularly using strategically placed thermometers to identify any dead spots or areas of poor circulation.
Ventilated Box Storage Solutions
Selecting the right ventilated storage container plays an essential role in preserving your root vegetables. You'll want to opt for wire mesh baskets or natural fiber containers that allow proper air circulation throughout your produce. While you can use cardboard boxes with holes or ventilated metal bins, you should avoid wooden boxes as they restrict airflow and can lead to spoilage.
If you're working with existing cabinets, you can install perforated metal bin inserts to improve ventilation. When setting up your storage containers, make sure to keep them elevated a few inches off the floor to maintain consistent temperatures.
You'll need to layer your vegetables using materials like damp sand, sawdust, or wood shavings to regulate humidity and prevent direct contact between items.
Don't forget to cover your containers with newspaper or cardboard to block out light, as exposure can trigger photosynthesis and accelerate decay. This is particularly important for potatoes and garlic, which need complete darkness for ideal preservation.
Remember to store different root vegetables separately and check them regularly for any signs of spoilage to maintain the quality of your entire storage system.
Natural Cold Room Design
Building a natural cold room starts with understanding the science of temperature and humidity control. You'll need to maintain temperatures between 32-40°F (0-4°C) and humidity levels of 85-95% to create ideal storage conditions for your root vegetables.
Converting a basement space or underground area into a cold room gives you a natural advantage, as these locations typically provide the steady cool temperatures you're seeking.
When designing your natural cold room, focus on these essential elements:
- Install proper ventilation systems to regulate airflow and prevent moisture buildup that could lead to mold growth.
- Create insulated walls and ceiling to maintain consistent temperatures, even when outside conditions fluctuate.
- Add humidity controls through natural materials like slightly damp sand or sawdust layering.
- Design storage zones with different temperature ranges for various vegetable types.
You'll want to position your storage shelves or bins away from any heat sources and incorporate traditional storage methods like sand layering or root clamping within your cold room design.
Remember to include a reliable thermometer and hygrometer to monitor conditions, as maintaining consistent temperature and humidity levels is vital for preventing premature decay and extending shelf life.
Frequently Asked Questions
Can I Store Different Root Vegetables Together in the Same Container?
You shouldn't store different root vegetables together. They'll release gases and moisture that affect each other's quality. Keep potatoes, onions, garlic, and other roots in separate containers for the best results.
How Do I Prevent Mold Growth When Storing Vegetables in Damp Conditions?
You'll need proper ventilation and regular inspections. Use containers with holes for airflow, maintain consistent temperature, and remove any spoiled vegetables immediately. Don't overcrowd storage bins, and keep humidity moderate rather than wet.
Should I Wash Root Vegetables Before Storing Them Long-Term?
Don't wash root vegetables before storage – it'll introduce moisture that leads to rot. You should only clean them right before cooking. If they're very muddy, gently brush off dirt and let them dry completely.
What Signs Indicate Root Vegetables Have Gone Bad During Storage?
Watch for mushy or slimy textures, mold growth, and shriveled appearances in your root vegetables. You'll also notice spoilage through offensive odors, soft spots, and unusual discoloration during storage.
Can Frozen Root Vegetables Be Safely Thawed and Stored Again?
You can safely refreeze root vegetables if they still contain ice crystals. However, you'll notice some quality loss. It's best to thaw them in your refrigerator and cook them immediately to prevent bacterial growth.
In Summary
You'll find these time-tested storage methods work best when you combine them based on your specific needs and climate. Whether you're using a root cellar, sand storage, or hay bales, remember to check your vegetables regularly for signs of spoilage. By implementing these proven techniques, you'll extend your harvest's shelf life and enjoy fresh root vegetables throughout the winter months.


Leave a Reply