You'll need these 10 proven tips for root cellar success: Choose a naturally shaded location with easy access, install French drains for proper drainage, build a strong foundation with a 16-inch concrete footer, use durable materials like cinder blocks, create cross-ventilation with inlet and outlet vents, maintain 32-40°F temperatures, control humidity at 90-95%, organize storage with vertical stacking, separate ethylene-producing fruits, and make seasonal vent adjustments. These time-tested techniques have helped generations preserve their harvest, and there's much more to discover about maximizing your cellar's potential.
Select Your Perfect Location
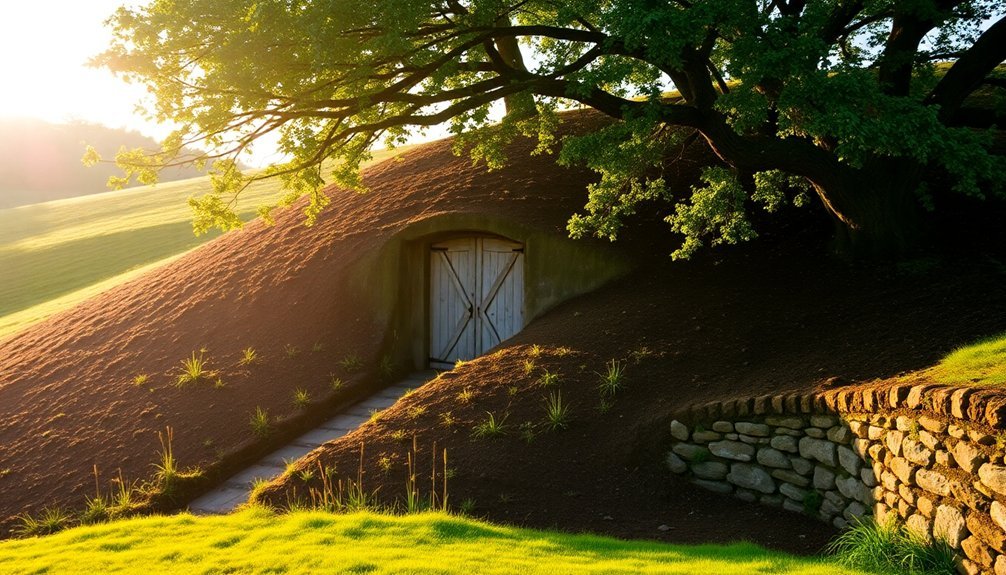
Before breaking ground on your root cellar, choosing the right location will make or break its success. You'll want easy access from both your home and garden to guarantee you'll regularly use your storage space. Look for a spot that's naturally shaded and connected to stable pathways, making it safe to access even during winter months.
Consider utilizing space under existing structures like decks or hillside terraces to save on resources and take advantage of natural terrain. The ideal temperature range of 35 to 55 degrees makes under-deck locations particularly suitable. If you're in the Northern Hemisphere, seek out north-facing slopes, while those in the Southern Hemisphere should opt for south-facing locations to maintain cooler temperatures.
Your selected site must have proper drainage to prevent moisture buildup and mold. Avoid areas prone to flooding or those that receive direct sunlight, as these conditions will compromise your cellar's effectiveness.
You'll need to clear any vegetation or debris before starting excavation. The ground should be stable enough to support your structure and allow for proper depth – at least 6 feet down. This depth helps capitalize on the earth's natural insulation properties while guaranteeing your cellar maintains consistent temperature and humidity levels.
Master Ground Water Management
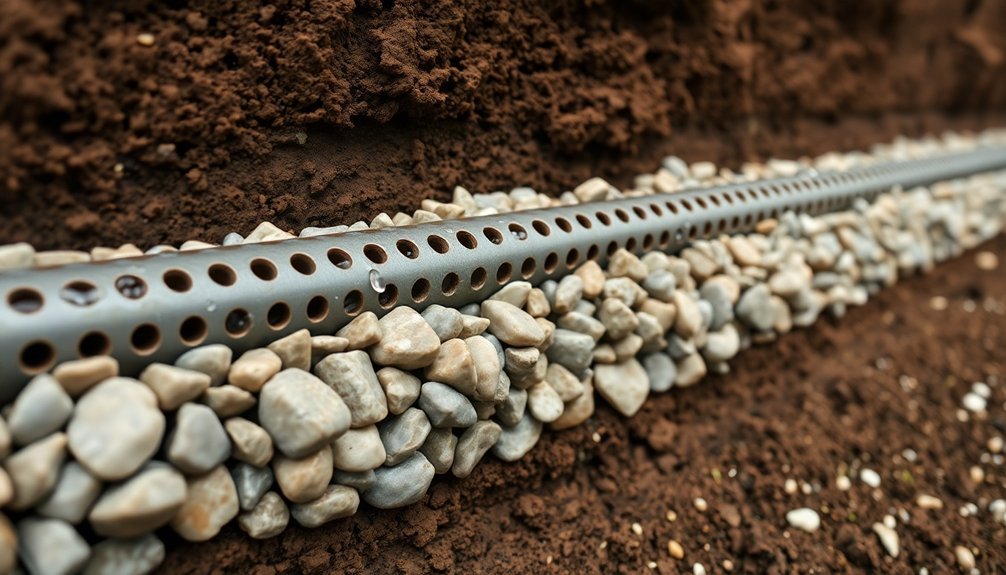
Managing groundwater effectively is critical to your root cellar's long-term success. Start by installing French drains along your cellar's exterior base, ensuring they're slightly angled away from the structure. You'll want to lay perforated drainage pipes in these trenches and cover them with a 6-inch layer of gravel to optimize water flow.
Don't skip waterproofing your walls and floor. Apply DryLok or similar waterproof coatings to interior surfaces, and use tar compounds on exterior walls. Place plastic sheeting over your gravel floor to prevent ground moisture from seeping upward. These methods help maintain ideal storage conditions for fruits and vegetables throughout winter months.
| Component | Problem | Solution |
|---|---|---|
| Walls | Water Seepage | Waterproof coating + tar |
| Floor | Rising Moisture | Plastic barrier + gravel |
| Exterior | Standing Water | French drains + slope |
| Structure | Rain Impact | Gutters + proper grading |
Monitor your cellar's moisture levels regularly and maintain your drainage system. You'll need to keep vents clear and functioning properly to prevent excess humidity buildup. Install rain gutters on your topside structure to direct water away from the cellar area. Remember to inspect your waterproofing measures seasonally and repair any compromised areas promptly to prevent water damage.
Build Strong Foundation Systems
You'll want to start your root cellar construction by pouring a 16-inch-wide concrete footer that sits below the frost line and cures for at least three days.
Next, you can install a French drain system around the perimeter to manage water flow and prevent moisture from compromising your foundation's integrity.
Once these critical elements are in place, you're ready to build your walls on the stable footer, ensuring they'll resist shifting and maintain structural stability for years to come.
The careful construction process helps maintain ideal storage conditions between 32-40°F for preserving your harvest.
Pour Concrete Footer First
The foundation of any successful root cellar begins with a properly constructed concrete footer. You'll need to dig a trench approximately 24 inches wide, guaranteeing it's level and deep enough to support your structure. This vital base prevents wall shifting and helps distribute the weight of your entire cellar evenly.
Before pouring concrete, you'll want to install metal reinforcement bars across the trench. Mix your concrete using a four-to-one ratio of sand to cement, and pour it carefully to avoid any deformation. Make certain you're checking the level constantly during the pour using metal bars as guides. Let the concrete cure completely before moving forward with wall construction.
Once your footer's cured, you can start laying blocks or bricks for your walls. You'll need to apply mortar with precise measurements and guarantee each row is level.
Don't forget to smooth out the surrounding earthen walls first to prevent any irregularities that could affect your construction. The footer's stability will help maintain your walls' integrity and prevent soil from caving in, while also supporting the heavy loads of your roof and any earth covering your cellar.
Install French Drain System
Around your root cellar's perimeter, a properly installed French drain system provides essential moisture control and foundation protection.
Start by identifying problem areas where water collects and plan your drain's route with a slope of one inch per eight feet. You'll need to dig a trench 6-12 inches wide and 12-18 inches deep, ensuring it slopes away from your cellar's foundation toward a suitable discharge point.
Line the trench with landscape fabric, install a perforated drainage pipe, and cover it with 2-3 inches of gravel. The fabric acts as a vital filter, preventing soil from clogging your system. Fold the fabric over the gravel layer before backfilling with soil to ground level.
- You'll feel tremendous relief knowing your precious harvest is protected from devastating water damage.
- You'll experience peace of mind during heavy rains, knowing your cellar stays dry.
- You'll save thousands in potential foundation repairs by preventing water damage before it starts.
Test your system by running water through it to verify proper drainage.
Don't forget to apply waterproof membrane to your cellar's exterior walls for added protection against moisture seepage.
Design Smart Air Flow
Your root cellar's ventilation system should take advantage of cold air's natural sinking behavior by placing inlet vents near the floor and outlet vents near the ceiling.
You'll achieve best cross-ventilation by installing a two-vent system that creates a natural draft, drawing cool air in through the lower vent while pushing warm air out through the upper vent.
Position your vents strategically – one near the cellar door at ground level and another at the ceiling on the opposite end – to maximize airflow and maintain ideal storage conditions.
Cold Air Sinks Strategy
Within a well-designed root cellar, understanding how cold air sinks becomes essential for maintaining ideal storage conditions. You'll need to position your air intake at the bottom of the cellar and your outlet near the ceiling, as warm air naturally rises while cool air falls. This natural circulation helps maintain temperatures between 32°F and 40°F for prime long-term storage.
Place your intake and outlet on opposite sides of the room to create a diagonal airflow pattern. You'll want to screen all intake pipes to keep pests out while letting that precious cool air in. If you're working with a smaller storage area, you can rely on a single outlet if there are enough natural cracks for air entry.
- You'll feel a sense of satisfaction watching your stored vegetables last months longer than usual when you've properly positioned your air flow systems.
- You'll experience peace of mind knowing your root cellar maintains consistent temperatures through natural physics.
- You'll take pride in using the earth's natural cooling properties to preserve your harvest without electricity.
Remember to elevate your crates to allow air circulation underneath, maximizing the benefits of this cold-air-sinks principle.
Natural Cross-Ventilation Methods
Effective cross-ventilation starts with strategic placement of intake and exhaust vents on opposite sides of the cellar. You'll want to install multiple vents to guarantee proper air movement, with exhaust pipes extending above ground level to prevent stale air accumulation at the ceiling. To maximize airflow efficiency, wrap these above-ground pipes with weatherproof insulation.
| Ventilation Action | Purpose |
|---|---|
| Position vents opposite | Creates natural airflow path |
| Elevate storage crates | Allows air circulation beneath |
| Seal vents in winter | Maintains stable temperature |
| Open vents at night | Captures coolest air |
| Install vent covers | Prevents cold air backflow |
You'll need to adjust your vents seasonally, keeping them open during summer months and sealed tightly in winter using packed cloth or rubber gaskets. Remember to extend your exhaust pipes high enough to prevent a layer of stagnant air from forming at ceiling level. This natural ventilation system helps remove ethylene gas produced by stored items and controls condensation levels. Keep space between shelves and walls to allow fresh air movement, and don't forget to install chimney caps on exhaust pipes to guarantee warm air can escape while blocking unwanted cold air entry.
Vent Placement For Success
Through careful planning of vent placement, you'll create an ideal airflow system that keeps your root cellar at ideal temperatures year-round. Position your intake vents low to the ground to draw in cooler air, while placing outlet vents near the ceiling to exhaust hot, stale air.
Install these 3-4 inch diameter vents on opposite walls to maximize cross-ventilation, and cover them with mesh to keep pests out.
When designing your vent system, you'll want to incorporate 4-inch ductwork with adjustable dampers for precise temperature control. You can twist the vent pipes to catch cooler or warmer winds, enhancing your cellar's natural temperature regulation capabilities.
- Imagine walking into your root cellar on a hot summer day and feeling that invigorating rush of cool air – that's the power of proper vent placement.
- Picture your harvest lasting months longer than ever before, providing fresh, nutritious food for your family through winter.
- Feel the satisfaction of knowing you've created a sustainable, energy-free storage solution that connects you to generations of traditional food preservation.
Remember to maintain your vents regularly, keeping them clear and functioning properly. During winter, you can seal them using packed cloth or rubber gaskets to maintain consistent temperatures.
Optimize Natural Cooling Methods
Natural cooling systems are the backbone of a well-functioning root cellar, combining earth insulation, air circulation, and strategic positioning to maintain ideal storage conditions.
You'll want to dig your cellar below the frost line and cover it with 2-4 feet of earth, topped with grass to prevent erosion.
To maximize natural air flow, you'll need to position air intakes low and outlets high, taking advantage of warm air's natural tendency to rise.
Place your storage crates and shelves off the ground to guarantee proper air movement throughout the space.
If you're working with a smaller cellar, a single high outlet may be sufficient when combined with lower air entry points.
You can enhance cooling efficiency by installing a passive heat exchange system using butane-filled copper pipes and water tanks.
This electricity-free solution creates a natural cooling cycle as the tanks freeze and thaw with seasonal temperature changes.
Choose a north-facing hillside for your cellar's location, and don't forget to incorporate proper drainage using gravel and pipes to prevent water damage.
Natural shade from trees or landscape features will provide additional temperature control benefits.
Control Indoor Humidity Levels
Maintaining proper humidity levels in your root cellar is essential for preserving fruits and vegetables throughout the storage season. Your root cellar's floor type plays an important role in moisture control, with dirt floors naturally holding more humidity than concrete or stone surfaces.
You'll find that a gravel layer over packed earth creates an ideal balance, helping maintain moisture while preventing waterlogged conditions.
For ideal storage conditions, you'll need to keep humidity levels between 90-95%. You can achieve this by placing pans of water on the floor, using damp burlap bags over produce, or packing vegetables in moist sawdust or sand.
Remember that a fuller cellar naturally maintains higher humidity, so don't worry if your storage space is small.
- You'll feel more confident knowing your produce won't shrivel when you monitor humidity levels with a hygrometer.
- You'll experience peace of mind as your carefully stored harvest stays fresh through winter.
- You'll save money and reduce waste by properly preserving your garden's bounty.
Regular monitoring and adjusting of moisture sources is key. If humidity drops, simply sprinkle water on the floor or gravel, but always maintain proper ventilation to prevent mold growth.
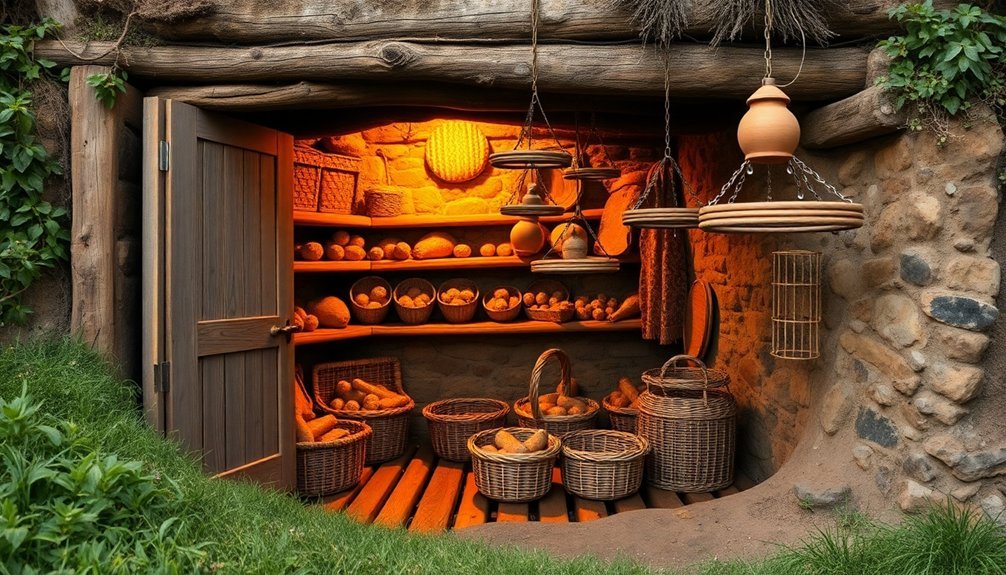
Create Efficient Storage Zones
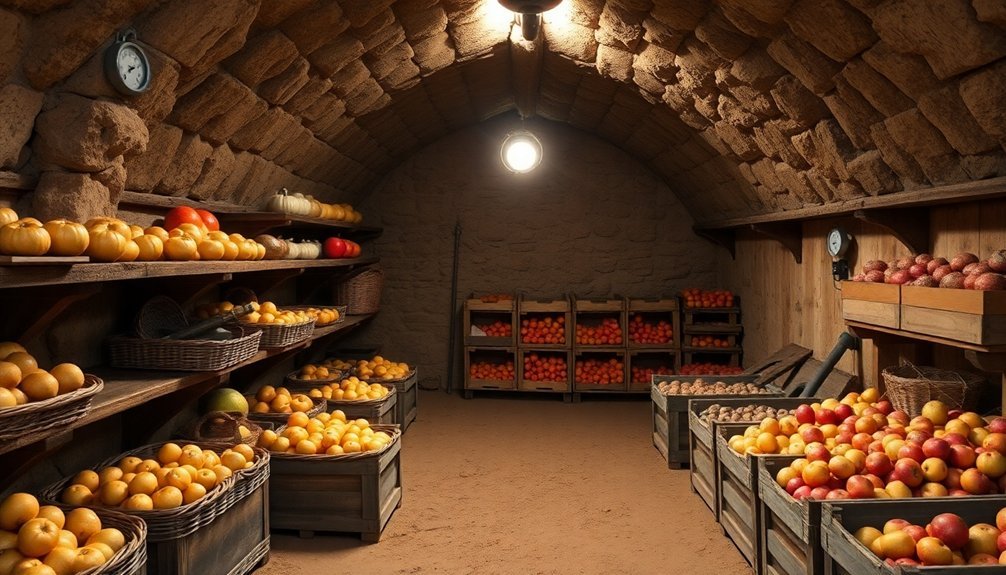
You'll maximize your root cellar's potential by stacking storage containers vertically and using sturdy shelving units that allow air circulation between levels.
Group your produce based on compatible storage needs, keeping ethylene-producing fruits separate from vegetables and maintaining similar humidity requirements within zones.
Create distinct temperature layers by placing cold-loving root vegetables near the floor, while positioning squash and tomatoes on higher shelves where temperatures remain slightly warmer.
Stack for Maximum Space
Strategic stacking transforms a modest root cellar into a storage powerhouse. When you maximize vertical space, you'll create organized zones that make the most of every square foot.
Start by installing sturdy, rot-resistant wooden shelves with 1-2 inch cleats at the back, keeping them about 16 inches deep for ideal access. Remember to maintain that vital 1-2 inch gap between the wall and shelves for proper air circulation.
Layer your storage solutions by using stackable containers that promote airflow. Plastic milk crates and simple wooden boxes work perfectly for this purpose, while burlap covers or old blankets protect your harvest from light exposure.
Don't forget to incorporate slats in your shelving design to prevent moisture buildup.
- You'll feel a sense of accomplishment watching your cellar transform from an empty space into an organized preservation system.
- You'll experience peace of mind knowing your harvest is properly stored and easily accessible.
- You'll enjoy the satisfaction of feeding your family from your well-planned root cellar throughout the seasons.
Use dampened sawdust or leaves between storage layers to maintain proper humidity, and position bins so you can easily rotate and check your stored items.
Group Compatible Produce Together
Success in root cellar storage depends on strategic grouping of compatible produce. You'll need to create distinct zones based on temperature, humidity, and storage requirements to maximize the longevity of your harvest.
Place root vegetables like potatoes, beets, carrots, and turnips in the coolest section, maintaining temperatures between 32°F and 40°F. Keep them in darkness using sawdust, peat moss, or damp sand to prevent drying and sprouting. Store them efficiently in buckets or feed sacks.
Your leafy greens and brassicas need high humidity (90-95%) and good air circulation. Use tubs with soil bases for vegetables with roots, and cover them with damp burlap or sawdust. Place these away from freezing areas while maintaining coolness.
Position fruits and squash on higher shelves where temperatures are slightly warmer. Guarantee proper ventilation to prevent ethylene gas buildup, and keep them away from direct sunlight to avoid spoilage.
For fermented foods, create a separate zone with consistent cool temperatures to slow fermentation. Use darkening curtains to protect light-sensitive items, and maintain high humidity levels. Monitor conditions regularly to adjust storage as needed.
Layer Different Temperature Zones
Within your root cellar, establishing distinct temperature zones creates the foundation for successful long-term storage. Take advantage of the natural temperature gradient, where warmer air rises to the ceiling while cooler air settles near the floor. You'll want to maintain temperatures between 32-40°F for best preservation, as these cooler conditions slow down ethylene gas release and extend your produce's shelf life.
Maximize your cellar's effectiveness by working with nature's insulation. When you build into a north-facing hill, you're harnessing the earth's constant cool temperatures and natural humidity. Create micro-environments using antechambers and divided sections to protect your inner storage from temperature fluctuations.
- You'll feel empowered knowing your food stays fresh longer in properly layered zones.
- You'll experience peace of mind seeing your harvest safely stored through winter.
- You'll enjoy the satisfaction of reducing food waste and grocery bills.
Adapt your storage solutions to match specific crop requirements. Use straw, hay, or sawdust between layers to maintain ideal humidity levels, and install bins at different heights to take advantage of vertical temperature variations.
Remember to adjust ventilation methods based on what you're storing to maintain best conditions throughout the cellar.
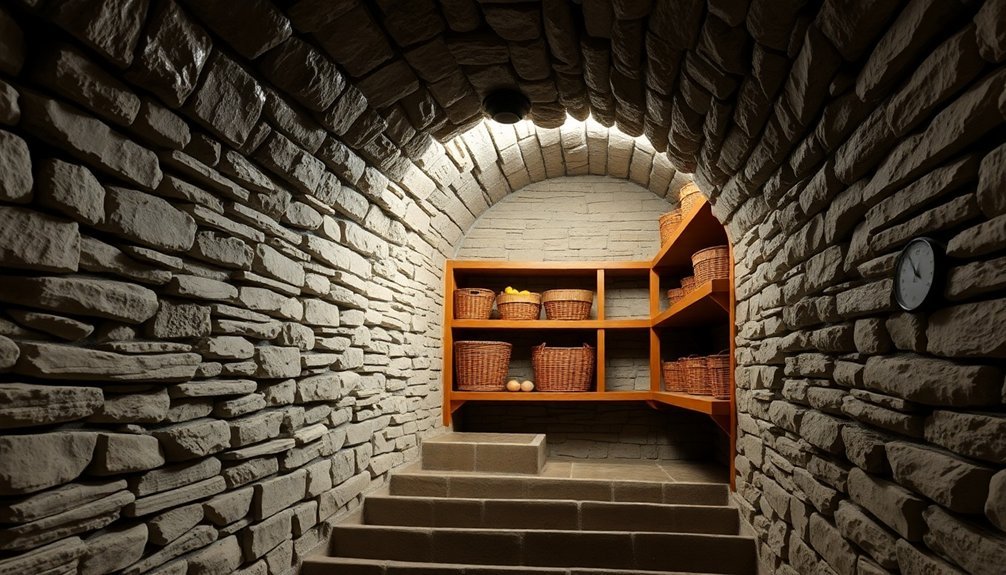
Choose Durable Building Materials
Selecting the right materials for your root cellar can mean the difference between a lasting storage solution and a failing structure. You'll want to choose materials that can withstand moisture, temperature fluctuations, and ground pressure while maintaining proper storage conditions for your produce.
| Material Type | Best Uses |
|---|---|
| Cinder blocks | Walls (350 blocks for 8×8 ft cellar) |
| Concrete w/rebar | Foundation and walls |
| Dirt/gravel floor | Moisture regulation |
| Treated wood | Above-ground flooring |
For underground cellars, you'll need proper insulation to maintain stable temperatures. Consider using urethane or Styrofoam sheets covered with 6-mil polyethylene for the roof's exterior. You'll want to cover this with 2-4 feet of earth and plant grass to prevent soil erosion.
When it comes to ventilation, incorporate pipes in the side walls that you can close off during winter. If you're using wooden flooring, space boards ½ inch apart and treat them with linseed oil for longevity. Don't forget to staple landscape cloth along the interior perimeter to prevent weed growth and enhance air circulation.
Install Proper Drainage Solutions
Proper drainage serves as the foundation for a functional root cellar, protecting your stored produce from excess moisture and potential flooding.
Start by installing a French drain along your cellar's exterior base, coupled with rain gutters on the topside structure to redirect water away from the walls. You'll need to back-fill with a 6-inch layer of gravel around the outside, including over the arch, to facilitate efficient water movement.
Inside your cellar, apply DryLok or similar waterproof coating to the walls, and lay plastic sheeting over the gravel floor to control rising moisture.
You'll want to maintain a dirt or crushed stone floor underneath to balance humidity levels while allowing necessary drainage. Install ventilation pipes at varying heights to guarantee proper air circulation and prevent condensation buildup.
3 Critical Reasons to Prioritize Proper Drainage:
- Protects your harvest from devastating mold and rot
- Preserves your cellar's structural integrity for generations
- Saves you countless hours of frustration and maintenance
Don't forget to monitor conditions regularly with a thermometer and humidity gauge, adjusting your drainage and ventilation systems as needed for ideal performance.
Maintain Ideal Temperature Balance
While a well-drained root cellar protects your harvest from moisture damage, maintaining the right temperature balance keeps your vegetables fresh for months.
You'll want to maintain temperatures between 32°F and 40°F for ideal storage, as this range greatly slows down vegetable respiration and decay.
To achieve this perfect range, take advantage of earth's natural insulation by building your cellar into a north or northeast-facing hillside. The soil's poor heat conduction will help maintain stable temperatures regardless of surface conditions.
You'll need proper ventilation with low air intake and high outlet vents on opposite sides to control temperature and remove ethylene gas.
For additional cooling during warmer months, you can create an ice-cooling system. Fill about one-third of your cellar space with ice made during winter months, or use frozen water bins to create a "cold battery" effect. This passive cooling method can maintain temperatures around 37°F without electricity.
Don't forget to elevate your storage crates for proper air circulation, and regularly monitor conditions to make sure they stay within the ideal range.
Temperatures below 32°F will freeze your produce, while those above 40°F can trigger sprouting and spoilage.
Frequently Asked Questions
How Long Can Different Vegetables Typically Last in a Root Cellar?
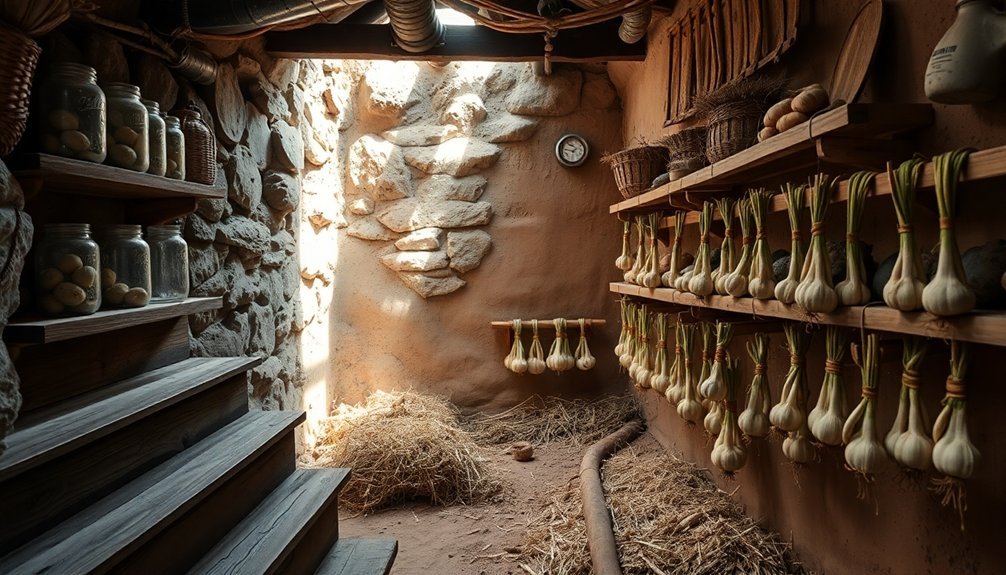
You'll find that root cellars can keep garlic and onions fresh for 8-9 months, carrots and cabbage for 6 months, while more delicate items like cauliflower and Brussels sprouts last just 3-4 weeks.
What Natural Pest Control Methods Work Best for Root Cellars?
You'll find peppermint oil, bay leaves, and diatomaceous earth work effectively as natural pest deterrents. Store food in airtight containers, use sand for root vegetables, and maintain cleanliness to prevent pest problems.
Can I Convert an Existing Basement or Shed Into a Root Cellar?
Yes, you can convert your basement or shed into a root cellar. You'll need proper insulation, ventilation, and humidity control. Basements are often ideal since they're naturally cool and underground already.
Should Root Cellars Have Electricity Installed for Backup Temperature Control?
While you don't need electricity for a root cellar to function, it's smart to install it as a backup. You'll have options for supplemental cooling, lighting, and monitoring when natural methods aren't quite enough.
How Often Should Stored Produce Be Checked and Rotated?
You'll need to check your stored produce every few days, especially during the first weeks after harvest. Keep rotating items using the first-in, first-out method and remove any spoiled items immediately.
In Summary
You'll find that a well-built root cellar is worth every bit of effort you've invested. By following these time-tested tips for location, drainage, airflow, and temperature control, you're setting yourself up for years of successful food storage. Remember to check your cellar regularly and make minor adjustments as needed. With proper maintenance, your root cellar will serve as a reliable natural refrigerator for decades to come.


Leave a Reply