
You'll discover time-tested salt box methods that transform your fresh catch into preserved delicacies lasting up to two years. Start with the Traditional Nordic box layering, using coarse salt between fish layers and weights for ideal preservation. Try the Japanese dry salt method's precise measurements of 1 tablespoon per 3/4 pound of fish, or explore Scandinavian techniques like brine, pickle, and dry salting. Keep your fish in cool, dark places between 0-5°C, and monitor humidity levels in airtight containers. Whether you're preserving cod, herring, or other species, these ancient techniques hold the secrets to perfect salt-cured fish.
Traditional Nordic Box Layering
Fishermen have long relied on the Traditional Nordic Box Layering method to preserve their catch. To begin, you'll need to clean and gut your fish within two hours of catching it. Remove the head, tail, fins, and scales, then wash away all blood and keep the split fish on ice until you're ready to process it.
For the salting process, you'll need a crock-pot or glass container. Start by coating the bottom with fine-grained salt, then roll each fillet in salt before layering them in the container. Add salt between layers and use a weight to keep the fish submerged in the brine. This process of brine-salting preserves fish for up to nine months when done correctly.
The curing duration depends on your fish's size. If it's eight pounds or less, you'll cure it for two days, while larger fish need up to 10 days. Once cured, repack the fish in fresh salt and store below 70°F.
You'll need to rinse and cook it for several hours before eating. For enhanced preservation, you can combine salt-curing with smoking. Choose between cold smoking (below 85°F) or hot smoking (120-180°F). You can also dry the salt-cured fish for extended shelf life.
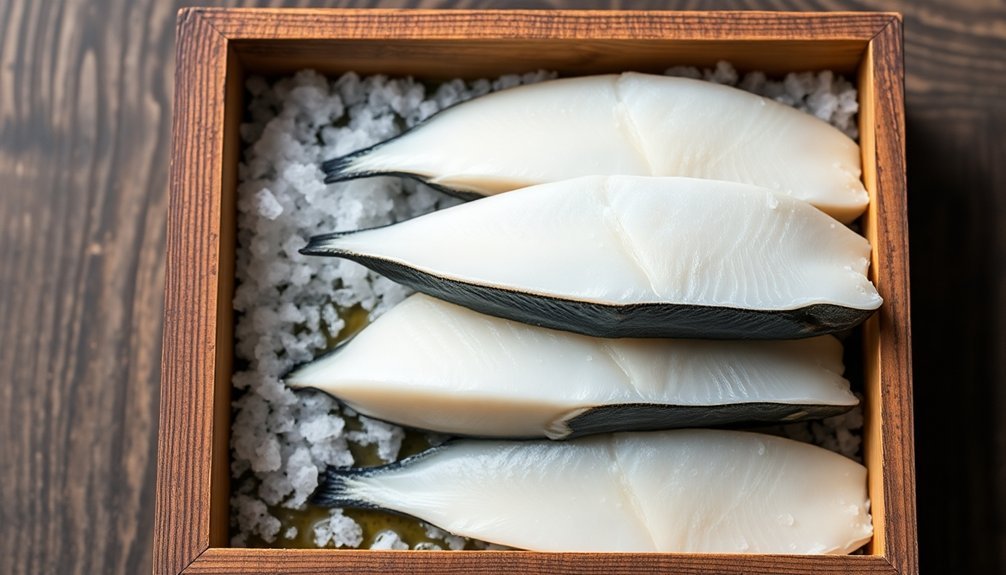
Japanese Dry Salt Method
While Nordic methods emphasize long-term preservation, the Japanese Dry Salt Method offers a more refined approach to fish curing.
You'll start by selecting fresh fish like sea bream or horse mackerel, then thoroughly clean it to remove all blood and slime. Make strategic cuts in the flesh to help the salt penetrate effectively.
You'll need to work in a well-ventilated area, away from direct sunlight. Apply food-grade salt at roughly one tablespoon per 3/4-pound of fish, rubbing it thoroughly into the flesh. For best results, maintain temperatures below 8°C to prevent discoloration and bacterial growth.
You can enhance the process by soaking the fish in salt water for 20-30 minutes to guarantee even distribution. This initial salting step helps draw out moisture from the fish, creating better conditions for preservation.
The Japanese method also offers unique variations. You can try the sakekasu technique, using sake lees to add flavor while preserving the fish, or the konbu method, where you sandwich the fish between kelp sheets for added umami.
Once cured, store your fish in a cool, dry place. If you're planning for later use, you can freeze the fish while maintaining its distinctive flavor and texture.
Mediterranean Sea Salt Curing
The rich flavors of Mediterranean cuisine shine through in this distinctive salt-curing method for fish.
You'll need a blend of coriander, cumin, and caraway seeds (1 teaspoon each), along with 1/2 teaspoon of coarse black pepper. The curing mixture consists of equal parts kosher salt and sugar (1/4 cup each).
This fusion cooking style brings together the best of Mediterranean and Bavarian culinary traditions. Unlike traditional salting methods, this technique is quick and straightforward.
You'll start by patting dry your 4-ounce skinless sea bass filets before applying the salt-sugar mixture to both sides. After a brief 30-minute refrigeration, you'll rinse the fish in ice water and pat it dry again before coating it with the crushed spice blend.
You'll cook the seasoned fish in olive oil over medium heat for about 10 minutes per inch of thickness, until it flakes easily.
Serve it over spaetzle that's been prepared with butter, sun-dried tomatoes, capers, and garlic. You can enhance the spaetzle further with heavy cream, parsley, lemon peel, white pepper, and nutmeg.
This method differs from other salting techniques as it's designed for immediate consumption rather than preservation, offering a fresh, flavorful alternative to traditional long-term storage methods.
Scandinavian Winter Storage Technique
Ancient Scandinavian winter storage methods rely on three key preservation techniques: salt-curing, smoking, and fermentation.
You'll need to start by choosing between brine, pickle, or dry salting methods for your fish preservation.
For brine salting, you'll submerge your fish in a saltwater solution for several days to weeks, depending on the size. You can also inject the brine directly into the fish muscle for more even distribution.
If you prefer pickle salting, layer your fish with abundant salt in a sealed container, allowing it to create its own brine.
With dry salting, you'll cover the non-skin side with salt and stack the fish in layers, letting the natural brine drain away.
You'll need to store your salted fish in a cool, dry place to promote proper maturation.
For smoking, first brine your fish, then hang it over a smoky fire to add flavor and increase preservation. Your smoked fish will last about a month when refrigerated.
You can complement these methods with traditional oven drying or fermentation techniques to guarantee you have preserved food throughout the winter months.
Celtic Stone Weight Process

Moving from Scandinavian preservation methods, Celtic fishing communities developed their own ingenious approach to catching fish using naturally perforated stone weights.
These weights, made from red or yellow clay, featured holes created by Common Piddock mollusks rather than human tools, making them perfectly suited for securing fishing nets along British coastal areas from Maryport to Beckfoot.
You'll find these weights were integral to an effective fishing system where nets were anchored to posts along the shore. The clay weights held down the bottom of the net while corks kept the top floating freely, creating an efficient trap for passing fish.
When you examine archaeological sites, you'll notice these weights often appear in lines, indicating their attachment to the base of gill nets.
While you might encounter sources identifying these as loom weights, their coastal location and arrangement suggest a primary use in fishing.
The weights' discovery in areas exposed by large tides confirms their historical use in fishing operations, though their adaptable nature means you can't rule out multiple applications across different periods, from Neolithic through Medieval times.
Portuguese Bacalhau Box System
Following centuries of maritime exploration, Portuguese sailors perfected the bacalhau box system for preserving codfish caught in the cold waters of Norway, Iceland, and Newfoundland.
You'll find this preservation method particularly effective because codfish's low oil and fat content makes it ideal for salting and drying in the sun.
When you're using the bacalhau box system, you'll need to layer the fish with salt and allow it to dry completely. This process prevents bacterial growth and mold formation, letting you store the fish indefinitely at room temperature.
The method proved so successful that it became standard practice in the Portuguese Navy from 1497 onward.
To prepare your preserved bacalhau for cooking, you'll need to soak it in cold water for 6-72 hours, depending on the fish's thickness. Be sure to change the water at least twice daily to remove excess salt. You can test the salt level by boiling a small piece and tasting it.
Today, you'll find this preservation technique still widely used, particularly for codfish sourced from Norway and Iceland. The method's continued relevance speaks to its effectiveness in maintaining both flavor and longevity.
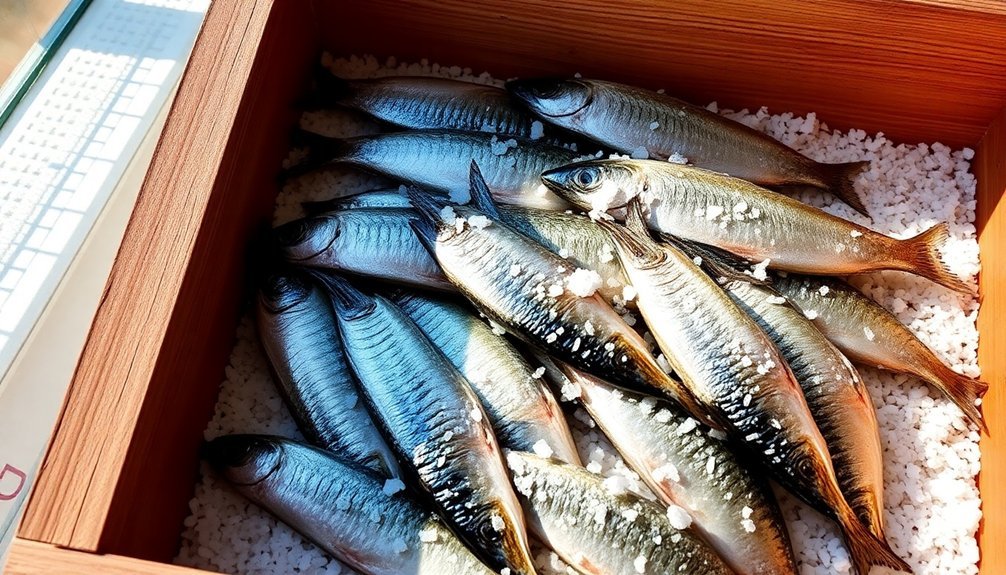
Baltic Wooden Crate Method
In the cold waters of the Baltic Sea, fishermen developed a practical adaptation of salt-box preservation using locally sourced wooden crates.
You'll want to start by thoroughly cleaning your wooden crate and ensuring proper drainage holes are in place to prevent moisture buildup. Line your crate with salt-resistant material to protect the wood from corrosion.
Begin the preservation process by creating a strong brine solution using one cup of salt per quart of water. You'll need to layer your fish carefully, ensuring each piece is completely covered in salt. The crate's design helps maintain ideal temperature control, especially when stored in cool, dark places. For enhanced preservation, you can combine this method with smoking techniques.
To maximize the crate's effectiveness, you'll want to monitor airflow carefully. The wooden construction naturally helps regulate moisture while protecting your fish from direct sunlight and wind. You should check your preserved fish regularly for any signs of spoilage.
For long-term storage, consider adding desiccants to your crate and maintaining temperatures close to 0°C. If you're planning extended storage, vacuum-seal portions of your salt-cured fish and freeze them for up to a year.
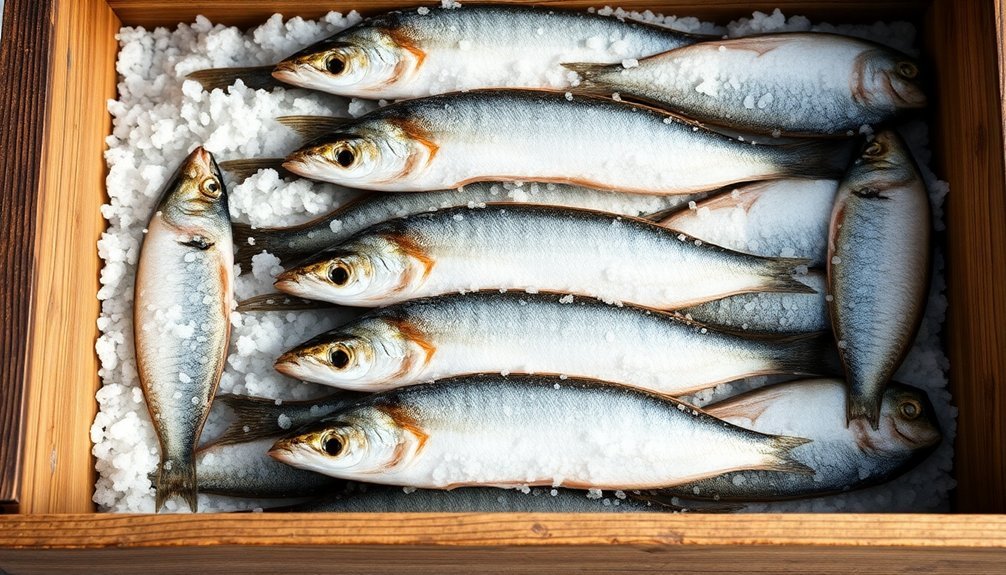
Atlantic Coast Fish Stacking
When you're stacking fish along the Atlantic Coast, you'll need to maintain proper layer spacing of 1-2 inches between each level to guarantee adequate drainage and prevent moisture buildup.
You'll find that salt distribution patterns vary by region, with Newfoundland fishermen typically using heavier applications near the coastline and lighter amounts inland.
To maintain ideal curing conditions, you must monitor and adjust for coastal temperature fluctuations, which can greatly impact the curing process and final product quality.
Layer Spacing For Drainage
Proper spacing between fish layers serves as the foundation for successful Atlantic Coast fish stacking. You'll need to create strategic spaces that allow brine to flow freely while maintaining consistent salt contact with your fish.
When you're arranging the layers, place larger fish with their bone sides against the container walls, and position smaller fish with their heads touching the sides.
For ideal drainage, you'll want to apply approximately one tablespoon of salt per 3/4-pound of fish, guaranteeing thorough coverage on all surfaces. Make sure you're creating deep enough slashes in the flesh to allow proper salt penetration.
As you build your layers, alternate between fish and generous amounts of salt, maintaining even distribution throughout the container.
To keep your fish properly submerged, place wooden planks or dishes on top of the salt layers. You'll need to monitor the layered fish regularly, checking that brine continues to drain effectively.
If you notice any pooling, adjust the spacing between layers. Remember to maintain temperatures below 8°C (46°F) and guarantee proper ventilation throughout the curing process to prevent bacterial growth and discoloration.
Regional Salt Distribution Patterns
Regional salt distribution along the Atlantic Coast follows three distinct patterns based on environmental factors and fish density.
You'll need to adjust your salting technique according to the specific characteristics of coastal fish and their natural habitat preferences. Fish from higher-salinity regions typically require less salt during the preservation process, while those from areas with lower salinity need more thorough treatment.
When stacking fish in your salt box, consider these critical distribution patterns:
- Higher-density areas where fish naturally cluster around structural elements like docks and oyster beds need a more concentrated salt application at those specific points.
- Areas with strong temperature gradients require varied salt distribution, with more salt needed for fish from warmer waters due to their higher metabolic rates.
- Regions with significant salinity differences demand adjusted salt ratios – coastal fish from brackish waters need 15-20% more salt than those from fully marine environments.
Remember to account for species-specific habits when layering your fish.
Different species inhabit distinct zones based on temperature and salinity preferences, so you'll want to group similar fish together for ideal salt distribution.
Coastal Temperature Control
Building on regional salt distribution methods, temperature control plays a central role in successful Atlantic Coast fish stacking. You'll need to monitor and maintain consistent temperatures to guarantee ideal preservation, as fish physiological responses are directly tied to their thermal environment.
When you're stacking fish in coastal salt boxes, you should aim for temperatures between 22°C and 25°C, similar to controlled aquaculture environments. If you're working in warmer regions, you'll want to implement cooling measures, as fish respond to heat by seeking cooler environments. This natural behavior can affect the quality of your preservation process.
You can maintain stable temperatures by using heat pump systems or designing your salt box with proper insulation. Remember that different fish species have varying thermal tolerances based on their native habitats. You'll need to adjust your temperature control strategy accordingly.
For example, if you're preserving salmon, they're particularly sensitive to temperature fluctuations and require more precise control.
Monitor your salt box temperatures regularly and make adjustments based on seasonal changes. This adaptive approach will help you maintain ideal preservation conditions and prevent spoilage throughout the year.
Eastern European Barrel Preservation
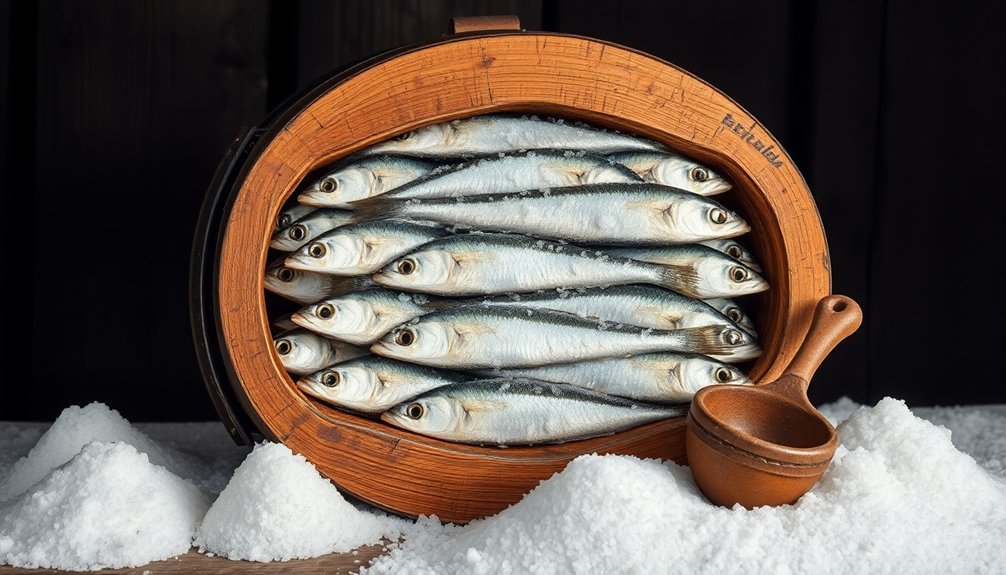
Traditional Eastern European barrel preservation centers on a time-tested method of preserving herring that's been practiced for centuries, particularly in Denmark and neighboring countries. The process involves carefully packing herring in large barrels with salt, allowing them to ripen naturally over several months through a protected manufacturing process.
You'll need to follow these essential steps to guarantee proper preservation:
- Pack fresh-caught herring tightly in layers, scattering salt between each layer.
- Fill the barrel with brine solution until all fish are completely covered.
- Store the sealed barrel in a cool environment (0-5°C) and roll it periodically.
During the ripening period, which can last up to six months, you'll need to monitor several quality parameters, including TVB-N and TMA-N levels.
The choice between pure and normal salt will affect your final product's taste and nutritional value. You'll also want to change the brine solution regularly to maintain quality.
When transporting the barrels, always use refrigerated vehicles and guarantee proper temperature control.
Remember that proper storage in a cool, dry environment is vital for maintaining the preserved fish's shelf life and quality.
Arctic Ice Box Salting
While Eastern European barrel preservation excels in herring storage, the Arctic's ice box salting method offers unique advantages for preserving larger fish species in extreme cold conditions.
In this method, you'll need to start by thoroughly cleaning your fish, removing all blood and black membranes before beginning the salting process.
To properly salt using the Arctic method, you'll lay your cleaned fish skin-side down in an insulated ice box, covering the flesh completely with salt. You'll then add wooden planks or heavy dishes on top to keep the fish submerged in the developing brine.
The cold Arctic temperatures, typically maintained at 2-4°C, work perfectly with this method to slow microbial growth during the curing process.
You'll need to monitor the brine formation regularly, ensuring your fish stays completely submerged by adding more salt when necessary. The process takes 2-3 weeks for smaller fish, longer for larger ones.
Once cured, your fish should have a water content of 55-58% and a salt content of 17-18%. For extended storage, you can further dry the fish to achieve klippfisk status, which can last up to two years when stored properly.
Frequently Asked Questions
Can Different Fish Species Be Cured Together in the Same Salt Box?
You shouldn't cure different fish species together in the same salt box. They have varying fat contents and textures that require different curing times. It'll lead to inconsistent results and potential quality issues.
How Do You Safely Remove Mold if It Appears During Storage?
If you spot mold, discard affected areas immediately. Clean the container with white vinegar or diluted bleach, then transfer remaining fish to a new, clean container. Don't try to salvage visibly moldy portions.
What Materials Should Never Be Used for Constructing a Salt Box?
Don't use untreated wood, aluminum, copper, iron, fabric, bamboo, or any porous materials for your salt box. They'll either react with salt, absorb moisture, or promote bacterial growth during fish storage.
Does the Moon Phase Affect Traditional Salt-Curing Timing and Results?
You won't find any direct impact from moon phases on salt-curing timing or results. The curing process relies on salt concentration, temperature, and humidity rather than lunar cycles affecting the preservation.
Can Leftover Curing Salt Be Reused for the Next Batch?
You shouldn't reuse curing salt for subsequent batches. It's risky due to potential contamination, reduced effectiveness, and compromised food safety. Using fresh salt guarantees the best results and keeps your cured fish safe.
In Summary
You've now discovered some of the world's most effective salt box methods for preserving fish. Whether you're trying the Nordic layering approach or the Japanese dry salt technique, you'll find these time-tested methods work remarkably well. Don't forget to properly clean your fish and use the right salt-to-fish ratio. With these traditional preservation techniques, you'll enjoy fresh-tasting fish throughout the year.


Leave a Reply