To make authentic desert jerky, you'll need lean meat sliced against the grain into thin, uniform strips. Choose a hot, dry day with temperatures above 85°F and humidity below 20%. Set up elevated drying racks in direct sunlight, ideally between 10 AM and 4 PM, and place your seasoned meat strips on food-grade mesh screens. Protect the meat from insects and debris with a slanted canopy that allows airflow. Your jerky's done when it bends like a green branch without snapping, showing a dark, consistent color. Following these ancient preservation techniques can reveal centuries of desert wisdom for your modern kitchen.
Traditional Desert Preservation Methods
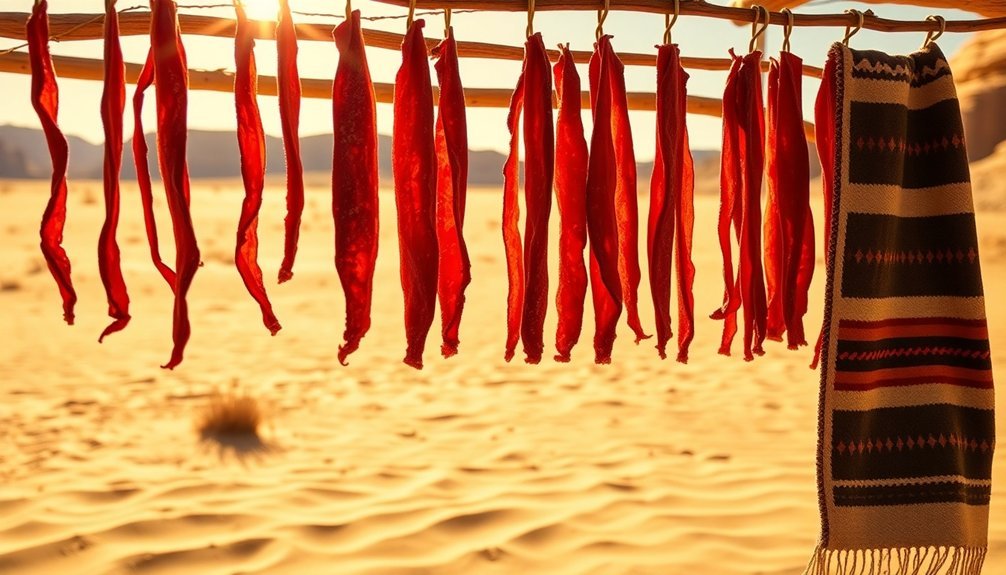
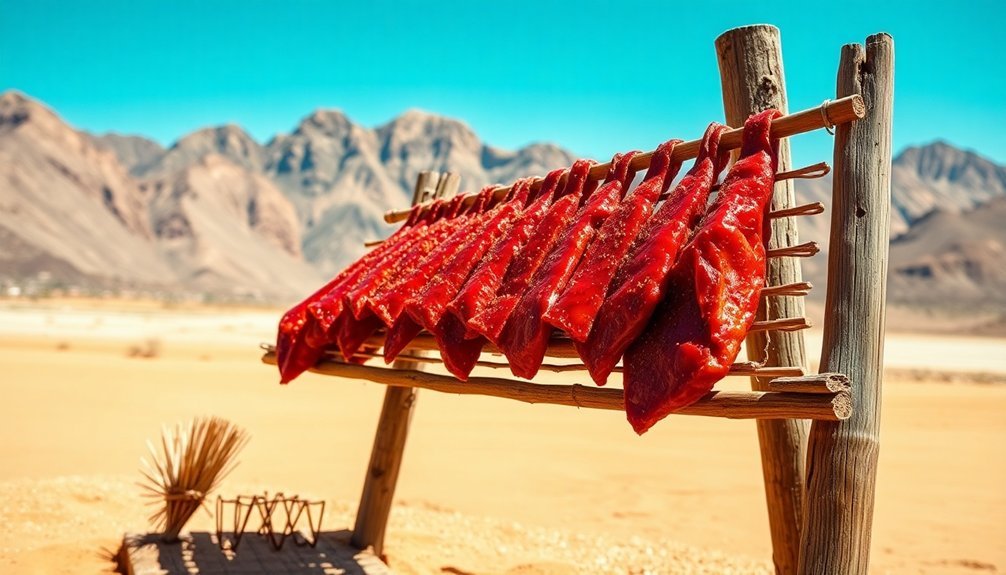
Throughout history, desert communities have relied on several effective methods to preserve meat in harsh, arid conditions. The desert's natural environment, with its intense heat, low humidity, and steady breezes, provides ideal conditions for sun-drying meat, one of humanity's oldest preservation techniques. Thin slices can be cut and hung directly in sunlight to dry naturally.
You'll find that sun-drying works best when you're working with lean cuts of meat like beef, lamb, or venison. Before you begin the drying process, you'll need to remove as much fat as possible to prevent rancidity and speed up preservation.
While sun-drying is effective, you'll want to protect your meat from potential contamination from insects, birds, and windblown debris.
If you're looking to enhance flavor while preserving your meat, you can combine traditional desert drying with curing techniques. You'll start by coating your meat generously with salt, which draws out moisture and creates an inhospitable environment for bacteria.
Once cured, you can proceed with the drying process. For additional flavor, you might consider incorporating regional spices, similar to the African biltong method, which combines vinegar soaking with spice coating before sun-drying.
Choosing Your Desert Meat
Selecting the right cut of meat makes all the difference when creating authentic desert jerky. You'll want to focus on lean cuts with minimal fat content, as fat can't be properly dehydrated and will cause your jerky to spoil. Top round, bottom round, and eye of round are your best beef options, offering the perfect balance of flavor, tenderness, and economical value. The minimal fat and easy preparation of these cuts helps make them the perfect jerky choice.
If you're feeling adventurous, consider using game meats like venison or elk. These extremely lean proteins create excellent jerky and offer unique flavors that complement traditional desert seasonings. You'll need to freeze game meat first to guarantee safety.
When you're at the butcher, look for meat with little to no visible marbling. Remember that you'll lose about two-thirds of the meat's weight during the drying process, so plan your quantity accordingly.
Ask your butcher to slice the meat against the grain, or if you're doing it yourself, partially freeze the meat first for easier cutting. Don't waste money on expensive cuts like ribeye or filet mignon – the lean, economical cuts will give you the best results for authentic desert jerky.
Essential Tools and Equipment
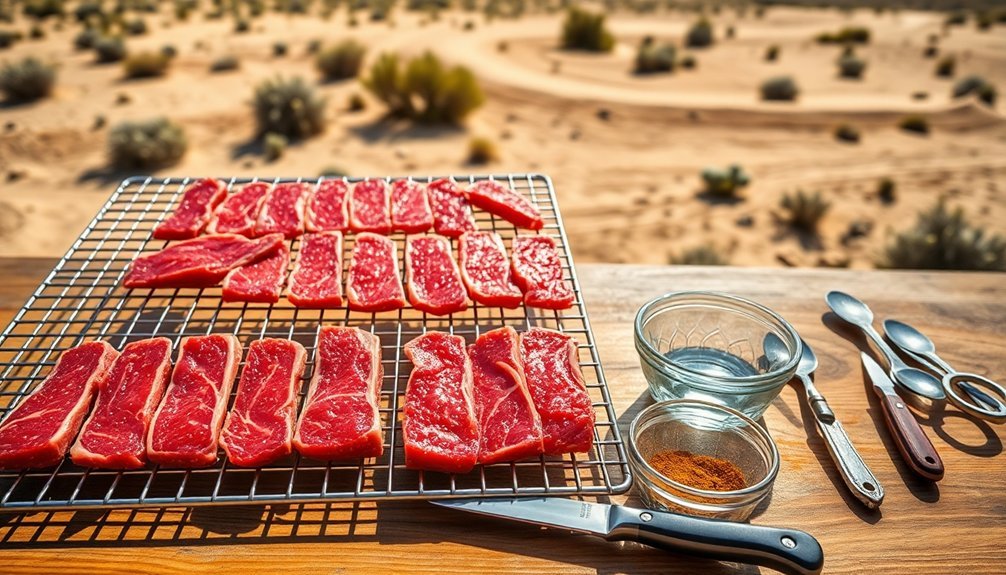
Now that you've chosen your meat, having the right tools will make or break your jerky-making success. You'll need precise cutting equipment to guarantee uniform slices, reliable drying tools for proper dehydration, and monitoring devices for safety.
| Essential Tool | Purpose | Key Feature |
|---|---|---|
| Jerky Board & Knife | Uniform Slicing | Cuts at 1/4" or 3/8" thickness |
| Dehydrator/Oven | Meat Drying | Temperature range 105-165°F |
| Wireless Thermometer | Safety Monitoring | Confirms 160°F internal temp |
Start with a quality jerky board and knife set to achieve consistent slices. Whether you're cutting with or across the grain, maintain a thickness of no more than 1/4 inch for safe, even drying. For the drying process, you'll need either a dehydrator like the Excalibur 3926TB or a properly set up oven with good air circulation. You can save 20% on costs by purchasing a complete jerky maker kit rather than individual components.
Don't forget your monitoring equipment – a wireless thermometer is vital for tracking internal meat temperature, confirming it reaches the safe minimum of 160°F. Once your jerky's done, you'll want a vacuum sealer and airtight containers for proper storage. Keep your tools clean with drip pans and dishwasher-safe components for easy maintenance.
Preparing the Meat
When handling the raw meat, always wear clean plastic gloves or use tongs to prevent bacterial contamination.
Keep your work surface sanitized and avoid cross-contamination with other foods.
If you're using a marinade, you'll need to heat the meat to 160°F to eliminate harmful bacteria like Salmonella and E. coli.
Use an oven thermometer to guarantee accurate temperature control throughout the process.
Desert Spice Blends

Traditional desert spice blends bring authentic Southwestern flavors to your jerky while acting as natural preservatives. You'll need to combine black pepper, jalapeño, chipotle, and habanero peppers to create varying heat levels, along with chili powder, cayenne, and paprika for depth of flavor.
Use freshly cracked pepper from a mill to maximize aroma, and incorporate soy sauce and vinegar as natural curing agents.
To prepare your marinade, mix these spices according to specific measurements, avoiding salt since it's often present in other ingredients. You'll want to add light molasses or honey for sweetness, and olive oil to guarantee a more flexible texture.
For that classic smoky touch, include liquid smoke in your blend. Don't use karo or corn syrup, as they'll leave your jerky with an unwanted sticky coating.
Apply your marinade using a sprinkler bottle for even coverage, then tumble the meat by hand to guarantee complete coating. You'll need to refrigerate the meat for 24 hours to allow maximum flavor absorption.
After drying, you can baste the jerky with leftover sauce for an attractive gloss, keeping everything natural and MSG-free.
Natural Sun Drying Setup
You'll need to select a location that's both arid and well-ventilated, ideally with temperatures reaching triple digits and consistent sunlight throughout the day.
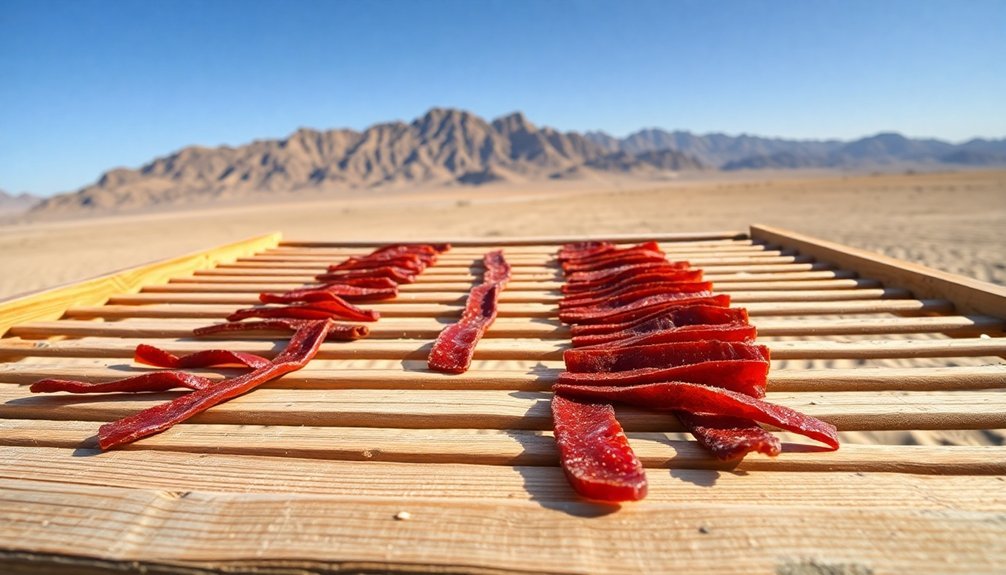
Start by constructing a raised platform using food-grade mesh screens secured to a wooden frame, keeping the meat at least 4 feet off the ground to protect from dust and animals.
Your setup should include a protective cover that shields the meat from unexpected weather while maintaining proper airflow, such as a slanted canopy or adjustable tarp positioned above the drying racks.
Safe Drying Location Selection
Selecting the perfect drying location is vital for successful desert jerky. You'll need to find a spot that receives consistent sunlight throughout the day, with steady breezes to prevent moisture buildup. Choose an elevated area away from ground moisture, as humidity is your biggest enemy in the jerky-making process.
Set up your drying station in an open space that's protected from dust and debris. You don't want your location to be too exposed to the elements, but it must have enough airflow to properly dry the meat. If you're in an area with unpredictable weather, make sure you can quickly move your setup to a protected spot if needed.
Watch out for areas that might attract insects or animals. Your chosen location should be at least 4 feet off the ground and away from vegetation that could harbor pests.
Keep the drying racks away from buildings or structures that might block the sun or create humid microclimates. Remember, you're looking for an arid environment with low humidity levels – this is vital for preventing bacterial growth and ensuring your jerky dries safely and effectively.
Mesh Screen Construction Steps
A successful jerky-drying setup hinges on proper mesh screen construction. Start by selecting FDA-approved food-grade polypropylene or high-quality plastic screens with 1/8" holes to guarantee your jerky stays secure while drying.
When you're working with roll material, cut the screen to match your drying space dimensions, keeping in mind you'll need extra coverage to protect from insects.
Before placing your jerky, you'll want to heat-treat the screen at 190 degrees to eliminate warping. Position the screen with the curled side down on your drying surface, making sure it's completely flat for ideal airflow.
Here's what you need to check before proceeding:
- Screen material is food-safe and dishwasher compatible
- Holes are small enough to prevent food loss but allow proper air circulation
- Screen surface is completely flat and secured to prevent movement
- Finger notches are accessible for easy food removal
Once your screen is properly constructed, spread your marinated jerky strips in a single layer, avoiding any overlap.
Remember to position the screen where it'll receive consistent airflow while protecting your jerky from environmental contaminants.
After use, clean thoroughly and store in a dry place to maintain its integrity.
Protection From Elements Techniques
Install your drying station where there's consistent airflow, but protect it from strong winds by using windbreaks if necessary.
You can create these using temporary barriers or by positioning your setup near (but not directly against) existing structures.
Don't forget to anchor your racks and protective covering securely – you can use weights, stakes, or tie-downs depending on your setup.
If you're expecting any precipitation, you'll need to quickly move your jerky to a covered area to prevent moisture absorption.
Timing the Desert Weather
To maximize your jerky's drying efficiency in the desert, you'll want to time your preparation during peak sun hours between 10 AM and 4 PM when temperatures reach their highest points.
You'll find the most favorable conditions during late spring and early summer, before the monsoon season brings unwanted moisture to the air.
Desert humidity levels typically stay below 20% during these ideal periods, making it perfect for achieving that authentic dry-aged texture in your jerky.
Peak Sun Hours
Understanding peak sun hours is vital for crafting authentic desert jerky. These important hours, when sunlight is most intense, typically occur during midday and can vary considerably based on your location.
In desert regions like Arizona and Nevada, you'll find 6-8 peak sun hours daily, making them ideal for jerky-making. If you're in areas like Florida or the Northeast, you'll need to adjust your timing to compensate for fewer peak hours, typically 2.5-4.5 daily.
To maximize your jerky-making success, plan your drying schedule around these peak hours:
- Start early in the morning to catch the full range of peak sunlight
- Position your drying racks where they'll receive unobstructed sun exposure
- Monitor seasonal changes, as summer offers more peak hours than winter
- Adjust drying times based on your location's specific peak sun patterns
Remember that clear skies are essential for best drying conditions.
You'll need to account for seasonal variations – for instance, if you're in Austin, you'll have nearly 7 peak hours in July but less than 3 in December. This understanding helps guarantee your jerky dries properly and safely, maintaining its authentic desert quality.
Seasonal Temperature Changes
Mastering seasonal temperature changes plays an essential role in desert jerky-making success. You'll want to time your jerky production around the desert's distinct seasonal patterns to achieve the best results.
| Season | Best for Jerky? | Temperature Notes |
|---|---|---|
| Summer | Yes | Perfect conditions with 134°F max temps; consistent heat for drying |
| Spring/Fall | Sometimes | Variable temps; monitor humidity levels carefully |
| Winter | No | Too cool and humid; temps can drop to 32°F |
Spring's fore-summer drought (May-June) offers excellent jerky-making conditions with rising temperatures and low humidity. Summer provides the most reliable environment, with daytime temperatures soaring above 100°F and consistently low humidity levels – perfect for achieving that authentic desert-dried texture. You'll want to avoid winter months when temperatures drop below 64°F and humidity rises above 50%, as these conditions can lead to improper drying and potential spoilage. Autumn can work well for jerky-making, especially during the dry period after the summer monsoon, but you'll need to watch for the occasional storms that could interrupt the drying process. For best results, aim for days when temperatures exceed 100°F with clear skies and low humidity.
Desert Humidity Levels
Three distinct periods of humidity occur daily in the desert, and you'll need to plan your jerky-making around them. During summer afternoons, you'll experience ideal drying conditions when humidity drops to around 10%, while winter afternoons hover near 30%. The desert's intense solar radiation and high temperatures create these perfect low-humidity windows for jerky preparation.
Your timing matters greatly because humidity levels fluctuate throughout the day:
- Morning starts with moderate humidity from nighttime cooling
- Midday brings the lowest humidity, perfect for maximum moisture extraction
- Afternoon continues with dry conditions until sunset
- Evening sees rising humidity levels, reaching up to 50%
You'll want to avoid making jerky right after rainfall, when humidity spikes can slow the drying process. Instead, wait for the characteristic dry conditions to return.
Desert organisms have adapted to these dramatic humidity swings, and your jerky-making process should too. Start your drying during the low-humidity window, when the sun's radiation is strong and the air's capacity to absorb moisture is at its peak.
This natural dehydration cycle creates the perfect environment for traditional desert jerky.
Protecting From Desert Elements
Successful jerky making in the harsh desert environment depends upon careful protection from unforgiving elements.
You'll need to shield your meat from direct sunlight while maintaining proper airflow and preventing contamination. Create a shaded area using natural materials like fallen tree boughs or local foliage, positioning your drying racks at an elevated height to maximize air circulation.
Keep insects and desert animals away from your jerky by implementing multiple protective measures. Cover your meat with fine mesh netting that allows airflow while blocking unwanted visitors.
Maintain a steady smoke source nearby, as it'll naturally repel flies and other insects. You can also incorporate natural insect-repelling spices in your marinade for added protection.
Monitor your jerky's exposure to moisture carefully, even in the arid desert environment. Set up your drying station with proper drainage and ventilation to prevent any moisture accumulation.
Use clean foil or baking sheets with elevated racks to guarantee air can circulate freely beneath the meat. Keep your preparation area and tools sanitized, and handle the meat minimally to avoid introducing contaminants that could spoil your desert jerky.
Testing for Readiness

To determine if your desert jerky is properly dried, you'll want to perform a simple bend test where the meat should flex like a green branch and break without snapping cleanly.
Check that the color is consistently dark with any visible fat appearing golden brown rather than white or ivory.
Make sure there's no residual moisture or dampness on the surface, as properly dried jerky should feel leathery but remain pliable enough to chew.
Bend and Snap Test
Testing jerky's readiness requires a simple yet effective bend and snap test. Before you begin testing, remove a piece from your drying setup and let it cool to room temperature. Warm jerky can mislead you about its true doneness, potentially resulting in over-dried meat.
When you're ready to test, the jerky should behave similar to a green tree branch – pliable but breaking when bent too far. Here's what to look for during your test:
- The jerky should bend without immediately snapping in half
- When bent far enough, it should break with some resistance
- The texture should feel firm yet pliable, not brittle or rubbery
- You should see a clean break rather than stringy, uncooked fibers
If your jerky snaps like a dead twig, it's over-dried. Conversely, if it remains rubbery without breaking, it needs more drying time.
Remember that proper drying isn't just about texture – your jerky must reach an internal temperature of 160°F for safety. Check your pieces every 15 minutes to verify consistent drying throughout the batch.
Visual Color Check
During your jerky's final inspection, a careful visual assessment provides essential clues about its readiness. You'll want to look for a uniform, leathery appearance across all pieces, with the Maillard reaction creating consistent coloring throughout the meat.
Make sure there aren't any raw or pinkish areas visible, as these indicate incomplete dehydration. Pay special attention to the fat content. Properly rendered fat should display a deep, golden-brown color.
If you notice any white or ivory-colored fat, your jerky needs more drying time. The surface shouldn't show any residual moisture or shine from the marinade, which could compromise shelf stability.
Let your jerky cool to room temperature before making your final assessment. Warm jerky can mask issues that become apparent once it's cooled.
As you examine each piece, check for signs of overcooking like dark or burnt spots. The meat's color should be uniform, and the texture should be consistently dry throughout.
Remember that proper visual indicators are vital for ensuring your jerky is both safe to eat and properly preserved for storage.
Moisture Content Assessment
Proper moisture content stands as the cornerstone of safe, shelf-stable jerky production. You'll need to achieve a moisture content of around 20% and maintain a water activity (aw) level below 0.75 to guarantee your desert jerky remains safe and delicious.
While commercial producers use sophisticated moisture meters, you can still effectively assess your jerky's readiness through careful observation and basic testing.
To properly evaluate your jerky's moisture content, follow these key indicators:
- Bend the jerky piece – it should crack slightly but not break, showing flexibility without being too moist
- Check for visible moisture when you cut into the thickest part – there shouldn't be any
- Press the jerky between paper towels – no moisture should transfer
- Test the texture by pulling apart a piece – fibers should separate cleanly without resistance
If you're producing jerky regularly, consider investing in a water activity meter for precise measurements. The target moisture-to-protein ratio should be approximately 0.75:1.
Desert Storage Solutions
Desert dwellers have developed ingenious storage methods over centuries to preserve food in harsh conditions. You'll find that many of these techniques remain effective for storing your jerky and other preserved foods today.
For ideal storage, you can create a ZEER pot system by nesting two clay containers with damp sand between them. This ancient refrigeration method can cool your storage space by up to 4.4°C through evaporation.
If you're using jars, place them in a water tray with a cloth wick to achieve cooling up to 35 degrees below ambient temperature.
You'll want to keep your jerky elevated and dry, similar to ancient granary structures that used raised platforms to protect against moisture.
Consider storing your preserved meats in sealed clay or ceramic containers, much like the traditional seed jars that were secured with clay rings and pottery disks.
Avoid in-ground storage methods, as they're vulnerable to moisture, mold, and pests.
If you're using cloth or basket storage, keep them suspended from beams to promote air circulation and prevent moisture accumulation.
Ancient Desert Jerky Wisdom

Throughout the centuries, indigenous peoples in the Andes mountains pioneered the art of jerky-making, known as Ch'arki in the Quechua language. Their wisdom, dating back to the 1550s, reveals a sophisticated understanding of natural preservation methods using the desert's harsh conditions to their advantage.
You'll find these ancient techniques remarkably effective, as they harness the power of sun, wind, and freezing temperatures to create long-lasting, nutrient-dense food. The process eliminates up to 90% of water content, making the meat resistant to spoilage while maintaining its nutritional value.
- Cut your meat thin and expose it to hot sun during daylight hours
- Allow the desert's freezing nights to further preserve the meat
- Use natural winds for even drying and prevention of moisture buildup
- Add salt to inhibit bacterial growth and enhance the drying process
When you study Native American preservation methods, you'll discover they expanded on these techniques by creating Pemmican, mixing dried meat with berries and fat.
This wisdom spread through cultural exchange, with Spanish conquistadors adapting Ch'arki to charqui, and early settlers learning these preservation methods from indigenous peoples.
Frequently Asked Questions
Can I Use Fish or Seafood to Make Desert Jerky?
You can definitely use fish for jerky! Focus on low-fat options like halibut, tuna, snapper, bass, or trout. Avoid oily fish like bluefish. Cut them thin, marinate well, and they'll make excellent jerky.
How Do Desert Animals Affect the Drying Process?
You'll need to protect your drying meat from desert animals, as they're attracted to the scent. Their highly efficient metabolisms and keen sense of smell make them persistent scavengers seeking protein-rich food.
What Altitude Works Best for Desert Jerky Making?
You'll find ideal jerky-making conditions at altitudes between 3,000-5,000 feet, where you've got lower humidity, faster drying times, and perfect air circulation. The thin, dry air helps create perfectly preserved meat.
Does Moon Phase Impact the Jerky's Traditional Drying Process?
You won't find any scientific evidence linking moon phases to jerky drying. Your success depends on controllable factors like temperature, humidity, and proper preparation rather than lunar cycles during the drying process.
Can Sandstorms Actually Improve the Jerky's Flavor Profile?
No, you don't want sandstorms near your jerky. They'll contaminate your meat with sand and dust, increase humidity, and create unsafe conditions for drying. Any earthy flavors they add aren't worth the health risks.
In Summary
You've now mastered the ancient desert art of sun-dried jerky making. By following these traditional methods and respecting the desert elements, you'll create flavorful, long-lasting meat that rivals any modern preservation technique. Remember to keep your jerky protected from sand and pests, store it properly in breathable containers, and always trust the desert wisdom that's been passed down through generations of nomadic peoples.


Leave a Reply