You'll find natural meat dehydration offers a reliable way to preserve meat using methods that desert cultures perfected over 12,000 years ago. To succeed, you'll need low humidity (around 30%), warm temperatures, and consistent air circulation. Start by selecting lean cuts like top round or venison, then trim visible fat and slice against the grain to 1/4 inch thickness. Traditional drying works best in sunny areas, where you can suspend meat strips individually for even drying. While electric dehydrators provide more control, ancient techniques using natural airflow and sunlight can achieve excellent results. There's a world of time-tested preservation wisdom waiting to enhance your food storage skills.
Ancient Desert Preservation Techniques
While modern refrigeration has revolutionized food preservation, ancient desert cultures developed remarkably effective methods for preserving meat through natural dehydration. In regions with abundant sunlight and wind, you'll find that these civilizations mastered the art of drying meat by cutting it into uniform pieces and exposing it to natural elements, a practice dating back to 12,000 B.C. in the Middle East.
In areas where sunlight or wind wasn't sufficient, you can see how they adapted by creating still houses heated by fire. These structures provided controlled conditions for consistent drying, ensuring meat preservation regardless of weather conditions. The ability to dry and store meat helped communities plan food supplies ahead, ensuring survival during lean periods.
They'd often combine this technique with curing and smoking, using salt to prevent bacterial growth while enhancing flavor.
One of the most innovative preservation methods you might encounter is the ZEER pot, developed in Ancient Egypt around 2500 B.C. This desert refrigerator uses evaporative cooling through a clay pot system with damp sand and wet cloth to maintain temperatures around 4.4°C.
You'll be interested to know that this method was revived in northern Nigeria in the 1990s, providing significant economic benefits and reducing food storage-related illnesses.
Climate Requirements for Meat Drying
When you're drying meat naturally, you'll want relatively low humidity levels around 30% to guarantee proper moisture removal without spoilage.
Warm temperatures work to your advantage, as they speed up the drying process while concentrating the meat's flavors. Unlike traditional curing methods where beneficial bacteria growth requires higher humidity, natural drying relies on low moisture environments.
You'll find the best results in climates with consistent warm weather and minimal day-to-night temperature fluctuations, though you must carefully monitor the process to prevent the meat from drying too quickly on the outside.
Optimal Humidity Levels Needed
The successful dehydration of meat depends heavily on maintaining proper humidity levels throughout the process.
You'll need to adjust your approach based on whether you're curing, dry aging, or traditionally drying your meat.
For traditional meat drying, you'll want to maintain a low humidity level of around 30%. This allows for gradual and uniform dehydration while preventing spoilage. Oxygen circulation is essential for proper oxidation and crust development during the drying process.
You'll need proper air circulation to avoid creating wet spots that could compromise your meat.
If you're curing meat, aim for humidity between 60-70% to promote good bacterial growth and prevent case hardening.
Don't let levels drop below 65%, as this can cause the outer layer to dry too quickly. For ideal results, maintain an average of 75%, but never exceed 80% to avoid unwanted mold growth.
For dry aging, you'll want to keep humidity between 80-85%. This range helps form the characteristic dry-aged crust while preventing excessive moisture loss.
If you let humidity drop too low, you'll end up trimming away more meat due to a deeper outer crust, while levels above 90% risk mold development.
Hot Weather Drying Benefits
Building on our understanding of humidity control, warm weather conditions create distinct advantages for meat dehydration. When you're drying meat in hot weather, you'll benefit from accelerated moisture evaporation, which greatly speeds up the entire process.
Warm, dry air creates ideal conditions that can help you achieve weight losses of up to 60-70 percent within just three to four days. You'll find that consistent temperatures between day and night are particularly beneficial for uniform drying.
The warm climate promotes continuous water migration from the meat's deeper layers to its surface, guaranteeing even dehydration throughout the product. However, you'll need to maintain proper air circulation of 0.5-2 m/s to prevent microbial growth and guarantee uniform drying.
When you're using hot weather to your advantage, you must still protect your meat from insects and monitor it regularly. You'll notice the meat's consistency changing from soft to firm to hard as the drying progresses.
Remember that while high temperatures speed up the process, you'll need to maintain good air circulation to prevent spoilage and guarantee proper oxidation, which helps form the desired crust on your dried meat products.
Selecting the Right Cuts
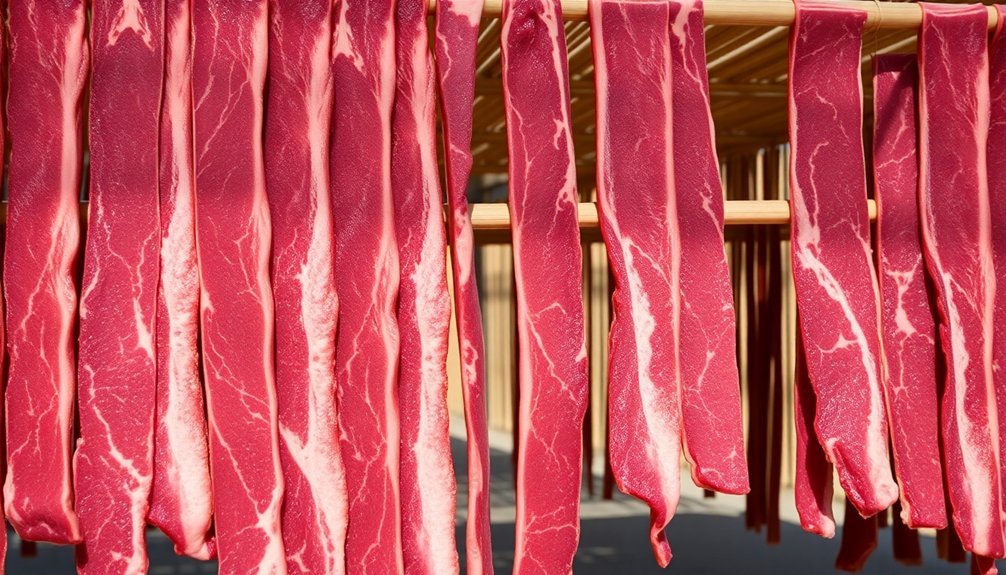
When selecting meat for natural dehydration, you'll want to focus on lean cuts like top round, eye of round, or venison, as fat content can lead to rapid spoilage.
You'll need to trim away all visible fat thoroughly, ensuring clean, uniform pieces that will dry evenly.
For best results, slice your meat against the grain to a consistent thickness of 1/4 inch (6mm), which allows for proper air circulation and even drying throughout each piece.
Best Lean Meat Choices
Selecting quality lean cuts stands as an essential first step in successful meat dehydration. You'll find that beef cuts from the round, particularly top and bottom round, offer excellent options due to their minimal fat content.
While brisket can work, it's better to stick with leaner cuts from the hindquarters for best results.
When working with poultry, you'll want to focus on chicken breast as your primary choice. You can use both home-cooked and canned chicken, though adding breadcrumbs to ground chicken helps maintain proper texture during the drying process.
For pork options, choose lean cuts and make certain they're cooked to safe temperatures before dehydrating.
If you're interested in exploring game meats, you'll discover that venison and other wild game are naturally suited for dehydration due to their lean composition.
You can also work with meat from sheep, goats, and cameloids, but you'll need to inspect them carefully for quality before processing.
Remember to cut all your meats uniformly, regardless of the type you're using, and consider presalting game meats to enhance the final product's quality.
Trim Fat Thoroughly
Proper fat trimming stands as the most critical step in preparing meat for dehydration. You'll need to remove all visible fat, gristle, and tendons to prevent spoilage and maintain the quality of your final product. Fat causes rancidity during storage and can greatly reduce your dehydrated meat's shelf life.
When trimming, suspend the meat to avoid surface contact and prevent bacterial contamination.
For successful fat removal, follow these essential steps:
- Remove all visible contamination and dirty spots by careful trimming rather than washing, which can spread bacteria.
- Use a sharp knife to methodically cut away every bit of visible fat, including marbling and surface fat.
- Trim away gristle and tendons while ensuring uniform piece sizes for even drying.
- Blot any remaining oil droplets with paper towels during the dehydration process.
Once you've thoroughly trimmed your meat, cook it to a safe internal temperature before cutting it into uniform pieces for dehydration.
If you're working with ground meat, add breadcrumbs to absorb excess fat. Remember, high-fat meats like duck and goose aren't suitable for dehydration, so stick to lean cuts for best results.
Optimal Thickness Guidelines
Before diving into the dehydration process, achieving the right thickness for your meat slices makes all the difference in creating perfect jerky. You'll want to aim for slices between 1/8 to 1/4 inch thick, as this range guarantees ideal drying while maintaining a desirable chewy texture. For consistent results, consider partially freezing your meat before cutting, making it easier to achieve uniform slices.
Select lean cuts like eye of round or sirloin tip for best results, as they'll dehydrate more efficiently and reduce the risk of spoilage. When cutting your meat, you'll need to maintain consistent thickness throughout to guarantee even drying times and uniform texture.
| Thickness | Drying Time | Texture Result |
|---|---|---|
| 1/8 inch | 3-4 hours | Crispy, potentially brittle |
| 1/4 inch | 4-6 hours | Ideal chewy texture |
| 1/2 inch | 8-10+ hours | Tough, risk of under-drying |
Watch your slices carefully during dehydration, as thinner cuts can quickly become too dry and brittle. If you're using thicker cuts, guarantee they're completely dried through to prevent any food safety issues.
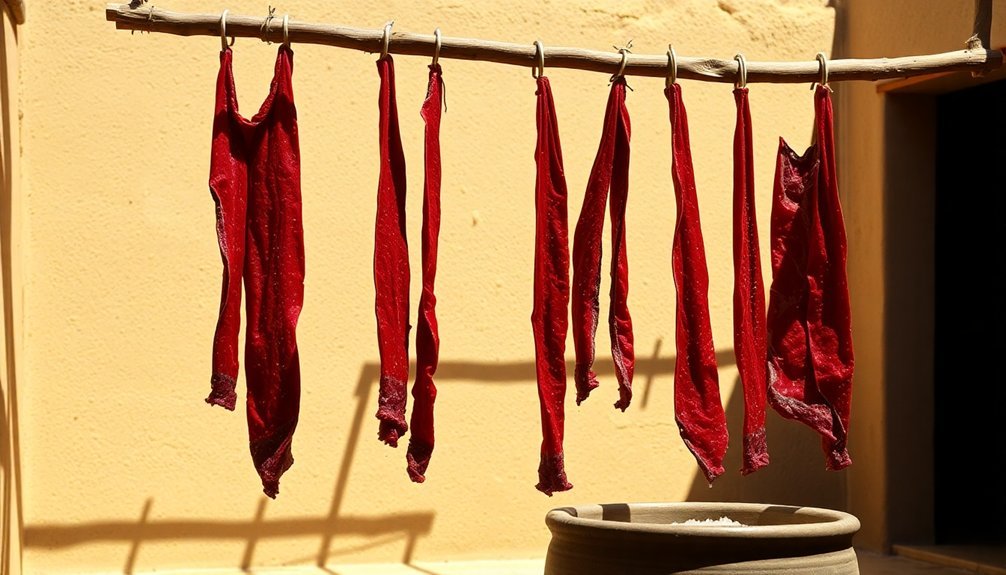
Traditional Preparation Methods
Successful meat dehydration starts with careful preparation of lean cuts. You'll need to thoroughly trim away all visible fat to prevent rancidity and maintain quality during the drying process.
Before you begin, make sure you're cutting the meat into uniform shapes and sizes, as this consistency allows for even drying throughout all pieces.
For traditional preparation, you'll want to take into account presalting your meat, especially when working with strips or large flat pieces. This involves a brief soak in a salt solution, followed by draining before the drying process begins.
Here are the key steps of traditional meat preparation for natural dehydration:
- Remove all visible fat and connective tissue using a sharp knife, guaranteeing clean cuts.
- Cut the meat into uniform pieces, maintaining consistent thickness throughout.
- Prepare a salt solution and soak the meat pieces for several minutes.
- Drain thoroughly and arrange pieces with adequate spacing for air circulation.
When following these preparation methods, you're setting up for ideal drying conditions that'll result in properly preserved meat.
Remember that proper preparation is essential, as it directly impacts the final product's quality, shelf life, and taste.
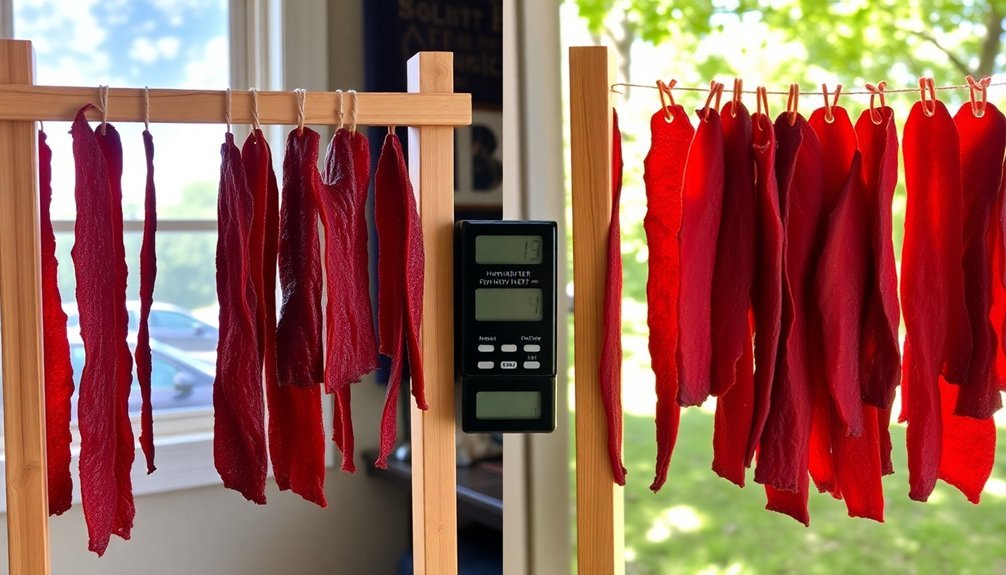
Natural Air Circulation Systems
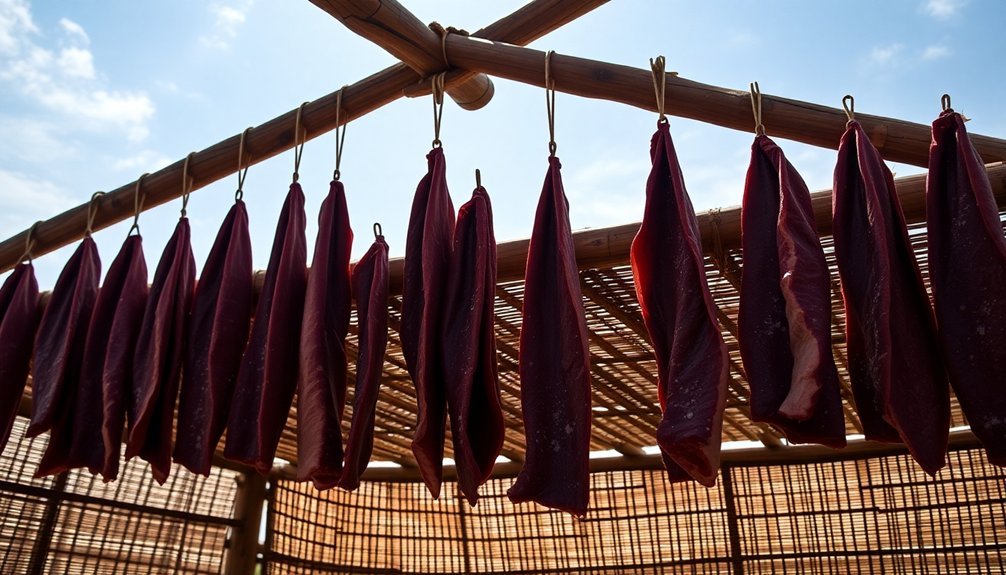
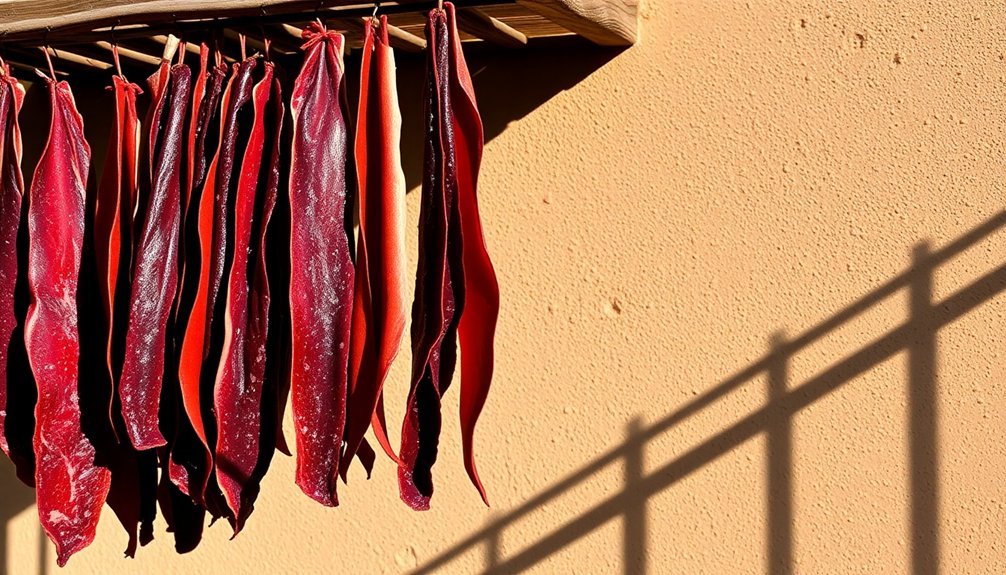
Nature's most effective drying mechanism relies on the consistent flow of warm, dry air around your meat. You'll want to guarantee your drying space maintains low humidity (around 30%) and steady temperatures to create ideal conditions for moisture evaporation.
By suspending meat strips individually with hooks or clips, you're allowing air to circulate freely along the entire surface of each piece.
To set up an effective natural air circulation system, you'll need to arrange your drying space to prevent meat pieces from touching each other or any supporting structures. This separation is vital as it prevents moisture buildup and potential microbial growth.
You should also monitor temperature and humidity levels using a thermometer and hygrometer to maintain perfect drying conditions.
Your drying facility must protect the meat from unfavorable weather while still allowing proper airflow.
Watch for signs of case hardening, where the outer surface dries too quickly and traps moisture inside. You can prevent this by moderating the drying rate through controlled air circulation.
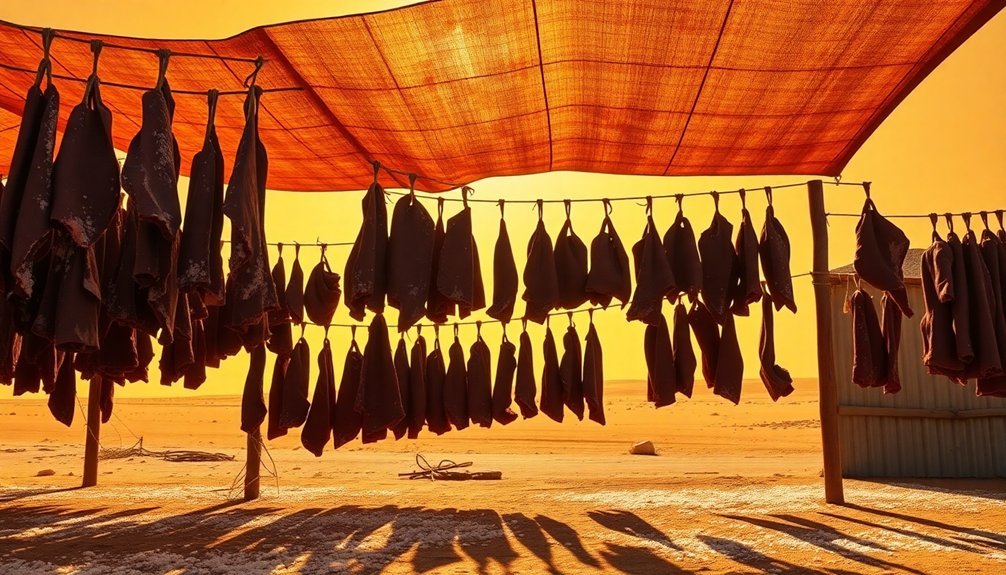
Sun Exposure and Temperature Control
While natural air circulation forms the foundation of meat drying, proper sun exposure and temperature control will determine your success.
You'll need a sunny area with low humidity and temperatures of at least 86°F (30°C) to effectively dry your meat. When using sun exposure, place your meat on a mesh screen and cover it with another screen to protect it from insects while allowing airflow.
Temperature control is essential for safe meat dehydration. You'll want to maintain temperatures between 160°F and 165°F (70°C to 74°C) to eliminate harmful bacteria while preventing overcooking.
Start with 4-6 hours of sun exposure, and you can extend this to 8 hours if needed.
For best results in sun-drying meat, follow these essential steps:
- Choose days with warm, dry air and humidity around 30%
- Monitor the meat's exposure to prevent over-drying from intense sun rays
- Keep meat pieces separated to guarantee uniform drying
- Track moisture reduction by checking weight loss regularly
Remember that incorrect temperatures or inadequate drying time can lead to bacterial growth.
If you're uncertain about the safety of sun-dried meat, consider post-drying heat treatment to 160°F as an extra precaution.
Indoor Versus Outdoor Drying
When you're choosing between solar drying and electric dehydrators for meat preservation, you'll need to weigh the zero-energy benefits of sun exposure against the consistent, controlled environment of indoor equipment.
You can achieve proper temperature control more reliably with a dehydrator's precise settings of 145°F-165°F, while outdoor drying requires careful monitoring of weather conditions and can take 3-4 days longer.
Weather impacts like high humidity and cool nights can greatly compromise outdoor drying success, making indoor dehydration the more dependable choice for meat preservation in most climates.
Solar Drying Vs Dehydrators
Choosing between solar drying and electric dehydrators comes down to your specific needs, climate conditions, and available resources.
Solar drying harnesses natural energy and works best in sunny, low-humidity environments, reducing your electricity costs while maintaining food quality. Electric dehydrators offer consistent results regardless of weather, with precise temperature and humidity control.
You'll want to take into account these key factors when deciding between the two methods:
- Climate Compatibility: Solar drying requires sunny conditions and low humidity, achieving moisture reduction from 91.94% to 22.32% in 44 hours for best results. If you're in a cloudy or humid area, an electric dehydrator's reliability might be worth the energy cost.
- Operating Costs: While solar dryers have minimal running costs and can be built from recycled materials, electric dehydrators consume power but provide consistent performance year-round.
- Control Level: Electric units offer precise temperature and airflow settings, while solar drying depends on natural conditions and requires manual vent adjustments.
- Time Investment: Solar drying needs more monitoring and weather consideration, but electric dehydrators work consistently with minimal oversight, making them ideal for busy schedules.
Temperature Control Methods
For successful meat dehydration, controlling temperature remains vital whether you're drying indoors or outdoors.
When using a dehydrator, you'll need to maintain temperatures between 145° and 155°F, using models with adjustable controls like the Gardenmaster or Excalibur that offer reliable temperature regulation and strong airflow.
If you're using an oven, you'll want to set it to its lowest temperature (ideally 140°F) or use the 'keep warm' setting. Prop the oven door open 2-4 inches and place a fan nearby to improve air circulation.
Remember to position an oven thermometer near your food for accurate readings.
Don't forget to properly prepare your meat by slicing it no thicker than ¼" and using only lean cuts (93% lean for ground meat).
After drying for at least 4 hours, you'll need to heat the meat to 160°F internal temperature, either by placing it in a 275°F oven for 10 minutes or by pre-cooking it through steaming or roasting.
This vital step guarantees you've eliminated dangerous pathogens like Salmonella and E. coli O157:H7.
Weather Impact Considerations
The choice between indoor and outdoor meat drying largely depends on your local climate conditions and available equipment. When drying outdoors, you'll need warm, dry air with humidity around 30 percent, while indoor drying offers more control over these variables through dehydrators or low-temperature ovens.
For successful outdoor drying, you'll want to monitor weather forecasts and guarantee proper air circulation by suspending meat strips individually. While direct sunlight can enhance the process, you'll need to balance exposure to prevent surface over-drying.
Indoor environments provide better protection against pests and contamination, along with consistent drying conditions.
- Monitor humidity levels closely – high moisture content will slow drying and may promote spoilage.
- Maintain proper spacing between meat pieces whether indoor or outdoor to guarantee uniform air circulation.
- Rotate meat strips periodically in both methods to achieve even drying.
- Keep your drying area clean and protected from pests, using covers outdoors and maintaining sterile conditions indoors.
You'll need to adapt your approach based on your climate. If you live in an area with unpredictable weather, indoor drying might be your best option for consistent results.
Safe Drying Time Guidelines
When dehydrating meat safely, you'll need to maintain temperatures between 160°F and 165°F for proper bacteria elimination. This temperature range guarantees you're killing harmful bacteria like E. coli and salmonella while preserving the meat's quality.
You can start at lower temperatures (145°F-150°F) for the first two hours if you're aiming for chewier jerky.
Your drying time will depend primarily on the thickness of your meat slices. For thin cuts, expect 3-5 hours of drying time, while thicker pieces may require 7-10 hours or more. If you're using an oven, the process could take anywhere from 4-15 hours.
You'll need to monitor your meat regularly to guarantee it's drying evenly and thoroughly. Don't let your meat pieces touch each other or any supporting devices, as this prevents proper air circulation.
You'll know your meat is properly dried when it's firm but still flexible, without any soft spots in the middle. Remember to trim excess fat before drying, as fatty areas can increase drying time and potentially harbor harmful microorganisms.
Regular weight monitoring during the process will help you track moisture loss effectively.
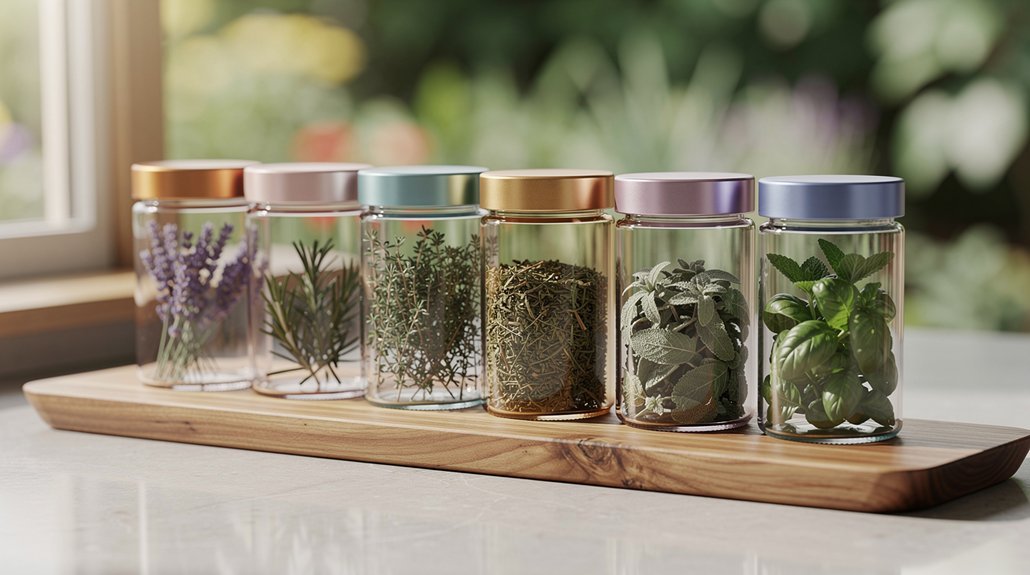
Traditional Seasoning Methods
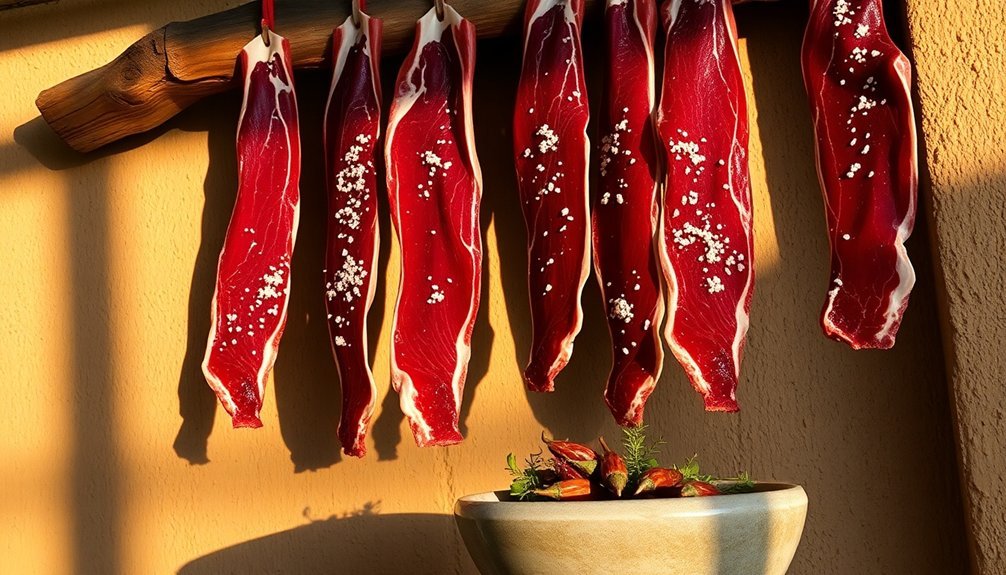
Seasoning your meat properly before dehydration plays an essential role in both flavor development and preservation. You'll find several time-tested methods, each offering unique benefits for your dried meat preparation.
The dry rub method lets you season meat strips with spices while maintaining a natural brown color. You're relying purely on the seasonings' flavors without artificial preservatives. In contrast, if you're using commercial curing salts, you'll need to trim the fat first and mix the cure with seasonings before rubbing it on all surfaces, resulting in a characteristic reddish color.
For ideal results in traditional meat preservation, follow these key steps:
- Remove all visible fat to prevent rancidity during the drying process.
- Choose between dry rubs, marinades, or curing salts based on your preservation needs.
- If using marinades, avoid oil-based ingredients that can cause spoilage.
- Consider presalting with a 14-percent solution for enhanced preservation.
Marinade-based seasoning offers flexibility with ingredients like soy sauce and Worcestershire sauce. You'll want to marinate the meat overnight in the refrigerator, then pat it dry before placing it on dehydrator trays.
Remember not to overlap the strips for even drying.
Quality and Safety Indicators
Properly seasoned meat leads naturally to understanding quality and safety indicators during the dehydration process.
You'll need to monitor several key parameters to guarantee your meat dehydrates safely and effectively.
Color uniformity is your first visual indicator – watch for an even tone throughout the meat, as dark spots or overly light areas signal uneven drying. You'll notice the meat becoming smaller and more wrinkled as muscle tissue shrinks, progressing from soft to firm texture. Your finished product should be pliable but not brittle, especially for jerky.
Water activity is essential for food safety – you're aiming for less than 0.75 aw to prevent microbial growth, with a prime moisture content of about 20%. You can track this through weight loss, which should reach 60-70% during the drying process. If you're using lean cuts, they'll dehydrate more efficiently and reduce spoilage risks.
Don't ignore your senses when evaluating quality. Your dried meat should have a slight tackiness from natural sugars, and there shouldn't be any rancid or off odors.
When rehydrated, your meat should retain most of its nutritive value, though its sensory properties will differ from fresh meat.
Regional Drying Practices
Throughout history, different regions have developed distinct meat drying practices based on their climate and available resources.
You'll find that Mediterranean and Middle Eastern cultures often rely on sun drying, taking advantage of their hot, arid conditions to create traditional dried meats. In contrast, Northern European communities have adapted to their cooler, damper climates by using traditional air drying methods in well-ventilated spaces.
When exploring regional drying practices, you'll notice these key patterns:
- Coastal regions often combine sun and air drying techniques, utilizing sea breezes to enhance airflow while protecting meat from direct sunlight during peak hours.
- Mountain communities frequently use elevated drying racks in cool, dry air, taking advantage of natural altitude conditions.
- Desert cultures maximize sun exposure during daylight hours but move meat to sheltered areas at night to prevent moisture reabsorption.
- Tropical regions have adapted by creating raised platforms with protective covers, allowing air flow while shielding meat from sudden rain.
You'll find that these regional variations aren't just about preservation – they're deeply connected to local cultural traditions and have been refined over generations to produce unique flavors and textures.
Long-Term Storage Solutions
Once your meat is properly dehydrated, you'll need reliable storage solutions to maintain its quality and safety over time. Your primary storage options include Mylar bags, glass jars, and vacuum-sealed containers, each offering specific advantages. Mylar bags work exceptionally well for rehydrating food directly in the bag, while glass jars with rubber seals provide excellent airtight protection.
To maximize shelf life, you'll want to combine your chosen container with oxygen absorbers and proper environmental conditions. Store your dehydrated meat in a cool, dark place, or consider freezer storage for extended preservation. You can considerably extend storage time by keeping temperatures between 2-4°C if you're using refrigeration.
Don't forget to properly prepare your meat before storage. You should trim excess fat and make sure it's thoroughly dried to prevent spoilage.
If you're looking for additional preservation methods, consider combining dehydration with curing or vacuum packaging. For the longest possible shelf life, you can use vacuum-sealed bags with oxygen absorbers, stored in a freezer. This combination can keep your dehydrated meat safe and flavorful for several years.
Frequently Asked Questions
Can I Dehydrate Pre-Cooked or Leftover Meats From Meals?
Yes, you can dehydrate pre-cooked and leftover meats. Just make certain they're lean, cut into uniform pieces, and thoroughly dried. You'll need to monitor them closely since they've already been cooked once before.
How Do Wild Game Meats Compare to Farm-Raised Meats for Dehydration?
You'll find wild game meats are ideal for dehydration since they're naturally leaner than farm-raised meats. They'll dry faster, store longer, and offer more protein per serving with unique, robust flavors.
What Natural Alternatives Can Replace Commercial Curing Salts?
You can use saltpeter (potassium nitrate), sea salt, celery juice powder, or herb-acid combinations as natural alternatives to commercial curing salts. Each option provides preservation benefits but requires careful measurement for safety.
Does Altitude Affect the Natural Meat Drying Process?
Yes, altitude greatly affects your meat drying process. You'll notice faster drying times and need to adjust temperatures higher. Watch carefully, as your meat can dry too quickly and become brittle at elevated locations.
Can Meat Be Dehydrated During Rainy or Humid Seasons?
Yes, you can dehydrate meat during rainy seasons, but you'll need to increase drying time and temperature to combat humidity. Consider using a dehydrator instead of natural methods for better moisture control.
In Summary
Natural meat dehydration isn't just an ancient skill – it's a practical way to preserve food that you can still use today. By following traditional temperature, airflow, and preparation methods, you'll create safe, long-lasting dried meats. Whether you're preserving game, beef, or poultry, remember to maintain proper humidity levels and use time-tested seasoning techniques. You're now equipped to carry forward this sustainable preservation practice.

Leave a Reply