
To make perfect fruit leather every time, focus on selecting ripe, high-quality fruits. Prepare them by blending into a smooth puree, adding a splash of citrus for flavor. Spread your mixture evenly on trays, about 1/4-inch thick, and set your oven to a low temperature to prevent case hardening. Dry the leather for 6-18 hours, checking for a slightly tacky texture. Once dried, condition the leather in an airtight container for even moisture distribution. Store it properly to maintain freshness, and remember to troubleshoot any issues you encounter for the best results. Discover expert tips for seamless fruit leather making!
Selecting the Right Fruit
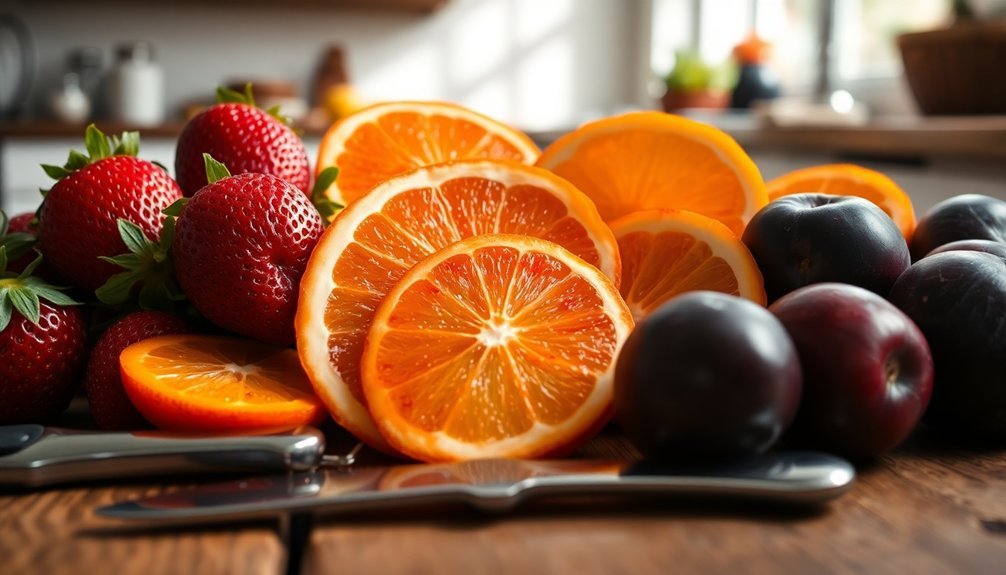
When it comes to crafting perfect fruit leather, selecting the right fruit is essential for achieving the best flavor and texture. Start by choosing fruits at peak ripeness. Fresh berries like strawberries and blueberries, stone fruits such as peaches and cherries, or tropical options like mango and pineapple work wonderfully.
If you can't access fresh fruit, don't worry—frozen and canned varieties are also viable choices. Consider the texture and seeds of your fruit. For instance, berries often have seeds that can be removed with a fine sieve if you prefer a smoother leather. Fruits with high water content, like melons or citrus, are better when paired with drier fruits to balance moisture levels.
Combining fruits can lead to unique flavors; for example, applesauce can enhance the leather's consistency, while ripe bananas can thicken the mix. Make sure to include fruits high in pectin, like apples or plums, as they help achieve a crack-free leather.
Ultimately, the right combination of fruits won't only enhance flavor but also improve the overall texture of your delicious fruit leather. Additionally, using a mixture of fruits can create a more complex flavor profile and elevate your fruit leather experience.
Importance of Fruit Preparation
When you prepare your fruit for leather, choosing quality fruits is essential for the best flavor and texture. Adding citrus not only enhances the taste but also helps maintain that vibrant color. To achieve a smooth puree consistency, make sure to blend thoroughly and adjust as needed for the perfect spread. Using fresh or frozen fruit can significantly improve the taste and texture of your fruit leather.
Choosing Quality Fruits
Selecting the right fruits is essential for crafting delicious fruit leather. You'll want to use fruits at their peak ripeness for the best flavor. A diverse mix can elevate your fruit leather, so include berries, stone fruits, tropical fruits, and classics like apples and pears.
Fruits with high water content, such as melons, citrus, kiwi, and grapes, work best when combined with drier fruits. This balance helps maintain the right consistency. Additionally, fruits high in pectin, like apples, plums, and cranberries, contribute to a smooth, crack-free texture. Dehydration techniques can also enhance the quality of your fruit leather by ensuring an even drying process.
Be cautious with bananas; while they add sweetness, their high starch content can be problematic if used alone.
Before you start, clean your fruits thoroughly, removing any dirt or blemishes, and cut them into small chunks for easier pureeing. Consider the skins and seeds, too—straining purees can help achieve a smoother finish.
Enhancing Flavor With Citrus
How can you elevate the flavor of your fruit leather? One simple way is to incorporate citrus. Adding freshly squeezed lemon or orange juice not only gives your fruit leather a revitalizing burst of flavor but also helps prevent it from darkening.
Plus, it balances the sweetness of your fruits, creating a more harmonious taste.
Here are three key reasons to use citrus in your fruit leather:
- Enhances Flavor: Citrus adds a zesty kick, making your fruit leather more vibrant and enjoyable.
- Preserves Color: Lemon juice or ascorbic acid prevents light-colored fruits from turning brown, keeping your fruit leather visually appealing.
- Balances Sweetness: The acidity in citrus cuts through the sweetness, ensuring a well-rounded flavor profile.
Remember to use citrus judiciously. Just a couple of teaspoons for every two cups of fruit will do.
You can also experiment by combining citrus with spices like ginger or cardamom for added depth. By integrating citrus thoughtfully, you'll create fruit leather that's not only delicious but also visually stunning!
Achieving Smooth Puree Consistency
Achieving a smooth puree consistency is essential for creating delicious fruit leather. Start by selecting ripe or slightly overripe fruit; this guarantees the best flavor and texture. Wash your fruit in cool water to remove any dirt. Depending on the type of fruit, you might need to peel, seed, and stem it. If you're working with larger fruits, cut them into bite-sized pieces for easier blending.
Once your fruit is prepped, blend it using a blender or food processor until smooth. If the puree is too thick, add a bit of water or fruit juice to reach the right consistency. Strain the puree to eliminate any seeds or pulp that could disrupt the texture. Cooking the fruit with a little water can also help create a smoother product.
When spreading the puree onto trays, aim for a thickness of about 1/8" to 1/4". This guarantees even drying without extending the process unnecessarily. If you notice any lumps or unblended pieces, remove them before drying.
Preheating and Oven Setup

To achieve perfect fruit leather, you need to start with the right oven temperature.
Preheat your oven to 150-170°F (65-77°C) for even drying, and don't forget to prepare your baking sheet properly.
Lining it with parchment paper or a silicone mat will guarantee your fruit leather comes off easily when it's done.
Optimal Oven Temperature
The key to perfect fruit leather lies in maintaining an ideal oven temperature. You should preheat your oven to the lowest setting, preferably around 170°F (80°C). Keeping the temperature below 200°F (95°C) is essential to avoid case hardening, which creates a dry crust that traps moisture inside.
Here are some tips to guarantee optimal results:
- Monitor Temperature: Use an oven thermometer to check that your oven consistently holds at 140°F or lower. Adjust the dial as needed.
- Enhance Airflow: Prop the oven door open with a wooden spoon and use a fan outside to improve air circulation. If your oven has a convection setting, utilize it for better airflow.
- Adjust for Humidity: Be aware that humid conditions may require longer drying times. If your leather isn't drying properly, check the temperature and consider extending the drying period.
Preparing Baking Sheets
Before you plunge into making your perfect fruit leather, prepping your baking sheets is essential for success. Start by preheating your oven to the desired temperature, ensuring it reaches a stable heat before placing anything inside. Use the lowest rack to promote even drying; this makes a significant difference in the outcome.
Next, line your baking sheet with parchment paper or a silicone baking mat—these materials handle the heat well. Make sure the lining covers the entire sheet without wrinkles; securing it can help prevent shifting during baking.
Pour the fruit puree onto the lined baking sheet and spread it evenly with a spatula. Aim for a uniform thickness of about 1/8 to 1/4 inch, depending on your desired consistency. To eliminate air pockets, tap the baking sheet gently on the counter. Remember, the edges should be slightly thicker than the center to avoid over-drying.
Once everything's set, place the baking sheet in the center of the oven, set a timer based on the estimated baking time, and periodically check to avoid overcooking. Rotate if necessary for even drying, and let it cool completely before handling.
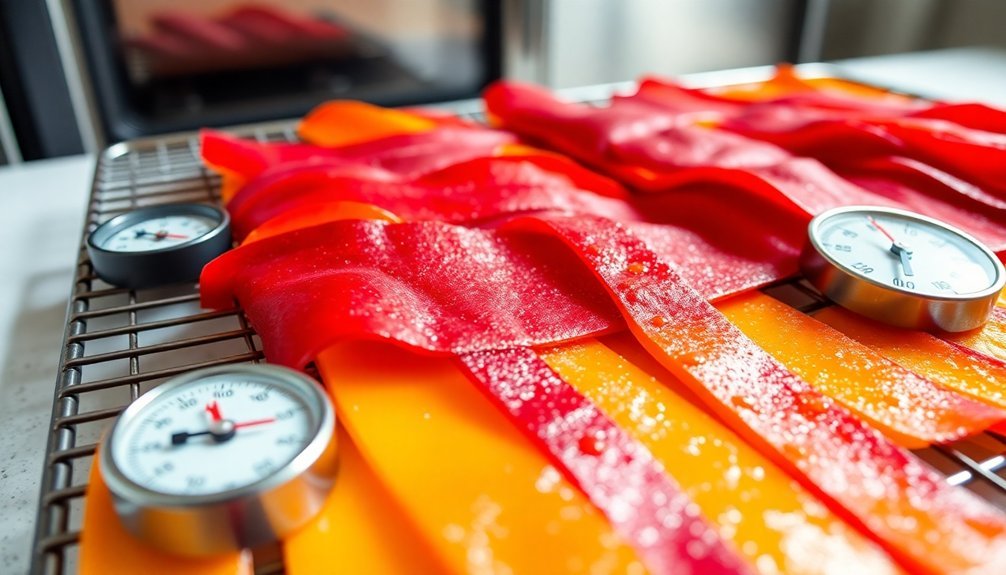
Achieving Proper Drying
Achieving proper drying is crucial for making perfect fruit leather, as it guarantees the final product has the right texture and flavor. To make certain you get it just right, pay attention to these key factors:
- Optimal Temperature: Set your dehydrator to around 140°F (60°C) to avoid case hardening. If you're using an oven, keep it at 170°F (80°C). Higher temperatures can cook the leather too quickly, while lower temperatures may lead to uneven drying.
- Drying Time: Expect to dry your fruit leather for 6 to 8 hours in a dehydrator and up to 18 hours in an oven. Keep in mind that humidity can extend drying time, so check regularly, especially towards the end.
- Surface Preparation: Use paraflexx sheets, parchment paper, or silicone mats for lining your trays. Make sure the items don't touch, allowing for proper airflow, and smooth out any wrinkles to prevent uneven drying.
Monitoring Texture During Baking
As you bake your fruit leather, keep an eye on its texture to guarantee it's reaching the right doneness.
Check the leather's thickness throughout the process, adjusting as needed for consistency.
This careful monitoring will help you avoid over-drying and achieve that perfect, pliable finish.
Checking Doneness Throughout Baking
Regularly checking the texture of your fruit leather during the drying process is essential for achieving the perfect consistency. You want to verify that your leather feels firm yet slightly tacky, signaling it's almost done.
To help you gauge doneness, keep these three checks in mind:
- Touch Test: Gently press the leather in several spots. It should feel dry but not completely dry—slightly tacky is okay, while wet areas indicate it needs more time.
- Visual Inspection: Look for consistent color and a shiny, translucent appearance. If you see any wet spots or indentations, it's not ready yet.
- Flexibility Check: Once you believe it's close, carefully peel back a corner. If it cracks, it's over-dried; if it bends easily without breaking, you've nailed it!
Adjusting Thickness for Consistency
To create the perfect fruit leather, you'll want to pay close attention to the thickness of your puree before and during the drying process.
Start by preparing your puree with 4 cups of fruit and ½ cup of water to achieve the right consistency. Cook the fruit for 20 minutes before blending for a smoother texture, and strain if necessary.
When spreading the puree, aim for an even layer, about ⅛ to ¼ inch thick, using an offset spatula. The edges can be slightly thicker, around ¼ inch, to prevent over-drying.
Avoid pouring a too-thin layer, as it'll lead to fruit crisps instead of leather, and don't go too thick, which will prolong drying.
While the fruit leather dries, rotate trays in the dehydrator to guarantee even drying. Keep an eye out for any dark, wet spots, which indicate it's not fully dry.
Your goal is a flexible texture, not brittle, so monitor the process closely. Once dried, let the leather cool completely before cutting and rolling to maintain its ideal texture.
Cutting Techniques for Uniformity
Achieving uniformity in your fruit leather begins with precise cutting techniques that guarantee even drying. When preparing your fruit, it's important to select ripe or slightly over-ripe options for the best flavor and texture.
Make sure to remove any blemishes, peel tough-skinned fruits, and cut everything into small to medium-sized chunks.
To optimize your cutting process, keep these three tips in mind:
- Use the Right Tools: A paring knife is great for removing bruises, while a chef's knife helps cut larger fruits efficiently. Always use a cutting board for safety.
- Achieve Uniform Thickness: Utilize craft wood as spacers to maintain even thickness while drying. Apply masking tape to secure these spacers, ensuring they don't cover the edges of your dehydrator sheet.
- Combine for Consistency: Mixing different fruits, like tart berries with sweet bananas, can enhance both flavor and texture, creating a more cohesive leather.
Rolling and Storing Methods
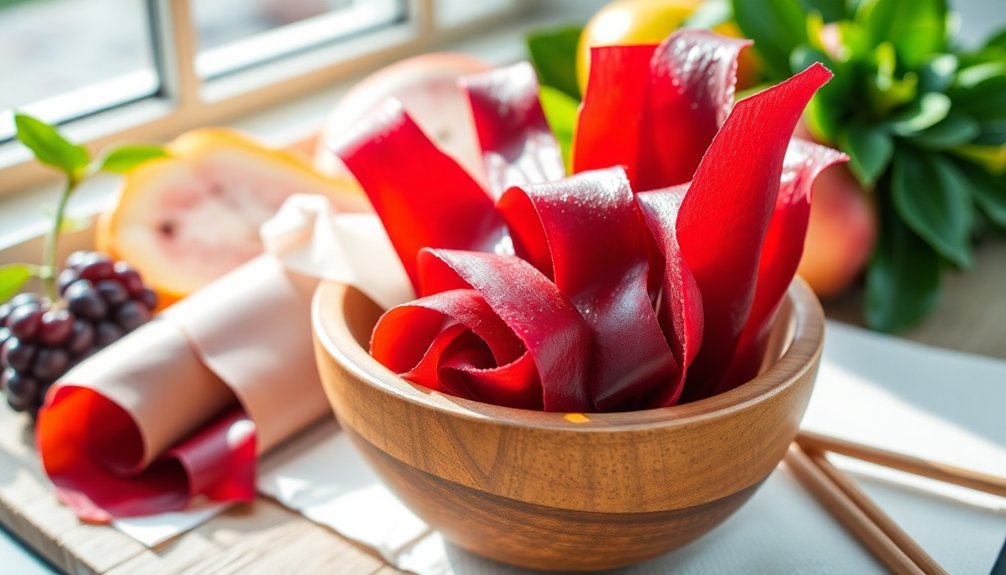
Once you've perfected your cutting techniques and created uniform fruit leather, it's time to focus on how to roll and store it effectively.
Start by ensuring the fruit leather is completely cool to prevent sticking. Use parchment paper or plastic wrap to roll the fruit leather into serving-size pieces, rolling tightly to maintain shape and prevent air from entering. For added creativity, consider using craft paper as an alternative.
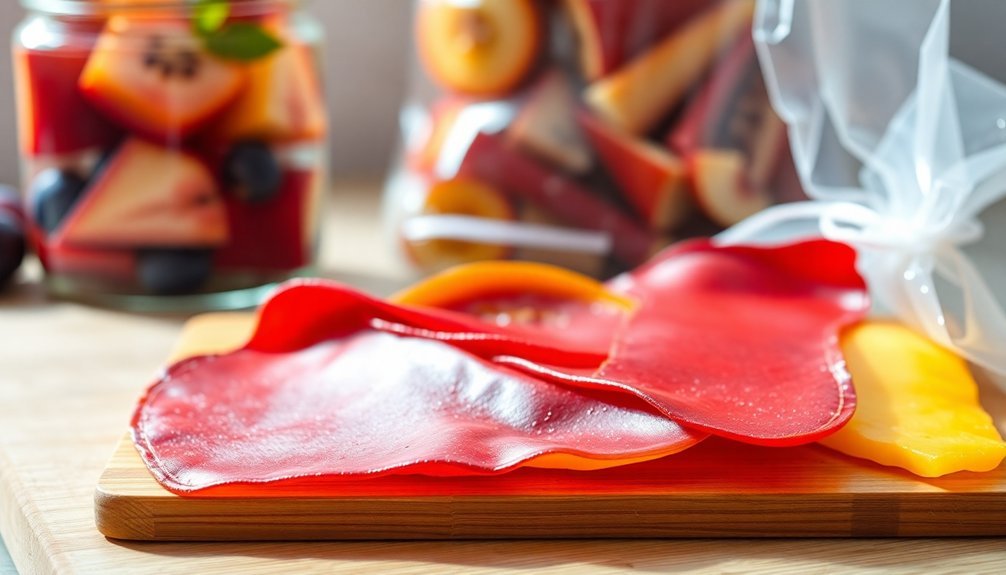
When it comes to storing, keep your fruit leather in a cool, dry place away from direct sunlight. Use airtight containers or sealed plastic bags to protect against moisture and contaminants.
Aim to maintain a storage temperature between 60°F to 70°F (15°C to 21°C), where your fruit leather can last 1-2 months. For longer preservation, consider refrigerating it in an airtight container, which can extend its shelf life up to 6 months. Just remember to check periodically for spoilage signs.
If you want to freeze your homemade treat, wrap it tightly in plastic wrap and place it in a freezer bag; frozen fruit leather can last up to a year.
Troubleshooting Drying Issues
How can you guarantee your fruit leather dries evenly and maintains the right texture? Start by spreading your fruit puree about 1/4-inch thick, slightly thinner in the center and thicker at the edges. Use an offset spatula or an angled pie server to achieve this.
To tackle uneven drying, follow these steps:
- Rotate trays: Midway through the drying process, rotate your dehydrator trays to assure even exposure to heat.
- Check regularly: Periodically check on the fruit leather to adjust tray positions as necessary and prevent over-drying at the edges.
- Misting for rescue: If your fruit leather becomes brittle, mist it with water and let it rest for a few minutes. Repeat until it regains pliability.
To prevent mold and spoilage, maintain a drying temperature of 135°F to 145°F. Assure the leather is flexible and dry to the touch before storage.
Finally, use ripe fruit to create a smooth puree, avoiding overly watery mixtures that lead to brittleness. By following these tips, you'll be well on your way to perfect fruit leather every time!
Maintaining Freshness in Storage
To keep your fruit leather fresh and flavorful, it's essential to store it properly. Start by finding a cool, dry place away from direct sunlight. Ideal storage temperatures range from 60°F to 70°F (15°C to 21°C), but if you want to extend its shelf life, consider refrigeration; it can last 6 to 12 months this way.
For even longer storage, freezing your fruit leather can keep it fresh for about a year.
Proper packaging is key. Use airtight containers or zip-top bags to shield your fruit leather from air and moisture. Wrapping individual pieces in parchment paper or plastic wrap before placing them in containers helps prevent sticking and keeps them fresh.
Vacuum-sealing is a great option for removing air and extending shelf life, while mylar bags offer excellent protection against light and moisture.
Always handle your fruit leather with clean, dry hands to avoid introducing contaminants. Cutting it into portions before storage minimizes exposure when you grab a piece.
Finally, periodically check for any signs of spoilage, ensuring you're enjoying the best quality every time.
Conditioning for Quality Control
Conditioning your fruit leather is vital for achieving the perfect texture and flavor. After dehydrating, you'll want to make certain your fruit leather is conditioned properly. This process balances moisture throughout the leather, preventing any tough or overly sticky spots.
Here are three key steps for effective conditioning:
- Cut and Layer: Once the leather is done, cut it into pieces and layer them in an airtight container. This allows any remaining moisture to redistribute evenly.
- Rest Period: Leave the container at room temperature for about 24 hours. This resting period is significant as it guarantees the moisture levels stabilize, enhancing the overall texture.
- Check for Stickiness: After resting, feel the leather. It should be non-sticky to the touch. If it feels tacky, you may need to dehydrate it a bit longer before conditioning again.
Frequently Asked Questions
Can I Mix Different Fruits to Create Unique Flavors?
You can mix different fruits to create unique flavors. Experiment with combinations like blueberries and raspberries or peach basil. Just remember, if they taste good fresh, they'll likely taste great dried too!
How Do I Know When the Fruit Leather Is Fully Dried?
To know when your fruit leather's fully dried, touch the center; it shouldn't leave an indentation. Check for uniform color, easy peeling from the surface, and make certain it feels pliable without stickiness.
Is It Necessary to Add Sweeteners for Taste?
You don't always need to add sweeteners for taste, especially with naturally sweet fruits. Taste the puree first; if it's tart, consider sweeteners like honey or corn syrup to balance the flavor and enhance texture.
What Fruits Work Best for Making Fruit Leather?
For making fruit leather, you'll want to choose berries, stone fruits, or tropical fruits. Berries are flavorful, stone fruits add sweetness, and tropical fruits bring high sugar content. Combining them enhances texture and taste.
Can I Use Frozen Fruit for Fruit Leather?
Yes, you can use frozen fruit for fruit leather! Just thaw it first, drain excess water, and blend it into a smooth puree. Follow the usual steps for drying and cooling to enjoy delicious fruit leather.
In Summary
By following these steps, you can make perfect fruit leather every time. Choose ripe fruit, prepare it well, and set up your oven properly to guarantee even drying. Keep an eye on the texture during baking, and use the right rolling and storing methods to maintain freshness. If you run into any issues, troubleshoot accordingly. With a little practice and attention to detail, you'll enjoy delicious, homemade fruit leather that's always a hit!


Leave a Reply