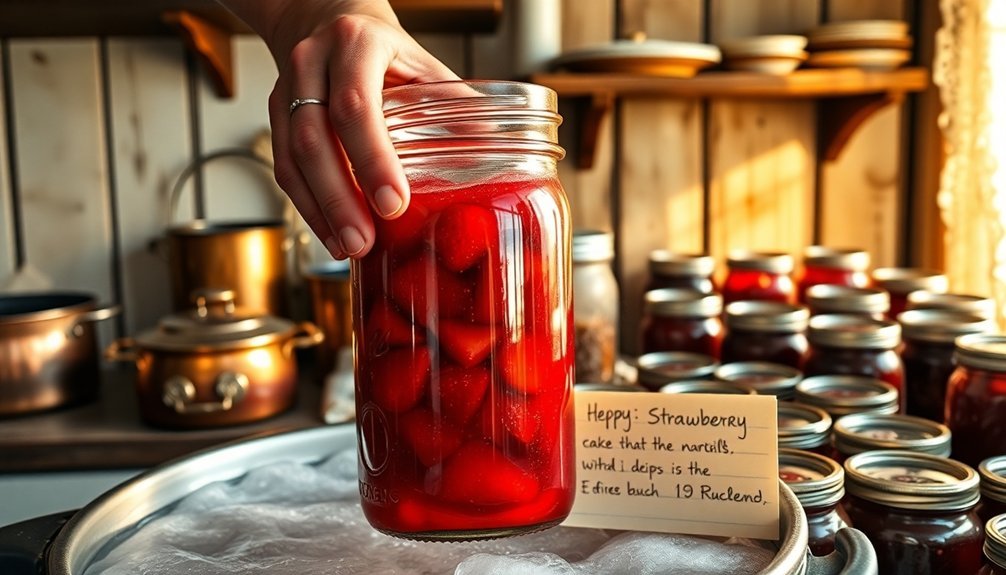
To successfully can fruit preserves like grandma, you'll need clean glass jars, new lids, and basic canning tools including a jar lifter and funnel. Start by selecting perfectly ripe, unblemished fruit at peak season for the best flavor. Set up three distinct work zones: cleaning, preparation, and processing. Thoroughly wash and prepare your fruit, then make a simple syrup by combining sugar and water. Fill sterilized jars with fruit and syrup, leaving proper headspace, then process in a water bath canner. Once cooled, check for proper seals before storing. These time-tested techniques will help you master the art of preserving summer's bounty.
Essential Canning Equipment and Tools
Before diving into fruit preserve canning, you'll need to gather the right equipment and tools for safe, successful preservation. Start with glass canning jars in various sizes – pints and half-pints work best for preserves. You'll also need new lids with intact rubber seals and matching bands. Always inspect your jars for cracks or nicks before use.
For processing, you'll want either a water bath canner or a large stockpot with a lid. Don't forget the jar rack – it keeps your jars from direct contact with the pot's bottom. If you're using a stockpot, you can create a makeshift rack using a folded kitchen towel or arranged canning rings. Consider investing in a preserving starter kit to simplify your initial setup.
Your filling and sealing toolkit should include a canning funnel, jar lifter, lid lifter, and bubble remover. You'll find these tools essential for safe handling and proper jar preparation. Keep a plastic spatula or chopstick handy to remove air bubbles from your filled jars.
Don't overlook basic prep tools: measuring cups, cutting boards, paring knives, and a colander. You'll need clean kitchen towels, paper towels for wiping jar rims, and a slotted spoon or ladle for handling hot preserves.
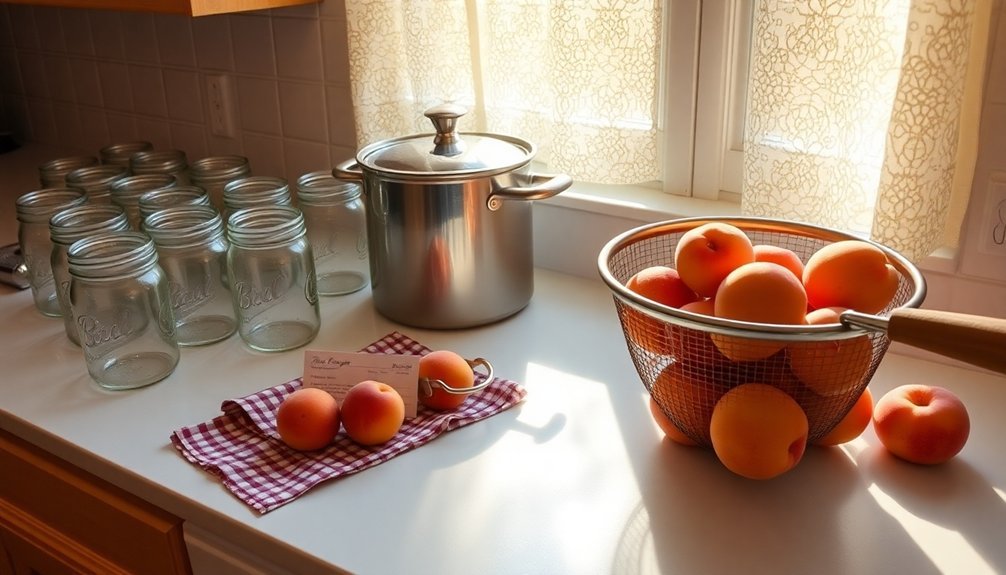
Selecting the Perfect Fruit
When you're selecting fruit for canning, choose pieces that are ripe but not overripe, as mushy or bruised fruit will break down during processing and create an inferior preserve.
You'll get the best results by picking fruit at its peak season, such as cherries in summer months and plums in early fall, when natural sugar content and flavor are ideal.
Remember that slightly firm fruit often works better than fully softened fruit, as it will hold its shape and texture better through the canning process.
Clean and fresh fruit is absolutely essential for safe, high-quality preserves that will last through proper storage.
Ripe vs. Overripe Fruit
Selecting perfectly ripe fruit for your preserves marks the difference between mediocre and exceptional results. You'll want to choose fruits that are firm, colorful, and aromatic, while avoiding any that show signs of spoilage or excessive softness.
If you're dealing with unripe fruit, you can ripen it by placing it in a paper bag with an apple on your counter. Ancient cultures discovered that drying ripe fruit was an excellent preservation method for maintaining food supplies during long journeys.
Don't make the mistake of using overripe fruit in your canning projects. While it might seem thrifty to use up those super-soft fruits, they'll likely float in your jars and produce inferior preserves.
Overripe fruit can compromise both safety and quality, potentially introducing spoilage into your finished product.
To guarantee success, inspect each piece of fruit carefully before canning. You'll need fruits that are fresh and firm, free from bruises, mold, or damage.
Handle them gently during preparation to prevent bruising, and always wash them thoroughly.
When you're ready to can, follow tested recipes precisely and use the recommended packing method – either raw pack or hot pack.
Remember to maintain proper headspace in your jars for safe preservation.
Peak Season Selection
Now that you know how to identify ripe fruit, timing your canning projects during peak harvest seasons will maximize your success.
Summer brings a bounty of peaches, berries, and cherries, while fall offers apples, pears, and grapes at their finest.
Winter's prime offerings include citrus fruits and pomegranates, and spring delivers fresh strawberries and apricots.
You'll find the best deals and highest quality fruit at local farmers' markets and pick-your-own farms.
Visit orchards during peak seasons, where you can select specific varieties ideal for canning.
Don't overlook end-of-season deals, when you can purchase 'seconds' at reduced prices – they're perfectly suitable for preserving.
Remember that your location affects fruit availability.
If you're in a warmer climate, expect earlier harvest times than those listed in general guides.
Build relationships with local farmers to learn about regional variations and get insider tips on the best preserving varieties.
Focus on high-acid fruits like apples, peaches, and berries, which are safer and more reliable for canning.
Choose sturdy varieties that'll maintain their texture through processing, avoiding delicate fruits like raspberries for whole-fruit preservation.
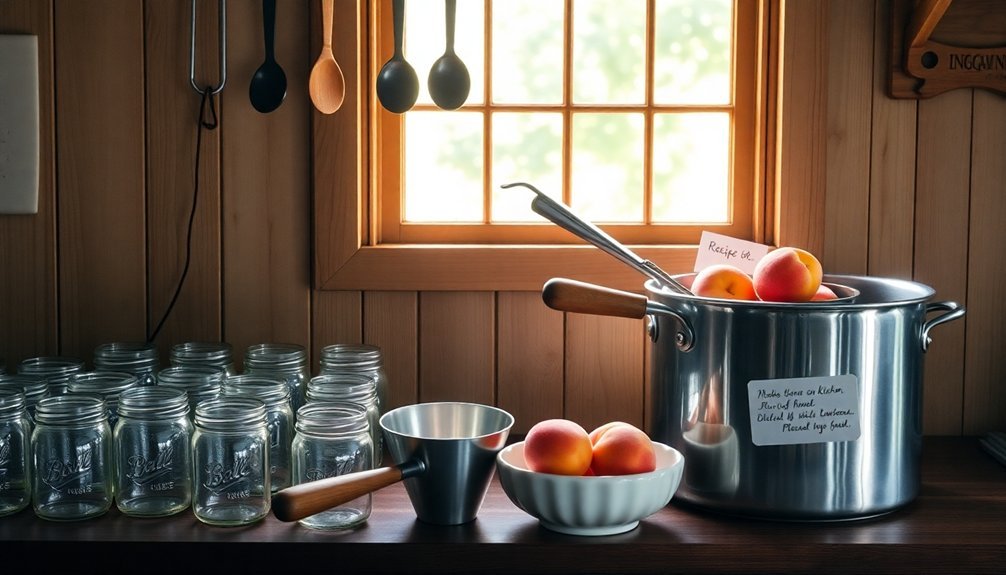
Preparing Your Workspace
Your success in canning fruit preserves starts with a spotless workspace and sanitized equipment, from jars to utensils and countertops.
Arrange your essential tools into designated zones – one for prep work, another for cooking, and a third for the actual canning process.
Keep your wide-mouth funnel, jar lifter, and other canning tools within arm's reach, and you'll move smoothly through each preservation step without having to search for equipment.
Clean and Sanitize Everything
Before diving into the canning process, proper cleaning and sanitization of your workspace and equipment are essential for safe food preservation.
Start by clearing all clutter from your work area and laying out clean kitchen towels where you'll place your hot jars. Make certain you're working in a well-ventilated space with a stable, sanitized surface.
You'll need to sterilize your jars by placing them open-side up on a rack in your canning kettle. Fill the kettle with hot water until it's an inch above the jars, then boil them for 10 minutes.
While the jars are sterilizing, prepare your fruit by washing it thoroughly in cold water, removing any damaged portions, and cutting it according to your recipe.
Don't forget to prepare your canning lids and rings – they'll need to soak in hot water to guarantee proper sealing. Place them in a shallow, heat-proof bowl, keeping them unstacked and easily accessible.
Before using any lids or rings, inspect them carefully for damage. Remember to wash your hands thoroughly before handling any equipment or food items to maintain proper sanitation throughout the process.
Organize Essential Tools First
A well-organized workspace sets the foundation for successful fruit preserving. Before you start cooking, gather and arrange your essential tools into logical work zones. You'll need specific items for measuring, preparing, processing, and cleanup.
| Essential Tool | Primary Purpose |
|---|---|
| Mason Jars & Lids | Storing preserves safely with airtight seals |
| Canning Funnel | Transferring hot preserves without spills |
| Jar Lifter | Handling hot jars safely during processing |
| Water Bath Canner | Processing high-acid fruit preserves |
| Headspace Ruler | Confirming correct jar filling levels |
Set up your water bath canner near the stove and arrange your clean jars nearby. Keep your measuring tools close to your prep area, where you'll wash and cut fruit. Position your funnel, jar lifter, and lid wand within easy reach of your canning station. Don't forget to place kitchen towels on your countertop for hot jars, and keep paper towels handy for wiping jar rims. Having vinegar and soapy water ready for cleaning guarantees you'll maintain proper sanitation throughout the process.
Create Processing Zones
Organizing tools sets the stage, but creating distinct processing zones maximizes efficiency and food safety. You'll need three main zones: cleaning, preparation, and processing.
In your cleaning zone, keep hot soapy water, dish rags, and cleaning supplies ready to tackle spills and maintain a sterile workspace. Separate raw and processed foods to prevent cross-contamination.
Set up your preparation zone with clean towels near the stove for hot jars and designate a quiet cooling area where jars won't be disturbed. Place a shallow heat-proof bowl for sealer lids within easy reach. Your wide-mouth funnel, jar lifter, and ladle should be arranged for smooth shifts between tasks.
Your processing zone centers around the canning pot. Position it on the stove with a rack inside to keep jars off the bottom. You'll need water heated to 140°F for raw-packed fruits or 180°F for hot-packed fruits, maintaining a level 1-2 inches above jar tops.
Keep your sterilized jars, screw bands, and new lids nearby, but separate from used equipment. Remember, you can reuse screw bands if they're rust-free, but always use new lids for proper sealing.
Sterilizing Jars and Lids
Properly sterilized jars and lids are essential for safe, long-term food preservation. You'll need to choose from several effective sterilization methods, including oven, boiling water, dishwasher, or microwave techniques.
For the oven method, preheat to 275°F, wash your jars with hot soapy water, and place them on a baking tray for 10-20 minutes.
If you're using the boiling water method, place jars on a rack in your canner, fill with water one inch above the tops, and boil for 10 minutes (adding an extra minute per 1,000 feet elevation).
Your dishwasher can sterilize jars using a high-temperature setting, but time the cycle to end when your preserves are ready.
For quick sterilization, you can microwave clean, slightly wet jars for 30-45 seconds, though this isn't suitable for Kilner-style jars or metal lids.
Remember to match temperatures between jars and food to prevent breakage. Don't add cold food to hot jars or vice versa.
Always use new two-piece lids, soaking them in boiling water for 5 minutes before use. Keep your sterilized jars warm until you're ready to fill them, and handle hot jars with thick oven mitts.
Making the Fruit Syrup
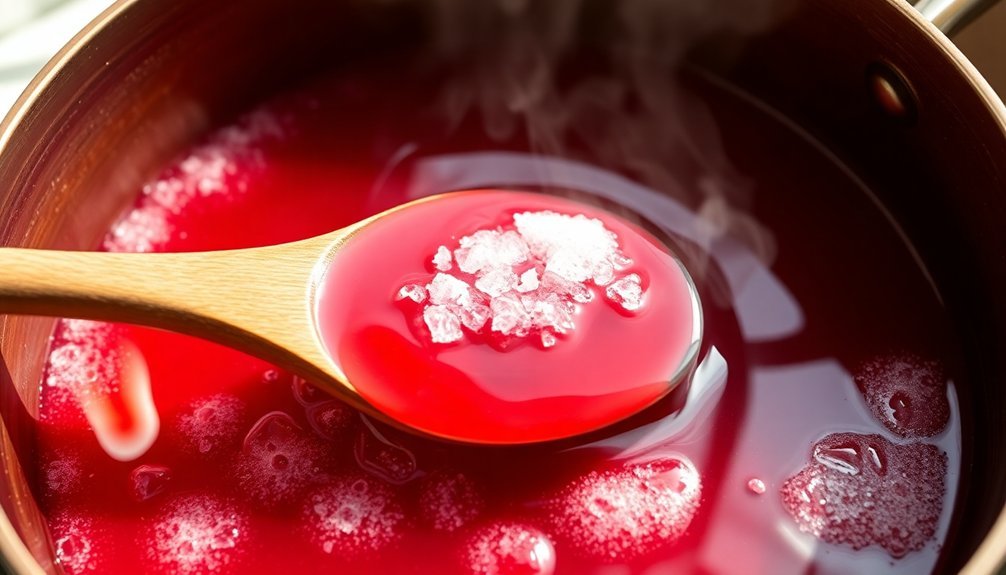
Creating the perfect syrup forms the foundation of successful fruit preserves. You'll need to choose the right syrup density for your fruit, ranging from extra-light to heavy. For most fruits, you'll want to start with a light or medium syrup, which uses 2 1/4 to 3 3/4 cups of sugar per 8-9 cups of water.
To make your syrup, combine the measured sugar and water in a saucepan and stir until the sugar dissolves completely. Bring the mixture to a full rolling boil. If you're using the hot pack method, add your fruit directly to the boiling syrup and reheat to boiling. Don't forget to skim off any foam that forms on top.
You can modify your syrup to suit your needs. If you'd like to reduce sugar, try replacing up to half the sugar with light corn syrup or mild honey. However, don't use artificial sweeteners during the canning process – they can either turn bitter or lose their sweetening power.
If you need to use sugar alternatives, add them just before serving. Remember to maintain the proper headspace (typically 1/2 inch) when filling your jars, whether you're using the raw or hot pack method.
Proper Jar Filling Techniques
Success in fruit preserving hinges on careful jar preparation and filling techniques. Before you start, wash your jars in hot soapy water and inspect them for any defects. If your processing time is under 10 minutes, you'll need to sterilize them. Heat your jars with warm water to prevent cracking when you add hot preserves.
When you're ready to fill, use a jar funnel to minimize mess and air bubbles. Pack your fruit according to your chosen method – loosely for hot pack or tightly for raw pack. You'll need enough liquid (syrup, water, or juice) to cover the fruit, typically ½ to 1½ cups per quart jar.
Don't forget to maintain proper headspace: ¼ inch for jams and jellies, ½ inch for preserves, and ¾ inch for whole fruit. Remove air bubbles by sliding a non-metallic tool along the jar's inside walls. Wipe the rims clean with a damp towel, then place heated lids on top. Screw the bands on until they're fingertip tight – don't overtighten them.
Once filled, your jars are ready for processing in the water bath canner.
Water Bath Processing Methods
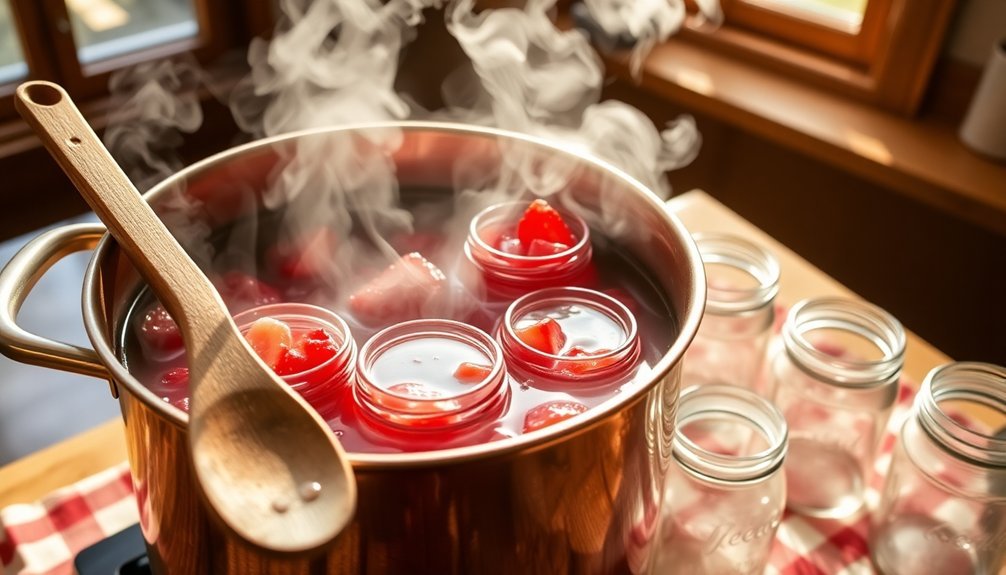
Water bath processing forms the foundation of safe fruit preservation.
You'll need to start by filling your canner halfway with water and preheating it to 140°F for raw-packed fruits or 180°F for hot-packed fruits. Make certain you've placed a rack at the bottom to keep jars elevated.
Once you've loaded your filled jars, verify there's 1-2 inches of water above their tops. Bring the water to a vigorous boil on high heat, then reduce it to maintain a gentle boil.
You'll need to keep an eye on the water level, adding boiling water if it drops below one inch above the jars.
It's essential to understand that water bath canning only works for high-acid foods. The acid in fruits, combined with the 212°F boiling temperature, creates an environment that kills harmful microorganisms and prevents botulism.
You must follow tested recipes to guarantee proper acidity levels.
After processing for the recommended time, turn off the heat and let jars stand for 5 minutes. Remove them carefully with a jar lifter and place them on a rack or dry towel.
Don't tighten bands or touch lids until they're completely cool.
Cooling and Testing Seals
Once you've removed your jars from the water bath, proper cooling and seal testing become the next major steps in preserving your fruit.
Place your hot jars on a wooden cutting board or thick towel, ensuring they're not touching each other. You'll hear satisfying "pop" sounds as the jars cool and create their vacuum seals.
After 12-24 hours of cooling, you'll need to test each jar's seal. Press down on the center of each lid – it shouldn't flex or make a clicking sound. A properly sealed lid will be slightly concave and won't move under pressure. If you tap the lid's center with a spoon, you'll hear a clear ringing sound, confirming a good seal.
Before storing your preserves, imagine your jars going through this final preparation:
- Remove the screw bands to prevent rust and false seals
- Wipe each jar with a damp cloth to remove any sticky residue
- Label each jar with the date and contents
- Check for any chips or cracks in the glass
Store your properly sealed jars in a cool, dark place.
If you find any unsealed jars, refrigerate and use them within three days or reprocess within 24 hours.
Storing Your Preserved Fruit
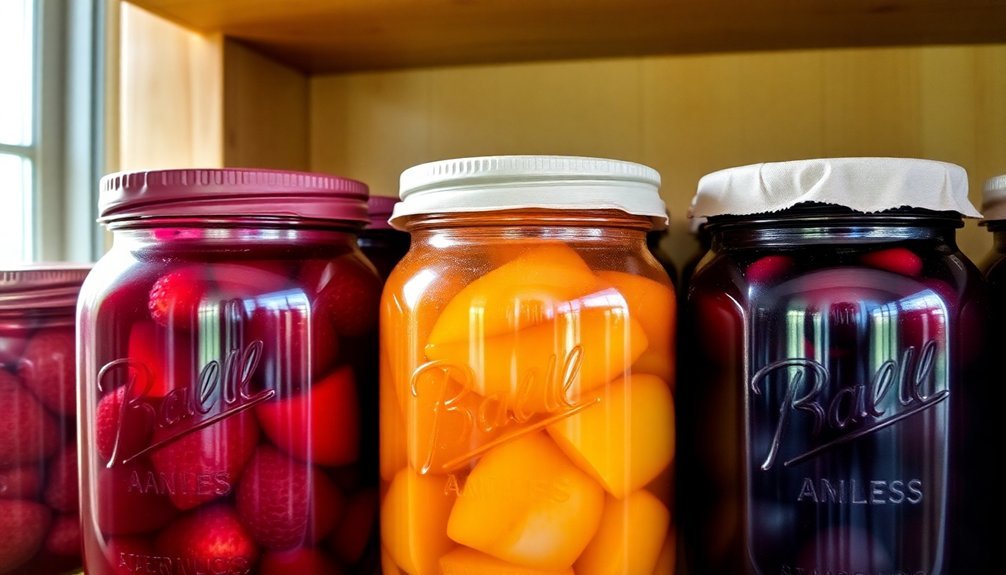
Proper storage conditions are critical to maintaining the quality and safety of your preserved fruit. You'll want to store your jars in a cool, dry place where temperatures stay between 40°F and 70°F. Keep them away from direct sunlight, heating pipes, and furnaces, as temperatures above 85°F can compromise the seal and spoil your preserves.
Before storing, remove the screw bands and wash both the lid and jar to eliminate any food residue. Make sure to dry everything thoroughly to prevent metal corrosion. Label each jar with the contents and date, which helps you follow the FIFO (first in, first out) method.
You can store your fruit preserves for up to two years, while fruit juices should be used within one year. Don't keep your jars in uninsulated attics or damp areas, as moisture can break the seals. Freezing temperatures are also harmful, so choose a storage spot that maintains consistent temperatures year-round.
Regularly inspect your preserved fruit for signs of spoilage, such as discoloration or mold. If you notice any deterioration or damage to the seals, it's best to discard those jars immediately.
Frequently Asked Questions
Can I Substitute Artificial Sweeteners for Sugar in Fruit Preserves?
You can use sucralose (Splenda®) in place of sugar, but you'll lose sugar's preservative qualities. Your preserves won't keep as long and may have texture changes. Use no-sugar-needed pectin for best results.
Why Do My Preserves Sometimes Turn Darker After Several Months?
Your preserves darken due to oxidation, light exposure, and chemical reactions. You'll notice less darkening if you store jars in a cool, dark place and guarantee they're properly sealed with minimal air.
What Causes Fruit to Float to the Top of the Jar?
Your fruit's floating because trapped air in the cells makes it buoyant. When you're canning, the fruit's ripeness, preparation method, and how tightly you pack it all affect whether it'll rise to the top.
Can I Reuse the Syrup From Previously Opened Preserves?
You can reuse syrup from opened preserves, but you'll need to strain and reboil it first. Keep in mind it may affect your fruit's quality and should only be reused with the same type of fruit.
How Do I Prevent My Jams From Becoming Too Runny?
You'll prevent runny jams by using fresh pectin, maintaining proper sugar-to-fruit ratios, and cooking to the right temperature. Don't rush the process; use the plate test to check consistency before canning.
In Summary
You're now ready to enjoy your homemade preserves throughout the year. Just store your sealed jars in a cool, dark place and check them periodically for signs of spoilage. Once you've opened a jar, keep it refrigerated and use within 3-4 weeks. With these time-tested methods and careful attention to cleanliness and safety, you'll have delicious preserved fruit to share with family and friends.


Leave a Reply