Water bath canning gives you a reliable way to preserve high-acid foods like fruits, jams, and pickles at home. You'll need essential equipment including a large pot with rack, Mason jars, new lids, rings, and handling tools like jar lifters and funnels. Start by washing and sterilizing your jars, then prepare your recipe using either raw or hot pack methods. Fill jars with proper headspace, remove air bubbles, and wipe rims clean before securing lids. Process filled jars in boiling water for the recommended time, then cool undisturbed for 12-24 hours. Following these basic steps carefully will help guarantee your preserved foods remain safe and delicious.
Essential Equipment and Tools
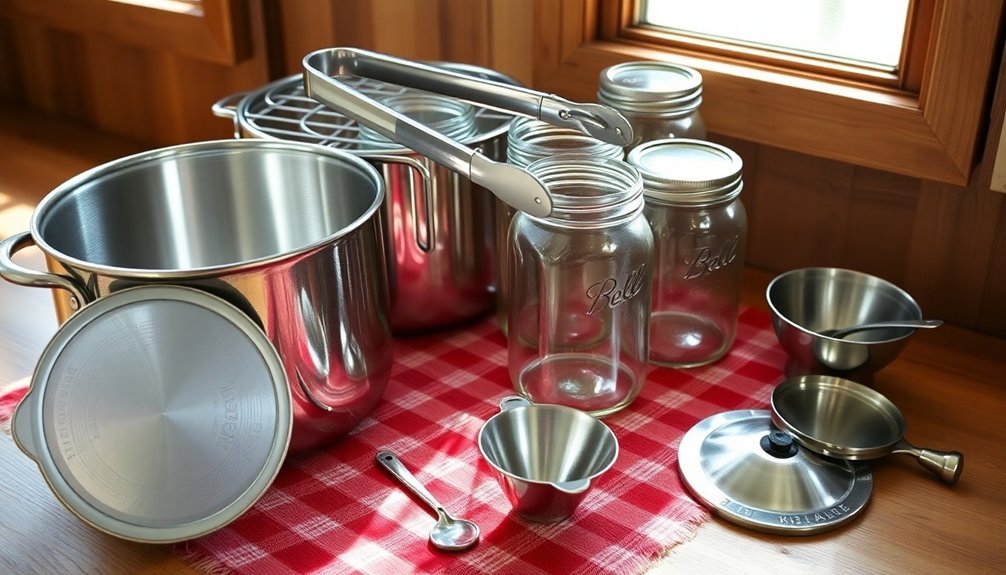
A successful water bath canning journey begins with gathering the right equipment and tools.
You'll need a water bath canner or a large pot with at least 16-quart capacity, plus a heat-proof rack to keep jars elevated from the bottom. If you don't have a dedicated canner, a tall stockpot with a makeshift rack will work. Sterilizing all tools is essential for safe food preservation.
For your preserves, you'll want heat-proof glass jars like Mason or Kilner jars in various sizes, from 4oz to quart capacity. Always use new lids and rings for each canning session, and inspect your jars for chips or cracks before use.
You'll find several tools indispensable for safe handling: jar lifters or canning tongs to move hot jars, a magnetic lid wand, and a wide-mouth funnel for filling.
Don't forget a bubble freer to remove air pockets and a jar wrench for proper lid tightening.
Complete your toolkit with measuring cups and spoons, potholders, clean towels, and a ladle for filling jars.
A colander, sieve, or food mill will help with food preparation, and you'll want a timer and marker for tracking and labeling your preserves.
Safety First
Safety stands as the cornerstone of successful water bath canning. You'll need to maintain strict cleanliness throughout the process, starting with thoroughly sterilizing all equipment in hot soapy water and rinsing away any residue.
Before handling any equipment or food, wash your hands with warm water and soap for 20 seconds, and repeat this step whenever you touch anything that might introduce contamination. Remember that high acid foods are the only safe options for water bath canning methods.
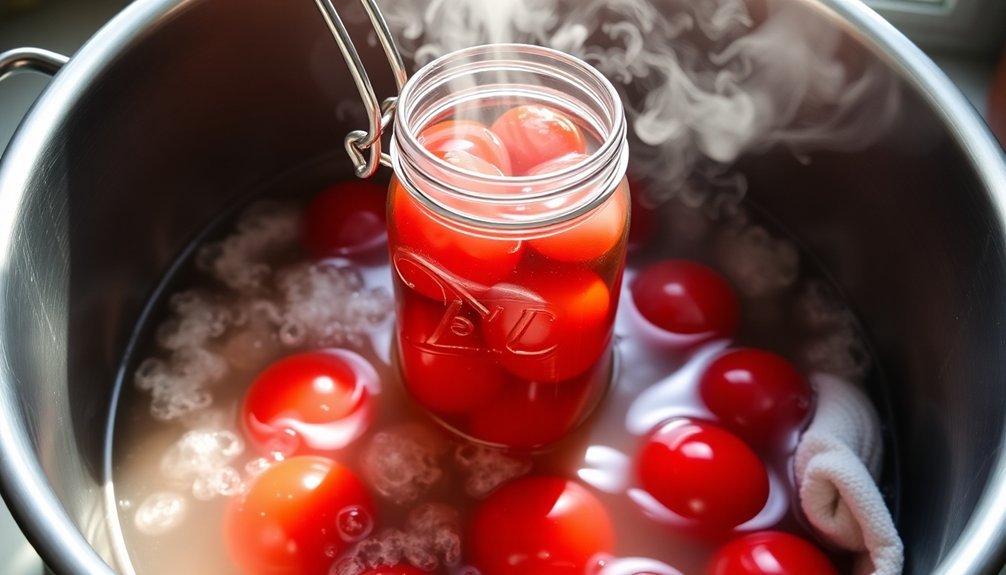
Temperature control plays an essential role in safe canning. You must keep the water at a rolling boil during processing, with water levels maintaining at least 1 inch above jar tops. If the boiling stops, you'll need to restart the processing time once the water returns to a full boil.
Here are three critical safety checkpoints you can't skip:
- Check jar rims for chips or cracks that could prevent proper sealing
- Measure headspace precisely to guarantee successful preservation
- Let jars cool naturally for 12-24 hours before testing seals
After processing, allow jars to rest in the canner for 5 minutes, then remove them without tilting to prevent water from compromising the seals.
Store your properly sealed jars in a cool, dark location to maintain their shelf life.
Understanding Water Bath Canning
With a solid foundation in safety measures, you're ready to master the fundamentals of water bath canning. You'll need essential equipment, including a water bath canner or tall stockpot, Mason jars, new lids, ring bands, and basic tools like a jar lifter and headspace measuring tool.
The process begins with proper jar preparation. You'll need to sterilize your jars if your recipe's processing time is under 10 minutes; otherwise, warm water is sufficient. Fill your jars with prepared food, ensuring correct headspace, and secure the lids. Always inspect jars for any nicks or cracks before use.
Place them in your canner, making sure there's at least an inch of water above the jars. Next, you'll bring the water to a full boil and start your processing time. Remember to adjust this time based on your altitude, and if the boiling stops, you'll need to restart the timing.
Once processing is complete, turn off the heat and let the jars rest in the water for 5 minutes. Finally, move your jars to a wire rack for cooling and complete sealing. After 24 hours, check each jar's seal to confirm it's properly vacuum-sealed and ready for storage.
Preparing Your Workspace
Before you start canning, you'll need to thoroughly clean and sanitize all work surfaces with hot, soapy water to guarantee a safe environment for food preservation.
Set up your workspace by arranging your sterilized equipment in an organized layout, keeping frequently used tools within arm's reach and maintaining separate zones for prep work and processing.
Create a designated safety area with heat-resistant surfaces and plenty of clearance for handling hot water, placing pot holders and protective equipment nearby for quick access.
Clear and Sanitize Surfaces
Properly preparing your workspace marks the crucial first step in water bath canning. You'll need to create a clean, organized environment to guarantee safe food preservation.
Start by removing all unnecessary items from your countertops and stove area, then thoroughly clean all surfaces with hot, soapy water using a microfiber cloth or clean kitchen towel.
Your sterilization process should include cleaning all equipment you'll use during canning. Wash your jars, lids, tongs, pot, inner rack, and funnel in hot, soapy water, then rinse them thoroughly.
Keep your jars warm in a pot of hot water until you're ready to use them, but don't boil the lids as it's not necessary.
- Set up your clean workspace with all essential tools within arm's reach to minimize movement and potential contamination.
- Place your sterilized equipment on a clean, dry surface, using your magnetic lid wand to handle lids without touching them.
- Position your canning funnel, bubble remover, and other tools in a logical sequence that matches your workflow.
Maintain this sterile environment throughout the entire canning process to guarantee safe, contamination-free preservation of your food.
Equipment Layout and Organization
A successful water bath canning session depends on strategic equipment layout and thoughtful workspace organization. Before you begin, gather your essential equipment: a water bath canner or large stockpot with rack, Mason jars, lids, rings, and specialized tools like your jar lifter and canning funnel.
Set up your workspace by creating distinct zones. Place your canner on the stovetop and arrange your clean jars nearby. Position your canning funnel, headspace measuring tool, and bubble remover within arm's reach. Keep your magnetic lid wand and jar lifter close by, as you'll need these frequently during the process.
You'll want to establish a filling station where you'll ladle hot food into jars. Confirm this area has enough space for your canning funnel and headspace tool.
Create a staging area for filled jars waiting to be processed, and designate a cooling space where processed jars can rest undisturbed for 12-24 hours.
Don't forget to check your altitude charts and have them readily available, as processing times may need adjustment. Keep all surfaces clean and sanitized throughout the process to prevent contamination.
Safety First Zone Setup
Setting up a safe workspace serves as the foundation for successful water bath canning. You'll need to start by creating a clean, organized environment that prioritizes both safety and efficiency.
Begin by thoroughly washing your hands with warm, soapy water and clearing your countertops of any unnecessary items that could interfere with the process.
To establish your safety-first zone, you'll want to:
- Sanitize all working surfaces with hot, soapy water, including countertops and stovetops, then dry them completely with clean microfiber cloths.
- Position your canning pot on a stable heat source, guaranteeing it's away from any flammable materials and within easy reach of your sterilized tools.
- Create distinct work zones: one for clean, sterilized equipment; another for processing the food; and a third for cooling completed jars.
Don't forget to maintain proper ventilation throughout the process to prevent steam buildup.
Keep children and pets away from your workspace, and verify you've got easy access to your jar lifter and canning rack.
Remember to avoid touching the insides of sterilized jars or lids, and always use clean, designated tools for handling equipment and food items.
Jar Selection and Preparation
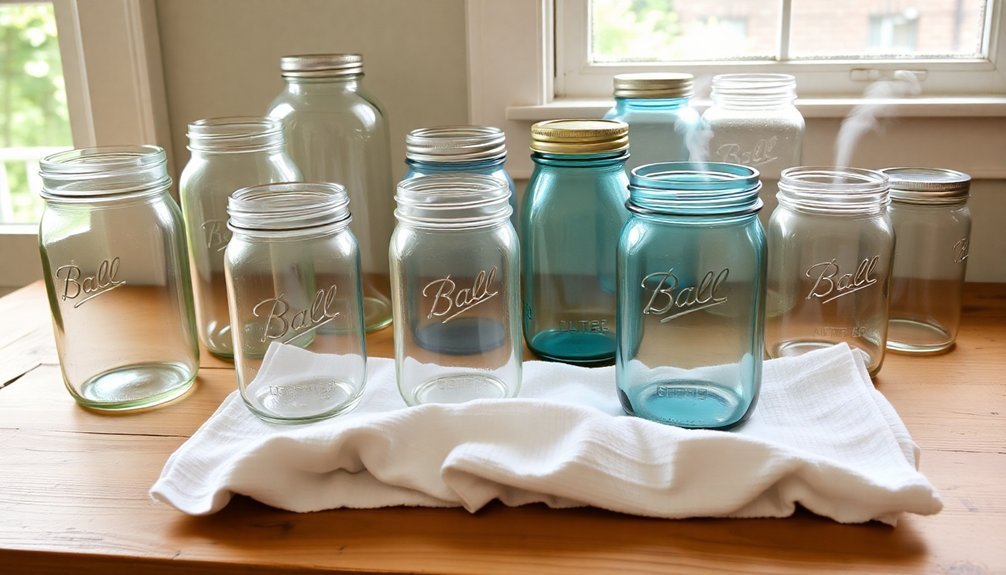
Successful water bath canning starts with choosing and preparing the right jars for your preserves.
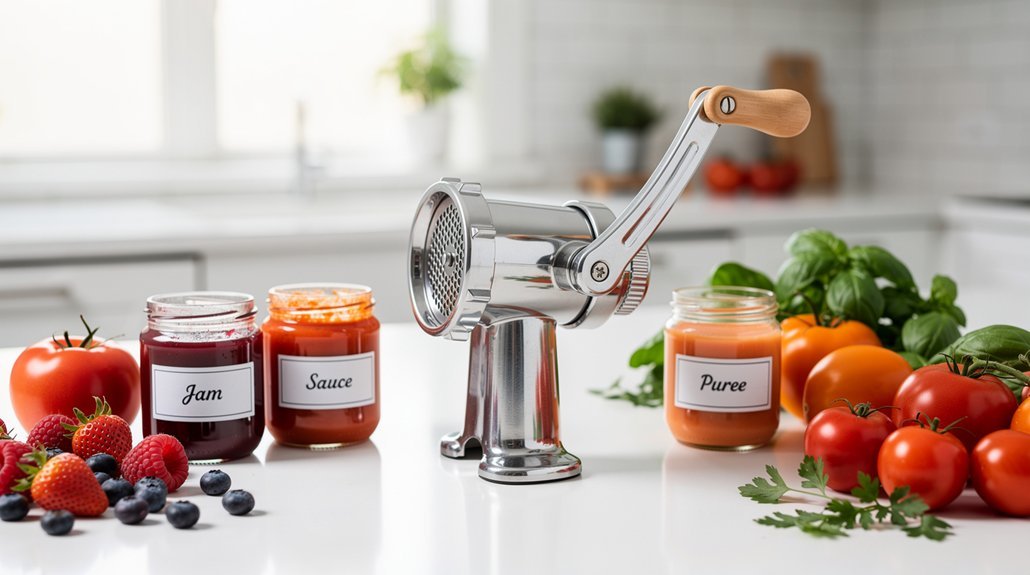
You'll need to select between regular mouth jars, ideal for pourable foods like jams and sauces, or wide mouth jars, perfect for whole fruits and vegetables. Consider your recipe's requirements when choosing jar sizes, ranging from 4 oz to 64 oz.
For jam and jellies, stick with 4-12 oz jars, while salsas and pie fillings work best in 16 oz containers. Choose 32 oz jars for fruit slices and pickles, and 64 oz jars for juices.
Remember that smaller jars follow pint processing times, while larger ones use quart guidelines.
Before use, you'll need to wash all jars, lids, and bands in hot, soapy water.
Sterilize jars by boiling them for 10 minutes if you're below 1,000 ft elevation, adding an extra minute per 1,000 ft above that. Keep your jars hot until filling by placing them in a simmering water bath.
Heat your lids separately in simmering water, but don't boil them. There's no need to heat the screw bands.
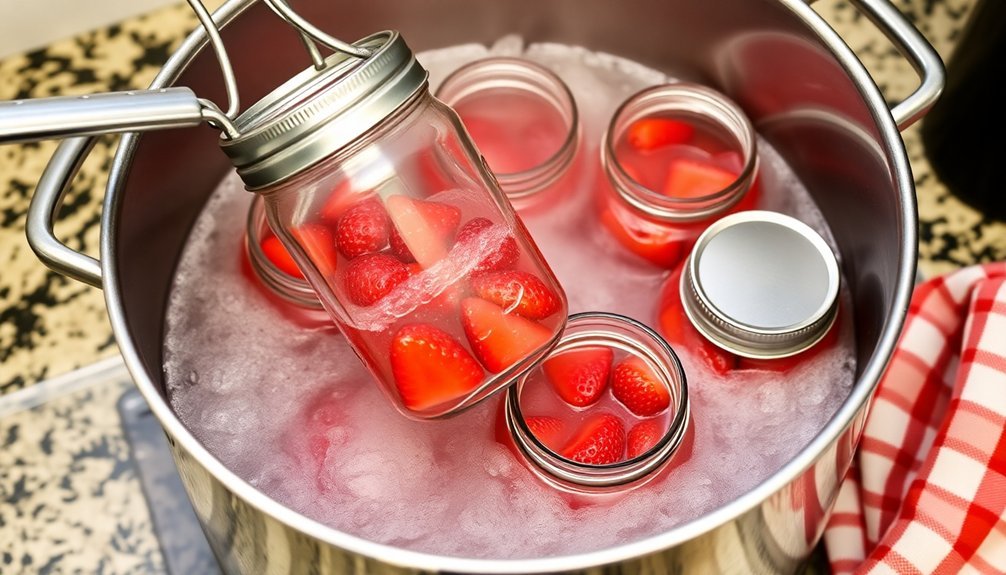
Filling Methods
When you're ready to fill your canning jars, you'll need to choose between raw pack (placing uncooked food in jars) or hot pack (pre-cooking food before filling).
You'll want to take into account that hot packing often results in better shelf life and more efficient jar space, while raw packing can help retain the fresh texture of certain fruits and vegetables.
Whichever method you select, maintaining proper headspace (typically 1/4" to 1/2" from the jar rim) is essential for achieving a reliable vacuum seal and preventing spoilage.
Raw Pack Vs Hot Pack
In accordance with your canning goals, choosing between raw pack and hot pack methods can considerably impact your preserves' quality and shelf life.
Raw packing involves filling jars with unheated food, while hot packing requires you to heat food to boiling and simmer it before jarring. Hot packing's pre-cooking step shrinks food, removes air, and typically results in better long-term preservation.
While raw packing might seem simpler, it often leads to floating food and potential discoloration within months. You'll also need more jars since the food hasn't been pre-shrunk.
Hot packing, though more time-consuming initially, provides better color retention and flavor development over time.
- If you're processing delicate items like pickles where texture matters most, raw packing might be your best choice.
- For fruits and most vegetables destined for water bath canning, opt for hot packing to prevent floating and guarantee better shelf life.
- When using a pressure canner for vegetables, you can successfully use either method, but remember that raw packing requires longer processing times.
Consider your food type, storage duration, and desired end result when selecting your packing method, as each offers distinct advantages for different preservation scenarios.
Proper Headspace Guidelines
Proper headspace measurements serve as a significant safeguard in water bath canning. When you're filling your jars, you'll need to leave specific amounts of space between the food and the lid to guarantee safe preservation and proper sealing.
For water bath canning, follow these essential guidelines: Leave ¼ inch for jams, jellies, juices, and relishes. For fruits, tomatoes, and pickles, maintain ½ inch of headspace. If you're working with low-acid foods that require pressure canning, you'll need 1 inch, while some vegetables and meats may require up to 1½ inches.
Getting the headspace right is vital because foods expand during heating. If you don't leave enough space, the food can bubble out and prevent proper sealing. Conversely, too much headspace can lead to discoloration and inadequate sealing due to excess air.
You can measure headspace using the ruler in your canning kit or by learning to gauge it against the jar's threads. Always double-check your measurements before processing. If you notice incorrect headspace, adjust the food level immediately to prevent sealing failures and guarantee your preserved foods remain safe and high-quality.
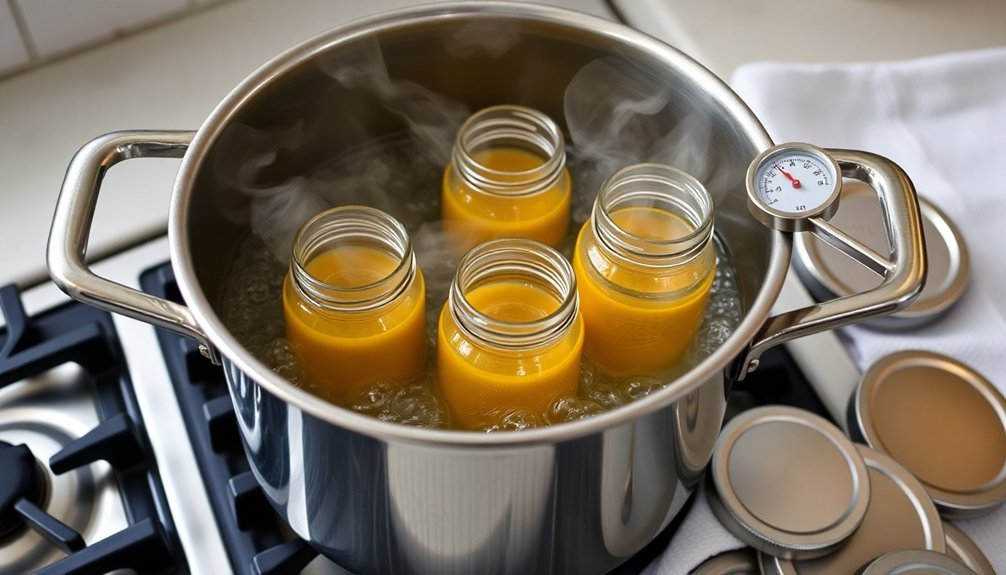
Processing Times and Temperatures

Successfully water bath canning your home preserves depends on precise processing times and temperatures that vary by recipe and altitude.
You'll need to adjust your processing time based on both jar size and packing method, with hot-packed foods typically requiring less time than raw-packed foods. For altitudes above 1,000 feet, you must increase processing times – add 5 minutes for 1,001-3,000 feet, 10 minutes for 3,001-6,000 feet, and 15 minutes for 6,001-8,000 feet.
To guarantee safe processing, you'll need to:
- Maintain a vigorous boil (212°F) throughout the entire processing time, restarting your timer if the boil stops.
- Keep water levels at least 1 inch above jar tops (2 inches for processing times over 30 minutes).
- Use only tested recipes with proper acidification (pH below 4.6).
Remember that processing time starts only after reaching a full rolling boil.
Don't cut corners with processing times – they're scientifically determined to prevent foodborne illness and spoilage.
Different recipes require different processing times, so always consult reliable canning guides for your specific food type and jar size.
Proper Cooling Techniques
After completing the water bath processing time, cooling your jars correctly becomes the next essential step for safe home canning.
Turn off the heat, remove the canner's lid, and let the jars remain submerged in the hot water for exactly 5 minutes. During this time, keep the area free from drafts and don't disturb the jars.
Once your 5-minute timer sounds, use your jar lifter to carefully remove each jar from the water bath. Place them on a level surface that's covered with a towel or cooling rack, ensuring they're away from any cold air currents.
Don't touch the rings or lids at this point, and resist the urge to cover the jars.
You'll need to leave your jars undisturbed for 12 to 24 hours to allow proper cooling and sealing. This extended cooling period is essential for forming a strong vacuum seal and ensuring even temperature reduction throughout the jar.
After 24 hours, check each lid by pressing on its center – it shouldn't flex or make a popping sound. If you find any unsealed jars, store them in your refrigerator and use them first.
Storage and Shelf Life
Your canned goods deserve a dedicated storage space that's cool, dark, and dry to maximize their shelf life and maintain quality. When stored properly, your home-canned foods can last up to a year or longer, especially high-acid foods processed through water bath canning.
Remember to store jars with their lids facing up and avoid stacking them directly on top of each other to prevent seal damage.
Before storing your canned goods, you'll need to confirm each jar's seal by pressing the center of the lid after 24 hours of cooling. If the lid doesn't flex, your jar is properly sealed and ready for storage.
Label each jar with the contents and date, and be sure to arrange them in a way that allows for regular inspection.
- Position your storage shelves away from windows and heat sources to protect your canned goods from temperature fluctuations.
- Keep jars elevated off the floor and at least 2 inches from walls to promote proper air circulation.
- Check your stored jars monthly for signs of spoilage, including bulging lids, leakage, or unusual discoloration.
Remember to discard any jars showing signs of compromise, and maintain a clean, pest-free storage environment to guarantee your preserved foods stay safe to eat.
Frequently Asked Questions
Can I Reuse Canning Lids From Previous Batches?
You shouldn't reuse canning lids, as manufacturers strongly advise against it. The sealing compound won't work reliably a second time, which puts your food at risk of spoilage and potential health hazards.
What Happens if Power Goes Out During Processing?
If your power goes out during processing, you'll need a gas stove or alternative heat source to maintain the boiling water. Without proper processing time, you must restart the process for food safety.
Why Did My Jars Float While Processing?
Your jars are floating because you've likely left too much space or air pockets in them. You'll also see this if you haven't tightened the bands properly or didn't follow recommended headspace guidelines.
Can I Stack Jars on Top of Each Other While Processing?
Yes, you can stack jars during processing, but you'll need a second rack between layers. Make sure your smaller jars are completely covered with water and there's enough space for boiling.
Should I Retighten Bands After Processing Is Complete?
No, you shouldn't retighten bands after processing. It can interfere with the sealing process and damage the lids. Instead, let your jars rest undisturbed for 12-24 hours while the proper seal forms.
In Summary
Now you're equipped with the essential knowledge to safely preserve your favorite fruits, jams, and acidic foods through water bath canning. Remember to follow proper sanitation, timing, and temperature guidelines to guarantee food safety. You'll enjoy your home-preserved goods for months to come. Don't forget to label and date each jar, and store them in a cool, dark place. Start small, gain confidence, and preserve the harvest!
Leave a Reply