
Ten time-tested sugar preservation methods will help you keep fresh fruit lasting longer. You can make traditional fruit preserves through canning, create candied fruit confections, roll out homemade fruit leather, pack fresh fruit in sugar, preserve in sugar syrups, macerate berries with sugar, cook old-fashioned jams, dry sugar-coated fruit slices, bottle spiced fruit syrups, or crystallize whole fruits. Each technique uses sugar's natural preservative properties to prevent spoilage while maintaining flavor and texture. These sweet preservation methods range from simple overnight processes to more complex multi-day projects, with endless possibilities for your seasonal fruit bounty.
Traditional Fruit Preserves

Fruit preservation has stood the test of time as one of humanity's most essential food storage techniques. When you're looking to preserve fruits using traditional methods, you'll find that sugar-based techniques offer reliable and delicious results.
Through canning and bottling, you can create long-lasting preserves by cooking fruits with sugar or syrup, then sealing them in airtight jars for safekeeping. Modern food preservation still draws inspiration from these time-tested techniques.
If you're interested in making jams and jellies, you'll need to cook your fruit with sugar until it reaches the perfect consistency. While jams utilize crushed or chopped fruit for a thick spread, jellies offer a clear, firm texture made from fruit juice.
You'll often need pectin, either naturally occurring or store-bought, to achieve the right texture and reduce cooking time. The sugar content isn't just for sweetness – it's vital for food safety as it attracts water and prevents bacterial growth.
For a different approach, you can try sun drying or dehydrating. You'll simply place fruit on trays and let the sun's heat remove moisture while preventing spoilage.
This method creates nutritious, flavorful dried fruits that you can store for extended periods.
Candied Fruit
Through the delicate art of candying, you can transform ordinary fruits into glistening, jewel-like confections that last for months. High acidity fruits like pineapple and kiwi tend to perform exceptionally well in the candying process. The process begins with selecting firm, fresh fruit and blanching it briefly in water to prepare the cell structure for sugar absorption.
You'll then simmer the fruit in a sugar syrup until it becomes uniformly glossy and translucent, which typically takes 15 to 45 minutes depending on your chosen fruit.
To guarantee the best results, you'll need to follow these essential steps:
- Store fruit completely submerged in syrup within airtight containers in the refrigerator
- Monitor humidity levels when drying candied fruit, using either a food dehydrator or wire rack
- Keep dried candied fruit in airtight containers to maintain freshness
- Apply finishing touches like sugar coating or chocolate dipping for extra flair
You can preserve your candied fruit in two ways: kept in syrup or dried completely. In syrup, it'll last about four months when refrigerated properly.
Dried candied fruit offers more versatility and can be stored for several months. You'll find these preserved treats make excellent additions to baked goods, decorative garnishes, or standalone confections.
Fruit Leather With Sugar
Along with traditional preservation methods, making fruit leather offers a delightful way to transform surplus fruit into portable, long-lasting snacks.
You'll need to start with ripe or slightly overripe fruit, washing it thoroughly and removing any seeds, stems, and peels before cutting it into chunks. Adding applesauce to the mix can help achieve a smoother texture and reduce tartness.
For each 13" x 15" sheet of fruit leather, puree 2 cups of fruit until smooth. If you're working with light-colored fruits, add 2 teaspoons of lemon juice or ⅛ teaspoon of ascorbic acid to prevent browning.
You can sweeten your puree with ¼ to ½ cup of sugar, though corn syrup or honey works better for extended storage by preventing crystallization.
Pour your prepared puree onto a plastic-wrapped cookie sheet or dehydrator tray, maintaining an even ⅛-inch thickness.
You'll need to dry the leather at 140°F, which takes 6-8 hours in a dehydrator or up to 18 hours in an oven. Once it's done, you shouldn't see any indentation when touching the center.
Roll the warm leather, wrap it in plastic, and store it in the freezer for up to a year or at room temperature for one month.
Sugar-Packed Fresh Fruit
When you're preparing to sugar-pack fresh fruit, you'll need airtight containers or freezer bags that prevent moisture loss and protect against freezer burn.
For best results, match equal weights of sugar and fruit, though you can adjust this ratio to your taste preferences and the fruit's natural sweetness.
Your containers should have enough headspace to allow for expansion during freezing while still maintaining a proper seal to preserve the fruit's quality.
Selecting Proper Storage Containers
Selecting the right storage containers stands as an essential step in preserving sugar-packed fresh fruit. You'll want to choose containers made of either plastic or glass, ensuring they're free from chips, cracks, or any damage that could compromise your preservation efforts.
When selecting containers, consider both the material and size that best suits your needs.
- Use wide-top containers for liquid packs to make filling easier and prevent spills.
- Choose narrow-top containers for dry packs to minimize air exposure.
- Select containers with proper sealing mechanisms to keep out moisture and air.
- Consider freezer-safe glass jars when planning for long-term storage.
Before filling your containers, make sure they're thoroughly clean and dry.
You'll need to place moisture-vapor-resistant paper over the fruit to keep it submerged in syrup or juice when using rigid containers. If you're using plastic bags, press out as much air as possible before sealing.
Don't forget to label each container with the contents and date before placing them in the freezer. Proper organization in your storage space will help prevent damage and make it easier to access your preserved fruit when needed.
Best Sugar-to-Fruit Ratios
Understanding proper sugar-to-fruit ratios can make or break your preservation efforts. While traditional recipes often call for equal parts sugar and fruit, you'll achieve better results using a 60:40 ratio of fruit to sugar by weight. You'll need a kitchen scale for accurate measurements since both fruit and sugar weights can vary considerably.
When you're ready to preserve, layer your prepared fruit with sugar and let it macerate in the refrigerator for one to three days. This process draws moisture from the fruit, creating a natural syrup that you'll want to save for cooking. Don't forget to scrape any undissolved sugar into the syrup before proceeding.
If you're freezing fruit, you'll need 2/3 cup of white sugar for each quart of prepared fruit. Mix them thoroughly and wait 10-15 minutes for the sugar to dissolve. For better color retention, you can add 1/4 teaspoon of ascorbic acid per quart.
Syrup Preserves
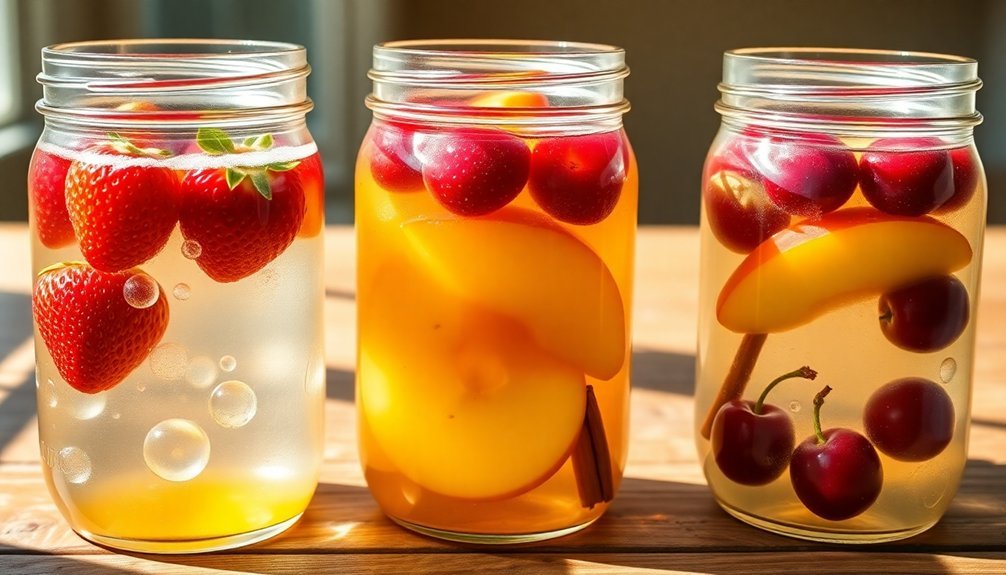
Syrup preserves offer a time-tested method for maintaining fruit's flavor and texture through careful sugar concentration.
You'll need to choose the right syrup strength based on your fruit's sweetness and desired outcome, ranging from very light (10%) to very heavy (50%) concentrations. For best results, dissolve your sugar in lukewarm water until clear, then chill before use.
- Very light syrup (½ cup sugar to 4 cups water) works best for naturally sweet fruits
- Medium syrup (1¾ cups sugar to 4 cups water) suits most general preserving needs
- Heavy syrup (2¾ cups sugar to 4 cups water) helps maintain firmer textures
- You can substitute up to 25% of the sugar with corn syrup or honey for variety
When preparing your fruit, select slightly underripe specimens and process according to type.
Peel and cut pears into halves, slice peaches, or leave small plums whole. Cook your fruit in the syrup until it's just tender when pierced.
Pack the prepared fruit into sterilized jars, fill to the brim with hot syrup, and remove any trapped air bubbles. Seal immediately to create a vacuum as the contents cool, listening for that satisfying pop that indicates proper preservation.
Crystallized Fruit
While syrup preserves rely on liquid sugar solutions, crystallized fruit takes preservation a step further through a meticulous candying process.
You'll need to start by blanching your fruit to make it more permeable, which is especially important for tougher parts like citrus peels and rinds. The real transformation happens when you simmer the fruit in syrup, carefully monitoring the temperature to prevent breakdown while gradually increasing the sugar concentration.
You won't get instant results with this method – the process can take days or even weeks, depending on your chosen fruit and technique. During this time, sugar molecules replace the water in the fruit's cells, creating a natural preservation mechanism that prevents microbial growth and decay.
You can speed up the final drying stage using a food dehydrator if you're short on time.
For the best results, you'll want to choose fruits that are well-suited for crystallizing, such as figs, pears, or citrus peels.
When stored properly in an airtight container, your crystallized fruit can last over a year in the refrigerator, or you can keep it at room temperature if it's completely dried.
Sugar-Macerated Berries
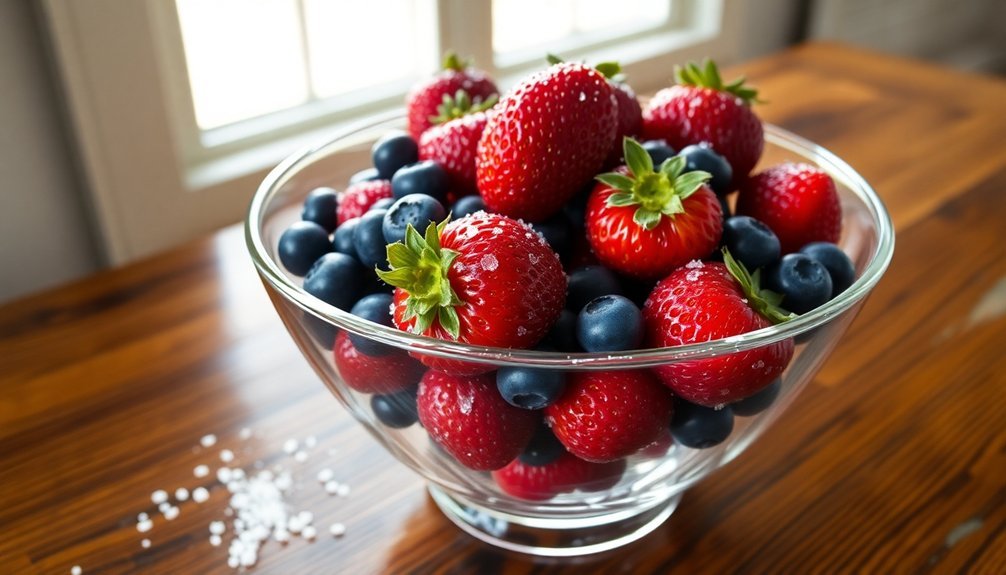
Sugar-macerated berries offer a simpler alternative to traditional fruit preservation methods. You'll find this technique particularly useful for slightly underripe or imperfect berries, as the process enhances their natural sweetness and creates a delicious syrupy consistency.
To begin, slice your berries into smaller pieces and mix them with sugar, using about 2 tablespoons to 1/4 cup per cup of fruit, depending on tartness.
- Add lemon juice or liqueurs for extra flavor complexity
- Let the mixture sit for 30 minutes to overnight in the fridge
- Store in a covered container to maintain freshness
- Use within 3-4 days to prevent mold and fermentation
The maceration process transforms your berries into versatile ingredients that you can use in countless ways. They'll make perfect toppings for desserts, mix-ins for breakfast dishes, or additions to beverages.
The sugar draws out the berries' natural juices, creating a syrup while softening the fruit's texture. When properly stored in the refrigerator, your macerated berries will maintain their quality for several days, though you'll get the best results by using them within the first couple of days.
Old-Fashioned Fruit Jams
You'll want to select fruit at its peak ripeness for the most flavorful old-fashioned jams, choosing pieces that are soft but not overripe.
For ideal results, let your fruit macerate with sugar for at least 30 minutes, though overnight soaking can intensify the flavors and improve the final texture.
Keep your cooking temperature at a steady medium heat while stirring frequently, watching for the telltale thickening that signals your jam is approaching the proper consistency.
Selecting Perfect Ripeness Levels
Selecting the perfect ripeness level of fruit is essential for creating exceptional old-fashioned jams. You'll want to choose fruit that's ripe but not past its peak, as overripe fruit contains less acid and pectin, leading to loose consistency and diminished flavor. The best time to gather your fruit is at the start of its harvest season when it's just reaching ripeness.
For ideal results, consider mixing ripe and slightly under-ripe fruit to enhance both texture and flavor profile. Under-ripe fruit contributes valuable pectin and acidity, while perfectly ripe fruit provides the sweetness and full flavor you're seeking. You'll need to adjust your sugar and lemon juice quantities based on your fruit's ripeness level.
Here's what to look for when selecting fruit for jam-making:
- Choose undamaged, fresh fruit that's free from blemishes
- Select seasonal fruit at the beginning of its harvest period
- Include some under-ripe pieces to boost pectin content
- Avoid overripe or damaged fruit that could affect texture
Remember to test your jam's consistency using the wrinkle test and adjust cooking time based on your fruit's water content and ripeness level.
Essential Maceration Time Tips
The time-tested process of maceration plays a crucial role in creating exceptional old-fashioned fruit jams. You'll want to set aside anywhere from a few hours to several days for proper maceration, though overnight soaking typically yields the best results. Even a brief 1-2 hour maceration can enhance your jam's quality.
During maceration, you'll need to thoroughly mix your fruit with sugar and optional lemon juice. Verify each fruit piece is well-coated, then refrigerate the mixture in a spacious container. Remember to stir once or twice during this period for even sugar distribution.
| Maceration Duration | Benefits |
|---|---|
| 1-2 hours | Basic juice extraction, minimal softening |
| 4-6 hours | Moderate flavor enhancement, partial softening |
| Overnight (8-12 hours) | Ideal juice extraction, thorough softening |
| 24-48 hours | Maximum flavor concentration, complete softening |
| 3-4 days | Extended flavor development, intense preservation |
Once maceration is complete, transfer your mixture to a thick-bottomed pot. You'll notice reduced cooking time thanks to the pre-softened fruit. While cooking, stir regularly and skim off any foam that forms. Test the jam's consistency by dropping a small amount on a cold plate to check its setting point.
Traditional Cooking Temperature Control
Mastering temperature control stands at the heart of traditional fruit jam making. You'll need to reach temperatures between 217-222°F (103-106°C) to achieve the perfect set. For best results, use a candy thermometer and remember that altitude affects your target temperature – if you're at 4,500 feet, aim for 211°F instead.
The success of your jam depends on maintaining the right sugar-to-water ratio, typically 80% sugar to 20% water. You'll want to add acid, like lemon juice, to help create the essential pectin bonds that form your jam's structure. Store-bought lemon juice works best due to its consistent pH level of around 5.
To achieve precise temperature control:
- Use a wide, tall pot to maximize surface area for faster evaporation
- Boil vigorously to quickly reduce water content
- Skim foam regularly for a clearer finished product
- Monitor temperature carefully to avoid breaking down pectin through overcooking
Remember that you can't rush the process – proper temperature control guarantees both preservation and the ideal gel structure.
Don't reduce sugar content too much, as it's vital for reaching the set point and preserving your jam.
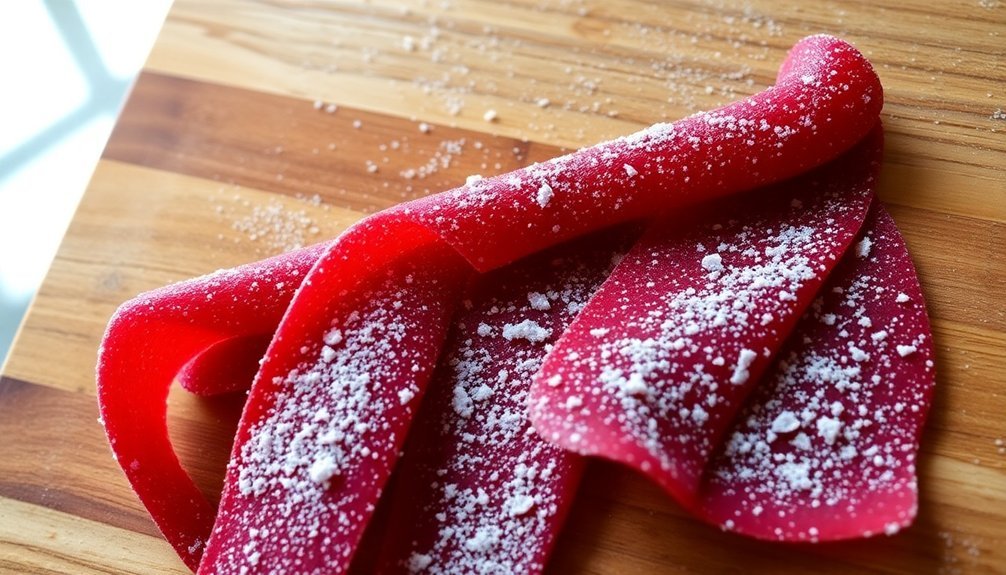
Sugar-Dried Fruit Slices

Creating sugar-dried fruit slices involves four essential steps that transform fresh fruit into sweet, shelf-stable delicacies.
Start by selecting ripe fruit, washing it thoroughly, and cutting it into uniform slices about ¼ to ⅜-inch thick. Remove any seeds and pat the slices dry to eliminate excess moisture.
Next, you'll need to prepare a simple syrup by combining equal parts sugar and water, bringing it to a boil. For extra flavor, add any juice from fruit scraps to your syrup. Coat your fruit slices lightly with sugar or dip them in the syrup, being careful not to over-saturate them.
You can dry your slices using several methods. The oven method requires your lowest temperature setting (170-175°F) for 3-6 hours, while a food dehydrator operates at 135-150°F. If you're patient, air drying is also an option, though it'll take several days.
Once your fruit slices are completely dry and cooled, let them condition for 4-10 days before packaging.
Store them in airtight containers in a cool, dry place. You'll find these versatile treats perfect for garnishing, cooking, or decorative purposes.
Spiced Fruit Syrups
While sugar-dried fruit slices offer one way to preserve fruit's sweetness, spiced fruit syrups bring warm, aromatic flavors to your preservation efforts.
You'll need maple syrup (or other granulated sweeteners), filtered water, warming spices like cinnamon and cloves, and citrus elements to create these versatile preserves.
To make your spiced fruit syrup, combine the ingredients in a saucepan and simmer for 10-15 minutes. You can add fresh ginger or vanilla extract for extra depth.
Once cooled, strain the mixture through a fine mesh strainer into sterilized glass bottles.
For safe preservation, you'll want to:
- Maintain sugar levels at 50% by weight
- Create an acidic environment using citrus or vinegar
- Heat pasteurize at 186°F for 6 seconds
- Use the hot fill and seal method
Store your finished syrups in sterilized bottles, ensuring they're properly labeled and dated.
While refrigeration keeps them fresh for about two weeks, you can extend their shelf life through proper vacuum sealing and storage in a cool, dark place.
For extra longevity, consider freezing portions you won't use immediately.
Frequently Asked Questions
Can I Use Alternative Sweeteners Instead of Regular Sugar for Preservation?
Yes, you can use alternative sweeteners like honey, maple syrup, or stevia for preservation. However, you'll need to follow specific guidelines since they affect texture differently and may require adjustments to maintain food safety.
How Do You Prevent Fruit From Floating to the Top of Jars?
You'll prevent fruit float by using firm, ripe fruit, hot-packing it tightly, removing air bubbles, and using lighter syrups. Heat fruit before packing and rotate jars during cooling to distribute contents evenly.
Why Do Some Fruits Turn Brown Even With Sugar Preservation?
Even when you've added sugar, fruits can still turn brown because sugar only slows down enzymatic browning – it doesn't stop it completely. You'll still have oxygen and enzymes interacting to create brown pigments.
What Causes Preserves to Become Grainy or Crystallized Over Time?
Your preserves can become grainy when excess sugar crystallizes, evaporation occurs through loose lids, or tartrate crystals form in grape products. You'll notice crystals forming if sugar wasn't fully dissolved during cooking.
How Can I Adjust Preservation Methods for High-Altitude Locations?
You'll need to increase boiling water bath times and pressure levels based on your altitude. Add 5-20 minutes for water baths and 2-5 PSIG for pressure canning as you go higher above sea level.
In Summary
You'll find these 10 time-tested sugar preservation methods invaluable for extending your fruit harvest throughout the year. Whether you're making old-fashioned jams, crystallized treats, or syrup-soaked preserves, sugar remains one of the most reliable ways to keep fruit's flavor and freshness. Don't let your seasonal bounty go to waste – start preserving today using these classic techniques that have stood the test of time.


Leave a Reply