Building a large-scale food drying system requires careful planning and attention to core components. You'll need to start with a robust stainless steel frame and design your layout to prevent contamination between zones. Install a reliable heating system (40-75℃) with PID controllers, and position exhaust fans above filter chambers for ideal airflow. Don't forget proper insulation using PUF injection and food-grade polycarbonate trays. You'll want to integrate safety features like HEPA filtration and maintain regular inspection schedules. The difference between an average and exceptional drying system lies in the details of your design and implementation.
Planning Your Drying System Layout
Four key aspects must be considered when planning your food drying system layout: facility organization, location requirements, safety compliance, and operational efficiency.
Start by classifying your workspace into distinct areas: primary processing, secondary processing, utilities, storage, and administration. You'll need to arrange these zones strategically, with high-risk areas surrounded by secondary manufacturing spaces to prevent contamination. A well-executed layout design can reduce operating costs by up to 50%.
When selecting your location, position the drying system close to your produce source to minimize transport time. Choose a spot with good drainage and partial shade to control temperature.
You'll need at least 6 feet of ceiling height and limited windows to prevent heat loss. Ascertain you've got reliable access to electricity and proper ventilation systems.
Your layout must comply with food safety regulations and GMP guidelines. Plan for cleaning stations and sanitization areas, and designate specific storage spaces for both raw and dried products.
Consider the flow of materials from left to right and create separate entry points for personnel to minimize cross-contamination. Use relationship diagrams and from-to matrices to optimize your layout's efficiency, paying special attention to temperature control zones and air flow patterns.
Essential Materials and Components
You'll need to start with a robust frame made of 304 stainless steel to guarantee food safety and structural integrity for your drying system.
For the heating system, choose heat-resistant components that can handle continuous operation, including appropriately sized air heating units and circulation fans that maintain consistent temperatures throughout your drying chamber. Consider options like steam, gas, or electricity for your heating method based on your specific needs.
Your control panel should incorporate essential monitoring sensors, temperature controllers, and programmable timers to regulate the drying process effectively.
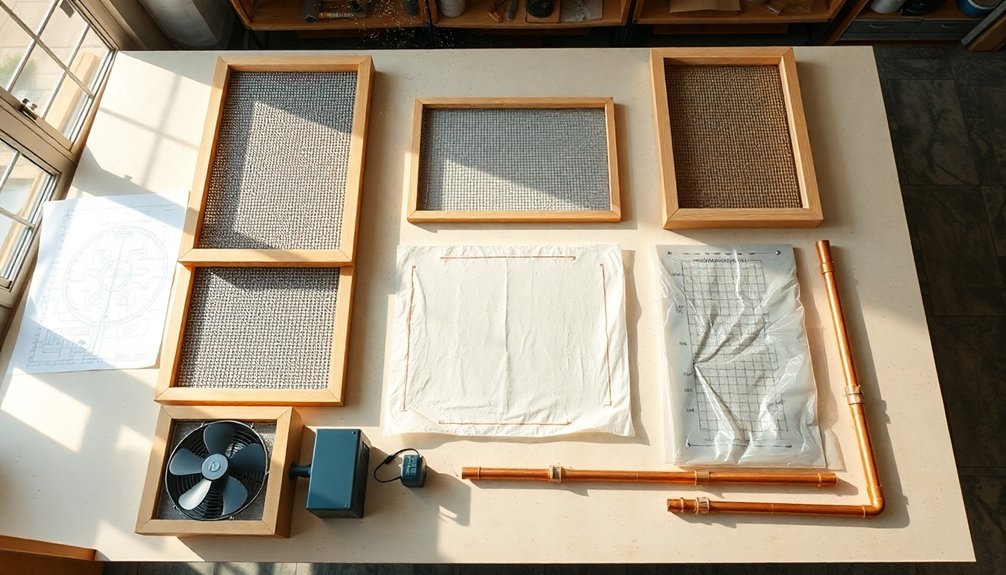
Primary Frame Construction Materials
When building a food drying system, selecting the right frame materials forms the foundation of your entire project. Your primary material choice should be wood, with pine being an excellent option for the frame, base, and tray supports. You'll need approximately 30 feet of inch-square wood for framing and 6 feet of 1" x 6" pine for the base construction.
Teak wood is particularly valuable for outdoor applications due to its natural resistance to weather and decay. The system should incorporate UV-stabilized polyethylene for optimal protection against harmful radiation. When constructing your frame, you'll want to guarantee it's sturdy enough to support fully loaded trays while maintaining perfect squareness throughout the structure.
For a successful frame construction, follow these essential steps:
- Cut your wood pieces to precise measurements, including the main frame components and support rails.
- Build the base first, attaching square-stock rails to the inside to guarantee proper tray alignment.
- Construct the frame to your desired height (typically 80 cm for a chimney solar dryer), making sure all joints are secure and square.
Remember to pre-plan your dimensions carefully, as the frame must accommodate your trays while maintaining proper airflow throughout the system.
Heating System Core Elements
Inside every efficient food drying system, the heating components form the heart of the operation. You'll need to choose between several heating options: steam-powered heaters, electric elements, or a hydronic heating coil system that uses natural gas or propane.
For maximum energy efficiency, consider incorporating a heat pump that recovers and reuses heat during the drying process.
Your heating system must work in tandem with air circulation components. You'll want to install high-temperature resistant axial flow fans and air blowers to maintain continuous airflow.
Include a cyclone separator to optimize air circulation, and don't forget to add air filters to guarantee clean operation. To remove moisture effectively, you'll need properly sized exhaust fans.
The control system is essential for maintaining precise temperatures. Install an automatic temperature control system with thermostats that can maintain temperatures between 40-75℃.
Add sensors to monitor both temperature and humidity levels, and implement feedback mechanisms that adjust the heating system based on drying cycle time and relative humidity.
For remote operation, you can include optional controllers to adjust water temperature and flow rates as needed.
Control Panel Component Selection
The control panel nerve center requires careful component selection to guarantee reliable food drying operations. You'll need a programmable logic controller (PLC) as your system's brain, paired with DC motor controllers to manage your conveyor operations and water pump functions. For monitoring and display purposes, incorporate an LCD screen to show real-time temperature readings and system status.
Essential components for your control panel should include:
- A backup power system to maintain operations during power interruptions, protecting your drying process and preventing product loss.
- Temperature sensors, specifically the DS18B20 model, which provide accurate readings for maintaining ideal drying conditions.
- Cooling components, including strategically placed fans and heat sinks, to protect your electronic equipment from overheating.
You'll want to implement an Arduino-based control system to automate your dryer's functions. This microcontroller will coordinate your conveyor belt movement, water pump activation, and temperature regulation.
Don't forget to include status indicators and signal lights to monitor device operations. Position your power supplies at the panel's top section, allowing natural heat dissipation while keeping sensitive components cooler in the lower areas.
Ventilation and Airflow Design
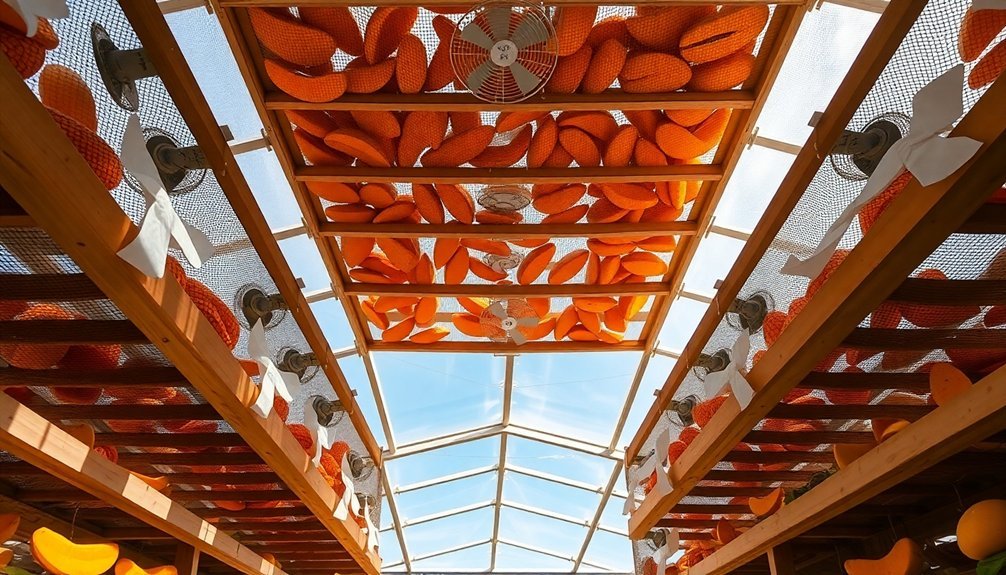
You'll want to position your intake vents at the base of your drying system and exhaust vents at the top to create a natural upward flow of air that efficiently removes moisture from your food.
To maximize airflow efficiency, stagger your drying racks with adequate spacing between them, allowing air to move freely around each piece of food being dried.
Make sure your exhaust vents are slightly larger than your intake vents to prevent any back pressure and maintain consistent airflow throughout the entire system.
Optimizing Air Circulation Patterns
Proper air circulation stands at the heart of an effective food drying system. You'll need to carefully consider both the velocity and distribution patterns of air throughout your drying chamber to achieve best results. Using stainless steel ducts – either seamless round welded or rectangular – will guarantee proper cleanability while minimizing condensation risks.
To enhance your air circulation patterns, focus on these key elements:
- Maintain terminal velocities between 100-150 FPM for spaces below 65°F, and make sure your registers supply air horizontally across the ceiling at 700-1,200 FPM.
- Install double deflection diffusers and register grills to control condensation and promote uniform air distribution.
- Position access doors strategically in your distribution ductwork for regular cleaning and swab testing.
You'll want to keep the space's dew point temperature below your coldest surface temperature to prevent unwanted condensation.
Consider using computational fluid dynamics (CFD) modeling to analyze your airflow patterns precisely. If you're working with fabric ducts, manufacturers can provide detailed airflow and velocity analysis to help you determine the ideal layout and sizing for your system.
Strategic Air Exhaust Placement
Building on your air circulation design, strategic exhaust placement plays a major role in maintaining ideal drying conditions. You'll want to position your exhaust fans directly above the filter chamber to create consistent negative pressure throughout your system. This setup helps prevent moisture and dust from escaping into unwanted areas.
| Component | Key Consideration |
|---|---|
| Duct Angles | Install at 45° in airflow direction |
| Duct Path | Minimize bends, shortest route possible |
| Duct Size | Match machine specs, larger diameter preferred |
When designing your exhaust system, you'll need to integrate pressure sensors to monitor and adjust system dynamics. Keep your ducting layout simple – each bend reduces efficiency and increases back pressure. You'll achieve peak performance by routing ducts directly to the exterior with minimal turns.
For multi-dryer setups, pay special attention to shared venting systems. You'll need to confirm proper sizing to handle combined airflow without creating excess back pressure. Consider installing a qualified technician-approved pressure gauge to monitor system performance and maintain readings within your installation manual's specifications. This approach helps prevent lint buildup and reduces fire risks while maximizing your system's drying efficiency.
Temperature Control Mechanisms
Temperature control mechanisms form the backbone of an effective food drying system, relying on sophisticated controllers and multi-zone management to maintain precise conditions.
You'll need to implement a combination of PID controllers and Internal Model Control (IMC) to guarantee your system maintains the exact temperature requirements throughout the drying process.
To achieve ideal temperature control in your DIY system, focus on these critical elements:
- Install independent temperature controllers for each zone, allowing you to manage different phases like heating, drying, and cooling within a single unit.
- Set up real-time PID parameter adjustments to respond to changes in air velocity, as increased airflow can affect both minimum temperature response and settling time.
- Implement continuous monitoring systems to maintain stability and prevent temperature deviations from your set points.
You'll want to confirm your air velocity stays within the ideal range of 1.20 to 1.57 m/s, as this directly impacts your temperature control effectiveness.
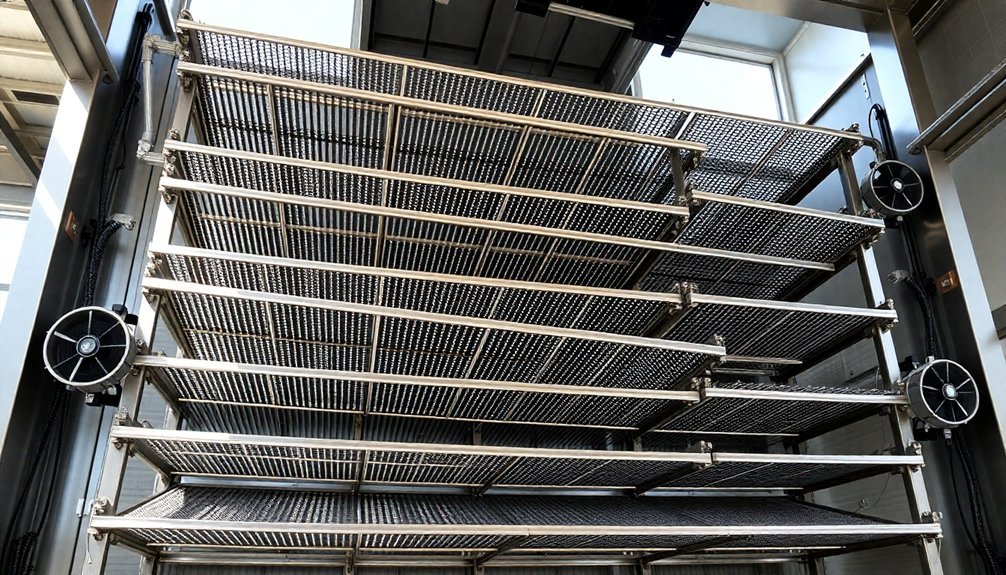
Building the Main Chamber

When building your drying chamber, you'll need to choose between cylindrical and rectangular designs, with stainless steel being the ideal material for both types.
Your choice will impact costs considerably, as rectangular chambers require more complex construction but offer better space utilization and heat plate arrangement efficiency.
For ideal heat retention, you'll want to implement proper insulation using PUF injection in rectangular chambers or PUF, rubber sponges, or mineral wools in cylindrical designs.
Material Selection Guide
Successful food dehydration starts with choosing the right materials for your drying chamber. When building your system, you'll need to balance durability, food safety, and cost-effectiveness.
Stainless steel stands out as the premier choice for commercial-grade chambers, particularly grade 304, which offers superior corrosion resistance and easy cleaning.
For ideal temperature control, consider using polyurethane heat-preserved boards at a 100mm thickness for your chamber walls. These boards considerably reduce heat loss and improve energy efficiency.
You'll also need reliable ventilation components, including mesh screens and properly sized fans to guarantee consistent airflow.
- Choose your primary chamber material: stainless steel for durability and food safety, or treated wood for a more budget-friendly option.
- Select insulation materials: polyurethane boards maintain temperature stability while minimizing energy loss.
- Install ventilation components: high-quality fans, mesh screens, and proper sealing materials to control airflow and moisture levels.
Don't forget to include food-grade polycarbonate trays and appropriate seals or gaskets to maintain the chamber's integrity.
Your material choices will directly impact your system's performance, longevity, and the quality of your dried products.
Insulation and Heat Retention
Proper insulation and heat retention form the backbone of an efficient food drying system.
You'll want to start by selecting high-performance insulation materials for your drying chamber. Polyisocyanurate boards offer excellent thermal resistance, while mineral wool provides additional sound dampening and fire resistance benefits. For best results, install insulation with a 10cm thickness and 40 kg/m³ filling density.
Create a vertical standing seam insulation panel system to protect your chamber from external weather conditions. You'll need to guarantee complete coverage of all tanks and storage areas without compromising their functionality.
Install a three-pass waste heat recovery system to minimize heat loss and incorporate a hot air circulation system that maintains a consistent temperature throughout the chamber.
To maximize efficiency, add a dehumidification system that removes excess moisture and install circulating fans for uniform heat distribution. Your temperature control system should maintain accuracy within ±1°C.
Don't forget to protect all insulation from external elements to prevent condensation and mold growth. This setup will guarantee your drying system operates quietly at ≤75 dB(A) while maintaining high energy efficiency regardless of external conditions.
Installing Heat Distribution Components
The heart of your food drying system lies in its heat distribution components, which work together to create uniform drying conditions. You'll need to install air flow ducts strategically throughout your drying chamber, guaranteeing they align with your heat sources and circulation fans.
Position your circulation fans to create an efficient airflow pattern that moves heated air evenly across your food trays.
Start your installation process by following these key steps:
- Mount your primary heat source (heat pump or infrared panels) with proper spacing above and below your material storage trays, guaranteeing even coverage and maintaining safe clearances for ideal heat radiation.
- Install U-shaped supplementary heating tubes along the chamber walls, positioning them to complement your primary heat source without creating hot spots or dead zones.
- Place strategically designed spoilers within the airflow path based on basic CFD principles to minimize velocity deviation and enhance distribution uniformity.
Remember to incorporate ventilation holes in your storage trays and guarantee they align with your airflow pattern.
You'll want to test the system's air distribution by running it empty and measuring temperatures at various points to verify uniform heating before loading food products.
Automation System Setup
Integrating automation into your food drying system maximizes efficiency while reducing manual oversight. You'll need to start by installing a PLC system that connects to temperature, humidity, and pressure sensors throughout your drying chamber. Mount these sensors strategically to capture real-time data about your drying environment.
| Component | Function | Installation Point |
|---|---|---|
| PLC Unit | Process Control | Main Control Panel |
| Temp Sensors | Heat Monitoring | Chamber Walls & Trays |
| Humidity Probes | Moisture Detection | Air Inlet & Outlet |
Configure your PLC to manage pre-drying checks automatically, including door seal verification and drain valve positions. You'll want to program specific drying profiles for different food types, allowing the system to adjust settings dynamically based on sensor feedback. Install touchscreen controls for easy operation and monitoring.
Set up your automation system to handle the three main drying stages: freezing, main drying, and final drying. Add IoT connectivity for remote monitoring through your smartphone or computer. Don't forget to implement data logging capabilities – they're essential for tracking performance and optimizing future batches. Include automatic shutdown protocols and alert systems to prevent over-drying and maintain product quality.
Multi-Zone Configuration Options
Multi-zone configuration provides four distinct advantages for your food drying system: independent climate control, streamlined processing, ideal heat distribution, and customizable product handling.
You'll be able to control temperature and airflow separately in each zone, allowing you to precisely manage different drying phases while protecting your product's integrity. When you're processing delicate items, you can reduce transfers between equipment by consolidating multiple steps into a single system.
To maximize your multi-zone dryer's efficiency, consider these key setup elements:
- Install air-to-air heat exchangers to pre-warm incoming cold air before it reaches your burners, improving energy efficiency.
- Configure multiple tangential inlets if you're processing powder products, creating a vortex flow for optimal extraction.
- Position your cooling zones strategically to quickly evacuate dried products from high-temperature areas, preventing burning.
You'll achieve peak performance when you maintain spray droplets between 40 to 60 μm in diameter.
Using CFD tools, you can fine-tune each zone's parameters for ideal heat transfer and evaporation rates. Whether you're drying milk powder or dehydrating other food products, you can customize your zones to support specific requirements like setting, tempering, or sterilization processes.
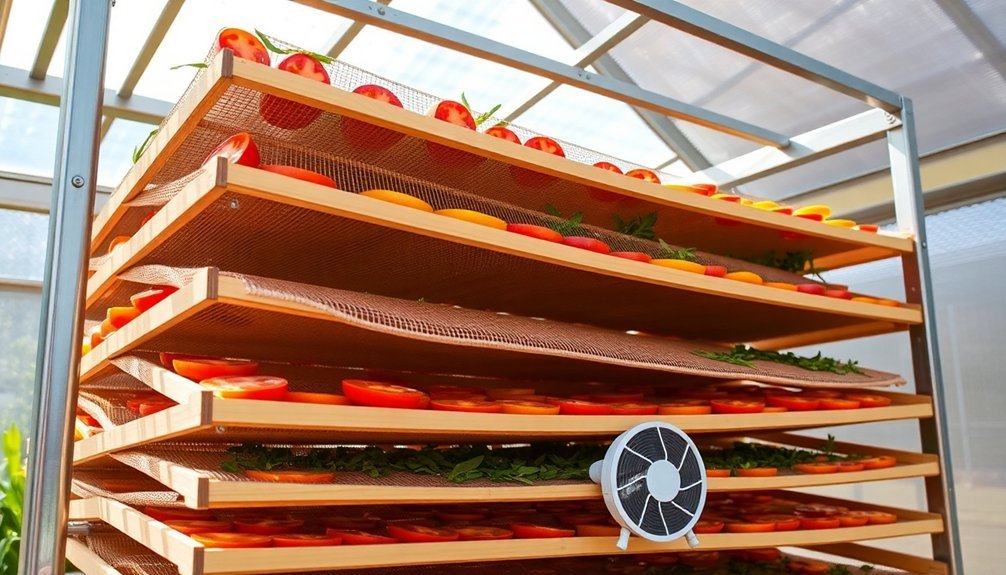
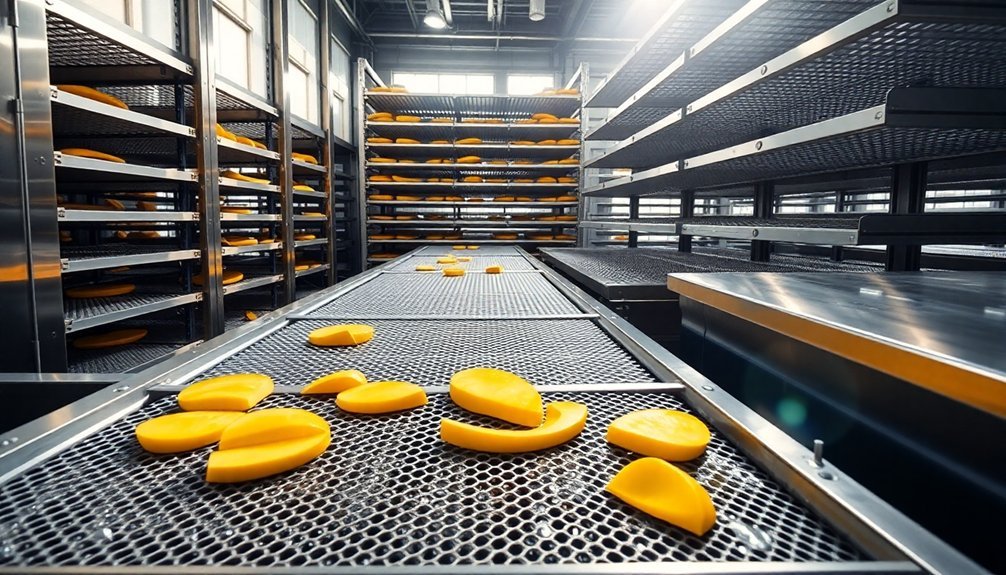
Drying Rack Construction

Building an effective drying rack starts with three essential components: a sturdy frame, proper ventilation design, and strategic height placement.
You'll want to construct your frame using metallic or hardwood supports, as these materials resist heat, fungi, and insects. Position your rack at least 1 meter above ground to maximize air flow and reduce drying time.
For the drying surfaces, you've got several options. You can use chicken wire, mosquito nets, or old fishing nets to support your food items.
If you're building an enclosed system, add insulation using polystyrene foam board or FRP board to maintain consistent temperatures and prevent condensation. For DIY solutions, combine furring strips with fine mesh screens to create reliable drying surfaces.
Your rack's design should accommodate your specific needs. For a large-scale operation, consider that a 12m x 2m rack can hold 22 removable trays, each carrying 12kg of fish.
Include adjustable shelving to maximize capacity and flexibility. Don't forget to install a drip tray to prevent spills, and if you're working indoors, cover the floor with plywood to prevent slipping hazards from condensation.
Energy Efficiency Optimization
Energy efficiency stands at the forefront of modern food drying system design. When building your own system, you'll want to incorporate proven technologies that maximize energy usage while maintaining food quality. By implementing advanced sensors for temperature, moisture content, and strain measurements, you can boost your system's efficiency by up to 10%.
- Start by integrating ultrasonic drying components into your design – they'll reduce your energy consumption by 20-40% and cut drying time by up to 70% compared to traditional methods, all while preserving food quality.
- Consider adding slot jet reattachment nozzles to your system, as they work exceptionally well with ultrasonic drying to enhance both energy efficiency and production rates.
- Install an automated tray system with continuous pushing hot plates to maintain consistent drying conditions and minimize energy waste through improved process continuity.
Monitor your system's performance through regular energy consumption measurements and adjust settings accordingly.
If you're working with a vacuum system, incorporate finned-tube coils in cold traps – this simple addition can reduce energy consumption by approximately 8%.
Remember that proper testing and measurement are essential for optimizing your system's efficiency.
Product Loading Mechanisms
A well-designed loading mechanism forms the backbone of any efficient food drying system. You'll need to choose between several proven methods based on your specific needs and scale of operation.
| Loading Type | Best Used For |
|---|---|
| Gravity Hoppers | Continuous feed operations with granular foods |
| Belt Systems | Large-scale uniform drying of flat products |
| Tray Systems | Batch processing of delicate food items |
| Rotary Feeds | High-volume industrial drying operations |
For small to medium operations, you'll want to evaluate a gravity-fed hopper system integrated with screw conveyors. This setup minimizes material buildup while ensuring smooth flow into your drying chamber. If you're handling larger volumes, a belt system might be your best choice, as it allows for even distribution and consistent drying across different zones.
For delicate foods, implement a tray system where you can stack products on multiple levels. You'll get better control over the drying conditions, and you can manually adjust the positioning as needed. If you're building a high-capacity system, evaluate a rotary feed mechanism with lifting flights – it's perfect for thoroughly mixing your product with the drying air while maintaining continuous operation.
Safety Features Implementation
While designing your loading mechanism is important, implementing proper safety features must be your top priority when building a food drying system.
You'll need to focus on personnel protection, equipment safety, and emergency preparedness to create a secure operating environment.
Start by installing extensive safety barriers, including guardrails around elevated platforms and clear warning signs near high-temperature areas.
You'll also want to implement proper lockout/tagout procedures for all drives and controls before any maintenance work begins.
Don't forget to include adequate ventilation and low-voltage lighting for when you're working inside the dryer.
- Install HEPA filtration systems to prevent cross-contamination and guarantee product safety
- Add protective guards over all rotating parts, including journal flanges and bolt heads
- Include emergency shutdown systems and carbon monoxide detectors
Your design should eliminate any crevices or dead spots where bacteria might grow.
Make sure you've engineered all components for easy cleaning and maintenance access.
Remember to establish a regular inspection schedule for checking seams, looking for erosion, and maintaining proper pressure levels in steam and water lines.
Train all operators thoroughly on safety protocols and emergency procedures.
Testing and Calibration Steps
Testing and calibrating your food drying system requires a systematic approach to guarantee maximum performance and consistent results. Begin by calibrating your optical sensors, making sure your RGB cameras can accurately detect surface features while your NIR spectroscopy systems properly measure internal moisture content. You'll need to validate these readings against standard thermogravimetric methods.
| Test Parameter | Calibration Method |
|---|---|
| Moisture Content | NIR Spectroscopy vs. Rapid Moisture Analyzer |
| Surface Features | RGB Camera vs. Visual Inspection Standards |
| Internal Quality | NIR-HSI vs. Laboratory Analysis |
Once your sensors are calibrated, conduct multiple test runs to establish baseline drying curves. You'll want to integrate your AI and machine learning models during these runs, training them to recognize specific product characteristics and ideal drying conditions. Monitor real-time data from all sensors to verify they're working in sync and providing accurate readings.
Don't forget to document all calibration results and test run data. You'll use this information to fine-tune your system's temperature, humidity, and airflow settings. Regular recalibration guarantees your system maintains its accuracy over time, while historical data analysis helps enhance future drying cycles.
Frequently Asked Questions
How Can I Prevent Mold Growth in Stored Dried Products?
You'll prevent mold by keeping humidity below 65%, using airtight containers, maintaining proper storage temperatures between 50-70°F, and ensuring your products are thoroughly dried before storage. Check regularly for any signs of growth.
What Certifications Do I Need to Sell Dried Foods Commercially?
You'll need HACCP certification, FDA registration, state food processing licenses, and GMP compliance. Consider additional certifications like organic, kosher, or food safety management systems depending on your market and products.
How Do Seasonal Humidity Changes Affect the Drying System's Performance?
You'll notice slower drying in humid seasons, requiring longer processing times and more energy. In dry seasons, you'll need to prevent over-drying. Adjust your dehumidification systems and controls seasonally to maintain quality.
Which Crops Should Not Be Dried Together Due to Flavor Transfer?
Don't dry strong-smelling foods like onions and garlic with delicate fruits or herbs. You'll want to separate acidic fruits, leafy greens, and high-sugar fruits from other crops to prevent unwanted flavor mixing.
How Long Can Dried Products Be Stored Before Quality Deterioration Begins?
You'll notice quality changes in dried foods after 6-12 months in typical storage. However, if you're using proper packaging, low temperatures, and controlling humidity, your products can maintain quality for up to 2 years.
In Summary
You'll find that building your own large-scale food drying system is both rewarding and cost-effective. Once you've completed the construction and testing phases, you're ready to start preserving food in significant quantities. Remember to regularly maintain your system, check safety features, and adjust settings as needed. With proper care, your custom drying system will serve you reliably for years of food preservation projects.


Leave a Reply