
When building a root cellar pit, you'll need to focus on seven proven elements for success. Start by choosing a gently sloping location below the frost line for natural insulation. Install perforated drainage pipes with proper grading to prevent water accumulation. Pour a solid concrete foundation reinforced with rebar for structural integrity. Create a two-part ventilation system with low inlet and high outlet vents for ideal airflow. Add a durable roof using layered materials and proper sealing. Control moisture with strategic earth layering and gravel beds. Implement these time-tested techniques, and you'll discover the keys to a lasting, functional root cellar.
Location Makes All The Difference
Selecting the perfect location for your root cellar pit can make or break its effectiveness.
You'll want to build into a gently sloping hillside, which provides natural insulation and helps maintain the vital temperature range of 32-40°F. Don't choose low-lying areas where water might collect; proper drainage is essential for keeping your stored produce safe.
Position your root cellar close enough to your home for convenient access during harsh weather, but make sure you're digging below the frost line (36-48 inches deep).
You'll need to check your local water table levels before excavation to avoid unexpected moisture issues. If you encounter extremely rocky ground, consider building at ground level and creating a berm around the structure instead. A soil composition analysis will help determine if your ground has the right mix of sand, silt, and clay for stable construction.
The ideal spot will help you maintain 85-95% humidity levels naturally through earth insulation.
You're looking for a location that won't experience dramatic temperature swings, as consistency is key for proper food storage.
Remember to factor in accessibility for regular maintenance checks and produce rotation.
The earth's natural moisture and insulating properties will work in your favor when you choose the right location.
Smart Underground Drainage Systems
Once you've chosen your ideal location, a well-designed underground drainage system will protect your root cellar from water damage. Start by digging drain trenches that are nearly level with your cellar floor, then angle them slightly downward away from the structure.
You'll need to dig wider and deeper trenches if you're dealing with clay or poorly draining soil. Managing proper moisture levels is essential since excess moisture issues occurred frequently in traditional root cellars.
Install black perforated drainage pipes in the trenches and cover them with gravel. Make sure the pipes extend to a downhill slope to handle heavy rains effectively.
You'll also want to implement French drains along the outer walls by filling the area with gravel layers at ground level, mid-wall, and near the top.
Secure the drainage pipes with cement at the exit point and cover the opening with heavy wire mesh to keep rodents out. Use tin sheets to separate the gravel from dirt during back-filling.
Keep the top of your cellar walls at least a foot below the lawn grade to prevent water seepage.
Don't forget to maintain your drainage system regularly to prevent clogs. If you're building in an area with poor drainage, you may need additional measures like temporary roofs during construction and extra-wide drainage trenches.
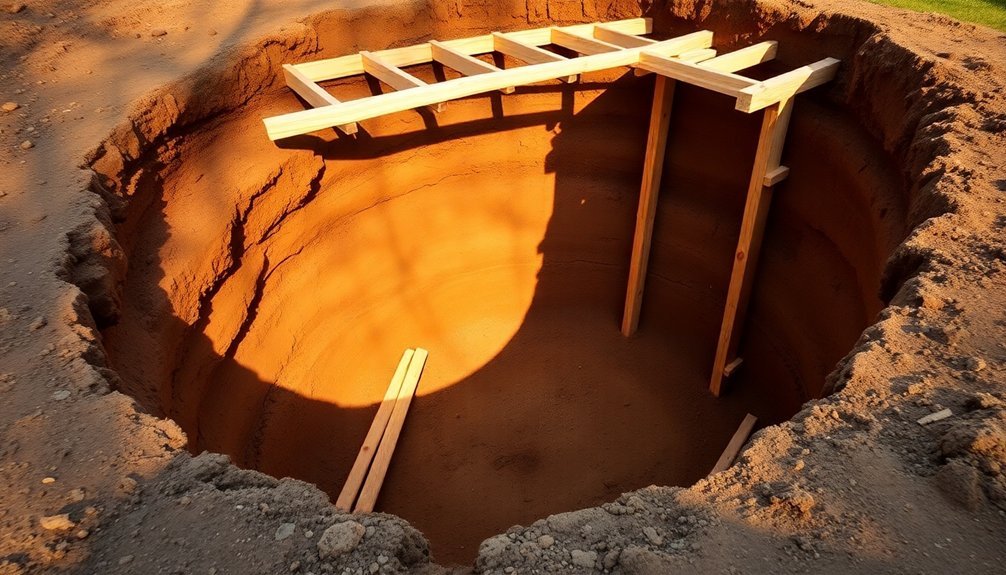
Wall Foundation Fundamentals
Before laying your first block or pouring any concrete, you'll need to establish a solid foundation for your root cellar walls. Start by digging your foundation hole below the frost line, paying special attention to the door area where you'll want extra depth protection against cold. Level the bottom carefully and add 6-8 inches of gravel for proper drainage.
Create your footer forms using 2-by-8 lumber, ensuring proper width dimensions – 16 inches for concrete block walls or 8 inches for poured concrete walls. You'll want your footer depth at approximately 7¼ inches to match standard 8-inch lumber dimensions. The 45-degree wing walls extend from the center to provide essential structural support.
Don't forget to include reinforcing rods throughout the footer for added strength.
Once you've poured your concrete into the forms, you'll need to allow 3-7 days for proper curing before starting your wall construction. Make sure your footer is perfectly level and plumb, as it'll determine the stability of your entire structure.
Remember to incorporate rebar within the concrete mix – this essential step provides the structural integrity your root cellar needs to withstand soil pressure and seasonal temperature changes.
Natural Air Flow Design
Proper air circulation sets up the foundation for a successful root cellar design.
You'll need to create a two-part ventilation system that works with natural air movement patterns to maintain ideal storage conditions. By positioning your inlet vent near the floor and the outlet vent high up near the ceiling, you're creating a natural chimney effect that keeps air flowing consistently through your cellar.
For maximum efficiency, install your vents on opposite sides of the cellar, with vertical ventilation being the preferred method.
You'll want to seal around your vents properly using packed cloth, expanding foam, or rubber gaskets to control airflow precisely. Consider adding a small electric fan to the exhaust vent if you need additional air movement.
- Place inlet vents low to the ground on the shadiest side of your cellar
- Install outlet vents high up, preferably through the roof using a vent stack
- Position vents on opposing walls if using horizontal ventilation
- Open vents during nighttime hours to let in cool air
This strategic vent placement helps regulate temperature, reduce moisture levels, and prevent harmful gas buildup, ultimately extending the shelf life of your stored produce.
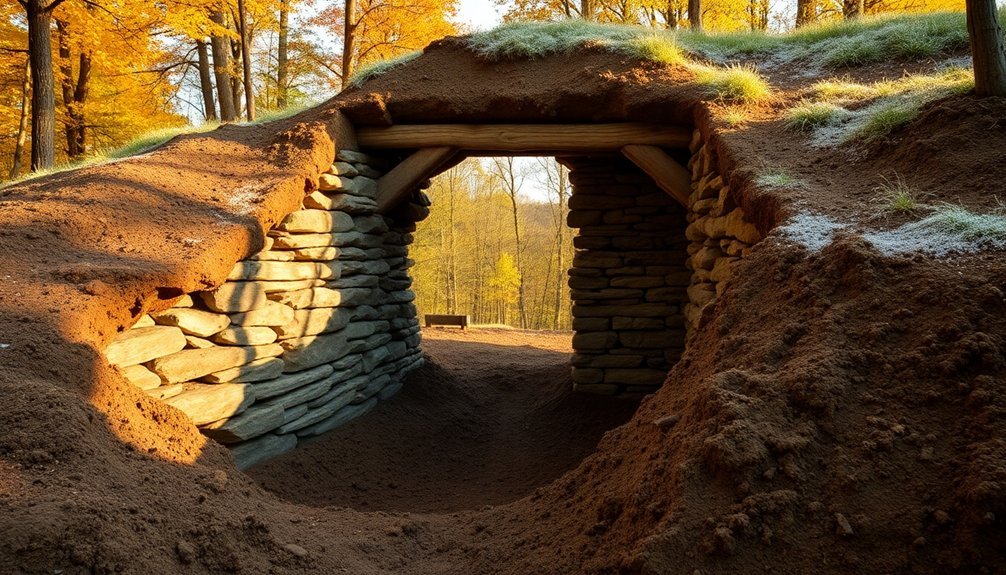
Practical Roof Construction Methods
With your ventilation system mapped out, the next challenge is building a robust root cellar roof that'll keep moisture out while maintaining consistent temperatures.
Start by laying a reinforced concrete slab as your foundation, ensuring it's properly supported by concrete blocks and a solid footer.
Layer your roofing materials strategically, beginning with two layers of OSB boards for structural support. Add Styrofoam Blue Board insulation on top, followed by EPDM rubber roofing to create a waterproof barrier.
You'll want to incorporate an arch design using plywood to enhance structural integrity and promote condensation runoff.
Secure temporary bracing using scrap 2x6s and poles while you're installing the OSB layers and pouring concrete.
For additional insulation, you can choose between several effective options: rigid foam sheets, heavy-duty insulating blankets, or a green roof system using soil and native plants.
If you're using metal roofing for the sides, extend it slightly over the roof edges to direct water away from the structure.
Remember to integrate your ventilation pipe through the ceiling during construction, ensuring it's properly sealed where it penetrates the roofing layers.
Moisture Control Strategies
Your root cellar's moisture control begins with strategic layering of drainage components, including gravel beds, perforated pipes, and moisture barriers that work together to direct water away from stored goods.
You'll need to position your drainage layers so they naturally channel moisture toward collection points, typically starting with a gravel base that slopes toward a French drain system.
For ideal natural airflow, you'll want to incorporate both low and high ventilation points that create a chimney effect, allowing damp air to rise and exit while fresh air enters through lower vents.
Layered Drainage System Components
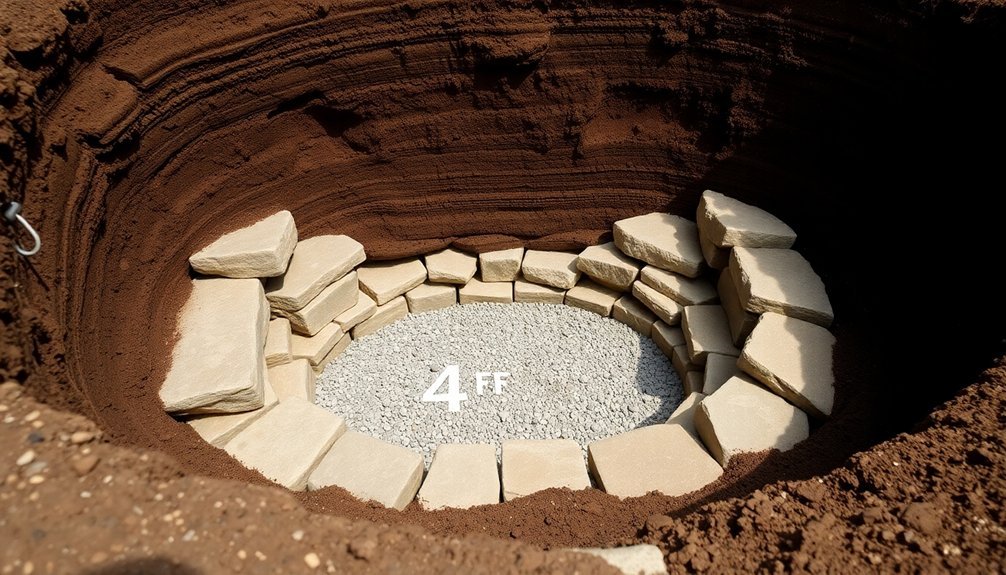
An effective drainage system lies at the heart of any successful root cellar, combining multiple layers of moisture control to protect your stored produce.
You'll need to start with a proper gravel foundation, laying at least 3 inches of rock at the bottom to create a French drain system. For clay or poorly draining soils, you'll want to add more gravel and possibly dig an additional drainage pit nearby.
Install perforated 4-inch drainpipes around your cellar's outer walls, placing them on the gravel bed with a slight slope to direct water away from the structure. Don't forget to protect these pipes with heavy roofing paper or 6-mil plastic sheeting to prevent clogging.
- Apply waterproof coatings like DryLok to interior walls
- Cover the gravel floor with plastic sheeting
- Install rain gutters on the topside structure
- Guarantee the interior floor sits higher than the outside soil
When backfilling, work in layers, tamping the soil firmly but not too tightly.
You'll want to leave space 2-3 feet below the surface for drainpipes, then complete the backfill. Plant grass on top to prevent erosion and maintain soil stability.
Natural Airflow Design Elements
Properly designed airflow systems serve as the lungs of your root cellar, controlling both temperature and moisture through strategic vent placement.
You'll need two essential components: a low inlet vent near the floor and a high outlet vent near the ceiling. This setup creates a natural convection current where cool air enters through the bottom and warm air exits above.
For peak performance, install your vents on opposite sides of the cellar. If possible, opt for vertical ventilation through the ceiling or roof, as it provides stronger airflow than horizontal placement.
During summer, keep both vents open to maintain circulation, but seal them tightly in winter using materials like packed cloth or expanding foam.
To manage moisture effectively, you'll want to incorporate several protective measures. Place plastic sheeting over your gravel floor to prevent ground moisture from seeping upward.
Apply waterproof coatings like DryLok to interior walls, and use moisture-absorbing materials such as hay or sawdust. Store your produce in wooden crates elevated off the floor to guarantee proper air circulation underneath.
Monitor air intake regularly and adjust your vents to maintain ideal temperature and humidity levels.
Earth Layering Techniques
Start your earth layering process by combining clay-rich soil with coarse sand at a 70/30 ratio for ideal compaction in your earthbags.
You'll need to create gentle slopes of at least 2% grade with each soil layer to direct water away from your cellar's foundation.
For best results, alternate layers of well-draining gravel with your soil mixture, ensuring each layer is thoroughly compacted before adding the next.
Soil Composition and Depth
When building a root cellar pit, understanding soil composition and proper depth is essential for maintaining ideal storage conditions.
You'll need well-drained soil to prevent water accumulation while maintaining enough moisture to keep humidity levels high. If you're dealing with rocky or gravelly soil, consider building an above-ground cellar with a berm to achieve similar insulating effects.
The ideal depth for your root cellar depends on your climate and local conditions. You'll want to dig below the frost line, which typically ranges from 36 to 48 inches, but aim for an average depth of 10 feet to maintain stable temperatures between 32-40°F.
- Check your soil's drainage capabilities and install perforated drainpipes around the cellar to carry off excess water.
- Ascertain you're digging deep enough to achieve proper temperature control but not so deep that you hit permafrost in colder regions.
- Test your soil's pH levels, as this can affect your choice of construction materials.
- Take advantage of earth's natural insulating properties by properly layering the soil around your cellar walls.
Remember that earth insulation provides excellent temperature stability and moisture retention while reducing the need for additional cooling measures.
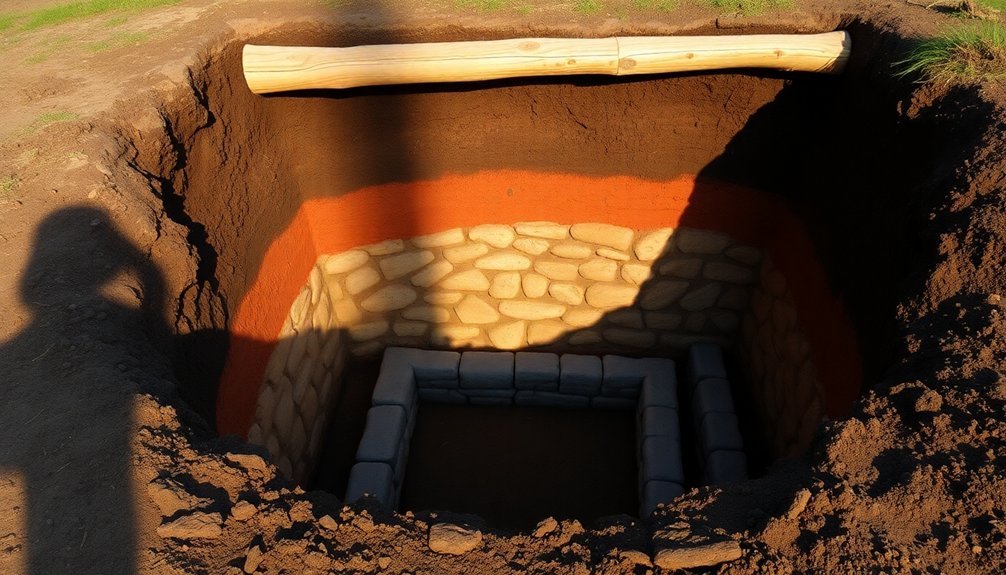
Layering Multiple Earth Types
Successful root cellar construction relies heavily on strategic earth layering techniques. You'll need to start with a properly excavated pit, where the soil you remove can be repurposed for filling your earthbags. Create a gravel trench around the foundation's perimeter and install a 6-mm plastic moisture barrier to prevent water from seeping into your structure.
When layering your earthbags, fill them with slightly moist dirt and verify even distribution. Place two strands of barbed wire between each layer, tamping each row thoroughly before adding the next. This creates a solid, interconnected structure that won't shift over time.
| Layer Type | Purpose | Key Requirements |
|---|---|---|
| Gravel Base | Drainage | Level, below frost line |
| Moisture Barrier | Water protection | 6-mm plastic sheeting |
| Earthbag Rows | Structural support | Moist soil, barbed wire |
For the final layers, backfill around the structure using a combination of soil and rocks to create a protective berm. This multi-layered approach helps maintain consistent temperature and humidity levels while verifying your root cellar's long-term stability. Don't forget to seal any gaps between the earthbags and foundation before completing the backfill process.
Strategic Drainage Slopes
Building on proper earth layering, your root cellar's drainage system requires careful slope management to prevent structural damage. The most critical aspect is installing a perforated 4-inch drainpipe that runs along the entire back wall, wrapping around both corners until it reaches daylight. You'll need to maintain a precise slope of 1 inch per 8 feet from the center, declining toward both sides to guarantee proper water flow.
To create an effective drainage system, follow these essential slope-related steps:
- Start by laying a 3-inch gravel bed as the foundation for your drainpipe, guaranteeing it maintains the correct slope gradient throughout.
- Cover the installed pipe with heavy roofing paper or 6-mil plastic sheeting to prevent silt infiltration.
- Add a layer of gravel above the pipe to enhance drainage and reduce soil pressure against the walls.
- Compact each layer of backfill firmly but gently as you progress upward.
Remember that your drainage system isn't meant to keep water out entirely but rather to prevent pressure from frozen soil expansion. This strategic approach protects your root cellar's walls from potential cave-ins and structural damage, particularly during winter months when soil freezing is most likely to occur.
Frequently Asked Questions
How Long Does It Typically Take to Build a Root Cellar?
You'll need about 3-4 weeks to build a basic root cellar if you're working full-time with a helper. It'll take longer if you're working solo or including complex features like ventilation systems.
What Tools Are Essential for a DIY Root Cellar Project?
You'll need these essential tools: shovels, levels, tamper, wheelbarrow, safety gear, rebar, wire cutters, and a sledgehammer. Don't forget plastic sheeting, sandbags, and concrete materials for construction.
Can Existing Basement Space Be Converted Into a Root Cellar?
Yes, you can convert your basement space into a root cellar. You'll need to choose a cool corner, add proper insulation, install ventilation systems, and maintain ideal humidity levels for food storage.
What's the Estimated Cost Range for Building a Basic Root Cellar?
You'll spend between $200-$55,000 for a root cellar, depending on your chosen type. A basic DIY project using earthbags or sandbags can cost as little as $250-$500 for materials.
How Many Pounds of Produce Can an Average Root Cellar Store?
You can store approximately 500-1,000 pounds of produce in a typical 50-100 square foot root cellar. If you're using pallet bins and maximize space efficiently, you'll be able to store even more.
In Summary
You'll find that building a root cellar pit requires careful planning and attention to detail. By following these time-tested tips for location selection, drainage, foundation work, ventilation, roofing, moisture control, and proper earth layering, you're setting yourself up for success. Whether you're storing vegetables, fruits, or preserves, your well-built root cellar pit will serve as a reliable food storage solution for years to come.


Leave a Reply