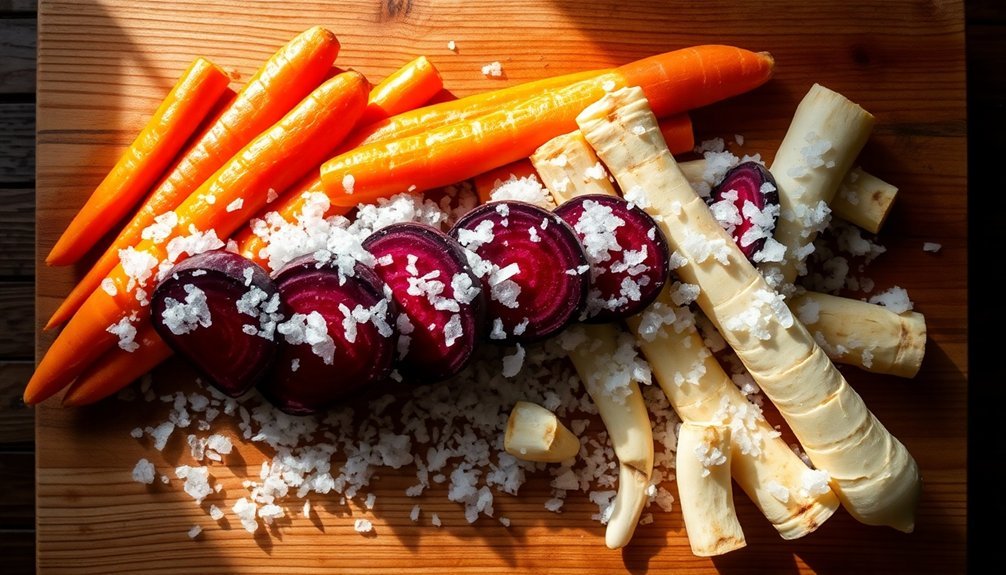
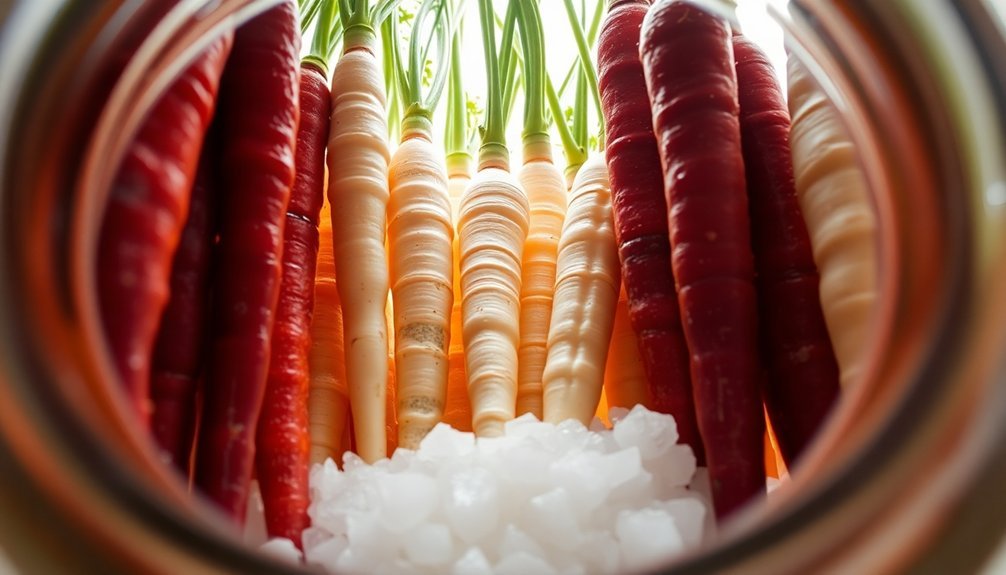
To salt-cure root vegetables, you'll need food-grade containers, measuring tools, and pickling or kosher salt. Start by selecting firm, unblemished vegetables like carrots, beets, or turnips at their peak freshness. Clean and cut them into uniform pieces, then weigh them to calculate your salt ratio (20-25% by weight for curing). Mix the vegetables thoroughly with salt, layer them in your container, and press firmly to release natural juices. Monitor daily, ensuring vegetables stay submerged in brine and maintain temperatures between 59-68°F. The process takes patience, but mastering these fundamental steps will reveal the art of preservation.
Tools and Equipment Needed
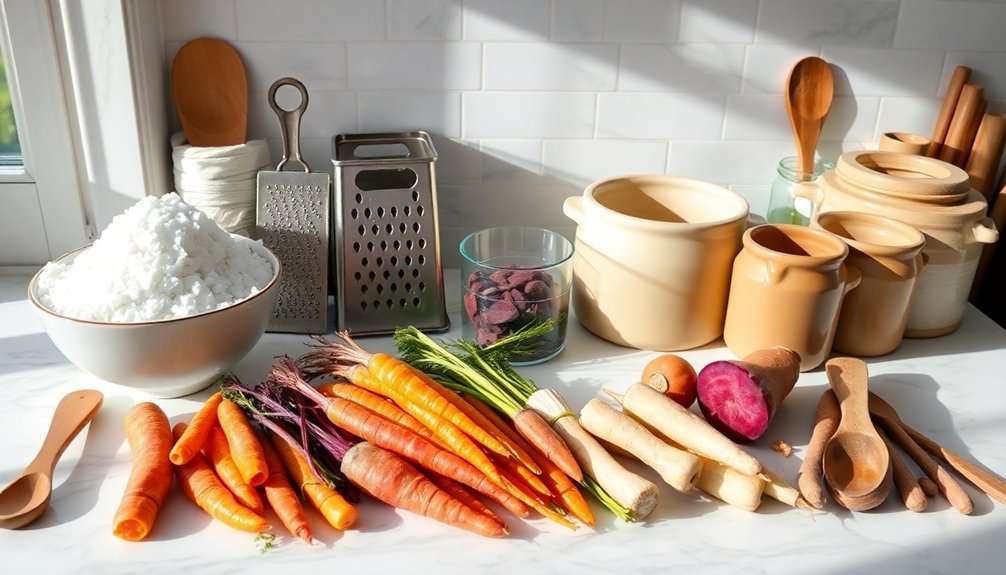
When starting on a salt-curing project for root vegetables, you'll need several essential tools and pieces of equipment to guarantee success. First, you'll require sterile, nonreactive vessels for the curing process. Choose from glazed pottery crocks, food-grade plastic containers, or glass jars, but avoid any metallic containers that might react with the salt. Using a pickling or kosher salt is essential, as table salt contains additives that can affect the final product.
You'll need precise measuring tools to achieve the correct salt concentrations. An accurate scale is vital for weighing both your vegetables and salt, while measuring spoons and cups help you maintain proper ratios – 2.5% to 5% salt for fermentation or 20% to 25% for curing.
For preparation, gather a clean vegetable brush, sharp cutting tools like knives or mandolines, and a grater for finely chopping. If you're using the high-salt method, you'll also need blanching equipment and clean towels for drying.
Finally, assemble your packing tools: a clean mixing bowl, spoons or spatulas for packing, fermentation weights to keep vegetables submerged, and an air-locked lid to prevent contamination while allowing gases to escape during the curing process.
Selecting Your Root Vegetables
You'll get the best results from your salt-curing by choosing root vegetables at their seasonal peak, when they're naturally packed with flavor and have ideal texture.
Look for firm, unblemished specimens that show no signs of soft spots or discoloration, particularly focusing on varieties like baby carrots, new potatoes, and small turnips that are under 2 inches in diameter. Ensure vegetables are whole and unpeeled for optimal results.
Aim for a diverse mix of colors and flavors in your selection, combining sweet options like candy beets with earthier choices such as celeriac or sunchokes.
Best Seasonal Root Options
Selecting the right root vegetables for salt-curing starts with understanding their seasonal availability and natural characteristics. You'll find your best options in fall and winter when root vegetables naturally develop their peak flavors and enter their dormancy period.
For fall curing, focus on carrots, beets, and parsnips. These vegetables actually become sweeter in cooler temperatures, making them ideal candidates for salt preservation. The ideal salt concentration of 2% works perfectly for these classic root vegetables. You'll want to harvest them when they're fully mature but before the ground freezes.
Winter brings excellent opportunities for curing turnips and rutabagas, which maintain their texture well during the preservation process.
If you're planning for spring, radishes are your best choice. They mature quickly and respond well to high salt concentrations.
When choosing any root vegetable for curing, look for firm, unblemished specimens without soft spots or discoloration. Remember that sunlight exposure affects maturity rates, particularly during shorter winter days, so you'll need to adjust your harvest timing accordingly.
Consider mixing different root vegetables in your curing projects to maximize nutritional benefits – you'll get a range of vitamins and minerals while creating varied flavors and textures for your preserved stores.
Checking Vegetable Quality
Now that you're familiar with seasonal options, proper quality inspection stands between you and successful salt-curing. When selecting root vegetables for curing, you'll need to assess their condition through visual inspection, texture testing, and aroma evaluation. Your chosen vegetables should have bright, even coloring without dark spots, bruises, or wrinkles that could compromise the curing process.
Start your inspection by following these critical checks:
- Press firmly on the vegetable's surface – it should feel hard and solid with no give or soft spots that could indicate internal decay.
- Examine the exterior carefully for cracks, damage, or signs of mold, ensuring attached roots remain crisp and sturdy.
- Perform a quick smell test – fresh root vegetables shouldn't have strong or unpleasant odors.
Pay particular attention to the vegetable's weight; it should feel dense and heavy for its size. The skin should be smooth and unblemished, as any damage can lead to spoilage during the curing process.
If you notice wrinkled skin, excessive softness, or any slimy patches, choose a different specimen. Remember, the quality of your final cured product directly depends on your initial selection.
Proper Salt Selection
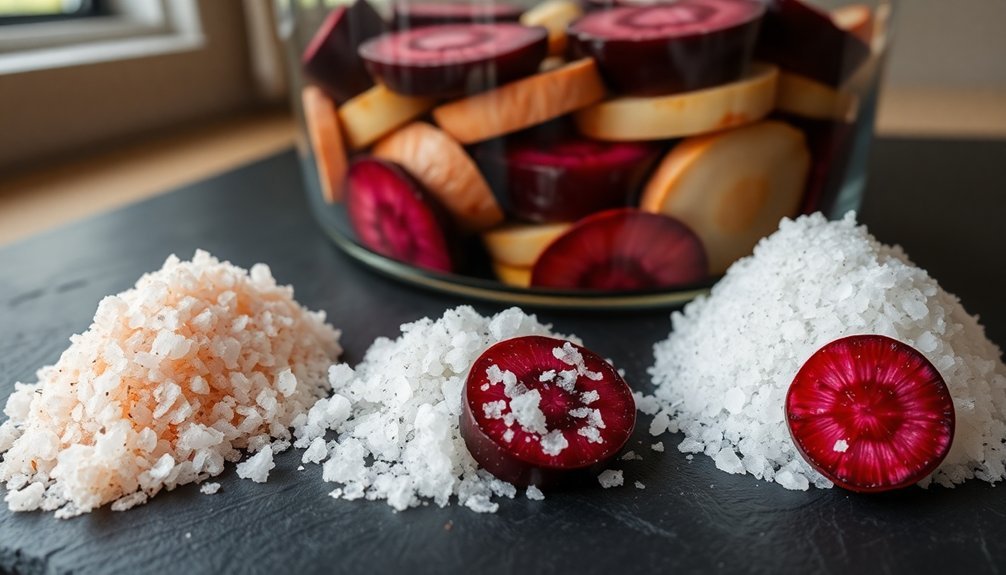
In line with successful salt-curing, choosing the right salt type is essential for preserving root vegetables. You'll want to use either pickling/canning salt or kosher salt, as they're pure and free from additives.
Stay away from table salt and sea salt, as their additives and minerals can interfere with the curing process and potentially lead to spoilage or discoloration.
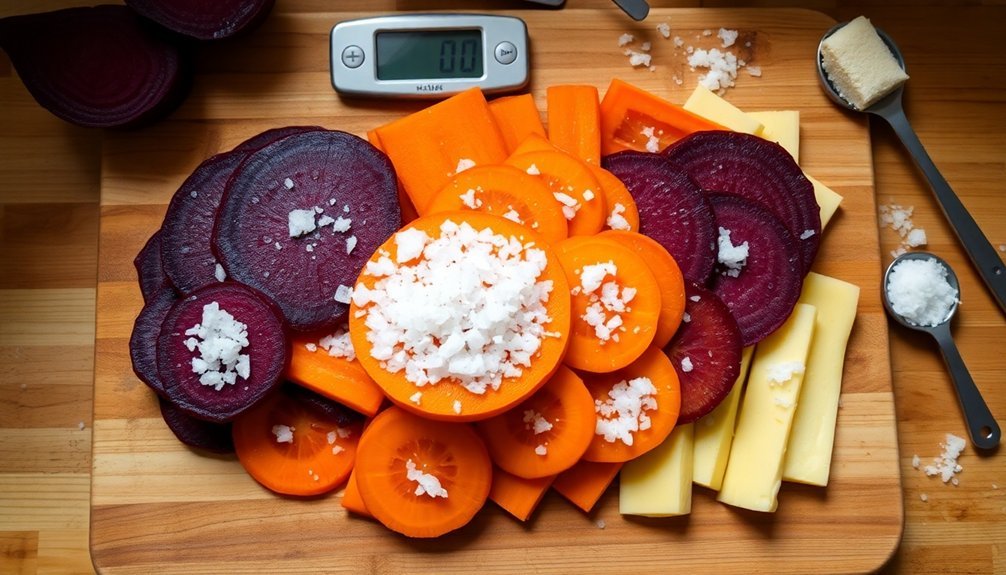
For root vegetables, you'll need to use a high salt concentration of 20-25% salt by weight of your vegetables to achieve proper curing. This high concentration prevents bacterial growth and helps maintain the vegetables in a near-fresh state.
You must weigh both your prepared vegetables and salt accurately, as even small variations can considerably impact your results.
When you apply the salt, it'll draw moisture from your root vegetables, creating an environment that inhibits harmful microorganisms. This process not only preserves your vegetables but also enhances their flavor and texture.
Remember to measure precisely – incorrect salt concentrations can lead to spoilage or unwanted fermentation.
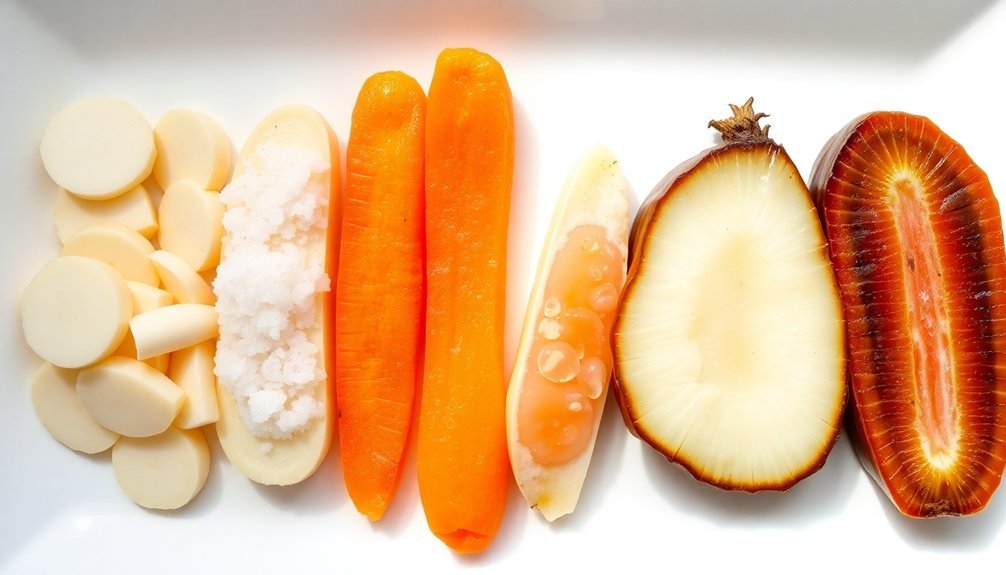
Cleaning and Preparation Steps
Proper cleaning and preparation lay the foundation for successful salt-curing of root vegetables. You'll need to start by selecting firm, slightly underripe vegetables that are free from damage or disease. Once you've chosen your produce, wash them thoroughly under cold running water, gently scrubbing with a vegetable brush to remove dirt and debris. Don't soak the vegetables, as this can lead to waterlogging.
For root vegetables like beets and carrots, you'll want to follow these specific steps:
- Remove tops and trim off roots, then peel using either a knife or a two-stage peeling process with carborundum followed by knife peeling.
- Cut vegetables into uniform pieces – ½-inch cubes or slices for beets, and thin slices or lengthwise strips for carrots.
- Remove excess moisture through straining or centrifugation, as dryness is essential for proper salt-curing.
After cutting, immediately treat sliced vegetables with citric or ascorbic acid to prevent browning.
Before packing, confirm all your equipment and containers are properly sterilized. You'll want to use clean, hot jars and maintain impeccable cleanliness throughout the process to prevent contamination that could compromise the curing process.
Salt Ratio Calculations
Once you've prepared your vegetables, calculating the correct salt ratios becomes your next key step for successful curing.
For root vegetables like beets, carrots, and radishes, you'll want to aim for a 2-2.5% salt concentration. To calculate this accurately, weigh your vegetables and water together, then multiply the total weight by 0.02 (for 2%) or 0.025 (for 2.5%) to determine how much salt you'll need.
You'll need to adjust your calculations based on several factors. In warmer weather, use 2.5% salt to slow fermentation and prevent spoilage. In cooler conditions, you can reduce to 1.5% for faster fermentation.
Don't exceed 5% salt, as this will halt the fermentation process completely.
For precise measurements, always use a digital scale rather than volume measurements. If you're using the dry salting method, use 1 tablespoon of salt for every 1½ pounds of vegetables.
When making a brine solution, multiply your water weight by the desired salt percentage. Remember to use natural, unrefined salts with high mineral content for ideal fermentation results.
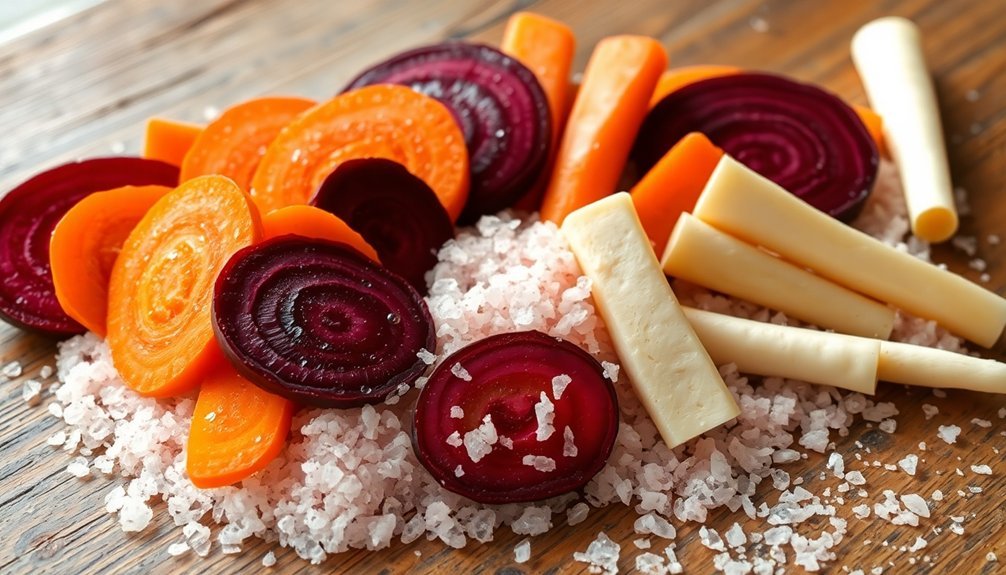
Mixing Technique
You'll need to distribute salt evenly throughout your root vegetables by working it in with clean hands, ensuring thorough coverage of each piece.
Start with a thin layer of vegetables in your mixing bowl, sprinkle salt over them, and repeat this layering process until you've used all your ingredients.
After layering, gently toss and mix the contents to achieve uniform salt distribution, paying special attention to any clumps of vegetables that might stick together.
Salt Distribution Best Practices
Successful salt-curing starts with mastering the distribution of salt throughout your vegetables. Your goal is to create an even coating that will draw out moisture consistently and create the perfect environment for preservation.
You'll need to weigh both your prepared vegetables and salt precisely, guaranteeing you're using the right concentration for your desired outcome – 20-25% for traditional curing or 2.5-5% for fermented pickles.
For ideal salt distribution, follow these essential steps:
- Begin with thoroughly cleaned and dried vegetables, paying special attention if you've blanched them first – excess moisture will throw off your salt ratios.
- Mix your vegetables and salt in a clean bowl using a gentle kneading motion, making sure every surface gets coated.
- Apply pressure as you mix to help release initial juices and create a natural brine.
As you work the salt into your vegetables, you'll want to layer them into your storage container, pressing down firmly on each layer to remove air pockets.
This methodical approach guarantees even contact between the salt and vegetable surfaces, which is vital for proper curing. If you're working with larger pieces, consider using a pre-mixed brine solution instead of dry salting.
Even Coverage Techniques
Every root vegetable deserves meticulous attention during the salt-mixing process to achieve ideal preservation results.
You'll need to start by preparing your vegetables properly – wash, peel, and cut them into uniform pieces. Make certain you've removed any damaged parts and thoroughly dried blanched vegetables before proceeding.
When you're ready to mix, combine your vegetables with the correct salt concentration in a clean bowl. For fermentation, you'll want 2½% to 5% salt, while curing requires 20% to 25%. Squeeze the vegetables as you mix to help release their natural juices. Don't leave any salt behind – scrape every bit from the mixing bowl into your fermenting vessel.
For larger root vegetables, you'll need to create a brine solution by mixing salt and water at a 3-5% concentration.
Whether you're using dry salt or brine, pack your vegetables tightly into a sterile vessel, pressing down each layer to eliminate air pockets. Keep the vegetables fully submerged and store them at 4-5°C. Before final packaging, rinse the vegetables to remove excess salt.
This careful attention to mixing technique guarantees even salt distribution and proper preservation.
Layer-By-Layer Incorporation Method
Building upon proper salt distribution, the layer-by-layer incorporation method offers enhanced control over the preservation process.
You'll need to carefully pack your salt-vegetable mixture into a sterile fermenting vessel, guaranteeing each layer is firmly pressed to eliminate air pockets and extract the maximum amount of liquid from your root vegetables. This methodical approach helps create the anaerobic environment essential for proper preservation.
- Start by placing a thin layer of your salted vegetable mixture at the bottom of your vessel, then press firmly to compress the layer and force out any trapped air. You'll notice liquid beginning to accumulate – this is exactly what you want.
- Continue adding layers gradually, pressing each new addition with consistent pressure. Remember to scrape any remaining salt from your mixing bowl into the vessel to maintain the correct salt concentration.
- Once you've transferred all layers, guarantee your vegetables are completely submerged in the resulting brine. If needed, place weights on top to keep everything below the liquid surface, as exposure to air can lead to spoilage.
This layering technique creates ideal conditions for either fermentation at room temperature or curing in cooler environments, depending on your chosen preservation method.
Packing the Curing Container
Proper packing technique guarantees your root vegetables cure successfully in their container. Start by selecting fresh, mature, and slightly underripe vegetables that are firm and free of blemishes.
After thoroughly washing and peeling them, cut them into your desired shapes and sizes.
Mix your vegetables with pickling or canning salt, ensuring you're using a 3-5% concentration for fermentation or higher for curing. As you mix, squeeze the vegetables to begin extracting their natural juices, and make sure you transfer all salt from the mixing bowl to your curing vessel.
Pack the mixture into a sterile, nonmetallic container – you can use a glazed pottery crock, food-grade plastic, glass jars, or wooden vessel. Press each layer firmly without crushing the vegetables, and don't fill beyond three-quarters capacity to allow for fermentation expansion.
You'll need enough liquid to cover the vegetables by at least an inch. If there's insufficient natural juice, prepare a supplementary brine.
Keep the vegetables submerged using weights and maintain the proper salt concentration throughout the curing process. You'll need to add salt periodically as water continues to drain from the vegetables.
Monitoring the Curing Process
Check your root vegetables' brine levels daily, ensuring they remain fully submerged to prevent spoilage and uneven curing.
Look for small bubbles and a slightly sour aroma as positive signs that fermentation is progressing properly.
You'll need to maintain a consistent temperature between 15°C to 20°C (59°F to 68°F) and keep the storage area dry to support ideal curing conditions.
Checking Brine Levels Daily
Diligence in monitoring brine levels plays an essential role in successful vegetable fermentation. You'll need to check your fermented vegetables daily to guarantee they remain fully submerged in the brine and maintain proper salt concentration.
As vegetables release moisture during fermentation, they'll naturally dilute the brine, requiring you to make regular adjustments to keep the ideal salt levels between 2% and 5%.
When checking your brine levels daily, follow these important steps:
- Use clean hands or sanitized tools to check vegetable submersion, adding weights if needed to keep produce below the surface.
- Test salt concentration with a digital refractometer, adjusting with additional salt if readings show dilution.
- Record all measurements and adjustments in a fermentation log to track patterns and identify potential issues.
Keep in mind that different root vegetables require specific salt concentrations – softer vegetables need around 2%, while firmer ones like beets demand 3.5%.
If you notice the brine becoming too concentrated, dilute it with water, and if it's too weak, add more salt. Always use precise measuring tools to maintain consistency throughout the curing process.
Visual Signs of Fermentation
Beyond daily brine monitoring, understanding the visual signs of fermentation will help you gauge the progress of your salt-cured root vegetables. You'll notice bubbles forming throughout the jar after a few days at room temperature, indicating active fermentation by lactic acid bacteria. The vegetables' colors may become slightly muted, and their texture will change as the salt and brine work their magic.
When you open the jar, you'll detect a strong but pleasant sour aroma – this is exactly what you want. However, if you smell anything rotten or off-putting, discard the batch immediately. Your root vegetables will develop a tangy, slightly carbonated flavor profile as they ferment, with smaller pieces fermenting faster than larger ones.
| Sign | What to Look For | What It Means |
|---|---|---|
| Bubbles | Gas production visible in jar | Active fermentation |
| Aroma | Pleasant, sour smell | Healthy bacterial activity |
| Color | Slightly subdued hues | Normal fermentation progress |
| Texture | Firm but slightly softened | Salt preservation working |
| Brine | Clear to slightly cloudy liquid | Proper environment for curing |
Taste your ferment daily to track its progress, and once it reaches your desired flavor profile, transfer it to cold storage to slow fermentation.
Temperature and Environment Control
Maintaining precise temperature and humidity levels is critical for successful root vegetable curing.
You'll need to keep the temperature at 85°F for sweet potatoes, while other root vegetables require cooler storage conditions between 32-38°F. The relative humidity should stay between 85-90% during the curing process to promote proper wound healing and suberization.
Proper ventilation and air circulation are essential to prevent moisture buildup and ethylene gas accumulation, which can lead to spoilage.
You'll want to monitor the environment regularly to avoid under or over-curing your vegetables.
Here's what you need to check daily:
- Temperature consistency – use a reliable thermometer to verify it doesn't fluctuate beyond the ideal range
- Humidity levels – maintain appropriate moisture without creating conditions for mold growth
- Air circulation – verify proper airflow around your vegetables to prevent localized moisture issues
Keep an eye on the color score of sweet potatoes – a reddish-purple hue indicates complete suberization.
For other root vegetables, check for proper drying of tops and examine regularly for any signs of deterioration or spoilage during the storage period.
Signs of Successful Preservation
Successful preservation of root vegetables requires careful monitoring of specific indicators throughout the curing process.
You'll know your root vegetables are properly cured when they maintain a near-fresh state while showing minimal softening. The vegetables should remain crisp and firm, with their natural appearance largely intact.
When checking your cured vegetables, look for a fresh smell without any off odors. The high salt concentration you've used (20-25%) should prevent all bacterial growth, guaranteeing your vegetables stay safe and stable.
You'll want to see effective moisture control, which helps maintain the proper texture and prevents spoilage. To confirm successful preservation, conduct quality checks regularly. Your vegetables should taste fresh with a balanced saltiness, not overwhelmingly salty.
Perform visual inspections to guarantee there's no discoloration, mold, or signs of spoilage. The texture should be firm and consistent throughout.
If you're measuring salt accurately with a digital scale and maintaining proper concentration levels, your root vegetables will remain stable during extended storage.
Remember that proper curing differs from fermentation – you're not looking for tanginess or acid development, but rather a clean, fresh-tasting preserved vegetable.
Storage Methods
Once you've confirmed proper curing of your root vegetables, you'll need to store them correctly to preserve their quality. The most effective storage methods combine salt layering with proper environmental conditions to maintain freshness and prevent spoilage.
For ideal storage results, follow these key steps:
- Select appropriate containers: Choose nonmetallic vessels like glazed pottery crocks, food-grade plastic, or glass jars for fermented vegetables. For dried root vegetables, use airtight containers or sterile jars.
- Create proper salt layers: Sprinkle salt evenly over your vegetables and pack them carefully to eliminate air pockets. This reduces moisture and inhibits bacterial growth.
- Control storage conditions: Place your containers in a cool, dark location away from heat sources and direct sunlight. Guarantee good ventilation to maintain dry conditions.
You'll need to check your stored vegetables regularly for signs of spoilage or mold. If you're using paper towels or cloth for items like potatoes, make sure they stay dry and replace them as needed.
Remember to maintain consistent cool temperatures throughout the storage period, and keep your containers tightly sealed to prevent air from entering.
Using Salt Cured Vegetables
Salt-cured vegetables bring unique flavors and textures to your culinary creations. You'll find these preserved vegetables work particularly well when paired with rice dishes, soups, and traditional meat preparations. To enhance their versatility, you can incorporate umeboshi plums or shio koji, which add depth and complexity to the final product.
Before serving your salt-cured vegetables, you'll want to contemplate adding complementary seasonings. Dried bonito flakes make an excellent last-minute addition, introducing a savory umami element that elevates the dish.
If you're serving the vegetables as a side dish, you can combine them with pork or other meat-based preparations for a more substantial meal.
When incorporating salt-cured vegetables into your cooking, remember they're intensely flavored, so you'll need to balance them with milder ingredients. You can rinse them briefly to reduce their saltiness if needed, though this isn't always necessary.
Don't hesitate to experiment with different seasoning combinations – try adding soy sauce for additional depth or mixing various cured vegetables together for a more complex flavor profile. The key is finding the right balance that suits your taste preferences.
Frequently Asked Questions
Can I Reuse the Salt Brine From a Previous Batch of Cured Vegetables?
You can reuse fermentation brine once or twice if it's not cloudy and within two weeks of the first batch. However, each reuse dilutes salt levels, so you'll need to add more salt.
What Causes Vegetables to Turn Mushy During the Curing Process?
Your vegetables can turn mushy when pectin breaks down, there's too much water content, or you've used incorrect salt concentrations. These factors disrupt the vegetable's cellular structure during curing, affecting their texture and firmness.
How Do Seasonal Temperature Changes Affect the Curing Timeline?
You'll need to adjust your curing timeline based on the season. In warmer months, you can cure faster (7-10 days), while colder temperatures require longer periods to achieve proper curing conditions.
Can I Mix Different Types of Root Vegetables in the Same Container?
Yes, you can mix different root vegetables in the same container. Just make sure they're cut to similar sizes, equally fresh, and properly prepared. You'll need to maintain consistent salt concentration across all vegetables.
Why Do Some Vegetables Float Even With Proper Weights Installed?
Even with weights, your vegetables can float due to trapped air pockets inside them and ongoing osmosis. You'll find this happens when the veggies haven't released all their internal moisture and gases yet.
In Summary
Now you're ready to start salt-curing your root vegetables with confidence. You'll find this traditional preservation method not only extends your harvest's shelf life but also intensifies flavors and creates new cooking possibilities. Remember to check your cured vegetables regularly and store them properly in a cool, dark place. With practice, you'll develop a knack for timing and soon have a pantry full of perfectly preserved roots.


Leave a Reply