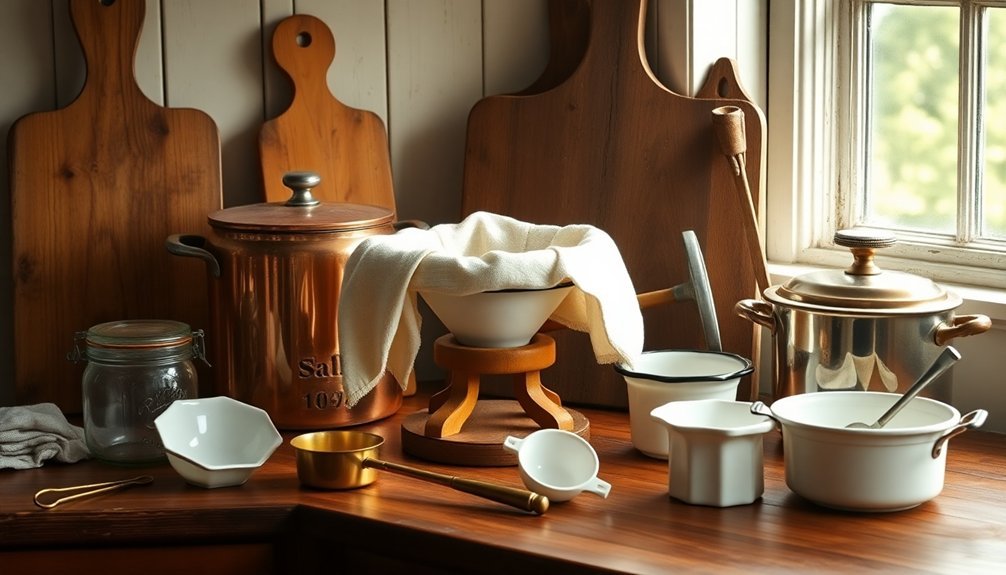
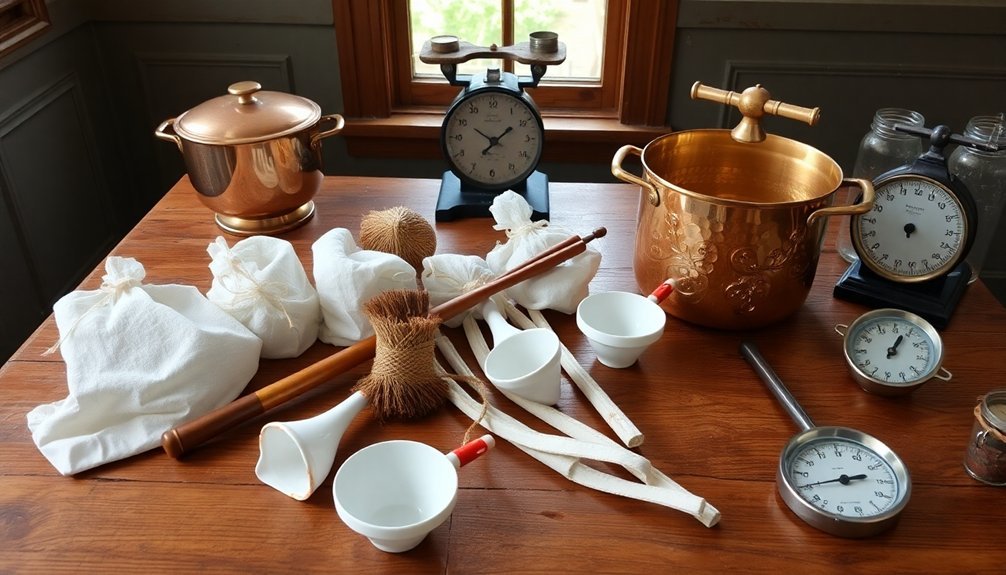
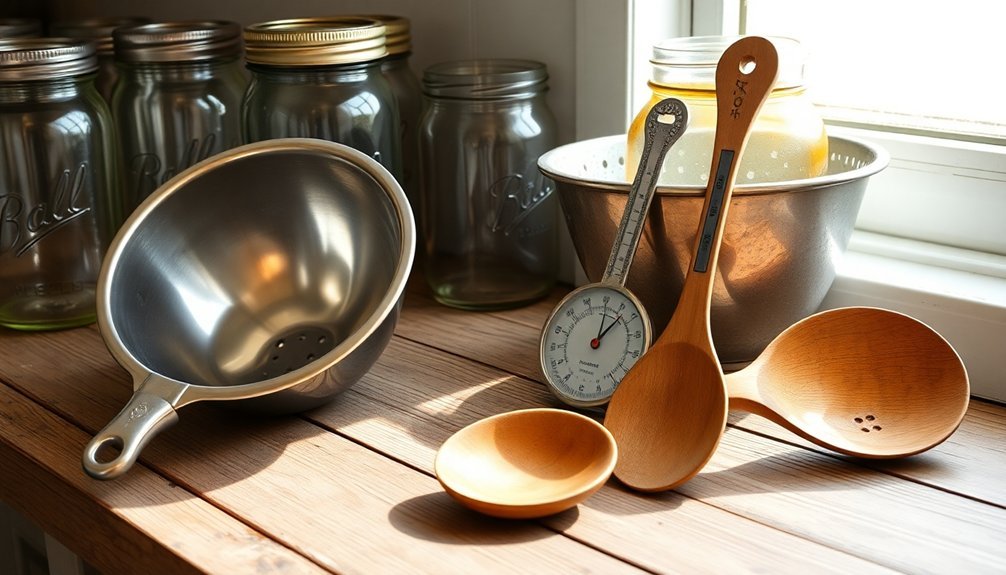
You'll need several essential tools for traditional jelly making, starting with a heavy 8-10 quart preserving kettle with high sides. Don't forget reliable thermometers that can handle temperatures up to 400°F, plus sturdy jelly bags or cheesecloth for straining. You'll want long-handled wooden spoons for stirring, heat-resistant mitts for safety, and proper measuring tools like dry cups and a scale. For storage, you'll need clean jars, lids, and a proper testing method to guarantee proper sealing. These time-tested tools form the foundation of successful preserving, but there's much more to discover about this traditional craft.
The Basic Preserving Kettle
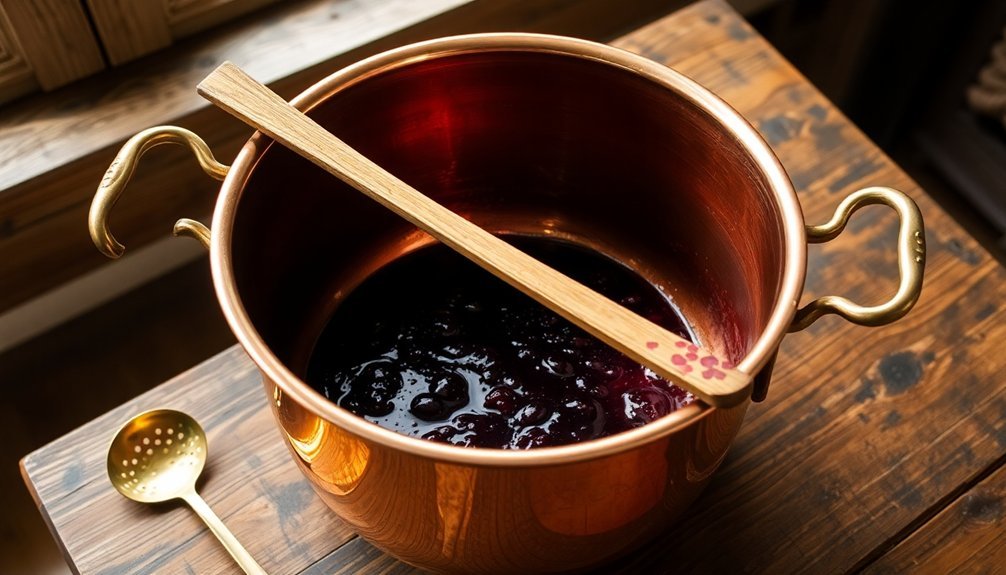
When making jelly at home, a proper preserving kettle serves as your most essential tool. You'll need an 8- to 10-quart kettle that's four times larger than your juice quantity to prevent boiling over and guarantee adequate space for the mixture. This size allows you to manage large batches while maintaining even heating throughout the process.
Choose a heavy metal kettle with a flat bottom for ideal heat distribution and stability. You'll want to avoid narrow or tall shapes that might cause overflow or dangerous splattering. The kettle should have high sides and enough space to safely attach your thermometer without requiring you to hold it manually. Adding a small amount of butter while cooking helps prevent excess foam formation during the boiling process.
Before you begin, you'll need to sterilize your kettle using hot, soapy water, followed by a thorough rinse and proper sterilization method. You can do this by boiling the kettle for the recommended time according to manufacturer guidelines.
When handling your kettle during the jelly-making process, always use pot holders or oven mitts, and keep a long-handled spoon nearby for safe stirring. Remember, your kettle's material should withstand high temperatures while maintaining its structural integrity throughout repeated use.
Essential Jelly Straining Equipment
Along with your preserving kettle, proper straining equipment forms the backbone of successful jelly making. You'll need a jelly bag or straining bag to extract clear juice from your fruit puree, and it's crucial to dampen the material before use to prevent juice absorption. A strainer set with frame can make the process significantly easier and more efficient.
- Traditional jelly bags work best when supported by a sturdy frame that suspends them over a collection bowl.
- Muslin or multiple layers of cheesecloth serve as excellent alternatives.
- A clean pillowcase can work in a pinch for straining.
- Homemade straining bags are viable options if you can't find commercial ones.
The straining setup isn't complete without proper support. You'll want a frame that can hold the weight of your filled bag while keeping it elevated above your collection bowl.
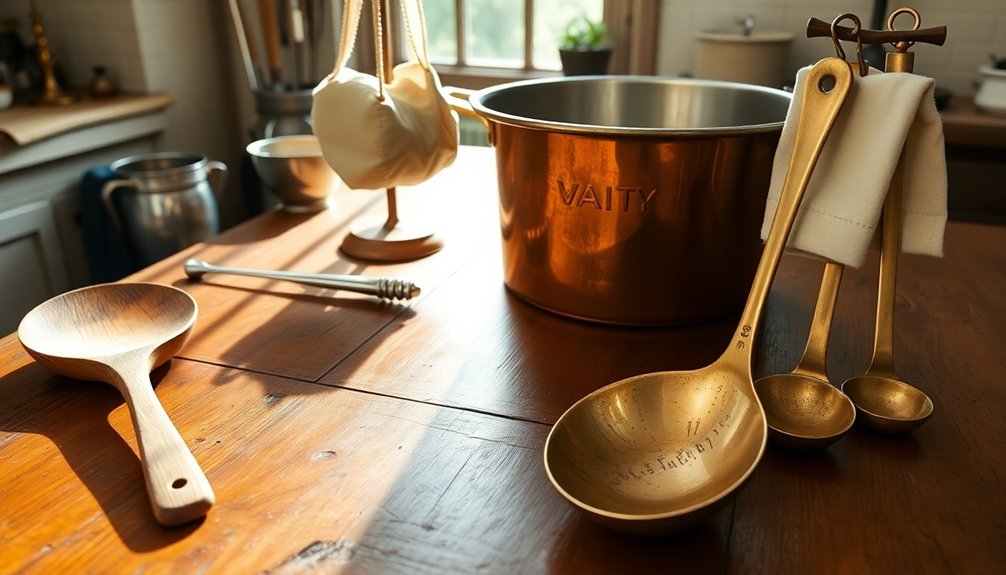
To make the process more efficient, you'll need several additional tools: a ladle for transferring the puree, a metal sieve for initial pulp removal, and a long-handled spoon for managing bubbles.
Don't forget jar tongs for handling hot containers and a cooling rack for your finished jelly jars. Keep these tools clean and readily available for the smoothest jelly-making experience.
Measuring Tools For Success
Precise measurements can make or break your jelly-making results. You'll need a combination of dry and liquid measuring tools to achieve consistent success.
For dry ingredients, use standard measuring cups (¼, ⅓, ½, and 1 cup sizes), and remember to spoon ingredients gently without packing them down. Level off each measurement with a knife's flat edge for accuracy. FSA UK standards require specific sugar measurements for proper jam consistency.
For liquids, you'll want clear measuring cups that you can read at eye level. Always measure on a flat surface and check the meniscus – that curved surface of the liquid – to guarantee precise amounts.
Don't forget your measuring spoons for smaller quantities of both dry and liquid ingredients.
Specific to jelly making, you'll need specialized tools for proper consistency. A jelly thermometer is essential to reach the vital temperature of 220°F (or 218°F at higher altitudes).
Consider investing in a refractometer to measure sugar content accurately. A digital scale provides exact weight measurements, while a jelmeter can help you estimate pectin levels and sugar requirements.
Though the jelmeter isn't as precise as other methods, it's still a helpful tool for home jelly makers.
Traditional Jar Storage Solutions
Proper storage determines the longevity and quality of your homemade jellies. To maintain your preserves in ideal condition, you'll need to establish a systematic approach to jar storage that protects your handiwork and keeps it easily accessible.
Before storing your jars, you'll want to:
- Remove rings and test seals by lifting jars by their lids
- Check for any damage like chips or cracks
- Label each jar with contents and date
- Verify jars are clean and completely dry
You'll need to find a cool, dark spot for your jelly collection, away from direct sunlight and temperature fluctuations. If you're using wooden shelves, protect them with cloth napkins or dish towels to prevent damage.
Root cellars work well if you've got one, but any temperature-stable location will do.
Don't forget to create clear, detailed labels that distinguish between similar-looking preserves. You'll want to include the type of jelly, any special ingredients or seasonings, and the month and year of preparation.
Keep your most frequently used varieties within easy reach, and store extras in boxes for convenient restocking.
Time-Tested Stirring Implements
When it comes to jelly making, wooden spoons stand as your most reliable stirring tools, with their long handles providing essential protection against hot splashes and their gentle touch preventing scratches on your cookware.
You'll find wooden implements particularly effective at breaking up bubbles and preventing ingredients from settling at the bottom of your pot, making them superior to metal alternatives that can react with acidic fruits.
While metal spoons have their place in the kitchen, wooden stirring tools remain the gold standard for jelly making due to their heat resistance and ability to prevent flavor contamination.
Wooden Spoons Reign Supreme
Among all jelly making tools, the humble wooden spoon stands as an undisputed champion in the kitchen. Crafted from dense hardwoods like beech, maple, or cherry, these time-tested tools offer unmatched versatility and safety when you're stirring hot, bubbling jellies.
You'll find wooden spoons excel in jelly making for several essential reasons:
- They won't conduct heat through the handle, keeping your hands safe as you stir continuously.
- They're non-reactive with acidic fruits, so they won't affect your jelly's taste or color.
- They'll never scratch your non-stick pots or leave metallic tastes in your preserves.
- They're incredibly durable, lasting decades with proper care.
To maintain your wooden spoon's performance, don't put it in the dishwasher – hand wash it instead. You'll want to oil it periodically to prevent cracking and maintain its smooth surface.
Look for spoons made from a single piece of wood with FSC certification, ensuring both quality and sustainability. When you're stirring hot jellies for extended periods, you'll appreciate how the gently rounded handle feels in your grip, making the task more comfortable and controlled.
Metal Vs Wooden Stirring
The age-old debate between metal and wooden stirring implements continues to shape how home cooks approach jelly making. You'll need to weigh the benefits of each type carefully to make the best choice for your kitchen.
| Feature | Metal | Wooden |
|---|---|---|
| Durability | Withstands heavy use | Can split or warp over time |
| Heat Handling | Excellent resistance | Limited exposure recommended |
| Sanitization | Easy to sterilize | Can harbor bacteria |
| Surface Impact | May scratch cookware | Gentle on all surfaces |
| Reactivity | Some metals affect flavor | Non-reactive with ingredients |
When you're stirring hot jellies, metal tools offer superior durability and heat resistance, making them ideal for professional-style cooking. You'll find stainless steel particularly useful, as it won't react with acidic fruits. However, if you're using non-stick or delicate cookware, wooden implements might be your better choice. They won't scratch your pans, and they'll stay cool enough to handle comfortably during long stirring sessions. Remember that wooden tools require more careful cleaning and shouldn't be left soaking in water. While both options have their place in jelly making, your specific needs and cooking style will determine which is best for you.
Heat Management Tools
Proper heat management tools form the foundation of successful jelly making. You'll need reliable thermometers and sturdy pots to maintain precise temperature control throughout the cooking process. When selecting your heat management tools, focus on functionality and safety to guarantee consistent results.
Your essential heat management toolkit should include:
- A candy thermometer that covers 90-400°F with pre-programmed candy stages and alerts
- A deep pot with tall sides and sufficient space for thermometer attachment
- Long-handled spatulas and wooden spoons for safe stirring
- Heat-resistant protective gear like oven mitts
You'll want to choose a thermometer with a secure back clip or adjustable pan clip to prevent it from falling into your mixture. Make sure it's equipped with a steam guard to protect the probe from damage.
Your pot should be deep enough to handle bubbling mixtures without overflow and made from material that can withstand high temperatures consistently. Position your cooling racks near your workspace, but leave enough room to maneuver safely with hot pots.
Remember to maintain good ventilation in your workspace to prevent excessive heat buildup while you're cooking.
Filling and Setting Equipment
You'll need reliable thermometers to monitor temperatures precisely for proper jelly setting, with digital models offering quick readings and traditional candy thermometers providing steady measurements.
Wide-mouth funnels help you transfer hot jelly into jars cleanly while minimizing splashes and waste.
For safe handling of hot equipment, you'll want specialized tools like jar lifters and magnetic lid wands to prevent burns and guarantee secure grip during the filling process.
Thermometers and Temperature Control
Monitoring precise temperatures makes the difference between perfectly set jelly and a runny or overly firm mess. You'll need a reliable thermometer that can handle temperatures between 100-400°F to achieve consistent results in your preserving projects.
Candy thermometers work exceptionally well for jelly making, featuring easy-to-read markings and secure pot clips for hands-free monitoring.
For best results, consider these critical temperature control features:
- Choose a thermometer with both Fahrenheit and Celsius readings to follow any recipe.
- Look for models with printed candy stages on the gauge, making it easier to identify soft ball, firm ball, and hard crack stages.
- Select thermometers with adjustable clips that won't slip during the cooking process.
- Invest in non-reactive stainless steel or nylon construction for durability.
Whether you opt for a traditional glass analog model or a modern digital probe, verify your thermometer's bulb or sensor is fully submerged for accurate readings.
You'll want to insert it at least two inches into the thickest part of your mixture. Remember to calibrate your thermometer regularly and clean it thoroughly after each use to maintain its accuracy and longevity.
Funnels for Clean Pouring
Precision in pouring hot jellies demands reliable funnels designed specifically for preserving. You'll find these essential tools made from either food-grade stainless steel or silicone, both offering excellent durability and heat resistance.
The stainless steel versions often feature a mirror finish that's dishwasher safe, while silicone options provide flexibility and non-stick properties.
When selecting your funnel, look for wide-mouth designs that'll make pouring easier and minimize splashes. Many come with removable narrow spouts, allowing you to adapt to different jar sizes.
You'll appreciate models that include ergonomic handles for steady positioning and detachable strainers to catch any unwanted particles.
You can clean your funnel easily with warm, soapy water, and most models are dishwasher safe for added convenience.
While they're indispensable for jelly making, you'll find these funnels useful for various kitchen tasks, from filling oil bottles to transferring dry ingredients.
Consider investing in a set that includes multiple sizes – they're cost-effective and will help you maintain a clean, efficient preserving process.
When you're done, simply hang them on hooks for easy storage.
Jar Handling Safety Tools
Beyond proper pouring tools, safe jar handling requires specialized equipment to protect both you and your preserves.
You'll need a reliable set of canning tongs, jar racks, and holders to safely maneuver hot jars throughout the sterilization and filling process.
When you're working with boiling water and steaming jars, you can't afford to risk burns or broken glass. That's why you'll want these essential jar handling tools:
- Sturdy canning tongs with rubberized grips to securely lift and lower jars into boiling water without slipping
- A canner rack that keeps jars elevated from direct bottom contact, preventing thermal shock and breakage
- A jar gapper tool that helps measure proper headspace and release trapped air bubbles
- A magnetic lid wand for safely retrieving hot lids from water without burns
Your jar handling tools should work together as a system.
Use the tongs to transfer jars in and out of the sterilizing bath, place them securely on the rack during processing, and maintain stability throughout filling.
Keep a clean, damp cloth nearby to wipe jar rims before lid placement, ensuring a proper seal every time.
Frequently Asked Questions
Can I Substitute Plastic Containers for Glass Jars in Jelly Making?
You shouldn't use plastic containers for jelly making. They can leach harmful chemicals, absorb odors, and aren't heat-resistant. Stick with glass jars – they're safer, preserve flavor better, and handle high temperatures properly.
How Long Should I Soak Cheesecloth Before Using It to Strain Jelly?
You don't need to soak cheesecloth – just dampen it right before use. This'll prevent juice absorption while straining. Make sure it's moist but not saturated, and use it immediately for best results.
What Natural Alternatives Can Replace Pectin in Traditional Jelly Recipes?
You can replace commercial pectin with natural alternatives like citrus peels, sour apples, blackberries, or crabapples. Cook these high-pectin fruits longer to release their natural thickening properties, or try cornstarch for quick results.
Does Altitude Affect the Jelly-Making Process in Old-Time Recipes?
Yes, altitude greatly affects your jelly-making process. You'll need longer cooking times, different boiling temperatures, and adjusted thickening methods. At higher elevations, you'll also require extra monitoring to guarantee proper setting.
Can Copper-Bottom Pots Affect the Color of Homemade Jellies?
You won't notice significant color changes from using copper-bottom pots in your jellies. While they provide excellent heat distribution, they're non-reactive with most fruit ingredients and won't affect your jelly's natural coloring.
In Summary
You'll find that traditional jelly making doesn't require fancy equipment – just reliable, time-tested tools. With your preserving kettle, straining cloths, accurate measuring cups, proper storage jars, wooden spoons, thermometer, and funnel, you're ready to create perfect jellies just like your grandmother did. Remember, it's not about having the latest gadgets, but rather mastering these basic tools that have served generations of home canners.


Leave a Reply