
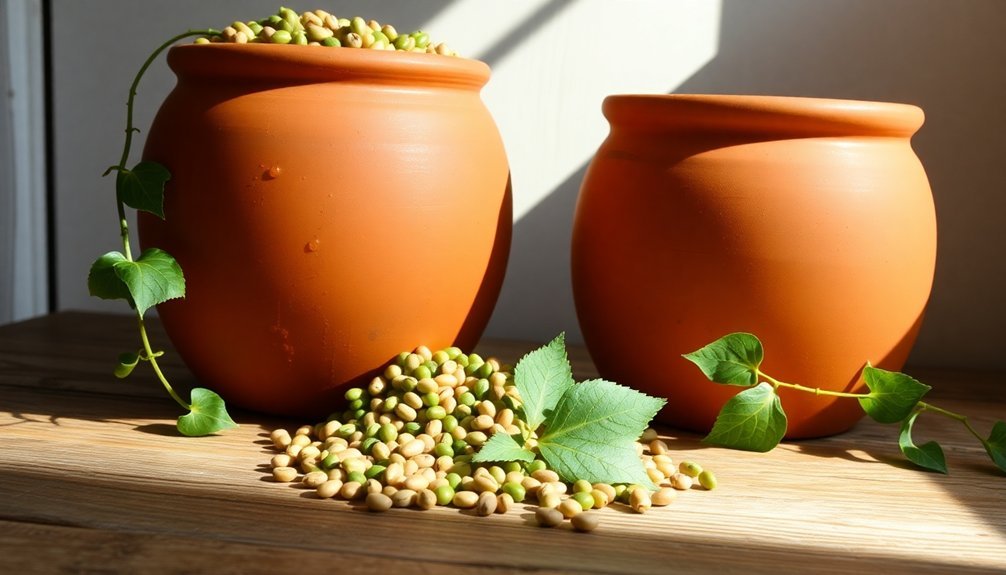
Store your fresh legumes up to three times longer using these clay pot preservation secrets. You'll need two clay pots with a 3-5cm gap between them, filled with filtered sand. Keep the pots in a shaded, well-ventilated area and maintain consistent moisture levels by checking daily. Clean your pots thoroughly with a 1:9 bleach-water solution before use, and control temperature by utilizing the natural evaporative cooling effect. Store compatible produce together, use damp paper towels for leafy legumes, and monitor humidity levels carefully. Position your pots correctly, and you'll reveal the full potential of this ancient preservation method.
Selecting Your Perfect Clay Pot
Successfully selecting a clay pot system starts with understanding the core materials needed for your legume storage.
With costs ranging $5-$40, you can find an affordable solution that fits your budget while meeting your storage needs.
You'll need two pots: an outer clay pot that's porous enough to enable evaporative cooling and an inner pot that can be clay, plastic, or metal. Clay remains the preferred choice for both containers due to its consistent cooling properties and natural porosity.
When choosing your pots, verify there's a 3-5 cm gap between them for the sand layer that's vital for the cooling process.
You'll want to evaluate the size carefully – while larger pots can store more legumes, they'll be markedly heavier and harder to relocate once filled with sand and produce. If you're working with limited space or need to move the cooler occasionally, opt for a medium-sized system.
Don't settle for non-porous materials for your outer pot, as they'll prevent proper evaporation.
You can explore variations like clay pot-in-clay dish setups, but always prioritize proper airflow and evaporation potential.
Remember that your chosen pots should be practical for your specific storage needs while maintaining the fundamental cooling functions through evaporation.
Essential Pre-Storage Cleaning Steps
Cleanliness stands as the foundation for effective legume storage in clay pots. You'll need to start by removing all debris and soil using a stiff brush or wire-bristle brush. For stubborn dirt, blast the pot with a powerful sprayer and scrape off persistent deposits with an old butter knife. Preventing damping off disease is crucial when reusing pots for future plantings.
Next, tackle those pesky mineral deposits that can harm your legumes. Use steel wool to scrub away the buildup, and don't hesitate to repeat the process if needed. Once clean, you'll need to disinfect your pot thoroughly using a 1:9 bleach-to-water solution or a 1:1 vinegar-water mixture.
| Cleaning Stage | What You'll Need |
|---|---|
| Debris Removal | Wire brush, sprayer |
| Mineral Removal | Steel wool, knife |
| Disinfection | Bleach or vinegar solution |
| Rinsing | Clean water |
| Drying | Air circulation |
Before storage, verify your pot is completely dry and soak it in clean water for 10 minutes after bleaching. You'll want to store your pots indoors, wrapped in newspaper to prevent damage. Remember to keep them in a space above freezing temperature to avoid cracks and extend their lifespan.
Proper Clay Pot Setup

Mastering the setup of your clay pot storage system requires careful attention to size selection and preparation. You'll need to choose two pots – a smaller one that fits inside a larger container – based on how many legumes you plan to store. Before using the pots, inspect them carefully for cracks and soak the clay vessels in water for at least 24 hours.
To assemble your cooler, start by filtering sand through a 3-5mm wire mesh to remove large particles and dust. Place a layer of this clean sand at the bottom of your outer container, then center the smaller pot on top of it. Fill the gap between the two pots with more filtered sand, making sure to wet it thoroughly for ideal cooling effect. The inner pot top should extend 2 centimeters above the outer pot rim.
Position your clay pot cooler in a shaded, well-ventilated area away from direct sunlight and heat sources. Cover the setup with a damp cloth or sack, being careful not to let excess water drip into the inner pot.
You'll need to monitor the sand and covering daily, keeping them consistently moist to maintain the evaporative cooling process that preserves your legumes.
Water Management Techniques
After setting up your clay pot system, proper water management becomes the next key focus. You'll need to maintain consistent water levels in your pots to guarantee your legumes receive ideal hydration through osmotic pressure. Fill the pots regularly, adjusting the frequency based on your soil conditions and weather patterns.
You'll notice water seeps through the clay walls gradually, creating an efficient delivery system that reaches directly to your legumes' roots. As the roots develop, they'll naturally wrap around the pot, maximizing their water uptake potential. Keep your pots filled to maintain soil moisture at field capacity, which creates perfect growing conditions for your legumes.
Monitor the soil's moisture level around your clay pots. You'll need to refill them when the surrounding soil begins to dry, but don't worry about overwatering – the system self-regulates based on the pressure gradient developed by plant transpiration.
If you're managing multiple garden beds, you can connect your clay pots to irrigation tubing and larger water tanks for automated filling. This setup reduces your maintenance time while guaranteeing consistent water delivery to your legume crop.
Leafy Legume Storage Methods

You'll find that proper water storage setup is essential for keeping leafy legumes fresh, requiring a balance between moisture retention and air circulation.
When storing legumes with leaves, you can place them in containers with a layer of damp (not wet) paper towels to maintain ideal humidity levels while preventing rot.
Your storage containers should be placed in the crisper drawer of your refrigerator, where temperature and moisture levels are most stable for preserving leafy vegetables.
Water Storage Setup
Proper water storage setup forms the foundation of a successful clay pot cooling system for leafy legumes.
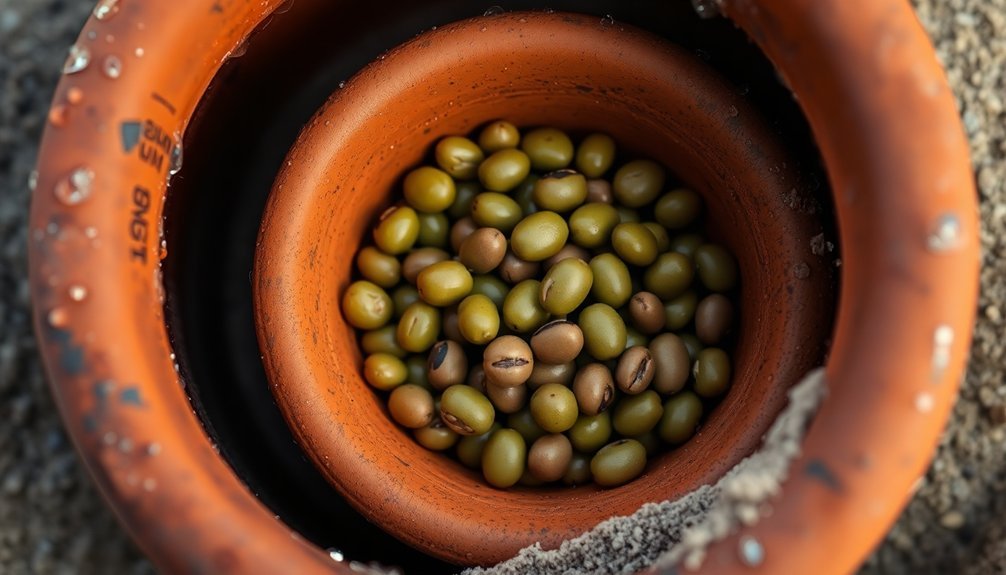
You'll need two pots with a 3-5 cm gap between them, filled with wet sand. Choose a clay pot for the outer container, while your inner pot can be clay, plastic, or metal. Cover the top with a jute bag or absorbent cloth to maintain moisture and protect your legumes.
Position your cooler where air flows freely, staying away from direct sunlight and poorly ventilated areas. Keep the sand consistently damp by watering it daily, ensuring the water absorbs within seconds. Don't oversaturate the sand, as this could cause your inner pot to float. Regular cleaning and maintenance will prevent dust accumulation and maintain cooling efficiency.
- Feel the satisfaction of preserving your legumes naturally, just as our ancestors did
- Experience the joy of reducing food waste while saving energy
- Embrace the sustainable practice of chemical-free food storage
- Connect with traditional wisdom that's stood the test of time
- Take pride in maintaining your own eco-friendly cooling system
Remember to store only dry, clean legumes, and keep ethylene-producing items separate to prevent premature spoilage of your harvest.
Maintaining Optimal Humidity
Success in storing leafy legumes hinges on maintaining precise humidity levels between 90-95%.
You'll need to create an environment that preserves moisture while preventing excess water buildup that can lead to rot. Clay pot storage systems excel at this, naturally maintaining humidity levels around 93.6%, which is suitable for preserving your legumes' freshness and nutritional value.
To maintain ideal humidity, you'll want to implement several key strategies.
Start by sprinkling your legumes lightly with water before storage, but don't oversaturate them. Place moisture-absorbing paper towels in your storage containers to manage excess condensation. If you're using a dedicated storage room, consider wetting the floor or using a humidifier to boost ambient moisture levels.
Don't forget about proper air circulation – it's essential for preventing moisture from becoming stagnant. You can use produce keepers with charcoal filters, which help absorb harmful gases while maintaining proper airflow.
Keep your legumes loosely packed to allow air movement between them. If you notice condensation building up, adjust your ventilation accordingly while keeping the humidity within the target range.
Root Vegetable Preservation Strategies
When storing root vegetables using sawdust layering, you'll want to place untreated wood shavings between each layer of vegetables to prevent direct contact and maintain ideal moisture levels.
You can control storage temperature by keeping your root vegetables between 32-40°F, which will greatly slow down sprouting and decomposition processes.
For the best results, you'll need to guarantee proper ventilation while maintaining high humidity around 95%, even when using sawdust as your storage medium.
Sawdust Layering Techniques
Mastering sawdust layering techniques can transform your root vegetable storage from basic to exceptional.
You'll want to start with untreated hardwood or cedar sawdust, ensuring it's dry and consistent in texture. Line your clean cardboard or wooden containers with newspaper, then add a quarter-inch base layer of sawdust before arranging your vegetables.
Place your vegetables in a single layer, making sure they don't touch each other, and cover them completely with loose sawdust. This spacing allows proper air circulation while maintaining ideal moisture levels.
Remember to pack the sawdust gently around each vegetable, and finish with a thick top layer to seal in the right conditions.
- Your vegetables will sleep peacefully in their sawdust bed, protected from decay
- Each perfectly preserved root tells a story of careful preparation
- You'll feel pride knowing you're carrying on ancient storage traditions
- Opening your storage container will reveal treasures months later
- You're creating a sustainable way to enjoy your harvest year-round
Store your containers in a cool, dark basement or unheated room, checking periodically for any signs of spoilage.
Keep the sawdust slightly moist but never wet, and adjust the layering if you notice any vegetables starting to shrivel.
Root Storage Temperature Control
Beyond the protective layers of sawdust, temperature control stands as the cornerstone of root vegetable preservation. You'll need to maintain temperatures between 32 to 38 degrees Fahrenheit for most root vegetables, though potatoes require a different approach.
Start potato storage at 45 to 60 degrees for the first two weeks, then reduce it to 35-40 degrees for long-term preservation. Your storage area's temperature must remain constant, as fluctuations can trigger sprouting or decay.
Don't let temperatures drop below 32 degrees, or you'll risk freezing your vegetables. Similarly, if temperatures climb above 40 degrees, you'll face premature sprouting and spoilage issues.
To maintain ideal conditions, you'll want to monitor your storage space regularly. Think of autumn days – that's the crisp, cool environment you're aiming for. You can use a thermometer to track temperature variations throughout the day.
If you're storing different vegetables together, remember that each has specific requirements. Keep potatoes away from apples, as the ethylene gas from apples can cause sprouting.
When you've established the right temperature range, you'll greatly extend your vegetables' storage life while maintaining their quality and flavor.
Temperature Control Secrets
Through the ingenious use of evaporative cooling, clay pot systems can maintain temperatures up to 10°C below the surrounding environment. Just like how your body cools through sweating, these pots use water evaporation from their outer surface to create a natural cooling effect.
You'll need to place your double-walled earthenware container in a shady, well-ventilated area for ideal performance. To maintain consistent cooling, you'll want to keep the sand between the two clay walls consistently moist. Cover your pot with a wet cloth or sack to enhance the cooling effect.
You'll find this system particularly effective in arid climates where traditional refrigeration isn't practical or available.
- Your fresh legumes will stay crisp and vibrant for four times longer than traditional storage
- You'll slash your food waste dramatically, joining the 98% of users who report less spoilage
- Your trips to the market will become less frequent, saving you precious time and money
- You'll naturally eat more healthy vegetables, like 88% of clay pot users
- Your investment of $5-40 will pay for itself many times over through reduced food waste
Humidity Balance Tips
You'll need to mist your legumes in clay pots once or twice daily, adjusting frequency based on your local climate and the specific needs of your plants.
To monitor moisture levels effectively, stick your finger about an inch into the soil, or use a moisture meter to guarantee conditions remain ideal for legume growth.
The porous nature of clay pots helps maintain proper humidity, but you should check the soil's moisture content regularly and adjust your misting schedule if you notice the soil becoming too dry or staying too wet.
Daily Misting Requirements
Maintaining perfect humidity in clay pots for sprouting legumes requires a careful balance of misting and ventilation. You'll need to mist your seeds 1-2 times daily, adjusting the frequency based on your environment's conditions. During winter months, using warmer water can speed up the sprouting process and maintain ideal temperature levels.
When misting, aim to create a consistent film of moisture without waterlogging the seeds. Keep your clay pot elevated on a trivet or stones to guarantee proper air circulation, and cover it with a clay lid, cheesecloth, or towel to retain moisture. You'll want to avoid misting at night unless you notice unusual drying conditions.
- Feel the satisfaction of watching your sprouts thrive with each perfectly timed mist
- Experience the joy of nurturing new life as you monitor moisture levels
- Embrace the mindful practice of checking your sprouts throughout the day
- Discover the rewarding rhythm of maintaining perfect growing conditions
- Take pride in mastering the delicate balance of moisture and air flow
Check the moisture level regularly by observing the surface of your growing medium. If it appears too dry, increase misting frequency; if too wet, reduce it and guarantee proper drainage.
Moisture Level Monitoring Methods
Three reliable methods help you monitor moisture levels in clay pot legume cultivation: direct inspection, sensor-based measurement, and gravimetric testing.
For direct inspection, you'll need to master the "feel method." Squeeze small soil samples from your clay pots to assess texture and moisture content. You can detect if the soil's too dry or waterlogged by checking its consistency and how well it forms ribbons between your fingers. This method requires practice but becomes more accurate as you gain experience.
Sensor-based monitoring offers a more precise approach. You can install capacitive or TDR sensors in your clay pots to measure volumetric water content. These devices provide real-time readings, helping you maintain ideal moisture levels for your legumes.
Consider using gypsum block sensors if soil salinity's a concern, as they're designed to handle this issue.
For the most accurate results, try gravimetric testing. While it's more time-consuming, this method gives you exact moisture percentages by weighing soil samples before and after drying.
You can use these measurements to calibrate your sensors and verify your direct inspection assessments, ensuring your legumes receive perfect moisture conditions.
Extending Storage Life

Several key strategies can dramatically extend the storage life of legumes in clay pot coolers. You'll need to master the evaporative cooling process, which can lower temperatures up to 10°C below ambient conditions.
Place your cooler in a shady, well-ventilated area to maximize its effectiveness, and maintain consistent moisture levels in the sand between the pots without oversaturating it.
Make sure you're checking the moisture levels daily and keeping the covering cloth damp but not dripping. You'll achieve excellent results by storing only compatible produce together, avoiding items like garlic or onions that can affect your legumes' quality.
Clean your cooler regularly with a damp cloth to prevent dirt buildup and maintain proper hygiene.
- Feel the satisfaction of pulling out fresh, crisp legumes weeks after storage
- Experience the pride of reducing food waste in your household
- Enjoy the peace of mind knowing you're using an eco-friendly preservation method
- Savor the independence of preserving food without electricity
- Appreciate the connection to traditional preservation techniques that have worked for generations
Remember to inspect your stored legumes regularly and remove any that show signs of spoilage to protect the rest of your harvest.
Maintenance and Care Basics
Proper care of your clay pot guarantees ideal storage conditions for legumes and extends its lifespan. After each use, let your pot cool completely before cleaning it. Instead of using detergents, opt for natural cleaners like rice flour or besan flour after soaking the pot in plain water.
For stubborn residue, you'll find baking soda works effectively as a scouring agent. You'll need to handle temperature changes carefully to prevent cracking. Always start cooking on low heat and gradually increase it to medium.
Don't place your hot pot on cold surfaces; use a cloth pot-holder instead. When cooking on the stovetop, a diffuser will help distribute heat evenly.
For storage, make sure your pot is completely dry and store it with the lid inverted, placing a paper towel between the pot and lid for proper ventilation. If you notice any mold, create a paste using equal parts baking soda and water, apply it for 30 minutes, then rinse thoroughly.
To eliminate food odors, simply simmer water with green tea leaves for 10 minutes. Remember, never put your clay pot in the dishwasher, as the high temperatures and detergents can damage it.
Frequently Asked Questions
Can Different Types of Legumes Be Stored Together in the Same Pot?
You can store compatible legumes together, but you'll need to separate certain types. Keep tomatoes and leafy greens together, but don't mix them with garlic, onions, or potatoes to prevent spoilage.
How Do Seasonal Changes Affect the Cooling Efficiency of Clay Pots?
You'll notice better cooling efficiency during dry seasons, with 5-10°C temperature drops when it's hot and dry. You'll need to water more frequently in summer, while humidity levels affect how well your pot cools.
What Signs Indicate That the Clay Pot Needs to Be Replaced?
You'll need to replace your clay pot when you notice visible cracks, consistent leaks, reduced cooling performance, or excessive water seepage. Don't ignore signs of structural damage as they'll compromise the pot's effectiveness.
Is It Safe to Store Legumes in Recycled or Repaired Clay Pots?
You shouldn't store legumes in recycled or repaired clay pots due to potential lead and cadmium contamination risks. They're unsafe unless properly tested, and there's also a higher chance of mold growth in compromised vessels.
Do Pesticide-Treated Legumes Require Different Storage Considerations in Clay Pots?
You shouldn't store pesticide-treated legumes in clay pots at all. They require strict storage in original containers with proper labels, controlled temperatures, and ventilation to prevent chemical breakdown and guarantee safety.
In Summary
You're now equipped to store your legumes perfectly in clay pots. Remember to check your stored legumes weekly and rotate them as needed. Don't forget to maintain proper humidity levels and clean your pots regularly for best results. With these techniques, you'll keep your legumes fresh for months while preserving their natural flavors and textures. Start implementing these methods today to maximize your clay pot storage success.


Leave a Reply