
Mastering smoke flow gives you precise control over your BBQ's temperature and flavor development. When you understand how smoke color indicates combustion quality – from ideal blue smoke to problematic white or black smoke – you'll create the perfect cooking environment. By managing your smoker's airflow through proper vent control, you're able to maintain steady temperatures between 200-250°F for peak results. Proper smoke flow also guarantees even heat distribution, prevents bitter creosote buildup, and helps develop that coveted smoke ring. Your ability to read and adjust smoke patterns holds the key to BBQ mastery.
Understanding Smoke Color Patterns

Every pitmaster needs to recognize smoke color patterns as they provide essential visual cues about your BBQ's combustion quality.
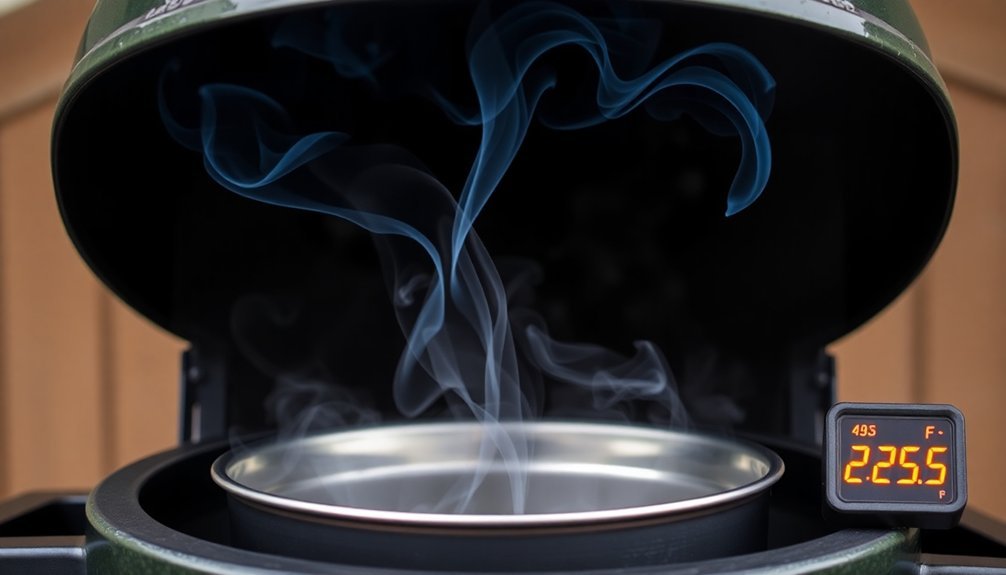
When you're monitoring your smoker, you'll want to avoid black smoke at all costs, as it indicates oxygen starvation and will leave your food tasting bitter and sooty. Controlling air intake helps prevent this undesirable smoke condition. Instead, aim for the coveted blue smoke, which appears as a thin, nearly invisible shimmer and signals perfect combustion.
You'll likely encounter white smoke when first firing up your grill, which is normal during the wood's dehydration phase. While it's acceptable for quick cooks like burgers, you don't want it lingering during low-and-slow sessions.
If you're seeing gray or brown smoke, it's often due to moisture and hydrocarbons from bark, while yellow smoke signals problematic incomplete combustion.
The key to achieving ideal smoke lies in particle size. Blue smoke contains the smallest particles (less than a micron), creating the cleanest burn and best flavor compounds.
When you spot billowing white or gray smoke, especially with pellet grills, you'll need to adjust your airflow, as this often indicates the presence of bark or flavor oils that can create unwanted bitter tastes.
Mastering Airflow Control Basics
Airflow mastery stands at the heart of successful BBQ smoking, and it all starts with understanding your grill's vent system.
Your grill's bottom and top vents work together to create a consistent flow of air that controls both temperature and smoke quality. When you're getting started, keep both vents fully open to maximize oxygen flow and get your charcoal burning hot. Opening these vents fully will help achieve better temperature control during the initial setup.
Once your fire's established, you'll need to adjust the vents strategically. Use the bottom vent for major temperature changes and the top vent for fine-tuning.
For mid-range cooking temperatures between 325-450°F, you'll want to find the sweet spot where both vents are partially open. If you're aiming for a low-and-slow cook, keep the bottom vent slightly open and adjust the top vent to maintain steady temperatures.
Water Pan Humidity Techniques
Water pans serve as the unsung heroes of temperature control and moisture management in BBQ smoking. They're vital for maintaining consistent temperatures by acting as a thermal mass that prevents sudden spikes and drops during long cooking sessions.
You'll find that water's boiling point of 212°F at sea level creates a natural temperature ceiling, helping stabilize your smoker's environment.
To maximize your water pan's effectiveness, fill it 2/3 to 3/4 full with hot water to reduce warm-up time. You'll want to line the pan with foil for easier cleanup and check water levels every 3-4 hours, topping up with hot water as needed. Using a healthy fire and water combination ensures the best results for consistent low and slow cooking.
When placing the pan, put it in the first stacker before moving it onto the base to prevent accidentally spilling water into your fire.
The water pan's humidity benefits are substantial. It'll create a moist environment that helps smoke particles stick to your meat's surface while preventing it from drying out.
This setup also serves as a heat deflector, protecting your meat from direct flames and managing fat drippings that could cause flare-ups.
You're fundamentally creating a more controlled, consistent cooking environment that's ideal for breaking down tough cuts.
Heat Zone Management
Properly setting up your fire configuration will determine how well you can maintain multiple temperature zones in your BBQ.
You'll want to establish distinct hot and cool zones by strategically placing your heat source – whether charcoal or gas burners – to one side while leaving the other side for indirect cooking.
Managing your grill's ventilation through proper damper adjustment helps control airflow, which is essential for maintaining your desired temperature zones and ensuring consistent smoke flow throughout your cooking session.
Fire Configuration Placement
Setting up your grill's fire configuration is a critical foundation for successful BBQ temperature control.
You'll need to start by placing your grill on a solid, non-combustible surface like concrete or brick, keeping it 10-12 feet away from any structures and maintaining a 30-inch clearance from overhead combustibles.
For ideal heat control, you'll want to master different fire configurations.
The two-zone setup gives you versatility with direct heat on one side for searing and indirect heat on the other for slower cooking.
Step up to a three-zone arrangement when you need more precise temperature control, with high heat, medium heat, and a cool zone for managing different foods simultaneously.
To fine-tune your temperatures, you'll need to manage your ventilation effectively.
Control oxygen flow through your vents and dampers – more oxygen increases heat, while less reduces it.
Consider using charcoal baskets to keep your fuel concentrated and burning longer.
Adding a water pan between the coals helps stabilize temperatures and catches drippings for easier cleanup.
Remember to keep your grill visible from inside your house and away from overhanging branches for safety.
Temperature Zone Creation
Every successful BBQ session relies on mastering temperature zone creation – an essential skill that lets you control heat distribution across your grill. By dividing your cooking surface into direct and indirect heat zones, you'll gain precise control over how your food cooks. The direct zone, positioned over your fuel source, delivers high heat for searing, while the indirect zone provides gentle heat for slow-cooking and preventing flare-ups.
To maximize your temperature control, you'll want to:
- Preheat your grill thoroughly before cooking, ensuring consistent temperatures across your zones.
- Use water pans to help stabilize temperatures and create moisture that enhances flavor.
- Add wood chips or chunks strategically to infuse smoke flavor without overwhelming the meat.
Moving food between these zones gives you ultimate control over doneness and texture. You can start thick cuts on high heat for a perfect sear, then move them to the indirect zone to finish cooking without burning.
This dual-zone approach isn't just about preventing mistakes – it's about elevating your BBQ game. With proper zone management, you'll handle everything from delicate fish to thick steaks with confidence, all while maintaining ideal cooking temperatures throughout your session.
Ventilation Setup Strategy
Building on your temperature zone mastery, understanding ventilation control takes your BBQ skills to the next level. You'll need to manage both bottom and top vents strategically to achieve ideal cooking conditions. Bottom vents control oxygen supply – open them for hotter fires, close them to slow the burn rate. Top vents regulate smoke and heat escape while creating essential convective airflow.
| Vent Position | Effect When Open | Effect When Closed |
|---|---|---|
| Bottom Vents | Increases oxygen, hotter fire | Reduces oxygen, slower burn |
| Top Vents | Releases smoke, creates suction | Traps heat, risks choking fire |
| Mid-Level Vents | Enhances convection flow | Concentrates heat zones |
| Side Vents | Improves cross-ventilation | Forces vertical airflow |
| Exhaust Ports | Maintains steady airflow | Builds pressure, affects temp |
You'll want to experiment with different vent combinations to find your BBQ's sweet spot. Keep the vents clean and free from ash buildup to maintain consistent airflow. Remember, you can extend cook times and save charcoal by properly managing your vents. For ideal results, start with all vents open, then adjust the bottom vents first, followed by the top vents to fine-tune your temperature.
Smoke Quality and Flow

Learning to read smoke signals in your BBQ will help you achieve competition-worthy results through proper airflow management.
You'll want thin blue smoke rather than thick white or gray smoke, as this indicates ideal burning conditions and guarantees clean flavor development in your meat.
Clean Blue Smoke Benefits
Anyone who's mastered BBQ smoking knows that achieving clean blue smoke is a game-changer for flavor and food safety.
When you maintain clean blue smoke, you're ensuring complete combustion that creates the perfect environment for flavorful, aromatic compounds to penetrate your meat without bitter tastes or harmful chemicals.
The thin, bluish smoke you're aiming for isn't just about aesthetics – it's a clear indicator that you've achieved the right balance of fuel and airflow.
You'll notice that proper fire management leads to stable temperatures and even cooking, while the smoke itself contributes to a balanced flavor profile that doesn't overpower your meat's natural taste.
- Clean blue smoke reduces harmful compounds like PAHs and HCAs, making your BBQ healthier
- It prevents creosote buildup that can leave bitter, unpleasant flavors on your food
- You'll achieve better temperature control and more consistent results
Controlling Dense Smoke Issues
Dense smoke can quickly ruin your BBQ efforts if left unchecked. You'll notice thick, white smoke signals poor combustion, which leads to bitter-tasting food and overly intense flavors.
Instead, you want to achieve thin, blue smoke that creates subtle, well-balanced flavor profiles in your meats.
To control smoke density, you'll need to master your smoker's airflow. Adjust the vents to regulate oxygen levels, which directly affects how your fuel burns.
Keep temperatures between 200-250°F for ideal smoke production – anything higher causes wood to burn too quickly, while lower temperatures won't generate enough smoke for proper flavor development.
Choose your wood carefully to prevent dense smoke issues. Stick to hardwoods like hickory, oak, or fruitwoods, and avoid softwoods that contain resins.
Your wood should be properly seasoned – neither too wet nor too dry – to guarantee clean, consistent burning. You can also use a water pan to help regulate temperature and maintain steady smoke flow.
Keep your smoker clean to prevent creosote buildup, which can create thick, acrid smoke.
Reading Smoke Signals Effectively
Successful BBQ smoking relies on your ability to read and interpret smoke signals accurately.
You'll need to monitor the color and quality of your smoke constantly, as it's your primary indicator of how well your fire is burning and whether your food is getting the right exposure.
When you're reading smoke signals, focus on achieving that thin blue smoke – it's the hallmark of clean combustion and perfect smoking conditions.
White smoke isn't ideal but can work for short periods, while black or gray smoke signals immediate problems you'll need to address.
Keep adjusting your vents to maintain proper airflow and ideal burning conditions.
- Watch your smoke color: Blue means you're on track, white means adjust your airflow, and black means stop and fix your fire immediately
- Monitor smoke consistency: You want an even, steady flow rather than billowing clouds or sporadic puffs
- Track your temperatures: Use multiple probes to confirm your smoker temperature aligns with your desired smoke quality
Temperature Stability Through Ventilation
Maintaining steady temperatures in your BBQ starts with understanding proper ventilation control. Your grill's dampers are the key to managing oxygen flow, which directly affects how hot your coals burn.
Keep the bottom dampers fully open to establish a strong baseline airflow, and use the top lid damper to fine-tune your cooking temperature.
You'll want to monitor your grill's temperature consistently using a reliable thermometer. Place it at cooking grate level for the most accurate readings.
If your grill doesn't have a built-in thermometer, invest in a remote probe thermometer to track temperatures without lifting the lid.
To maintain ideal airflow, you'll need to keep your vents clean and clear. Clogged dampers can severely restrict oxygen flow, making it difficult to control temperatures effectively.
Regular cleaning of your grill's bowl and ash catcher prevents airflow blockages and guarantees consistent performance.
Remember that more oxygen means higher temperatures, while less oxygen reduces heat. You can adjust your vents accordingly to achieve specific temperature ranges – fully open for high heat, half-open for medium heat.
This control allows you to maintain stable cooking conditions throughout your BBQ session.
Perfect Smoke Ring Development
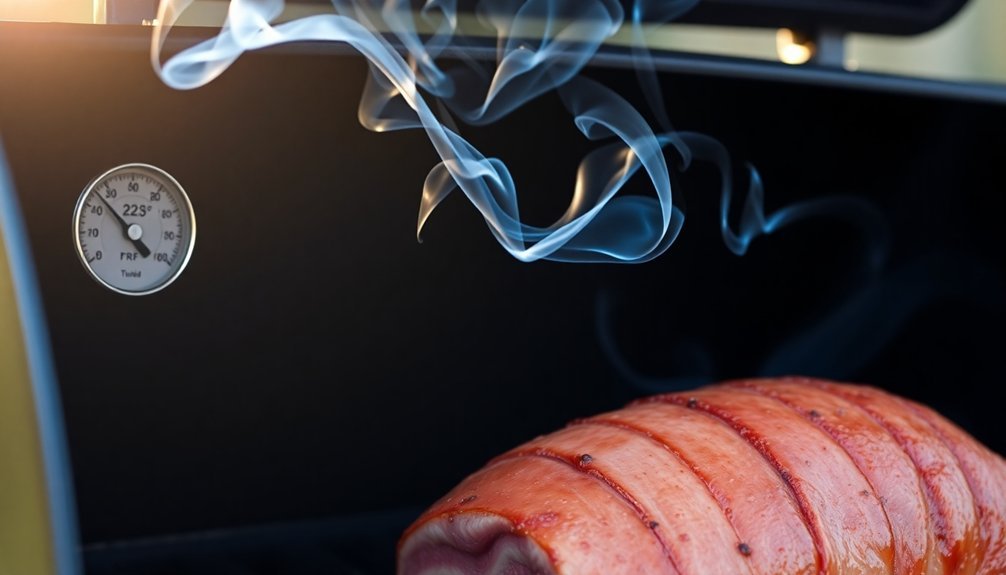
Now that you've mastered temperature control through ventilation, let's focus on achieving that coveted smoke ring in your BBQ. The key is maintaining temperatures below 140°F for as long as possible, as this allows the smoke to interact with the meat's myoglobin before it denatures at higher temperatures.
To maximize your smoke ring development, follow these vital steps:
- Start with cold meat and keep your smoker's temperature low, as the ring stops developing once the meat reaches 160°F.
- Choose the right wood combination – pair hardwoods like oak or hickory with fruitwoods such as cherry for ideal NO and CO production.
- Manage moisture effectively by using a water pan while ensuring the meat's surface stays relatively dry to improve smoke penetration.
Your preparation technique matters greatly. Remove visible fat that could block smoke penetration, and don't apply too heavy a rub that might create a barrier.
Consider adding a small amount of baking soda to your rub – it'll lower the meat's pH and enhance the smoke ring reaction.
Remember that proper airflow isn't just about temperature control; it's essential for carrying those smoke particles that create your perfect ring.
Frequently Asked Questions
How Long Should Wood Chunks Soak Before Adding Them to the Smoker?
You shouldn't soak wood chunks at all before smoking. Dry chunks provide better smoke and flavor immediately. Soaking doesn't increase moisture penetration and can actually lower your smoker's temperature and create unwanted steam.
Can Different Types of Wood Chips Be Mixed for Unique Flavors?
Yes, you can mix different wood chips to create unique flavor profiles. Try combining hickory with fruit woods for a sweet-smoky blend, or mix mesquite with pecan for a balanced, complex taste in your BBQ.
What Causes a Metallic Taste in Smoked Meat?
You'll get a metallic taste in smoked meat when creosote builds up from incomplete combustion, poor ventilation traps smoke, or you're using the wrong wood types. Dirty smokers and stale smoke also cause this issue.
Does Wind Direction Affect Smoke Flow and Temperature Control?
Yes, wind direction greatly affects your BBQ's smoke flow and temperature. You'll need to position your cooker perpendicular to the wind and adjust air intakes accordingly to maintain consistent temperatures and proper smoke distribution.
Should the Chimney Cap Be Adjusted During Rainfall?
You shouldn't adjust your chimney cap during rainfall. Instead, use a rain cap or secondary pipe to prevent water from entering. Adjusting the cap could disrupt proper airflow and won't effectively solve rain-related issues.
In Summary
You'll find that mastering smoke flow isn't just about maintaining temperatures – it's the key to your BBQ success. When you control airflow, manage heat zones, and understand smoke patterns, you're creating the perfect environment for that sought-after smoke ring and authentic BBQ flavor. Keep practicing these techniques, and you'll transform from a backyard griller into a true pitmaster who can deliver consistently excellent results.


Leave a Reply