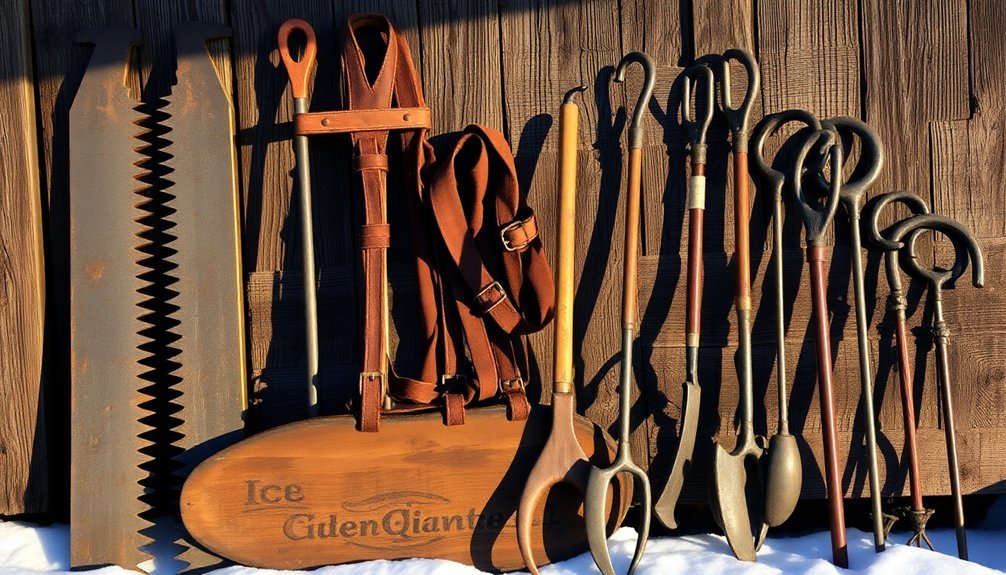
Classic ice harvesting relied on seven essential tools that revolutionized this demanding industry. You'll recognize the hand-powered ice saws and cutting blades that carved through thick sheets, while horse-drawn ice plows with eight teeth created uniform grooves. Heavy ice breaking chisels provided the raw power needed for thick ice, and long pike poles helped guide massive blocks safely. Ice thickness measuring augers guaranteed worker safety, while specialized transportation sleds moved 300-pound blocks efficiently. You couldn't work without safety cleats and grips, which prevented dangerous slips. These fascinating tools tell a larger story of America's ice harvesting heritage.
Ice Saws and Cutting Blades

The evolution of ice cutting tools marks a significant shift in the ice harvesting industry. What started with simple axes in the late 1700s quickly progressed to specialized hand ice saws in the early 1800s, revolutionizing how ice was harvested from frozen ponds.
These hand saws were designed to tackle ice up to 18 inches thick, with each cutting edge penetrating about 1/4 inch into the frozen surface. You'll find that these saws required a specific technique – you'd pull the blade almost completely out of the ice before pushing it back down to the surface. The most effective method involved leaning over handles while pulling the saw upward.
To improve efficiency, some saws featured multiple cutting edges, allowing for deeper cuts with each pass. By 1918, power saws transformed the industry, cutting through 100 feet of 12-inch thick ice in just one minute – replacing the work of five horse-drawn plows.
Today's ice cutting technology has evolved into electric band saws, which you'll typically see cutting large blocks into manageable slabs and cubes. These modern variants are compact, reliable, and safe for single-operator use.
While they're primarily made of stainless steel, you'll still find traditional hand saws being used for more precise, smaller-scale cutting operations.
Horse-Drawn Ice Plows
While hand saws revolutionized ice cutting, Nathaniel Wyeth's introduction of horse-drawn ice plows in the 1800s brought unprecedented efficiency to the harvesting process.
These innovative plows featured eight teeth, with each tooth set to cut one-quarter inch deeper than the one before it, allowing workers to deepen grooves by two inches in a single pass. You'll find that multiple passes could achieve depths up to seven inches, perfect for harvesting 12-inch ice blocks. Modern chainsaws and hand saws are still employed to create manageable ice blocks in today's harvesting operations.
The harvesting process required careful preparation and execution. Before you'd begin plowing, you'd need to mark the ice field in a checkerboard pattern using a swing guide. Safety was paramount – horses needed proper equipment, including a critical "choke rope" that could save their lives if they fell through the ice.
Here's why horse-drawn ice plows transformed the industry:
- They tripled the amount of ice that could be harvested
- They created more uniform, larger ice blocks
- They replaced labor-intensive manual methods
- They met the growing demand for ice until mechanical methods emerged
This efficiency boost helped meet the increasing ice demands of the 19th century, making ice more accessible to businesses and households alike.
Heavy Ice Breaking Chisels
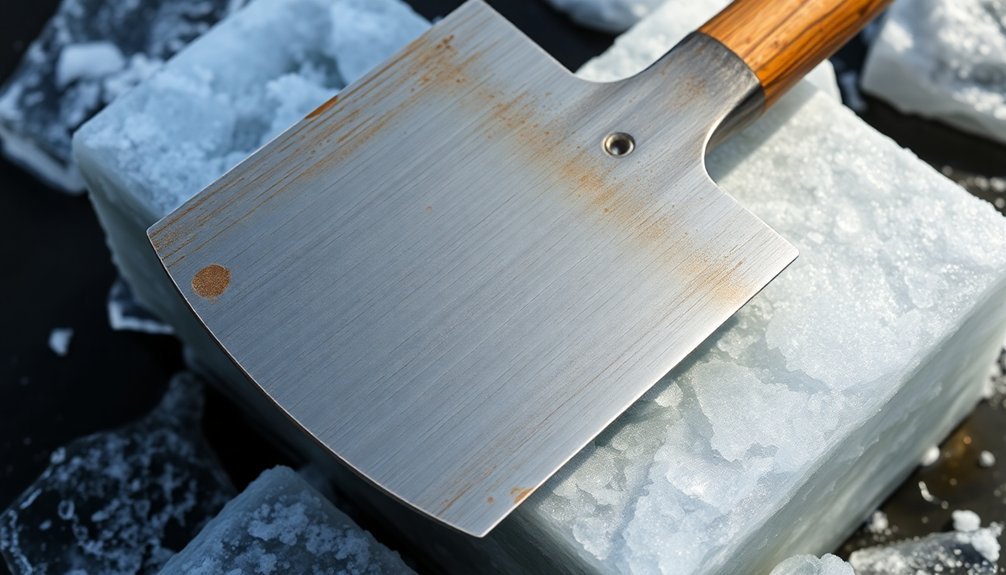
Ice harvesting's most formidable hand tool, the heavy breaking chisel, combined brute force with precise engineering to tackle thick ice sheets.
You'll find these tools were crafted from robust steel or iron, featuring a broad, flat blade designed specifically for maximum ice-breaking impact. The weighted heads increased striking force, while wooden or metal handles provided the necessary grip and durability for sustained use.
When you're working with these chisels, you'll need to employ a specific swinging or chopping motion, which requires considerable physical strength and endurance.
You'll want to coordinate your efforts with other ice harvesting tools to maximize efficiency. During the 19th and early 20th centuries, these chisels proved vital to the ice trade industry, though they've since been replaced by mechanized alternatives.
To maintain your ice breaking chisel, you'll need to keep the blade sharp and regularly inspect both the handle and head for damage.
You must store it in a dry place to prevent rust, and you'll want to wear appropriate protective gear during use. Proper training isn't just about efficiency – it's essential for your safety when wielding these powerful tools.
Long Pike Poles
You'll find long pike poles indispensable when you need to guide floating ice blocks across water or along ice channels.
These 12-16 foot tools let you reach far out onto the ice surface while maintaining a safe position on solid ground.
The sharp, hooked ends give you excellent control for maneuvering heavy ice blocks precisely where you want them to go.
Guiding Floating Ice Blocks
The long pike pole served as one of the most vital tools for guiding massive ice blocks during the harvesting process. When you're managing floating ice blocks, you'll find that these 12 to 16-foot poles, typically crafted from ash or hickory, provide the perfect balance of strength and maneuverability.
The steel or iron tips at the end allow you to hook and steer ice blocks while maintaining a safe distance from the frigid water.
To effectively guide ice blocks using a pike pole, you'll need to master these key techniques:
- Position yourself firmly on solid ice or shoreline, using the pole's length to your advantage.
- Coordinate with other handlers to control larger blocks, ensuring synchronized movements.
- Use gentle nudging motions to direct the ice blocks' path through the water.
- Maintain a secure grip using the rope or tape-wrapped handle for precise control.
You'll find that the pole's length isn't just about reach – it's a vital safety feature that keeps you at a safe distance from the floating ice.
During peak winter months, you'll rely on these sturdy tools to efficiently move ice blocks while minimizing physical risk.
Extended Reach Applications
Three primary applications made long pike poles indispensable for ice harvesting operations.
First, you'd use these 12-20 foot poles to safely reach and manipulate ice blocks from a stable position on thicker ice or platforms. The ash or hickory construction provided the necessary strength while maintaining manageable weight for extended use.
Second, you'll find these poles were essential for coordinated team efforts when moving larger blocks. The metal-tipped ends would grip the ice securely, while the wrapped handles gave you better control during precise maneuvers. You'd need to coordinate your movements with other workers, using leverage and body weight to guide heavy blocks effectively.
Third, you'd rely on these poles for safety-critical operations in challenging conditions. When working on potentially hazardous ice, you could test ice thickness and stability from a safe distance.
You'd also use the poles while wearing your spiked boots and warm layers, maintaining balance and control in slippery conditions. If you were working with safety lines, the pole's length would give you extra reach while staying secured to your anchor point.
Ice Thickness Measuring Augers
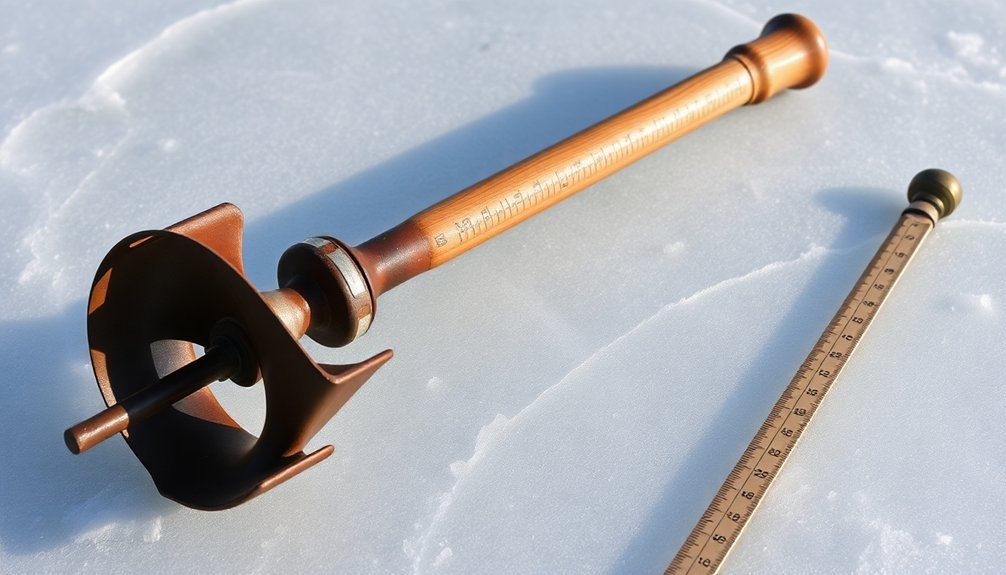
Before you test ice stability, you'll need to measure ice thickness by drilling holes at appropriate intervals with a manual or motorized auger.
You can check the ice depth by noting the markings on your auger's shaft or using a dedicated measuring gauge as you drill through the layers.
An effective ice auger features sharp, durable blades made of high-carbon steel or tungsten carbide, along with safety guards and an ergonomic handle design for secure operation.
Safety First Testing Protocol
Safety protocols require ice thickness measuring augers as foundational equipment before any harvesting begins.
You'll need to conduct multiple measurements across your intended harvesting area, as ice thickness can vary considerably. When you're testing, make sure you're wearing appropriate safety gear, including warm clothing and a safety harness.
To guarantee accurate measurements, you'll want to clear any snow or debris from the testing sites before drilling. Your auger should have clearly marked intervals, making it easier to determine the exact thickness at each point.
Keep detailed records of your measurements, noting both the location and time of day for each test.
Follow these essential steps for proper ice thickness testing:
- Test multiple points in a grid pattern, spacing holes at least 30 feet apart
- Drill straight down with your auger until you break through to water
- Measure the ice thickness immediately, before water freezes in the hole
Depth Measuring Process
Accurate ice depth measurement forms the cornerstone of safe and successful ice harvesting. You'll need to select the right type of auger for your specific needs, whether it's a manual hand-cranked model or a more advanced power auger with digital readouts. Each tool offers different benefits, with power augers providing faster drilling and digital models delivering precise real-time measurements.
To measure ice thickness properly, you'll start by identifying a secure spot on the ice surface. Once you've selected your location, you'll drill through the ice using your chosen auger, making sure to maintain a steady, controlled motion. It's vital that you take multiple readings at different points to ascertain you're getting consistent measurements across your harvesting area.
When you're using your auger, you'll want to make certain it's properly calibrated before starting work. Remember that environmental conditions, like temperature fluctuations and varying ice density, can affect your readings.
You should maintain your equipment regularly and check its accuracy throughout the harvesting season to guarantee reliable measurements. If you're new to ice measurement, consider working with an experienced operator who can guide you through proper technique.
Auger Design Features
The modern ice-thickness measuring auger combines robust construction with precision engineering to deliver reliable measurements in harsh winter conditions. You'll find these tools crafted from high-grade steel or iron, with rust-resistant coatings that protect against the harsh elements. The sharp, precision-engineered bits are designed to cut through ice efficiently while removing shavings during operation.
When you're examining an ice auger's key features, you'll notice several essential design elements that enhance its functionality:
- Measurement indicators etched directly onto the shaft, allowing you to read ice thickness accurately in real-time.
- Anti-slip handles wrapped in textured materials or ergonomically designed grips that help maintain control during operation.
- Protective guards surrounding the auger bit to prevent accidental contact during use.
- Spring-loaded or sliding measurement indicators that provide precise thickness readings.
The auger's crank mechanism reduces the physical effort needed to bore through thick ice, while the specialized bit design guarantees smooth operation.
You'll need to maintain these features by regularly sharpening the bit and protecting the measurement markings to guarantee continued accuracy. When properly cared for, these tools remain reliable for years of ice thickness measuring.
Transportation Sleds
Moving massive ice blocks from frozen lakes to storage facilities required specialized transportation equipment, with horse-drawn sleds serving as the primary hauling method. These sleds were specifically designed to handle ice blocks weighing between 200-300 pounds, which you'd typically find cut to uniform dimensions of 22 by 22 inches.
Much like modern symmetrical rescue sleds used today in ice emergencies, these transportation sleds weren't operating in isolation but were part of a larger, integrated system. Steel three-runner tracks helped workers load the ice blocks onto the sleds, while pre-cut channels and ramps streamlined the movement from water to transport.
When you're dealing with icy terrain, sleds proved far more effective than wheeled wagons.
The loading process was labor-intensive, requiring multiple workers using specialized tools. You'd see them wielding sharp-hooked tongs, long pitchforks, and ice hooks to guide blocks through water channels and up onto the sleds.
Once loaded, horses would pull these heavy loads to nearby ice houses, where workers would carefully stack the blocks with insulating materials like sawdust or hay between layers, ensuring the ice would last through warmer months.
Safety Cleats and Grips

While horse-drawn sleds carried heavy ice loads, workers needed reliable footing to handle these massive blocks safely. Ice harvesters relied on specialized cleats featuring durable spikes and grips that could withstand extreme cold temperatures down to -40°F.
These essential safety tools prevented dangerous slips and falls while working on frozen lakes and icy surfaces. The cleats' tungsten carbide spikes, which were 10 times stronger than rolled steel, provided superior traction and actually became sharper with use.
You'll find these cleats were particularly important for workers who needed to shift between different surfaces while handling ice blocks.
Here's why ice harvesting cleats were significant for worker safety:
- They prevented serious injuries like fractured tailbones and wrists from falls on ice
- The high-visibility straps allowed workers to spot each other easily during low-light conditions
- Workers could quickly adjust the cleats to fit over various boot sizes
- The natural rubber construction maintained flexibility even in bitter cold temperatures
The combination of rubber traction studs and metal spikes guaranteed workers maintained stable footing whether they were cutting ice blocks, loading sleds, or maneuvering between harvesting areas.
Frequently Asked Questions
How Long Did a Typical Ice Block Last in Storage?
You'll find that your stored ice blocks could last from winter until late autumn, or even several years in well-constructed ice houses. The duration depends on insulation quality and storage conditions.
What Was the Average Wage for Ice Harvesters in the 1800S?
You'd earn about $1 per day as an ice harvester in the 1800s, equivalent to $25 today. If you brought your own horse or donkey, you'd get an extra $2 daily for the added help.
How Many Accidents Occurred During Ice Harvesting Operations Annually?
You won't find exact annual accident statistics for ice harvesting operations, as they weren't formally documented. While drowning, hypothermia, and tool-related injuries were common risks, historical records don't provide specific numbers.
Which Regions Were Most Dependent on Harvested Ice for Preservation?
You'll find that growing cities along the Northeast Coast and New England were most dependent on harvested ice, as they needed it for food preservation in their expanding urban centers and industries.
What Alternative Methods Existed for Those Who Couldn't Afford Harvesting Tools?
You could harvest ice by working with your community to share basic tools, using axes to chop blocks, digging storage pits insulated with straw, or joining cooperative efforts where neighbors pooled their resources.
In Summary
You'll find these seven essential ice harvesting tools represent an incredible period of human ingenuity. Whether you're fascinated by the massive ice saws, horse-drawn plows, or simple pike poles, each tool played a crucial role in keeping communities cool before modern refrigeration. Next time you grab ice from your freezer, you're connecting with a legacy of winter workers who mastered these tools to harvest nature's coolant.


Leave a Reply