To store dried vegetables in olive oil, you'll need to guarantee they're properly dehydrated to about 10% moisture content and completely cooled before starting. Clean and sterilize glass jars with tight-fitting lids, then pack your dried vegetables loosely. Choose high-quality extra virgin olive oil and pour it over the vegetables until they're fully covered, leaving 1/2 inch headspace. For safety, you must acidify vegetables by soaking them in a 3% citric acid solution for 24 hours before drying to achieve a pH below 4.6. Store your jars in the refrigerator between 32-75°F and use within the recommended timeframe. There's much more to learn about this traditional preservation technique.
Benefits of Oil Storage

Several key benefits make oil storage an excellent preservation method for dried vegetables. When you store vegetables in olive oil, you'll create a protective seal that isolates the food from air, considerably delaying oxidation and deterioration. This barrier helps maintain both nutritional value and flavor, guaranteeing your preserved foods stay fresh longer.
You'll need to be mindful of food safety concerns, particularly regarding botulism risk. When storing low-acid foods in oil, you must refrigerate or freeze them to prevent Clostridium botulinum bacteria growth. Commercial garlic mixtures are safely acidified for room temperature storage. If you're working with garlic, herbs, mushrooms, or chilies, refrigeration is essential unless you've pickled them with vinegar or lemon juice.
The practical advantages extend beyond preservation. You'll find that oil-preserved vegetables remain versatile for various dishes, from salads to pasta. The flavored oil itself becomes a valuable ingredient for vinaigrettes and marinades.
When you properly store vegetables in clean, sterile jars and confirm they're completely submerged in oil, you'll create a sustainable preservation system that maintains quality while providing ready-to-use ingredients for your cooking needs.
Selecting the Right Vegetables
When choosing vegetables for oil preservation, you'll need to focus on varieties that maintain their texture and flavor after drying. The best options include garlic, sun-dried tomatoes, capsicums, chillis, ginger, and eggplant. These vegetables have proven successful in oil preservation due to their natural characteristics and ability to maintain quality. The practice of preserving vegetables in oil has a rich history dating back to 6000 BC in Israel.
You'll want to select vegetables at their peak maturity and flavor, with the exception of sweet corn and green peas, which should be slightly immature. Make sure your produce is free from decay, bruises, or mold, and wash them thoroughly to remove dirt and chemical residues. For leafy vegetables, drain and shake them well before processing.
Before storing in oil, you must either acidify your vegetables or dry them properly. Sun-dried tomatoes naturally achieve a pH of around 4.0, making them ideal for oil preservation. However, other vegetables need additional acidification to reach a pH below 4.6 for safety.
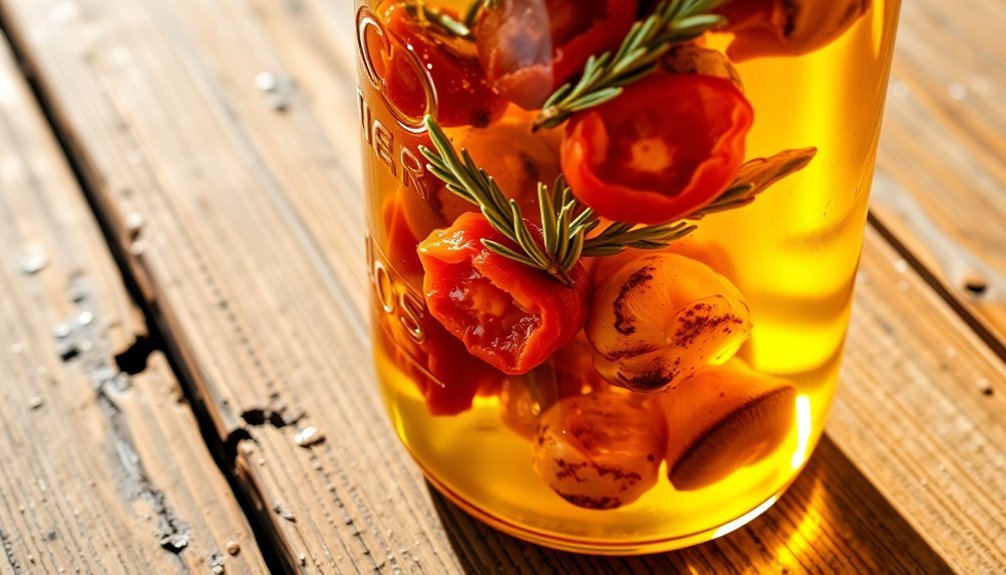
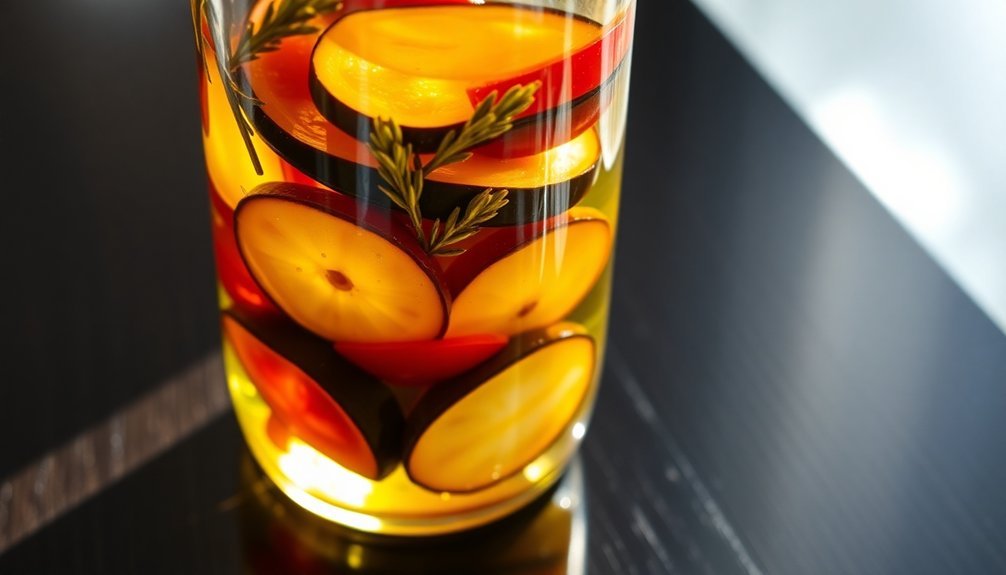
You can slow-roast, grill, or steam vegetables like bell peppers, zucchini, mushrooms, and green beans before preserving them. Don't forget that you can enhance flavors by adding herbs like rosemary, thyme, or sage.
Preparing Vegetables for Drying
You'll need to thoroughly clean your vegetables by washing them under cool water to remove any dirt or debris.
Next, sort through the vegetables to remove any damaged pieces, and take out all seeds, cores, and pulp that could affect the drying process.
Cut the vegetables into uniform pieces while removing any remaining inedible parts to guarantee they'll dry evenly.
For convenience, you can use frozen vegetables instead of fresh ones, which allows you to skip the cleaning and cutting steps.
Clean and Sort First
Preparing vegetables for oil storage begins with proper cleaning and sorting. You'll need to select fresh, high-quality vegetables at their peak maturity, avoiding any that show signs of wilting, decay, or damage. It's best to gather your vegetables early in the morning when you're ready to start the preservation process.
Wash your vegetables thoroughly in cool water, using a brush to remove all soil, residue, and potential spray deposits. For leafy vegetables, shake them well after washing to eliminate excess water. Be certain you drain all vegetables completely to prevent excess moisture from affecting the drying process.
Next, you'll need to trim away any fibrous, woody, or bruised areas from your vegetables. Remove seeds and cores where necessary. As you work, sort through the vegetables carefully, discarding any pieces that show signs of decay, mold, or damage.
Cut your vegetables into uniform, thin slices using a food processor or slicer to guarantee even drying later. Keep the pieces consistent in size, as this will help them dry at the same rate and store better in oil.
Removing Seeds and Pulp
After cleaning and sorting your vegetables, proper seed and pulp removal stands between you and successful drying.
You'll need to approach this task differently depending on whether you're working with dry or fleshy vegetables.
For dry vegetables, you'll want to thresh them by beating or rubbing the seed heads to release the seeds. Use screens or sieves to separate the seeds from the remaining plant material. If needed, try winnowing with a fan to blow away any lightweight chaff while keeping the heavier vegetable parts.
When dealing with fleshy vegetables, cut them open and scrape out the seeds and pulp. You can place these in a bowl of water and agitate the mixture – the viable seeds will sink while the pulp floats. Pour off the floating debris and repeat until the water runs clear.
For stubborn pulp, you might need to soak the vegetables to loosen it.
Don't skip the proper drying step after removing seeds and pulp. Spread your cleaned vegetables on screens or sheet pans where they'll get good airflow. Keep them away from direct sunlight and temperatures above 95°F. Using a fan will speed up the drying process.
Drying Methods and Techniques
You'll find two primary methods for drying vegetables: using a food dehydrator set at 140°F with built-in air circulation, or using your oven with the door propped open and an external fan for airflow.
Your dehydrator offers more consistent results and convenience, though it'll cost between $50-$350, while oven-drying requires closer monitoring to prevent accidental cooking at high temperatures.
When using either method, you need to maintain proper temperature control and watch your vegetables closely toward the end of the drying period to achieve the ideal 5-25% water content.
Dehydrator Vs Oven Methods
Both dehydrators and ovens offer distinct advantages for drying vegetables, though each method comes with unique trade-offs. You'll find that dehydrators provide more consistent results with better color retention and texture integrity, while ovens can sometimes dry certain foods faster, like kiwi leather and kale chips.
| Feature | Dehydrator | Oven |
|---|---|---|
| Drying Time | Generally longer but consistent | Can be 2-3x longer, varies by food |
| Quality | Better color, texture preservation | May darken, become brittle |
| Energy Use | More efficient, cost-effective | Higher consumption, less efficient |
When you're choosing between methods, consider that dehydrators are more "set-and-forget," while ovens require regular monitoring to prevent scorching. While the initial cost of a dehydrator ($50-$350) might seem high, you'll save money over time through better energy efficiency. You'll get better results with delicate items like herbs in a dehydrator, but ovens can handle larger vegetable pieces effectively. If you're planning to dry foods frequently, a dehydrator's precise temperature control and consistent results make it the better choice, despite some foods taking longer to dry than in an oven.
Temperature Control Guidelines
Through proper temperature control, you'll achieve ideal results when drying and storing vegetables in olive oil. The best storage temperature range falls between 32°F and 75°F, which helps maintain the quality and longevity of your dried vegetables.
While room temperature storage is acceptable, you'll get better results by keeping your preserved vegetables in cooler conditions.
You'll want to choose a storage location that maintains consistent temperatures, as fluctuations can compromise the integrity of your preserved vegetables. A cool, dark pantry or kitchen cabinet works well, but if you live in a particularly warm or humid climate, consider using your refrigerator.
Refrigeration can greatly extend the shelf life of your oil-preserved vegetables and help maintain their quality.
When selecting your storage space, avoid areas that might experience temperature spikes or excessive heat exposure. High temperatures can degrade both the vegetables and the olive oil, potentially leading to spoilage.
If you're planning for long-term storage, you'll find that maintaining lower temperatures consistently will give you the best results in preserving both flavor and nutritional value.
Optimal Drying Times
Successful vegetable drying hinges on selecting the right drying method and following precise timing guidelines.
When using a food dehydrator, you'll benefit from its precise temperature control and efficient air circulation, which helps achieve ideal drying times while preventing scorching. You should arrange your vegetables in a single layer and turn larger pieces every 3-4 hours during the drying process.
If you're using an oven method, set the temperature as low as 140°F and prop the door open 2-6 inches. You'll need to place a fan near the door to improve air circulation. Watch your vegetables closely, especially toward the end of the drying period, as they can quickly go from perfectly dried to scorched.
For vine-dried beans and legumes, you'll know they're ready when the pods rattle and the vines are shriveled.
Regardless of your chosen method, vegetables should be dried until they're brittle or crisp, containing about 10% moisture. Remember that drying times will vary based on the vegetable type, size of pieces, and your chosen drying method.
Always let your vegetables cool completely before storing them in olive oil.
Essential Equipment and Materials
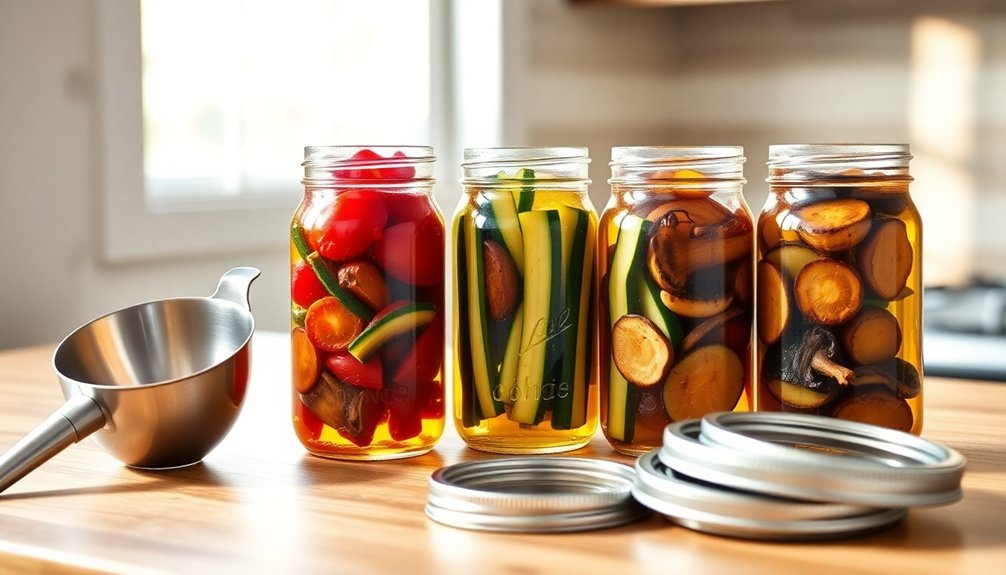
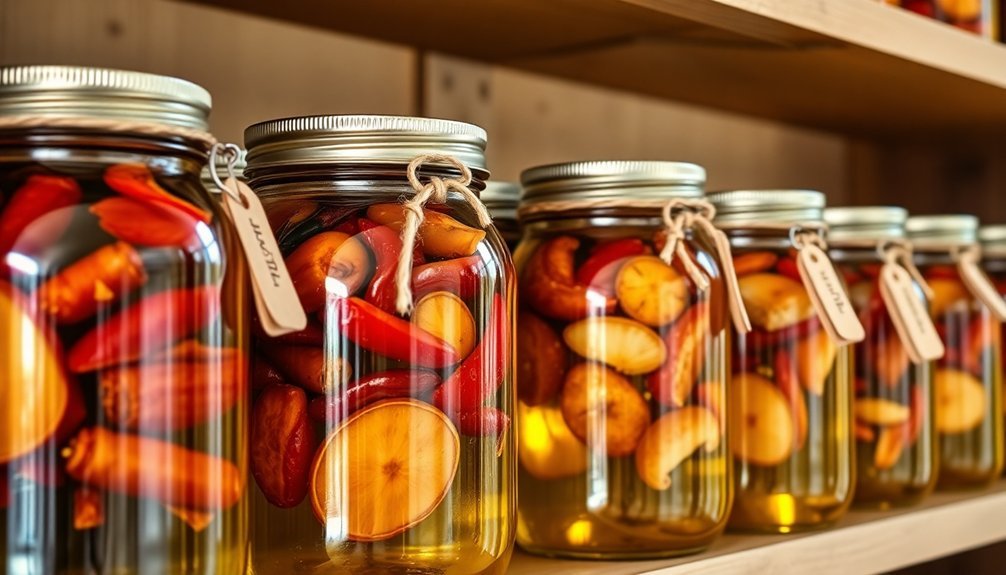
Proper preparation starts with gathering the right equipment and materials for storing dried vegetables in olive oil. You'll need clean, sterile glass jars with tight-fitting lids to create an airtight environment. While glass is ideal, you can also use ceramic, porcelain, or stainless steel containers that won't react with the preserving ingredients.
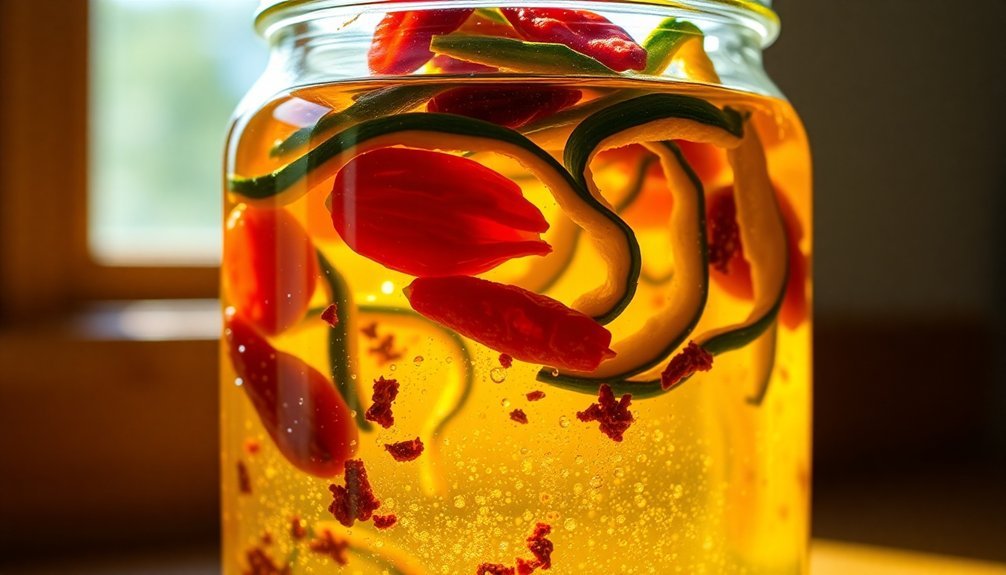
For the preservation process, gather high-quality olive oil, vinegar (balsamic or white), and basic seasonings like salt and pepper. You can enhance flavors with optional additions such as herbs, garlic, lemon zest, or chilies.
Select vegetables suitable for preservation, including beets, tomatoes, zucchini, eggplant, peppers, and mushrooms. You'll also need sterile utensils and tools, like skewers or spoons, for handling the vegetables and removing air bubbles.
An oven or cooking device is essential for pre-cooking the vegetables before preservation. Keep in mind that you'll need adequate storage space in your refrigerator or a cool, dark place with consistent temperatures between 57°F and 70°F.
If you're planning for long-term storage, consider using tinted glass containers or a freezer-safe option.
Acidification Steps
Safety in preserving dried vegetables begins with proper acidification, a critical step that prevents the growth of harmful bacteria like C. botulinum. You'll need to prepare a 3% citric acid solution by mixing 1 tablespoon of citric acid with 2 cups of water.
For different vegetables and herbs, you'll need to follow specific ratios:
| Ingredient | Acidification Method |
|---|---|
| Garlic | 1 part garlic to 3 parts acid solution |
| Fresh Herbs | 1 part herbs to 10 parts acid solution |
| Tomatoes | Natural acidity – no additional needed |
| Other Vegetables | Must be acidified before oil storage |
| Mixed Ingredients | Follow strictest ratio for safety |
Soak your chopped vegetables or herbs in the acid solution for at least 24 hours, ensuring they're completely submerged. You'll know herbs are properly acidified when their color changes. After acidification, the final pH must be below 4.6 for safety. While tomatoes don't require additional acidification due to their natural acidity, other vegetables must complete this process before you store them in oil. Store your acidified vegetables in clean, sterile jars and keep them refrigerated.
Adding Seasonings and Herbs

When choosing between fresh and dried herbs for your olive oil-preserved vegetables, you'll want to opt for dried herbs like thyme and basil for long-term storage, while fresh herbs are better for short-term refrigerated preparations.
Mediterranean seasoning blends featuring rosemary, oregano, and basil can transform your preserved vegetables into Tuscan-inspired delicacies.
If you're using garlic, remember that raw garlic in olive oil must be refrigerated and used within four days to prevent botulism risk, while garlic powder offers a safer alternative for shelf-stable storage.
Fresh Vs Dried Herbs
Understanding the difference between fresh and dried herbs is essential when flavoring your oil-preserved vegetables. When working with herbs, you'll need to know that woody herbs like oregano, rosemary, and thyme work better dried, while leafy herbs such as basil, cilantro, and parsley are best used fresh.
For your oil-preserved vegetables, you'll want to stick with dried herbs, as they're safer for long-term storage at room temperature. Fresh herbs in oil can create food safety concerns and must be refrigerated and used within four days.
When converting measurements, remember that dried herbs are more potent – use 1 tablespoon of dried herbs for every 3 tablespoons of fresh herbs.
While dried herbs don't truly expire, they can lose their potency over time. You can expect them to maintain their flavor for about a year.
To maximize their flavor in your preserved vegetables, try rubbing the dried herbs between your palms before adding them to release their essential oils. If your dried herbs have lost their vibrant color or smell dusty, it's time to replace them with fresh ones.
Garlic Safety Guidelines
The proper handling of garlic in oil-based preparations stands out as one of the most critical safety concerns for preserved vegetables. When you're working with garlic and oil, you'll need to follow strict storage guidelines to prevent the growth of Clostridium botulinum, a dangerous bacteria.
If you're using fresh garlic in oil, you must refrigerate the mixture and use it within four days, or freeze it for long-term storage. Even dried garlic requires refrigeration when mixed with oil. Don't forget to label your containers with both preparation and discard dates. You can't store these mixtures at room temperature unless they're properly acidified.
For safe acidification, use citric acid powder rather than lemon juice or vinegar, mixing 1 part garlic with 3 parts 3% citric acid solution by weight. Once acidified, you can infuse the garlic in oil for 1 to 10 days at room temperature, using a ratio of 1 part acidified garlic to 10 parts oil.
While you can add ingredients like peppercorns or chili flakes to vinegar-preserved garlic, avoid adding parsley to any garlic-oil mixtures. Always discard the mixture if you notice any signs of mold or yeast growth.
Mediterranean Seasoning Blends
Packed with aromatic herbs and robust spices, Mediterranean seasoning blends can transform your preserved vegetables in olive oil into vibrant, flavorful delicacies.
You'll want to combine dried herbs like basil, oregano, thyme, rosemary, and dill with essential spices including garlic powder, onion powder, and smoked Spanish paprika. For an authentic Mediterranean touch, incorporate ground cinnamon, nutmeg, cumin, and coriander.
When you're adding these seasonings to your preserved vegetables, follow these key steps:
- Mix your chosen dried herbs and spices before adding them to guarantee even distribution throughout the oil.
- Allow your seasoned mixture to mature for two weeks to develop ideal flavor profiles.
- Keep all vegetables completely submerged in the seasoned oil to prevent spoilage.
Olive Oil Selection Guide
Selecting the right olive oil forms the foundation for properly storing dried vegetables. You'll want to choose extra virgin olive oil, specifically looking for bottles harvested within the last 18 months. Single-origin oils guarantee you're getting pure quality without unexpected blends or additives.
| Region | Variety | Best For |
|---|---|---|
| Italy | Coratina | Bold vegetables, strong herbs |
| Spain | Arbequina | Delicate herbs, mild vegetables |
| Greece | Koroneiki | Mixed Mediterranean blends |
When choosing your oil, look for dark glass bottles that protect against light degradation. Avoid clear or plastic containers, as they can compromise the oil's quality and potentially leach microplastics. You'll know you've selected a high-quality oil if it has a slight burn at the back of your throat – this indicates beneficial polyphenols are present.
Consider the flavor profile that'll complement your dried vegetables. Southern Italian oils offer intense bitterness perfect for robust vegetables, while Spanish Arbequina provides a milder backdrop for delicate herbs. Store your chosen oil in a cool, dark place with a tight seal to maintain its quality throughout the preservation process.
Safe Storage Practices
When preserving dried vegetables in olive oil, proper storage practices play an essential role in preventing foodborne illness and maintaining quality. You'll need to guarantee your vegetables are thoroughly dried until they're leathery or crisp, and if you're using tomatoes, remove their skins first.
Always acidify your vegetables with bottled lemon juice or 5% vinegar before storing them in oil. Use clean, sterilized glass containers with tight-fitting lids, and keep your vegetables completely submerged in olive oil.
You'll want to store your preparations in the refrigerator and use them within four days, or freeze them for longer storage. Remember that refrigeration will solidify the oil, so you'll need to warm it gently in water before use.
- Check regularly for signs of spoilage, including mold growth or off odors
- Maintain proper oil coverage by adding more oil after each use
- Test the aroma before using to confirm the oil hasn't become rancid
If you're using vinegar for acidification, maintain a 2:1 ratio of oil to vinegar. Always label your containers with preparation and use-by dates to track freshness effectively.
Preventing Spoilage and Contamination
Building on proper storage practices, preventing spoilage and contamination starts with thorough drying of your vegetables. You'll need to guarantee your vegetables are almost crisp before storing them in oil, as any remaining moisture can lead to bacterial growth. This is particularly vital because low-acid foods in oil can harbor dangerous Clostridium botulinum bacteria.
If you're working with tomatoes, you'll benefit from their naturally reduced pH after drying, which makes them safer against food poisoning bacteria. For other vegetables, you'll need to either acidify them properly or verify they're completely dried. Don't attempt home acidification without professional guidance, as improper techniques can be dangerous.
To further prevent contamination, heat your oil to 180°F before adding your dried vegetables. You'll want to use sanitized, airtight containers or vacuum-sealed bags to minimize air exposure.
While properly dried vegetables in oil can be stored at room temperature, it's safer to refrigerate homemade mixtures and use them within three weeks. Keep your containers in a dry, well-ventilated area to prevent moisture reabsorption, and always label them with contents and dates.
Using Preserved Vegetables
Once your vegetables are properly preserved in olive oil, you'll discover countless ways to incorporate them into your daily meals. From enhancing simple pasta dishes to creating flavorful salads, these preserved vegetables can transform ordinary recipes into Mediterranean-inspired delights.
You'll find they're particularly versatile when added to grain bowls, risottos, or mixed into pesto-based sauces.
For quick and delicious meal ideas, try these popular applications:
- Create vibrant antipasti platters by combining your preserved vegetables with cheese, cured meats, and crackers for an impressive appetizer spread.
- Add depth to sandwiches and wraps by layering the vegetables with fresh ingredients and spreading tapenade or aioli for extra flavor.
- Toss them into pasta salads with olive oil and herbs, or incorporate them into warm grain bowls for a satisfying lunch option.
Don't forget to experiment with your preserved vegetables in salads – they pair exceptionally well with fresh greens, nuts, and cheese.
You can also use them as toppings for bruschetta or crostini, or mix them into dips like hummus for a flavorful Mediterranean twist.
Long Term Storage Requirements
Always use sterile jars and eliminate air bubbles by stirring with a skewer.
Check your preserved vegetables regularly for signs of spoilage, such as mold or unusual smells.
For maximum safety, maintain consistent storage conditions and guarantee proper acidification through your oil-vinegar mixture.
Frequently Asked Questions
Can I Reuse the Flavored Olive Oil After All Vegetables Are Consumed?
Yes, you can reuse flavored olive oil up to 5 times for cooking or frying. Just make sure you've filtered out all food particles, and don't use it raw. Discard if it's dark or smoky.
What Causes Some Dried Vegetables to Float to the Top?
Your dried vegetables may float due to trapped air bubbles, higher moisture content, or density differences with the oil. You'll need to guarantee complete drying and proper oil coverage to prevent floating.
Should Vegetables Be Cooled Completely Before Adding Olive Oil?
You don't need to cool dried vegetables before adding olive oil, but they must be completely dry. Any moisture can cause spoilage or bacterial growth, so make certain they're thoroughly dried before storage.
Can I Mix Different Types of Dried Vegetables in One Jar?
Yes, you can mix different dried vegetables in one jar, but make sure they're all completely dried to prevent spoilage. It's best to combine vegetables with similar drying times for consistent results.
How Do I Clean Oil Residue From Jar Lids Between Uses?
You'll need to sprinkle baking soda on the lid, add vinegar, and let it fizz overnight. After rinsing thoroughly, try rubbing lemon oil with a cotton ball for stubborn oil residue.
In Summary
You'll find that properly storing dried vegetables in olive oil adds incredible flavor to your pantry while extending shelf life. Remember to always use completely dried vegetables, sterilized containers, and high-quality oil. Keep your preserved vegetables in a cool, dark place and check regularly for signs of spoilage. With these precautions, you'll enjoy your oil-preserved vegetables safely for months to come.


Leave a Reply