Building your own underground cheese cave combines natural climate control with precise aging conditions. You'll need to select a north-facing slope for consistent temperatures and minimal solar heat gain. The cave's design should maintain 48-55°F temperatures and 70-99% humidity through proper ventilation and moisture management. Essential elements include 8-inch thick concrete walls, strategic drainage systems, and automated humidity controls using salt solutions. Daily monitoring of temperature and humidity guarantees ideal cheese aging, while regular maintenance prevents mold issues. Discover how these fundamentals work together to create your perfect cheese aging sanctuary.
Understanding Natural Cave Benefits

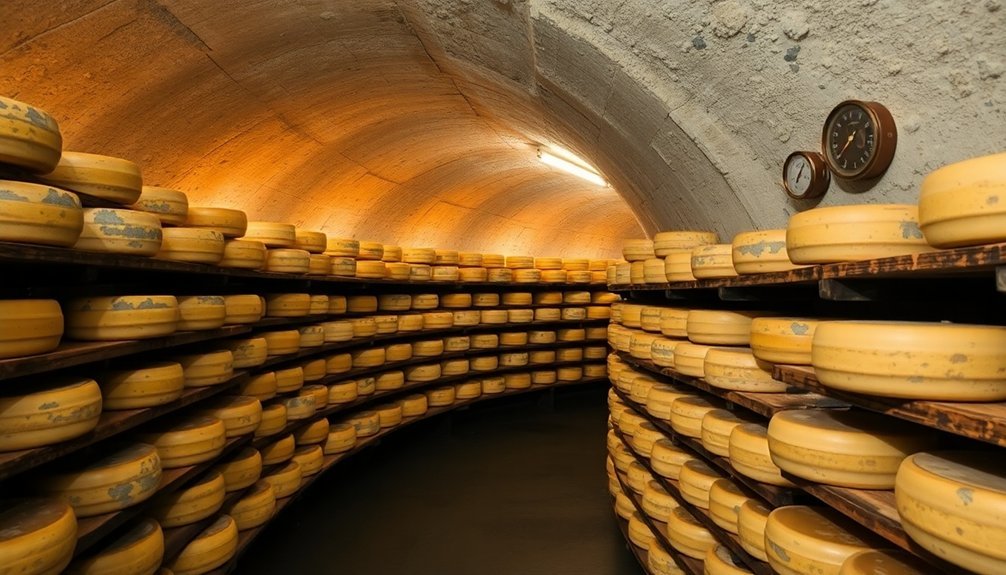
Exploring the natural properties of cave environments reveals why they've been prized for cheese aging for centuries. These underground spaces maintain consistent temperatures between 45 and 60 degrees Fahrenheit, providing ideal conditions that you won't easily achieve with standard refrigeration, which typically runs too cold at 40 degrees or below. Sweet earthy aromas circulate throughout the aging space, infusing the cheeses with distinct flavors.
You'll find that natural caves offer a perfect balance of humidity, naturally maintaining levels between 75% and 99%, which keeps your cheese from drying out or developing unwanted cracks.
The natural ventilation system in caves also plays a significant role, carrying fresh air while removing gases that cheeses release during aging.
What makes caves particularly special is their unique terroir – the combination of environmental factors that influence your cheese's final taste. The cave's indigenous microorganisms, including beneficial bacteria and fungi, contribute to developing authentic, place-specific flavors that you can't replicate in artificial environments.
Additionally, you'll benefit from the cave's energy efficiency, as it maintains stable conditions with minimal intervention.
When you're aging cheese underground, you're tapping into a natural system that's been perfected over millennia, offering superior results compared to above-ground alternatives.
Location Selection and Planning
When selecting an ideal location for your underground cheese cave, you'll need to evaluate the site's natural slope to guarantee proper drainage and temperature control.
The ideal location on the north side of a structure helps minimize unwanted solar heat gain that could disrupt aging conditions.
You'll want to study the terrain's natural drainage patterns to prevent water accumulation that could compromise your cave's stability and humidity levels.
Your access planning should focus on creating a convenient entry point that aligns with both the slope and drainage considerations while maintaining the necessary temperature isolation for proper cheese aging.
Site Slope Assessment
Located within the broader site selection process, slope assessment plays a crucial role in determining the feasibility and safety of an underground cheese cave. You'll want to focus on sites with gentle slopes that provide natural drainage while avoiding areas prone to erosion or landslides.
When evaluating potential slopes, you'll need to take into account multiple factors that affect both construction and long-term stability. Start by examining the gradient's impact on accessibility – your construction equipment and maintenance vehicles will need reliable access to the site. Similar to Murray's Cheese's four distinct caves, your slope may need to accommodate multiple cave sections for different aging processes.
Pay attention to how the slope affects water runoff patterns, as proper drainage is critical for preventing moisture issues in your cave. The slope's orientation also influences solar exposure and wind patterns, which directly impact your cave's internal climate.
You'll need to evaluate how the gradient affects natural ventilation and temperature control. Consider installing monitoring equipment to track soil stability and moisture levels before finalizing your site selection.
Remember to check local building codes, as many jurisdictions have specific requirements for slope construction. If you're working with a particularly challenging gradient, you may need to consult with a geotechnical engineer to guarantee long-term structural integrity.
Natural Drainage Patterns
The success of your underground cheese cave hinges on proper natural drainage patterns during the site selection process. You'll need to carefully analyze how water naturally moves through your chosen site to prevent moisture-related issues that could compromise your aging environment.
Understanding these patterns helps you position your cave where water will flow away from the structure naturally, protecting your valuable cheese inventory and maintaining ideal humidity levels.
When evaluating natural drainage patterns, verify you're considering both surface and subsurface water movement. Look for signs of existing water flow and consider how seasonal changes might affect drainage behavior.
You'll want to incorporate these observations into your cave's design, particularly when planning your drainage system and determining the cave's orientation.
- Check for natural slopes that direct water away from your intended cave location, aiming for a minimum 2% grade
- Identify any seasonal water tables or underground springs that could affect your cave's stability
- Observe surface water patterns during heavy rainfall to understand potential problem areas
- Consider installing French drains or similar systems to supplement natural drainage where needed
These drainage considerations will directly impact your cave's ability to maintain proper humidity levels between 85-95% while preventing unwanted moisture accumulation.
Underground Access Planning
Beneath the earth's surface, planning your cheese cave's access points requires careful consideration of both immediate and long-term needs. You'll need to design entrance ways that accommodate both daily operations and emergency situations while ensuring proper temperature control and minimal environmental disruption.
| Access Type | Primary Purpose | Key Features |
|---|---|---|
| Main Entry | Daily Operations | Wide doorway, gradual slope, temperature lock |
| Service Access | Maintenance | Utility conduits, ventilation controls, monitoring systems |
| Emergency Exit | Safety | Quick-release mechanisms, backup lighting, direct surface route |
When designing your access points, you'll want to incorporate features that maintain the cave's internal climate while allowing efficient movement of cheese wheels and equipment. Consider installing an airlock system at the main entrance to minimize temperature fluctuations during frequent entries. You'll also need to plan for utility access, ensuring that power cables, water lines, and ventilation systems can be easily reached for maintenance. If you're including public viewing areas, separate these from your primary operational access points to maintain food safety protocols and operational efficiency. Remember to position your access points where they won't interfere with natural drainage patterns or compromise the structural integrity of your cave system.
Cave Design Fundamentals
Mastering the fundamentals of cheese cave design requires careful attention to four vital elements: temperature control, humidity management, air ventilation, and layout enhancement.
You'll need to maintain temperatures between 48-55°F for harder cheeses while ensuring consistent humidity levels of 70-99% for proper aging. Consider installing temperature control devices and integrated humidity controllers to maintain these precise conditions.
Your ventilation system plays an essential role in preventing stale air and allowing natural mold development on cheese rinds. You can utilize buried PVC pipes for geothermal cooling and fresh air circulation, while automated systems help maintain ideal airflow throughout your cave.
Key design considerations to maximize your cave's efficiency:
- Install hygrometers and humidifiers to monitor and adjust moisture levels
- Use clay floors or damp materials like sponges to help regulate humidity naturally
- Create separate spaces for different cheese types requiring unique aging conditions
- Arrange cheeses with adequate spacing to prevent cross-contamination
Your cave's layout should accommodate your specific production volume while allowing for proper air circulation.
Remember that temperature directly influences humidity levels, so these systems must work in harmony for successful cheese aging.
Essential Construction Materials
Building a successful cheese cave demands carefully selected construction materials that work together to create ideal aging conditions.
You'll need cement blocks and poured concrete for the structural foundation, with 8-inch thick walls that naturally regulate temperature and humidity. The arched concrete roof design promotes proper air circulation while providing structural integrity.
For effective climate control, you'll want closed cell spray foam insulation rated R-25 or higher, paired with a vapor barrier coating.
The interior walls require stucco finishing and lime wash treatment to guarantee proper vapor permeability. You'll also need pine shelving to store your cheese wheels as they age.
The drainage system calls for PVC pipes and French drains installed at the cave's base to prevent moisture buildup.
Don't forget to include chilled water piping for cooling during warmer months.
For functionality, you'll need materials for an elevator system to transport cheese carts and proper air conditioning equipment like a Coolbot or mini-split system.
Finally, you'll require landscaping materials to cover the cave and help it blend seamlessly with the surrounding environment.
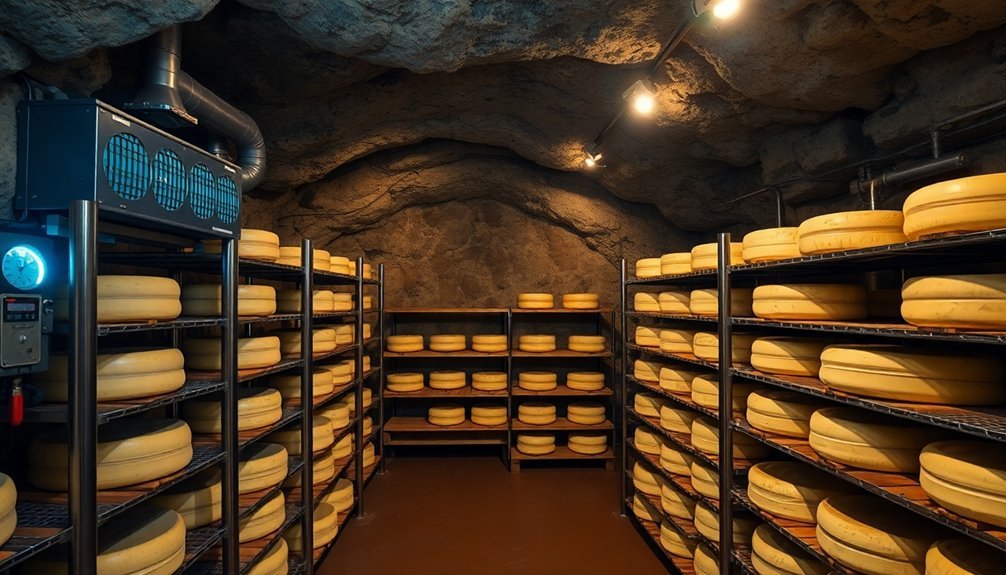
Ventilation System Setup

You'll need to establish a reliable airflow system in your underground cheese cave by incorporating both intake and exhaust vents positioned at opposite ends to create natural circulation.
To maximize natural cooling, you can position your intake pipes on the north side of the cave where temperatures remain more stable and connect them to a wind-powered turbine ventilator that draws in fresh air.
When installing the ventilation pipes, make certain they're properly insulated, sloped slightly to prevent condensation buildup, and equipped with filters to keep out debris and unwanted organisms.
Basic Air Flow Design
Proper air flow stands at the heart of any successful cheese cave design. You'll need to guarantee continuous air movement to maintain even temperature distribution and eliminate unwanted gases like CO2 and ammonia.
A well-designed ventilation system won't just prevent mold buildup but will also support the growth of beneficial cultures essential for cheese aging.
For a basic air flow setup, you'll want to incorporate these key components:
- Buried PVC pipes (at least 200 feet) to bring in geothermal-conditioned air
- Strategically placed fans or humidifiers with built-in fans for gentle air circulation
- Air intake and exhaust points positioned to optimize flow patterns
- Temperature and humidity monitoring devices to guide ventilation adjustments
If you're working with a small cave, simply opening and closing the door once or twice daily might suffice.
For larger spaces, you'll need a more sophisticated system using filtered outside air. Consider installing computer or muffin fans as cost-effective alternatives for maintaining constant air movement.
Remember to use vapor-permeable materials like lime wash in your construction to support natural air circulation throughout the space.
Natural Cooling Methods
Inside of an underground cheese cave, natural cooling methods provide the most sustainable and efficient way to maintain ideal aging conditions. By utilizing geothermal cooling through buried PVC pipes extending over 200 feet, you'll condition incoming air to match the earth's stable temperature year-round. This system requires minimal maintenance while delivering consistent results for your aging space.
You'll want to maximize natural earth insulation by constructing 8-inch thick cement walls and bridge arch ceilings. Adding a lime wash coating to the interior surfaces allows the structure to breathe properly, while the rounded arch design enhances air movement throughout your cave. These structural elements work together to maintain temperatures close to the surrounding earth.
To control humidity naturally, incorporate clay bricks or salt brine solutions into your design. When soaked, clay bricks can maintain a consistent 85% relative humidity level. You can supplement these with damp cloths or water trays as needed.
Don't forget to monitor humidity levels with a hygrometer and adjust accordingly. For ideal aging conditions, install small fans to prevent stagnant air and guarantee proper circulation, which is vital for developing cheese flavors and textures.
Ventilation Pipe Installation
Setting up a ventilation system starts with strategic pipe placement throughout your cheese cave. You'll need to install both inlet and outlet pipes, guaranteeing they're positioned to create effective air circulation without direct airflow between them.
Your inlet pipes can be buried underground to naturally cool incoming air using the earth's temperature, while outlet pipes should be positioned high to vent stale air away from the cave.
Choose PVC pipes for their durability and ease of installation. You'll want to incorporate bends or goose necks at the pipe ends to prevent debris from entering while maintaining efficient airflow.
The system should facilitate regular air exchange to eliminate gases produced during cheese aging and prevent mold buildup.
Key components for successful ventilation:
- Install multiple vents throughout the cave to maintain even air circulation
- Position exhaust pipes to effectively remove CO2 and ammonia
- Add filters to intake pipes to prevent contaminants from entering
- Include monitoring devices like hygrometers and thermometers to track environmental conditions
Regular maintenance checks guarantee your ventilation system continues functioning properly, allowing you to adjust airflow based on your cheese aging needs.
Temperature Control Methods
Temperature regulation stands at the heart of successful underground cheese aging. You'll need to equip your cave with reliable temperature monitoring devices and control systems to maintain the ideal environment of 50-55°F (10-15°C) for most cheeses.
Start by installing a temperature controller with a probe that'll cycle your cooling system on and off as needed. You can modify existing equipment like a wine fridge or mini fridge by adding external temperature controllers.
To stabilize temperatures, add thermal mass using water bottles, which help minimize fluctuations when you open the cave door.
Don't underestimate the importance of proper insulation – it's essential for maintaining consistent temperatures and reducing external influences. You'll want to monitor your cave's temperature regularly using data loggers or reliable thermometers.
If you're dealing with fluctuations, consider using a root cellar or basement location, as these naturally maintain temperatures around 50°F (10°C).
For the cheese-making process itself, use a temperature-controlled cheese vat or sous-vide device for precise control.
When cooling curds, rely on an ice bath or refrigerator to achieve the right temperature quickly and consistently.
Humidity Management Techniques
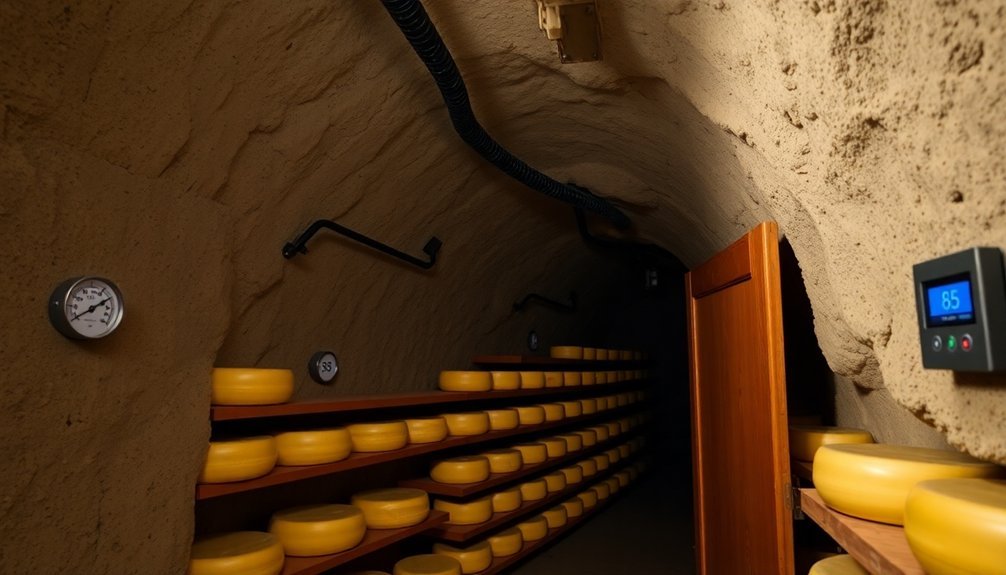
You'll need multiple moisture sources to maintain proper humidity in your underground cheese cave, including open water containers and salt solutions that create specific moisture levels.
A quality digital hygrometer helps you track humidity levels accurately, while remote monitoring systems let you check conditions without entering the cave.
You can fine-tune your cave's moisture by placing saturated salt solutions in strategic locations, mixing one tablespoon of salt with one teaspoon of water to achieve the right consistency.
Natural Moisture Sources
Managing humidity in a cheese cave requires a delicate balance of natural moisture sources and controlled environments. You can harness natural moisture through several effective methods, including salt solutions and water-based techniques.
Creating a saturated salt solution with different salt types allows you to maintain specific humidity levels, with sodium chloride providing around 75% humidity and potassium chloride reaching up to 85%.
Water-based methods offer simple yet effective solutions for humidity control. You'll find that strategically placed water pans with partial covers can regulate moisture levels, while hanging damp cloths provides a steady release of humidity.
Remember to use distilled or sterile water to prevent contamination and mineral buildup in your aging space.
- Place shallow water containers with adjustable covers to fine-tune humidity release
- Create salt solutions using specific salts for targeted humidity levels
- Position damp cloths or paper towels throughout the space, remoistening as needed
- Install a fountain mister with a humidity sensor for automated moisture control
When implementing these natural moisture sources, you'll need to monitor and adjust based on your cheese type and seasonal changes.
Consider combining multiple methods to achieve ideal humidity levels in your cave.
Humidity Monitoring Equipment
Effective humidity monitoring in your cheese cave depends on reliable equipment and precise control systems.
You'll need a digital hygrometer as your primary monitoring device, which provides instant readings of both humidity and temperature levels. Choose a battery-powered model that you can easily calibrate to guarantee accuracy throughout your aging process.
For automated control, install a humidity controller that connects to your humidifier or dehumidifier. These systems will maintain your target humidity levels automatically, activating devices when readings fall outside your specified range.
You'll want to position your sensors strategically to get accurate readings from different areas of your cave.
Your equipment setup should include both a humidifier and dehumidifier to manage moisture levels effectively. Use distilled water in your humidifier to prevent mineral buildup, and clean both devices regularly to prevent mold growth.
For precise control, supplement your automated system with small fans to maintain even air circulation. You can also use humidity-absorbing materials like silica gel when you need to reduce excess moisture quickly, or damp towels when you need to boost humidity levels temporarily.
Salt Solution Techniques
Salt solutions offer a reliable and cost-effective method for maintaining consistent humidity levels in your cheese cave.
You'll need to create a saturated solution by mixing salt with filtered water until it no longer dissolves, typically using 26-28% salt by weight. Let the solution sit overnight to guarantee complete saturation, and keep it at the same temperature as your cave to prevent fluctuations.
Place your salt solution container at the bottom of your cheese cave, where it'll work alongside other humidity control methods. The solution naturally maintains a relative humidity of around 75% by absorbing or releasing moisture as needed.
You'll want to monitor the solution regularly to guarantee there's always undissolved salt present, as this is essential for maintaining consistent humidity levels.
- Create multiple smaller containers rather than one large one for better distribution
- Position containers away from direct airflow to prevent rapid evaporation
- Check salt levels weekly and top up as needed
- Combine with water pans or humidifiers for precise control
Remember to adjust the amount of solution based on your cave's size and the specific needs of your aging cheeses.
Good air circulation will help distribute the humidity evenly throughout your aging space.
Cave Flooring Considerations
For a successful cheese cave, proper flooring selection plays an essential role in maintaining ideal aging conditions. You'll want to choose materials that can withstand constant humidity levels between 80-98% while supporting efficient cleaning protocols.
Concrete serves as an excellent primary flooring option, as it naturally helps regulate temperature and humidity within your aging space.
When installing your floor, incorporate geothermal cooling elements by laying piped chilled water systems underneath the concrete. This setup helps maintain consistent temperatures naturally during warmer months. The concrete should be finished with vapor-permeable coatings, such as lime wash, allowing the floor to breathe while preventing moisture buildup.
Your flooring must also accommodate proper drainage and cleaning requirements. Consider adding a slight slope to prevent water pooling, and guarantee the surface finish isn't too smooth to avoid slip hazards in the humid environment.
The floor should seamlessly connect with your 8-inch thick cement walls, creating an effective thermal mass that contributes to the cave's overall temperature stability.
Remember to keep the floor clear of wooden elements, particularly those made from oak or maple, as they can stain your aging cheeses.
Drainage and Waterproofing

Maintaining proper drainage and waterproofing systems serves as the backbone of any successful cheese cave operation. You'll need to start by identifying key drain points and installing a ½ inch vinyl tube system that connects to your evaporator pan. Ascertain the drain spout directs water to a suitable drainage area with a slight slope to prevent backflow.
For effective waterproofing, you'll want to seal all gaps and cracks with weatherproof sealants, paying special attention to areas around doors and shelves. Apply a urethane or epoxy coating to your walls and floor, ascertaining complete coverage and proper drying time.
Essential components for your drainage and waterproofing system include:
- A sloped floor design with a water collection tray
- A properly sealed drainage mechanism with trap installation
- Waterproof coatings on all surfaces
- A ventilation system to control condensation
Monitor humidity levels using a hygrometer and maintain proper air circulation to prevent moisture buildup.
Don't forget to conduct regular inspections of your drainage system for blockages and check waterproofing materials for damage. If you notice excessive condensation, consider adding a dehumidifier to your setup.
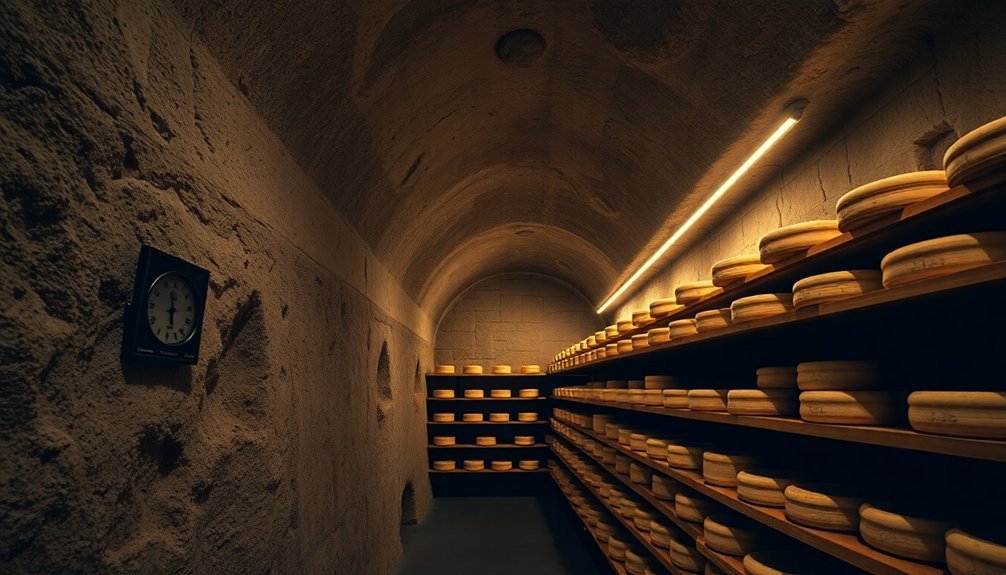
Cheese Storage Layout
A well-designed storage layout forms the foundation of your cheese cave's success. Start by installing wooden shelves made from pine or ash, as they're easy to clean and won't stain your cheese. You'll need to space your shelves to allow proper air circulation, which is essential for even aging.
| Storage Element | Key Consideration |
|---|---|
| Shelf Material | Pine or ash wood |
| Shelf Spacing | Allow 6-8" between levels |
| Cheese Placement | 2-3" gaps between pieces |
| Environment Control | Use airtight containers |
When arranging your cheese, maintain adequate spacing between pieces to prevent cross-contamination and guarantee even aging. You'll want to clean and air-dry your shelves regularly to control unwanted mold growth. For smaller operations, you can create microclimates using airtight containers with damp paper towels.
Place different cheese varieties strategically based on their specific aging requirements. If you're using a modified refrigerator, position your cheese in the warmest section. Remember to adjust your layout seasonally, as climate changes can affect your cave's environment. By maintaining proper spacing and organization, you'll create ideal conditions for aging various cheese types simultaneously.
Cave Maintenance Schedule
Your cheese cave's storage layout sets the stage for success, but regular maintenance keeps it running smoothly. You'll need to establish a consistent schedule to monitor and adjust the critical environmental factors that affect your aging cheese.
Start by implementing these essential maintenance tasks:
- Daily checks of temperature (45-60°F) and humidity (70-90%) using digital thermometers and hygrometers
- Weekly renewal of humidity sources, including soaked clay bricks or salt solutions
- Monthly cleaning of cave surfaces with light wipe-downs to prevent unwanted mold growth
- Seasonal adjustments to ventilation and cooling systems based on climate changes
Make it a habit to check your cave's conditions twice daily, especially during extreme weather.
You'll want to maintain proper air circulation through your ventilation system, whether you're using buried PVC pipes or mechanical means. When you notice temperature fluctuations, adjust your cooling elements promptly.
Keep a log of your readings and adjustments to track patterns and identify potential issues early.
Remember to flip and brush your cheese regularly according to each variety's specific needs, ensuring even aging throughout the cave environment.
Frequently Asked Questions
How Long Does It Take for Mold Colonies to Develop Naturally?
You'll notice mold colonies developing within 24-48 hours as spores germinate, though they won't be visible yet. You can expect to see and smell the colonies after 2-4 weeks of growth.
Can Multiple Cheese Varieties Age Together Without Cross-Contamination?
You can age compatible cheeses together, but you'll need separate spaces for different aging styles. Hard cheeses can share space, while soft varieties need isolation to prevent unwanted mold and bacteria transfer.
What Emergency Backup Systems Are Recommended for Power Outages?
You'll need a UPS for immediate protection, plus a home battery backup system for longer outages. For extended coverage, consider combining this with a solar generator and inverter/charger for continuous power supply.
How Do Seasonal Temperature Fluctuations Affect Aging Time and Flavor Development?
You'll notice seasonal temperature changes affect your cheese considerably. In cooler seasons, aging slows down but develops complex flavors, while warmer periods speed up aging but create milder flavors with less complexity.
What Lighting Options Are Safe for Cheese Inspection Without Affecting Temperature?
You'll want to use LED strip lights or fiber optic lighting, as they emit minimal heat. Position them away from your cheese and consider battery-operated options with timers to maintain consistent cave temperatures.
In Summary
Now that you've planned and built your underground cheese cave, you'll need to monitor humidity, temperature, and airflow regularly. Keep detailed records of your cave's conditions and how your cheeses age. Don't forget to check drainage systems monthly and clean surfaces weekly. With proper maintenance, your cheese cave will provide the perfect aging environment for years to come, letting you create exceptional artisanal cheeses at home.


Leave a Reply